-

Win a Free Custom Engraved Brass Coin!!!
As a way to introduce our brass coins to the community, we will raffle off a free coin during the month of August. Follow link ABOVE for instructions for entering.
-

PRE-ORDER SHIPS IN SCALE TODAY!
The beloved Ships in Scale Magazine is back and charting a new course for 2026!
Discover new skills, new techniques, and new inspirations in every issue.
NOTE THAT OUR FIRST ISSUE WILL BE JAN/FEB 2026
- Home
- Forums
- Ships of Scale Build Logs
- Super Detailing Static Models / Other Genres
- Historical Trailways, Guns, Aircraft, and Cars
You are using an out of date browser. It may not display this or other websites correctly.
You should upgrade or use an alternative browser.
You should upgrade or use an alternative browser.
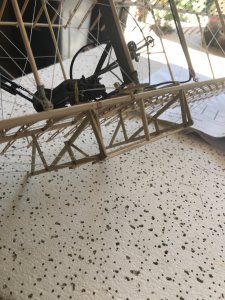
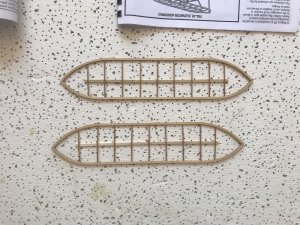
Next up is the elevator structure which will attach to the front the plane. There are two identical elevators(as shown in pic below) on the Wright Flyer. I have chosen to keep them static as opposed to having them be able to move. The model is pretty fragile so I feel this is a good choice. The elevator is attached to its own support structure shown in pic below as well. When completed there will also be a pulley system added which is how the elevator was controlled by the pilot. Care and lots of test fitting needs to be done to get the angles of the supports and support arms correctly aligned to attach to the plane as well as rest the elevator.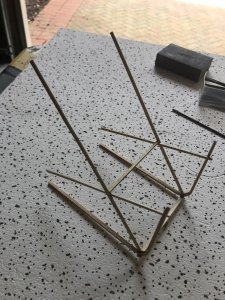


While these parts were drying after joining I went to work on the rudder structure. This is a fairly straightforward box like structure with wire braces added for support. The rudder will be attached to the plane using eyelets on both ends. Attaching the elevator and rudder structures will be the next steps in the project. 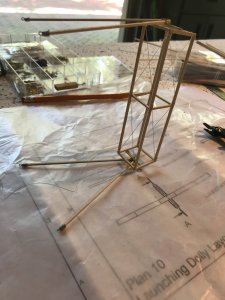

So it looks like the final few pictures of the Flyer project were lost in the server issue. I have added them back as best I could. Bottom line this project was a nice change and a throw back to my younger plane building days. I did decide to add a stain on the Flyer to help it be more defined/visible. I know not historically accurate but the real plane had a skin on it as well. If you decide to build this model use epoxy on all key joining parts as they will not hold well with CA.
Also included a pic of the Wright Brothers first flight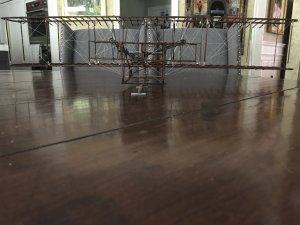
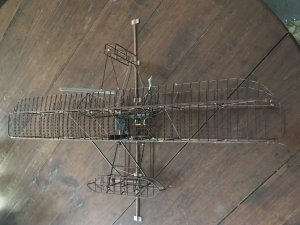
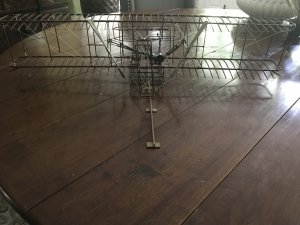
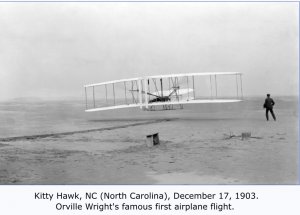 iin Kitty Hawk.
Also included a pic of the Wright Brothers first flight


 iin Kitty Hawk.
Congratulations for this model - It is looking, and I am very sure, that it was, a nice and interesting project in between.
Many thanks for this log and all the photos
Many thanks for this log and all the photos

Very Nice! I somehow lost touch with this thread and looked it up because I am finally going to start mine after a year.
Did you stain after it was completely assembled or in sub-assemblies? I think that really adds to the look as I'm sure the real one wasn't pristinely clean.
Hope mine turns out half as nice.
EJ
Did you stain after it was completely assembled or in sub-assemblies? I think that really adds to the look as I'm sure the real one wasn't pristinely clean.
Hope mine turns out half as nice.
EJ
Wow - very nice and lools to be very delicate to handle as well.
Really an excellent build that is begging for wing coverings and ready for the gentle winds and a launching rail to take off. I have not seen all of the support rigging with the wings before or at least recognized them as visible here. Too bad that it could not receive a miniscule RC . . . but then maybe that could be solved like the brothers did with their own work not achieved by others. PT-2This post shows the bracing added to the wings. The thread is secured to the hardware with a small drop of CA. Make sure you drill all the required holes in the struts when building them as instructed. It’s a bit too late once they are on the plane. The instructions aren’t very clear on which struts do not have holes drilled into them so really study the plane pics to get this right. I apologize for this pic, I couldn’t find a handy background where the bracing wire was clearly visible. Lesson learned on this step, you will need more thread than supplied. I found a very close match in Michaels store and the thread was 100%nylon and much better quality than in the kit. Made the work easier.
View attachment 102930
EJ, sorry for the long delay in replying. I stained after the plane was built. I think its a matter of preference. My main concern with staining at the subassembly level was potentially making it more difficult to glue the subassemblies together. The only trick in staining after assembly was trying to keep the stain off the rigging thread as much as possible.Very Nice! I somehow lost touch with this thread and looked it up because I am finally going to start mine after a year.
Did you stain after it was completely assembled or in sub-assemblies? I think that really adds to the look as I'm sure the real one wasn't pristinely clean.
Hope mine turns out half as nice.
EJ
Good luck on your build. I'd love to see your pics.
Barry
Thanks Donnie. It is indeed very delicate to handle!! Where to put it out of the cat's reach has been a continuing challengeWow - very nice and lools to be very delicate to handle as well.
Barry
Thanks, as an old RCer it would have been an interesting challenge to try to make this flyable. As I think about it the scale would likely need to be increased a bit to add more support for the structures. Maybe something to do down the road!!Really an excellent build that is begging for wing coverings and ready for the gentle winds and a launching rail to take off. I have not seen all of the support rigging with the wings before or at least recognized them as visible here. Too bad that it could not receive a miniscule RC . . . but then maybe that could be solved like the brothers did with their own work not achieved by others. PT-2
Thinking about the RC scale will keep your batteries charged! PT-2Thanks, as an old RCer it would have been an interesting challenge to try to make this flyable. As I think about it the scale would likely need to be increased a bit to add more support for the structures. Maybe something to do down the road!!
- Joined
- Dec 31, 2018
- Messages
- 19
- Points
- 58

Beautiful build. You could cover half and leave the other half naked and get both views. RC kits are available.Thinking about the RC scale will keep your batteries charged! PT-2
https://www.radicalrc.com/category/Radical-RC-E-Kits-190

Dare 1903 Wright Flyer RC
After many months of development and testing Dare has successfully flown the 1903 Wright Flyer! Development of the Wright Flyer was done to produce a "flying model" of the airplane that proved powered flight was possible. A Pat Tritle Design. It's hard to believe the Wright Type "A" Flyer could...
From what I see in the kit photos it does not have the precise rigging lines that are in your own build. Looks heavier and more bulky from those photos, You get my vote for best Flyer build. PT-2Beautiful build. You could cover half and leave the other half naked and get both views. RC kits are available.
https://www.radicalrc.com/category/Radical-RC-E-Kits-190

Dare 1903 Wright Flyer RC
After many months of development and testing Dare has successfully flown the 1903 Wright Flyer! Development of the Wright Flyer was done to produce a "flying model" of the airplane that proved powered flight was possible. A Pat Tritle Design. It's hard to believe the Wright Type "A" Flyer could...brodak.com
- Joined
- Dec 31, 2018
- Messages
- 19
- Points
- 58

Agreed that the static scale build wins hands down! It is a beautiful build of a complex aircraft.
The RC flying kits have some compromises for flying. They are more sport or semi-scale. In flight they look realistic and fly about the same as the original.
John
The RC flying kits have some compromises for flying. They are more sport or semi-scale. In flight they look realistic and fly about the same as the original.
John
It wouldn't take much of a puff of wind to send them off and the pilot fighting to regain control before the crash. I used to fly gliders with wing spans of around 7 to 8 ft, hunting for thermals to keep them up unless winds at higher elevations would try to take them off and out of my control so I would have to chase them on the ground to get them down again. :-( PT-2Agreed that the static scale build wins hands down! It is a beautiful build of a complex aircraft.
The RC flying kits have some compromises for flying. They are more sport or semi-scale. In flight they look realistic and fly about the same as the original.
John
Thanks!!From what I see in the kit photos it does not have the precise rigging lines that are in your own build. Looks heavier and more bulky from those photos, You get my vote for best Flyer build. PT-2
Happy Birthday, Barry!  Enjoy your special day!
 Enjoy your special day!

