Model Airways-The Wright Flyer-Scale 1/16

Brian,

The two drawing are in the instructions and the photo of the engine used in the Flyer. The "feet" are what the engine rests and are used to attache the engine to the wooden mount ("logs") that is part of the wing structure. drill out the lugs on the engine and match drill in the correct location/orientation on the engine mounts. I'm guessing there is hardware provided to install the engine.

This build thread has a lot of helpful photos including the engine installation the should be of some help.

Regards,

John McMakin
Thanks for including a photo of the actual engine. Really helps.
 
What are you guys using for your metal to metal glue? CA is quick but doesn't seem to hold to metal all that well.
Hello Brian. It well depends on how large are the parts. Large parts, I prefer to solder, smallest PE parts I glue using CA. It holds reasonably strong, you have to make sure to clean the surface before gluing.
 
I clean PE with a solvent based plastic "glue", which is not a glue at all, but a plastic solvent, such as Plast-I-Weld or Tamiya exra thin. It removes any oils or other contaminates. If the part is big enough, I also rough up the surface a bit with fine sandpaper.

I have the flyer in my stash but havn't had the courage to start it yet. I'm following your build with great interest.
 
Hello Brian. It well depends on how large are the parts. Large parts, I prefer to solder, smallest PE parts I glue using CA. It holds reasonably strong, you have to make sure to clean the surface before gluing.
I can see soldering brass but can you solder Britania? Won't it just melt?
 
I can see soldering brass but can you solder Britania? Won't it just melt?
Britania is a pewter alloy, and it might melt. I didn't see any PE parts made out of Pewter. It is usually brass. For Pewter I would use Epoxy glue
 
Can someone pls share with me some photos of how you did the "speed control" as shown in Fig-16, page 13 of the instructions? I understand there is a tiny little arrow head looking pointer that apparently fits in the slot in the top of PE35 but what does it do after that? Does it point at something or does it rub against part of the motor or what? What does PE36 do? How does the arm with the three holes attach? and to what? and how?
Lovely kit with incredibly detailed parts beautifully made but GEEEZE the instructions don't appear to have been written by someone for whom English is a first language. Just awful !!
I don't know if the cast parts you mention are Brittania white metal or other. With my MS2130 Bluenose kit almost all of the cast parts were very poorly done and many too small to be used as plan instructions show. You are not alone in this issue. Rich (PT-2)
 
Rich...PT2? As in Navy PT? Have we talked about this already?
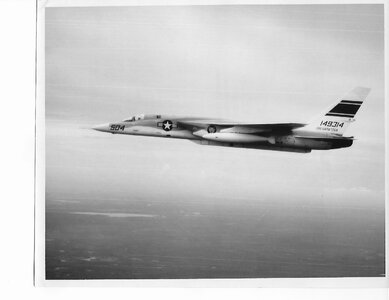
Yes, USN Heavy Attach Reconaissance Squadrons 3, 5, ;and 9 mostly out of NAS Sanford Florida in the mid '60' as a Photo Interpreter, returned to college after a 3 year tour as an E-5. Photo of one our squadron's RA5-C Vigilante by North American Northrop is here. . . similar long sleek profile as the Bluenose.Rich SCV and RA-5C.jpgDuringf an 11 month tour in the Med deployed aboard the USS Saratoga in 1964
 
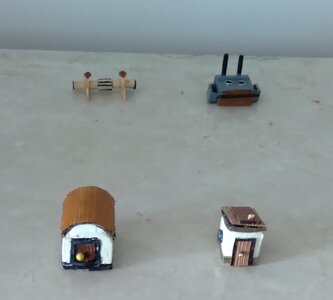
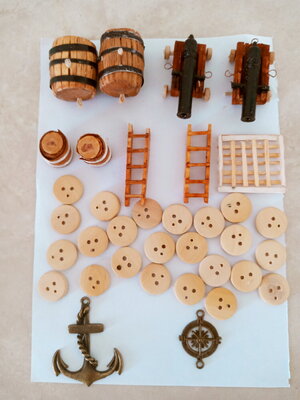
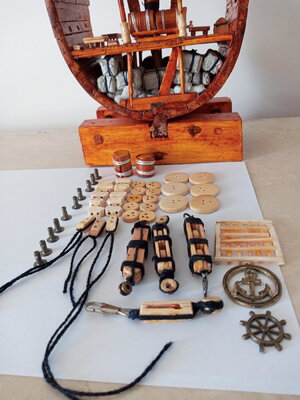
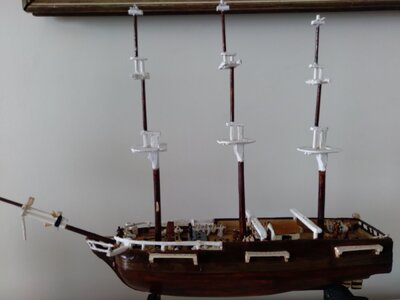
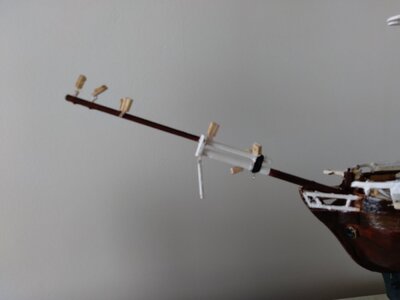
Na tentativa de amenizar os efeitos colaterais do tratamento de quimioterapia , comecei a fabricar artesanalmente itens para modelismo naval, a pratica do artesanato em modelismo naval de madeira, tem sido de suma importância na retomada das minhas atividades
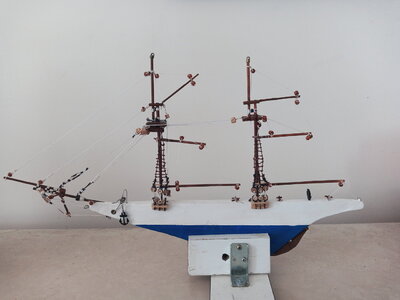
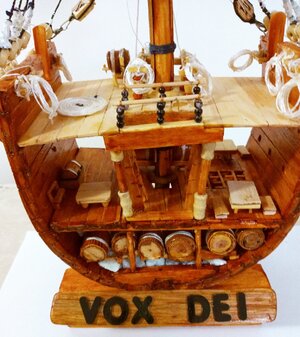
Acompanhando postagens de fotos e desenhos de modelismo naval na WEB, construi a silhueta de um schonner e tempos depois , projetei e construi um cross section, aoi qual batizei de VOX DEI (VOZ DE DEUS)
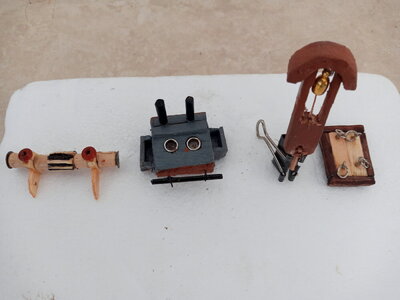
No presente momento estou trabalhando na confecção de todos os itens necessários para construção do Baleiro ESSEX, conforme fotos .
Não tenho acesso a KITs para construir meus modelo navais, utilizo-me somente de fotos e desenhos que são postados na
WEB.

google translation:
In an attempt to alleviate the side effects of chemotherapy treatment, I started to craft items for naval modeling, the practice of craft in wooden naval modeling, has been of paramount importance in resuming my activities
Accompanying postings of photos and drawings of naval models on the WEB, I built the silhouette of a schonner and later, I designed and built a cross section, which I named VOX DEI (VOICE OF GOD)
At the moment I am working on making all the items necessary for the construction of the ESSEX Baleiro, as shown in the photos.
I don't have access to KITs to build my naval models, I only use photos and drawings that are posted on
WEB.
20201028_131133.jpg20210118_113617.jpgBow2.jpgE11.jpg20201017_114603.jpgSeccionado.jpgEssex2.jpg20201124_151746.jpg2 Mini gun.jpg3 Mini gun.jpg
 
Last edited by a moderator:
Na tentativa de amenizar os efeitos colaterais do tratamento de quimioterapia , comecei a fabricar artesanalmente itens para modelismo naval, a pratica do artesanato em modelismo naval de madeira, tem sido de suma importância na retomada das minhas atividades
Acompanhando postagens de fotos e desenhos de modelismo naval na WEB, construi a silhueta de um schonner e tempos depois , projetei e construi um cross section, aoi qual batizei de VOX DEI (VOZ DE DEUS)
No presente momento estou trabalhando na confecção de todos os itens necessários para construção do Baleiro ESSEX, conforme fotos .
Não tenho acesso a KITs para construir meus modelo navais, utilizo-me somente de fotos e desenhos que são postados na
WEB.

View attachment 219350View attachment 219351View attachment 219352View attachment 219353View attachment 219354View attachment 219355View attachment 219356View attachment 219357View attachment 219359View attachment 219360
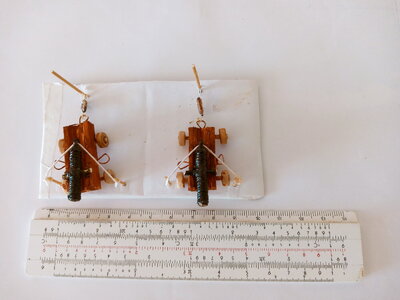
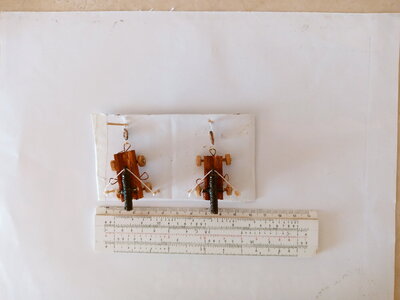
I have a 6-inch slide rule like that that is now tan and still used in my glove box to do quick mileage checks. Originally for currency conversion when on leave in both European and Japanese ports of call. Used 12 inchers in my architectural structural design courses but have forgotten the slide right rule for placing the decimal point so I just use a common sense smell test now. Very nice small work that you do. Rich (PT-2)
 
I never built the Model Airways version. Did years ago build the 1/8 Hasegawa one. What a monster and was a major piece of work. Wish I had some photos of.
Rick
 
Enjoyed looking through the log as I'm getting ready to start on my kit. First thing I'm noticing from the log and the plans is that my current modeling table may not be long enough.
 
Enjoyed looking through the log as I'm getting ready to start on my kit. First thing I'm noticing from the log and the plans is that my current modeling table may not be long enough.
Ha, you definitely need some space for that wing. It’s long and fiddly until it’s all together.
 
Barry....what the heck is the crankshaft made out of? I kept looking for a pre-formed (Britania) crank until I finally found a footnote or addendum that said something about a change in part number nomenclature being 1/32 brass tubing. Is the crank something the builder is supposed to fab out of tubing? What length? Doesn't say anywhere. Maybe, as we used to say in the Navy "Hammer to fit...paint to match"
Hallo @Brian Amato
we wish you all the BEST and a HAPPY BIRTHDAY
Birthday-Cake
Sorry @Barry1 to highjack your older topic for the greetings
 
Thanks for the very kind birthday wishes and for tips on building the Wright Flyer.
Brian Amato
 
Back
Top