
Looking great! If you don't mind sharing, where did you get those lovely sheaves?Hello. Pulleys from the store with a diameter of 4 mm arrived for me. I completed the double pulley-gat on the starboard side and installed it. I will show how I make this design without different machines. In my case, slats 1 mm thick and 4 mm wide are required. The manufacturing process itself is shown in the photo. If you have questions, please ask. I will answer with pleasure.
View attachment 291490View attachment 291491View attachment 291492View attachment 291493View attachment 291494View attachment 291495View attachment 291496View attachment 291497View attachment 291498View attachment 291499View attachment 291500View attachment 291501View attachment 291502View attachment 291503View attachment 291504

You are using an out of date browser. It may not display this or other websites correctly.
You should upgrade or use an alternative browser.
You should upgrade or use an alternative browser.
Model VICTORY by Deagostini, scale 1/84
- Thread starter Alexander74
- Start date
- Watchers 85
-
- Tags
- deagostini victory
...they are around your home corner and sound. Check them out. Lovely service by Egor, shipping prompt and fast to the USA. In Cannada, you will receive it in a few days.Looking great! If you don't mind sharing, where did you get those lovely sheaves?
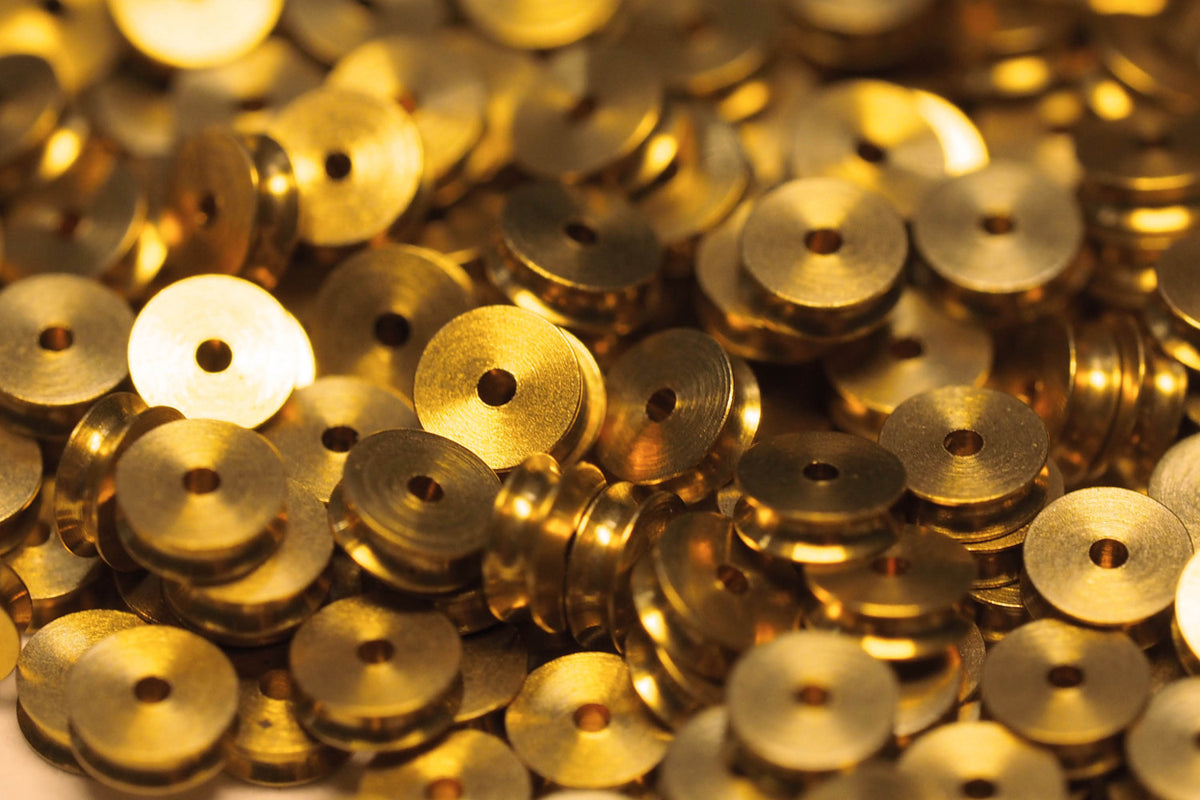
Brass Sheaves (10pcs)
Description Brass sheave. Outside diameter is 3.0mm Hole diameter is 0.6mm Thicknesses are 1.0mm and 1.5mm Pack of 10.
 craftysailor.com

Hello. I haven't been here for a long time. Work did not stand still. And so: when I approached the laying of the squeezing belts below the velvet, it turned out that I had not finished the valance and had too small an angle. It was necessary to make the transition in this place more gentle.
it was like this


It became like this


it was like this
It became like this
After correcting the gap, I proceeded to sheathing the hull below the waterline. First there were 7 black hornbeam belts. After that, I sheathed the bottom with slats from the set. They are birch. I had to adjust them a little in size on a circular saw and make them the same 4 mm by 1.5 mm. Black hornbeam remained only in visible places above the waterline. The body will be sheathed with copper plates, so the body was sheathed with birch without marking and observing the rules. All this will be hidden by copper plates. Last night I finished the underbody trim. Photo result. Started grinding and preparing for laying copper plates.


Wow! Lots of progress! Wonderful work Sasha!
While I was engaged in sheathing, I assembled the guns on the deck of the operdeck. Due to the fact that they will hardly be noticeable (there will be another deck above), I left the machines from the set. I just painted them yellow. Well, after assembly, I put it in a box, until they were installed on the deck.


Thanks PaulWow! Lots of progress! Wonderful work Sasha!
So clean and colorful! You do such nice work, Alexander.

I really like the yellow canon carriages. Good looking job of planking Sasha, that Hornbeam is amazing.While I was engaged in sheathing, I assembled the guns on the deck of the operdeck. Due to the fact that they will hardly be noticeable (there will be another deck above), I left the machines from the set. I just painted them yellow. Well, after assembly, I put it in a box, until they were installed on the deck.View attachment 296294View attachment 296295View attachment 296296View attachment 296297View attachment 296298View attachment 296299View attachment 296300View attachment 296301

Looking amazing Sasha, what's hornbeam like to work with does it bend well with heat?
While on the body only black and yellow hornbeam. Bends when heated. I first soaked in water, and then bent with an iron. This is when he bent on the edge. In the nose, the 3.2 mm thick slats were bent without an iron. I wetted it, pressed it to the body with clamps, and when it dries it dries. After drying, the rail retains its shape and can be glued only by slightly adjusting it in place.Looking amazing Sasha, what's hornbeam like to work with does it bend well with heat?
Great planking work Sasha, a joy to watchAfter correcting the gap, I proceeded to sheathing the hull below the waterline. First there were 7 black hornbeam belts. After that, I sheathed the bottom with slats from the set. They are birch. I had to adjust them a little in size on a circular saw and make them the same 4 mm by 1.5 mm. Black hornbeam remained only in visible places above the waterline. The body will be sheathed with copper plates, so the body was sheathed with birch without marking and observing the rules. All this will be hidden by copper plates. Last night I finished the underbody trim. Photo result. Started grinding and preparing for laying copper plates.View attachment 296282View attachment 296283View attachment 296284View attachment 296285View attachment 296286View attachment 296287View attachment 296288View attachment 296289View attachment 296290View attachment 296291View attachment 296292View attachment 296293

Good day everyone. I decided to replace the grids with suitable scales. This is how it looks in the kit compared to what I decided to install

This is what the whole set looks like on the oper deck deck. you need to make boxes for the cores on two large gratings.


N
The smaller to scale gratings look awesome.This is what the whole set looks like on the oper deck deck. you need to make boxes for the cores on two large gratings.View attachment 297683View attachment 297684View attachment 297685View attachment 297686
Hello everyone and have a nice day.
I noticed in Anatomy just such a thing at the admiral's entrance. Rooster grill. Embodied on the model.


I noticed in Anatomy just such a thing at the admiral's entrance. Rooster grill. Embodied on the model.
I want to show how I do deck nailing. In case there is no die, but there is a grinding machine. But I spied on one of the ship-modeling forums just such an adaptation. Power supply from an old computer, an old hard drive. Here it is desirable to have a disk as old as possible, which rotates without stopping, because modern ones stop after a short time. I dismantled the disk case and put sandpaper on the disk itself. From above, it is pressed against the disk with a washer in the center. It is not necessary to glue emery to the disk itself.

Why a hard drive. Its rotation speed is less than that of a grinding machine and it is more convenient to sharpen thin slats 1x1 mm on it. Nothing further complicated. I prepared rails 1x1 mm and on this grinder, by rotating the rail, I sharpen it into a cone. PVA glue (I have Titebond with a blue label) diluted with water to a liquid state, dip the tip of the rail in glue and insert it into the hole on the deck. I bite off the excess.


After that, I carefully cut off the remnants flush with the deck with a knife and grind the entire deck. It turns out like this.

Here I just wet it with water, for visibility. I will still sand the entire deck and then cover it with oil. Here is such a technology. If you have any questions, I'll be happy to answer.
Why a hard drive. Its rotation speed is less than that of a grinding machine and it is more convenient to sharpen thin slats 1x1 mm on it. Nothing further complicated. I prepared rails 1x1 mm and on this grinder, by rotating the rail, I sharpen it into a cone. PVA glue (I have Titebond with a blue label) diluted with water to a liquid state, dip the tip of the rail in glue and insert it into the hole on the deck. I bite off the excess.
After that, I carefully cut off the remnants flush with the deck with a knife and grind the entire deck. It turns out like this.
Here I just wet it with water, for visibility. I will still sand the entire deck and then cover it with oil. Here is such a technology. If you have any questions, I'll be happy to answer.
- Joined
- Apr 20, 2020
- Messages
- 5,746
- Points
- 738

that what I call it creativity, well doneI want to show how I do deck nailing. In case there is no die, but there is a grinding machine. But I spied on one of the ship-modeling forums just such an adaptation. Power supply from an old computer, an old hard drive. Here it is desirable to have a disk as old as possible, which rotates without stopping, because modern ones stop after a short time. I dismantled the disk case and put sandpaper on the disk itself. From above, it is pressed against the disk with a washer in the center. It is not necessary to glue emery to the disk itself.
View attachment 298424
Why a hard drive. Its rotation speed is less than that of a grinding machine and it is more convenient to sharpen thin slats 1x1 mm on it. Nothing further complicated. I prepared rails 1x1 mm and on this grinder, by rotating the rail, I sharpen it into a cone. PVA glue (I have Titebond with a blue label) diluted with water to a liquid state, dip the tip of the rail in glue and insert it into the hole on the deck. I bite off the excess.
View attachment 298425
View attachment 298426
View attachment 298427
After that, I carefully cut off the remnants flush with the deck with a knife and grind the entire deck. It turns out like this.
View attachment 298428
Here I just wet it with water, for visibility. I will still sand the entire deck and then cover it with oil. Here is such a technology. If you have any questions, I'll be happy to answer.

Wow, there's innovation for you! Not sure what the admiral would say though if I dismantled the home PC and told her I needed it for a grinding machineI want to show how I do deck nailing. In case there is no die, but there is a grinding machine. But I spied on one of the ship-modeling forums just such an adaptation. Power supply from an old computer, an old hard drive. Here it is desirable to have a disk as old as possible, which rotates without stopping, because modern ones stop after a short time. I dismantled the disk case and put sandpaper on the disk itself. From above, it is pressed against the disk with a washer in the center. It is not necessary to glue emery to the disk itself.
View attachment 298424
Why a hard drive. Its rotation speed is less than that of a grinding machine and it is more convenient to sharpen thin slats 1x1 mm on it. Nothing further complicated. I prepared rails 1x1 mm and on this grinder, by rotating the rail, I sharpen it into a cone. PVA glue (I have Titebond with a blue label) diluted with water to a liquid state, dip the tip of the rail in glue and insert it into the hole on the deck. I bite off the excess.
View attachment 298425
View attachment 298426
View attachment 298427
After that, I carefully cut off the remnants flush with the deck with a knife and grind the entire deck. It turns out like this.
View attachment 298428
Here I just wet it with water, for visibility. I will still sand the entire deck and then cover it with oil. Here is such a technology. If you have any questions, I'll be happy to answer.

Great job Sasha, it really does look good
Such innovation! I have the highest respect for such clever methods.