-

Win a Free Custom Engraved Brass Coin!!!
As a way to introduce our brass coins to the community, we will raffle off a free coin during the month of August. Follow link ABOVE for instructions for entering.
-

PRE-ORDER SHIPS IN SCALE TODAY!
The beloved Ships in Scale Magazine is back and charting a new course for 2026!
Discover new skills, new techniques, and new inspirations in every issue.
NOTE THAT OUR FIRST ISSUE WILL BE JAN/FEB 2026
You are using an out of date browser. It may not display this or other websites correctly.
You should upgrade or use an alternative browser.
You should upgrade or use an alternative browser.
Yep that is the plan but I have some time till I'm there working on that part because I'm putting my detail work into the deck. I'm taking this nice and slow to make sure I do this ship due justice.when I used balsawood blocks between bulkheads it was so that the planking would sit more regularly without showing hard points where is crosses the bulkheads. (Mamoli Friesland)
@tonphil1960 I have started to fix the treenails and thank you for pointing that out before I got too deep into the model. 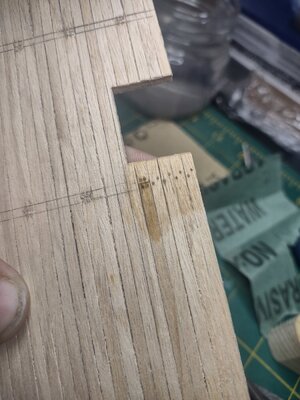
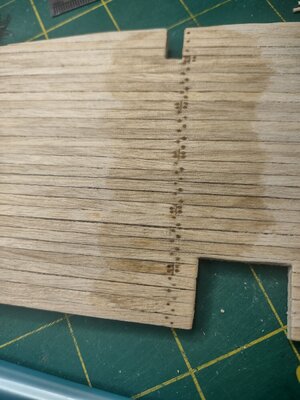
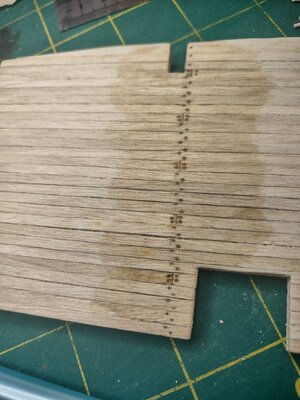
Also some stains that I was thinking of so you have a better idea of what I'm looking to do could be these. Truth be told I have never done oil on it and just used the wood as is cause I don't know when or how to do it. I am open to learn if someone has some advice because it is something I will need to use.
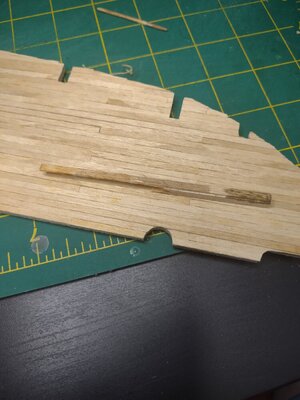


Also some stains that I was thinking of so you have a better idea of what I'm looking to do could be these. Truth be told I have never done oil on it and just used the wood as is cause I don't know when or how to do it. I am open to learn if someone has some advice because it is something I will need to use.

At first I thought your car to be very small! Then it occurred to me that OcCre have revised the kit, as mine came in a box 24" long x 16" wide. I guess the false keel is now one-piece, not two. I hope the rigging instructions have also been updated, as these have been known to cause much head scratching. Mine took me 15 months to build.So I have been waiting for a couple months to be able to get this ship and finally got the chance to get her. She is quite a large kit and a well invited challenge and next step in my path to developing as a model ship builder. View attachment 303692
This one is as big as my back seat which is crazy. I have been looking at logs and diagrams for weeks and once I got the ship home i did the normal check over the whole kit and found that unlike most of models where it's a set of plywood for the skeleton this kit comes with particle board. It's lighter but it doesn't feel as strong which leads me to believe that is why most modelers use balsa blocks in the slots in-between the bulk heads. View attachment 303693View attachment 303694View attachment 303695
Nice aligned and doing an overnight dry so I can start in morning on the deck. And start getting some next steps done.
Stuart
Yep it's all one piece so the box is 36" long and I would need to see how your instructions were to see if there was a difference but they are quite understandable and seperated out quite nicely too. I feel the rigging will not be as bad to figure out as my last shipAt first I thought your car to be very small! Then it occurred to me that OcCre have revised the kit, as mine came in a box 24" long x 16" wide. I guess the false keel is now one-piece, not two. I hope the rigging instructions have also been updated, as these have been known to cause much head scratching. Mine took me 15 months to build.
Stuart
Go slow man. It’s not a race. Quality over quantity anyday. Thing is progress feels good when it’s easy but later on in the build it will be tedious and slow going. Practice that discipline now too. Burn out sucks.
It’s a shame to cover up beautiful wood with anything other than clear or oils. Don’t apply till absolutely necessary.
Think ahead. Way way ahead. Order of build is critical. Make subassemblies then only when you can’t move on build them up into a main structure. Like I said when you were here. Don’t glue (or paint, or stain) anything unless you cannot move along further without doing so.
Just some advice so you succeed.
Is it glued yet ? Push all the planks to the center to close it since on the outer edges there will be the waterway and spriketing where you can make up the couple mm’s you need.
Check how the waterway will fit all that goes on the outer edges. That’s where you can make it up but check whatever goes inboard too because those holes all take something. There’s always a fudge factor but 1mm off times a large span equals quite a bit of a mistake.
And sorry for the stupid question but waterway is the side panels that have the gun ports in them? But I will check all this for sure.Check how the waterway will fit all that goes on the outer edges. That’s where you can make it up but check whatever goes inboard too because those holes all take something. There’s always a fudge factor but 1mm off times a large span equals quite a bit of a mistake.
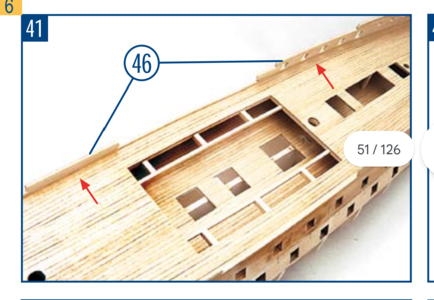
If you have plans there you should be working off them 100% if possible. There has to be waterways in the kit,
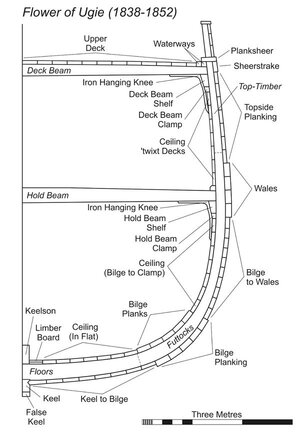
I wish I was lying but I just did another check over all the plans that are online and the paper ones and there is no mention of water ways or planking on the edge before the top timber or an iron hanging knee or hold beam shelf or any of that.....so looks like I need to do some mods or be ok with it....(which I don't think I can be ok with that)If you have plans there you should be working off them 100% if possible. There has to be waterways in the kit,
Last edited:
So I have decided that I will plank it after it's glued down with a king plank to make sure it's setup correctly and covering the gap correctly. As for the missing items I am going to try and find something that is like the Montanes because there is literally nothing on the anatomy of this ship and it's true build besides the drawling that OcCre sent. I need to do some research and see if there is anything that has a cross section or something to help with this.
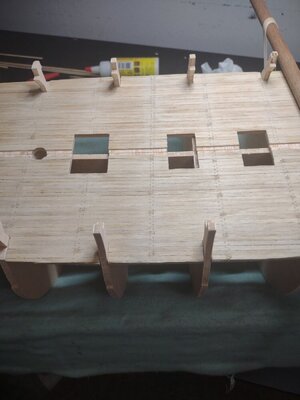

You can always add the waterway yourself too to make it more accurate and fix the planking issue. See how others did it in the build logs you found.
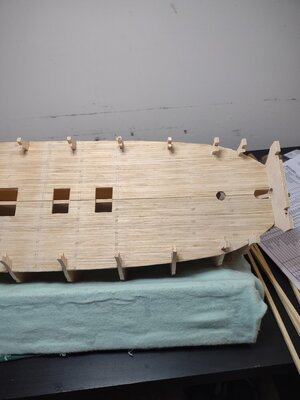
So I have been working diligently on the lower deck and trying to make sure it's done right. After some man hours I finally got the deck on and glued and the came the decision as to what I would do with the deck. Going into this project my Goal was not to make a pristine museum quality kit but one I could be proud of and learn from as well.
So I have seen a lot of people do weather on decks or different kinds of treatments and I teased the idea at first if trying it but then I heard about oils. I wasted a good day trying to attempt to make the linseed oil I picked up work out. It went ok but it just takes FOREVER to cure for the next coat and I did not like the finish it came out with with the small shinny layer. So yea back to thinking. So I went with staining with a twist.
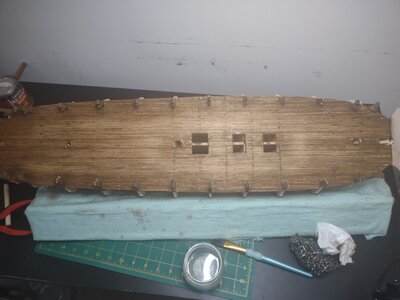 this is my first attempt of putting some realistic wear on the walk paths of the deck. I feel like I did a decent job at this and will be making the top deck lighter because it's where the sun will be hitting the deck the most. I am going to put a matte layer on this to try and protect it once I figure out where the ladders will go and make sure all the patching is aligned.
Please give me some advice if you think this is stupid or if you think it's a good idea I'll listen to all. Thank you all for visiting and pulling up some chairs!!
So I have seen a lot of people do weather on decks or different kinds of treatments and I teased the idea at first if trying it but then I heard about oils. I wasted a good day trying to attempt to make the linseed oil I picked up work out. It went ok but it just takes FOREVER to cure for the next coat and I did not like the finish it came out with with the small shinny layer. So yea back to thinking. So I went with staining with a twist.
 this is my first attempt of putting some realistic wear on the walk paths of the deck. I feel like I did a decent job at this and will be making the top deck lighter because it's where the sun will be hitting the deck the most. I am going to put a matte layer on this to try and protect it once I figure out where the ladders will go and make sure all the patching is aligned.
Please give me some advice if you think this is stupid or if you think it's a good idea I'll listen to all. Thank you all for visiting and pulling up some chairs!!
It is a very interesting approach and introduces a certain 'look' to your build. The only thing I would point out is that when you start down this path you need to be consistent. Be certain to keep applying this same 'used' appearance to future aspects of your ship.


