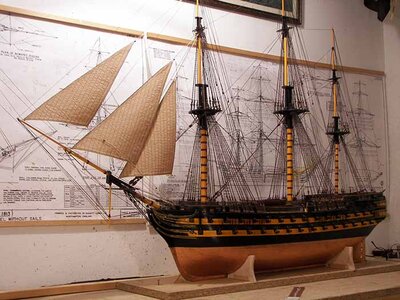
Montanes by OcCre 1:70

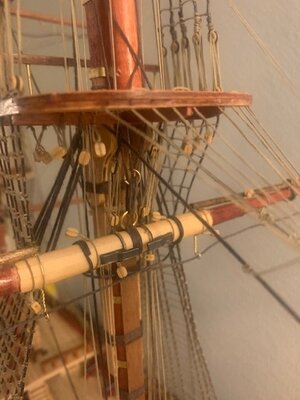
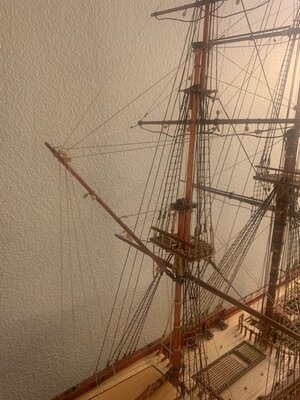
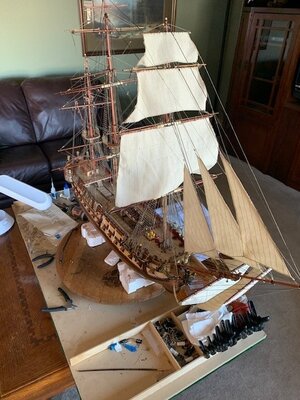
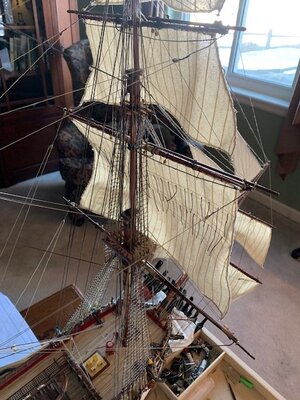
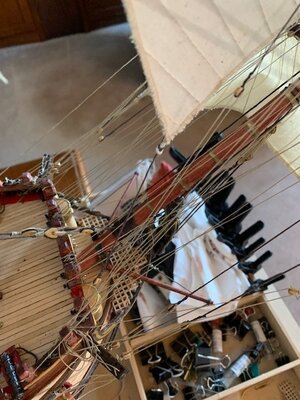
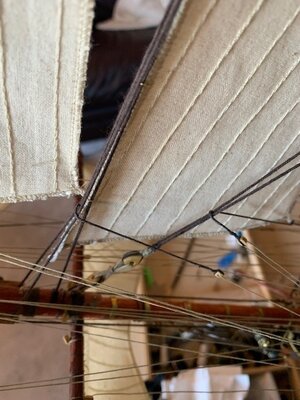
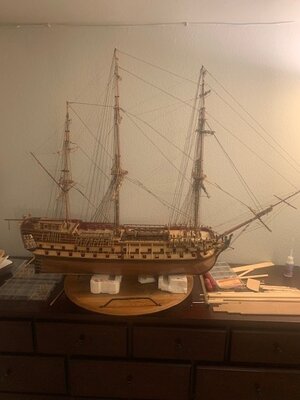
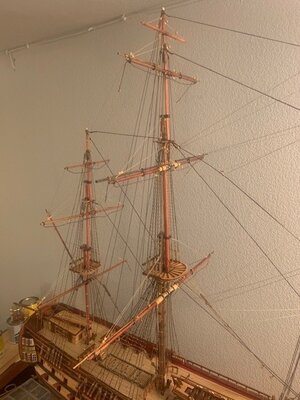
Weekly Update - big milestone completed. All yards and yard rigging complete.

Tons of lessons learned. How to read the instructions, using tools and sticks to help get the lines attached to cleats and pins. Mostly figuring out how to interpret very cryptic instructions. You can imagine. For those to back aft yards, I had to pin the sail on it to make sure I got the angles correct.

Tomorrow I will head over to Hobby Lobby to try to find some canvas colored 0.8mm string. This we'll sew onto the sales to make the clues. I need to research or search this board to see if I can find a good way to make the sails bulge and appear to be filled with wind. Any ideas? Spray starch and a balloon?

For sure on the next boat I do I will toss the provided string!!! And I will serve the lines and probably toss the provided blocks.

Probably ought to start thinking about a display stand. Oh oh. I think before I start attaching the sales it might make sense to add all of the coils of ropes and deck items.

Well - pics below.

Have a nice day everyone.
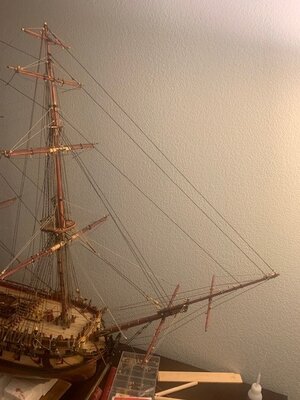
Yards Done Bow Sprit and fore mast pic 2.jpgYards done full picture pic 1.jpgYards done main mast and mizzen mast pic 3.jpgYards done main mast close up pic 5.jpgYards done mizzen mast pic 4.jpg
 
Weekly Update - big milestone completed. All yards and yard rigging complete.

Tons of lessons learned. How to read the instructions, using tools and sticks to help get the lines attached to cleats and pins. Mostly figuring out how to interpret very cryptic instructions. You can imagine. For those to back aft yards, I had to pin the sail on it to make sure I got the angles correct.

Tomorrow I will head over to Hobby Lobby to try to find some canvas colored 0.8mm string. This we'll sew onto the sales to make the clues. I need to research or search this board to see if I can find a good way to make the sails bulge and appear to be filled with wind. Any ideas? Spray starch and a balloon?

For sure on the next boat I do I will toss the provided string!!! And I will serve the lines and probably toss the provided blocks.

Probably ought to start thinking about a display stand. Oh oh. I think before I start attaching the sales it might make sense to add all of the coils of ropes and deck items.

Well - pics below.

Have a nice day everyone.
View attachment 269699View attachment 269700View attachment 269701View attachment 269702View attachment 269703
Looking great, nice work.
 
Weekly Update - big milestone completed. All yards and yard rigging complete.

Tons of lessons learned. How to read the instructions, using tools and sticks to help get the lines attached to cleats and pins. Mostly figuring out how to interpret very cryptic instructions. You can imagine. For those to back aft yards, I had to pin the sail on it to make sure I got the angles correct.

Tomorrow I will head over to Hobby Lobby to try to find some canvas colored 0.8mm string. This we'll sew onto the sales to make the clues. I need to research or search this board to see if I can find a good way to make the sails bulge and appear to be filled with wind. Any ideas? Spray starch and a balloon?

For sure on the next boat I do I will toss the provided string!!! And I will serve the lines and probably toss the provided blocks.

Probably ought to start thinking about a display stand. Oh oh. I think before I start attaching the sales it might make sense to add all of the coils of ropes and deck items.

Well - pics below.

Have a nice day everyone.
View attachment 269699View attachment 269700View attachment 269701View attachment 269702View attachment 269703
She’s definitely beginning to look like a real ship. Congratulations on the great progress so far.
 
Ag
Dear Scot

First get well soon.

I like to sign my models with my DNA as you did so :)

At this point of your construction, I want to warn you about the guns on the upper deck.

There are 8 guns with carriages . Last night I glued them at their places.

I spend 2 hours for just gluing and it was frustrating.

I suggest you to locate and glue those guns before instaling the forecastle deck plates. ( I think BOM number is 32)

Just an idea.

View attachment 202513
Agree I had similar issue with my build - first fight with my ship resultedROTF
 
W
ok - over on Bilal's Montanes build log I asked for some advice on how to create the grove down the middle of a 2mm by 2mm rubbing strake. Got plenty of great advice!! Turns out you can purchase a sort of scraping tool that you can use or you can make one with a utility knife blade. I checked out the local hobby shop and they had no idea what I was talking about. Even when I showed them the pictures of one. BTW - this is a big hobby shop and to my dismay they do not support wooden model ships builds. Oh well.

So I made one with a utility knife blade. I recruited my brother in law and away we went. We found that the 2mm slot with a tooth in the middle was just too challenging so what we did instead is make a slot that was more like 3mm with a tooth then I ran the rubbing strake through at an angle. It worked great!!

Special thanks to Bilal for letting me post on his build and special thanks to "docattner" for the wonderful suggestions.

Once I get the technique down pat I'll get them made and glued on accordingly.

Couple pics below.

View attachment 217379View attachment 217380View attachment 217383
Well done on this- I still can’t get it right.
 
Re
Continuing on. With the officers quarters brackets in place and my griping over I have moved on to other things. Took my time over the weekend to get the cannons in place and attached the cannon ropes. I finally got really good at making the knots when I got to the last one!! Arg! But in the process I think I gave myself a decent foundation when starting the rigging.

One of the items that was bothering me was how to deal with the cannon door (lines?). The rope for the crew to pull on to open cannon doors. Tried drilling a small hole but it was too hard to get the thread through, a bigger hole works but it just looks like a hole. So it was off to the hobby store and internet to try to find some 2 to 3mm grommets. Nothing available, at least nothing I would find. So while standing around in the hobby story I spotted some brass piping that seemed about the right size. I cut these up to make little pipes that the line would go through. Seemed to work ok.

with a 3/32 sized drill and a little tap with a hammer they slide in nicely and makes it look much better then a simple hole. The plan is to put these in this evening.

If it ultimately looks dumb we'll just paint them black.

pics below

View attachment 235461View attachment 235462View attachment 235463View attachment 235464View attachment 235465
Great detail on these gunport lids. - Going through your log, a little late. Got to shoot to a meeting, will pick it up on my return.
 
I use bees wax on my lines. You run the line along edge of the wax, then pull it through your fingers as you twist it, to spread it around the line evenly. Very easy and quick once you get the hang of it. You can buy bees wax online from hobby shops.
Here in SA we wait forever for on line purchases. Waiting waiting....for my bees waxROTF.
 
Grant,

Bees wax is certainly best but, I am seeing some dust accumulation

hmmm - I am going to go and document the candle wax vs the bees wax. The front of the boat is primary candle wax and the back is primarily bees wax. This might be interesting.

I'll post results tomorrow.

Scott
 
To show dust accumulation I am going to need to move the boat back to the open work area where I can do a better job of backlighting. At first glance it looks like the candle wax has a bit more dust then the beeswax side. Obviously I will clear off all dust before putting the beast into it's cage.

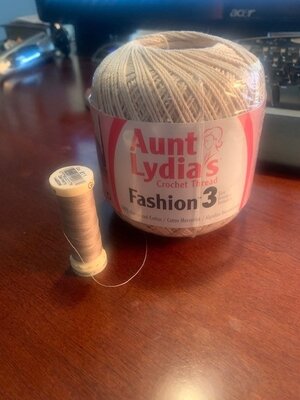
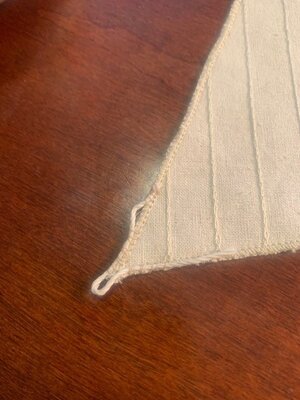
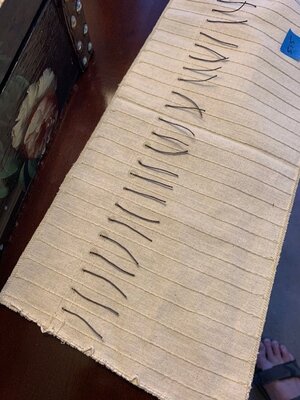
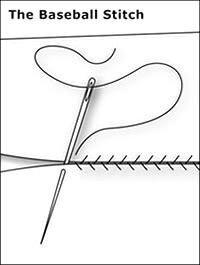
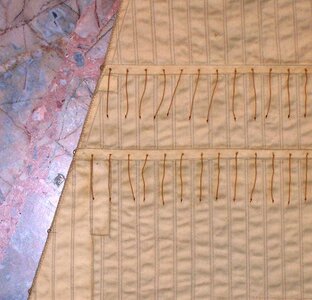
It's now time to start the sail work. I found some string at Joann's Fabric's that may just work. I also did a trial sew of a couple clews. Seems ok. Just need to decide if I should take the string all the way around or just where I need them.

Don't laugh, see below. Aunt Lydia's crochet thread  pic 5.jpgTrial clew Pic 4.jpg
 
Back in the saddle.

Sorry for the delay in posting. I had to take a short break.

OK lets see where was I. I finished up the rigging (sans a few bits) and started working on sails. Holly Molly this little exercise really really increases the quantity of rigging!! The amount of lines coming off the bowsprit is incredible and I have 8 more to go!! I have the bowsprit sails, all three jibs, and the top two sails of the foremast completed. Currently working on the primary sail of the foremast. I have it connected now I just need to attached its running rigging.

Lesson learned about yards. Don't just follow the instructions to the letter. Look way ahead on how the sails are actually connected. By doing so you'll reposition many of the blocks to more proper positions.

The reefing lines (those lines in the middle of the sail) are a challenge for sure. I searched around but could not find any instruction on how to connect them. Finally just sewed them on with a loop of thread.

Are there any decent techniques on shaping sails (spray starch??).

A few pics below.

Jan 4 Pic 1.jpgJan 4 Pic 2.jpgJan 4 Bowsprit lines pic 3.jpgJan 4 jib lines ic 5.jpgJan 4 reefing lines pic 6.jpg
 
To show dust accumulation I am going to need to move the boat back to the open work area where I can do a better job of backlighting. At first glance it looks like the candle wax has a bit more dust then the beeswax side. Obviously I will clear off all dust before putting the beast into it's cage.

It's now time to start the sail work. I found some string at Joann's Fabric's that may just work. I also did a trial sew of a couple clews. Seems ok. Just need to decide if I should take the string all the way around or just where I need them.

Don't laugh, see below. View attachment 270053View attachment 270054
WELL. DONE.
 
Back in the saddle.

Sorry for the delay in posting. I had to take a short break.

OK lets see where was I. I finished up the rigging (sans a few bits) and started working on sails. Holly Molly this little exercise really really increases the quantity of rigging!! The amount of lines coming off the bowsprit is incredible and I have 8 more to go!! I have the bowsprit sails, all three jibs, and the top two sails of the foremast completed. Currently working on the primary sail of the foremast. I have it connected now I just need to attached its running rigging.

Lesson learned about yards. Don't just follow the instructions to the letter. Look way ahead on how the sails are actually connected. By doing so you'll reposition many of the blocks to more proper positions.

The reefing lines (those lines in the middle of the sail) are a challenge for sure. I searched around but could not find any instruction on how to connect them. Finally just sewed them on with a loop of thread.

Are there any decent techniques on shaping sails (spray starch??).

A few pics below.

View attachment 280644View attachment 280645View attachment 280642View attachment 280643View attachment 280646
I do my reefers (not joints) while watching tv with the Admiral. I used to put a spot of glue on them but it looked ugly. I now use a double knot in the back and sew a knot in the front. Love your sails. I’ve never done any with bowlines and clues. Good job!
 
To show dust accumulation I am going to need to move the boat back to the open work area where I can do a better job of backlighting. At first glance it looks like the candle wax has a bit more dust then the beeswax side. Obviously I will clear off all dust before putting the beast into it's cage.

It's now time to start the sail work. I found some string at Joann's Fabric's that may just work. I also did a trial sew of a couple clews. Seems ok. Just need to decide if I should take the string all the way around or just where I need them.

Don't laugh, see below. View attachment 270053View attachment 270054
done very well. oneof the few sails i have with the RELINGE
Back in the saddle.

Sorry for the delay in posting. I had to take a short break.

OK lets see where was I. I finished up the rigging (sans a few bits) and started working on sails. Holly Molly this little exercise really really increases the quantity of rigging!! The amount of lines coming off the bowsprit is incredible and I have 8 more to go!! I have the bowsprit sails, all three jibs, and the top two sails of the foremast completed. Currently working on the primary sail of the foremast. I have it connected now I just need to attached its running rigging.

Lesson learned about yards. Don't just follow the instructions to the letter. Look way ahead on how the sails are actually connected. By doing so you'll reposition many of the blocks to more proper positions.

The reefing lines (those lines in the middle of the sail) are a challenge for sure. I searched around but could not find any instruction on how to connect them. Finally just sewed them on with a loop of thread.

Are there any decent techniques on shaping sails (spray starch??).

A few pics below.

View attachment 280644View attachment 280645View attachment 280642View attachment 280643View attachment 280646
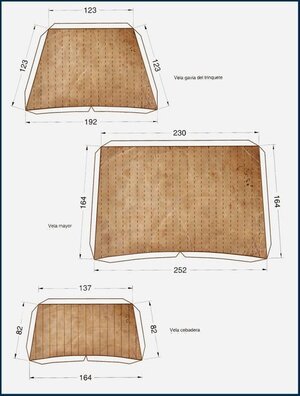
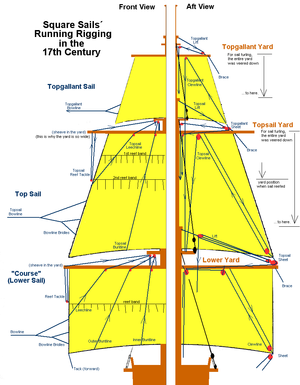
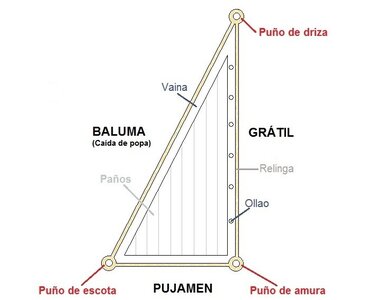
AGAIN WELL DONE. IT IS NEARLY EVERYTHING THERE SHOULD BEE. Very few is doing the Relinge (sorry Spanish Word) have forgotten the UK word.. under Tools-new tools - I have made some fig and tools, which can help you. special tools for attaching into the cornes. The REEFING LINE??

0000.jpg

00.png

659d927c34122eceaecded7cafea8f0e.jpg

1721--TAYSAILS.jpg

1759-VELA- STAYSAIL- DICIONARIO- DICIONARY-1.jpg

4970-SAIL-SQUAR.jpg
 
I do my reefers (not joints) while watching tv with the Admiral. I used to put a spot of glue on them but it looked ugly. I now use a double knot in the back and sew a knot in the front. Love your sails. I’ve never done any with bowlines and clues. Good job!
You are NOT the only one being DOWN-and it is not over.
But back to you Riggen and Sails I will give You a 9 out of 10, as you have rigged the lower mast (with Cap) the UK style, where Montanes was rigged as French ship, with another CAP- see Witic, he changes to my recommendation - BUT WEEL DONE SAILOR.
THAT IS NEARLY ME, ONLY WITH A WHITE BARB and captain hat a little never. have lost 22 kg over 6 weeks

5B203F99-C1C9-4C54-BBBD-A32E9E9623AD.jpeg
 
Hello all,

Well, starting building out the skeleton of the Montanes and I am dealing with troubles already!! I glued the two main center sections and all was well until the next morning. The Aft center "board" decided to do two things, bend and twist. Out here in Colorado during the winter time things are incredibly dry so to say the least I was pretty surprised. I had a 1/3 inch bend, and more frustrating, a 1/3 inch twist.

After dry fitting the frames that twist really gets magnified. Sorry, I did not take a picture (should have).

After pondering the situation for a while I decided to go ahead and glue in the frames and see if I could get the bend out by adding the crossbeams. (the 2cm by 2cm reinforcements) Not really. So did the next best then and build a stand which took most of the bend out. That took the bend out of the bottom section but I still had an 1/8 inch at the top. Took that out with the deck.

Next challenge is to see if I can take out this crazy twist. The only way to accomplish was to twist it back by hand then glue and nail the deck. I prepped the decking by pre-drilling some 0.8mm holes for the nails. I added the glue then twisted it a little past straight and had my wife tap in the nails. IT WORKED!!! That also took out the last bit of bend (I'm left with 1/16 inch bend and can live with that).

Net result is I'll need to add the deck planking later. Ok fine I can do that.

Sunday morning I found more warping. I'll deal with these later.

Kind of a wobbly start.
Hallo @Scottola
we wish you all the BEST and a HAPPY BIRTHDAY
Birthday-Cake
 
Back
Top