MSW USS Constitution

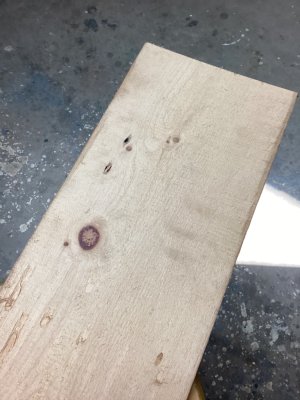
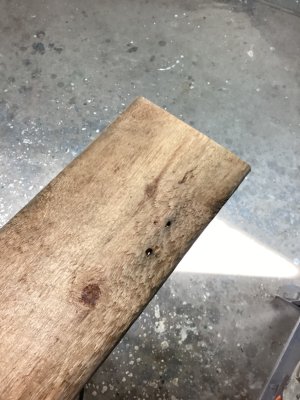
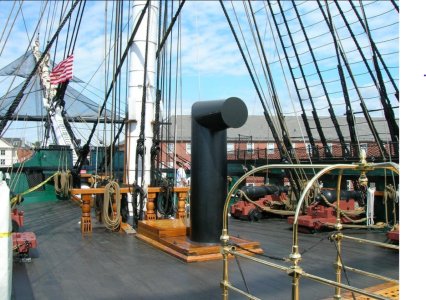
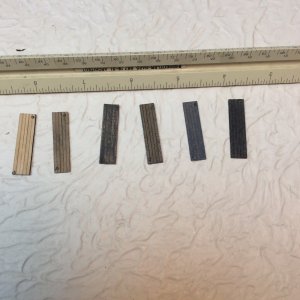
The attached photos are of a piece of White Pine lumber salvaged from a grain elevator that stood for over 125 years adjacent to the harbor that Duluth Minnesota shares with Superior Wisconsin. The piece has been re-saved from a thicker plank so one side is fresh cut and the other weathered from 125 years of exposure to the elements. Unlike Constitution’s deck, it has not been washed and holystoned daily.

Roger

IMG_0166.jpegIMG_0171.jpeg
 
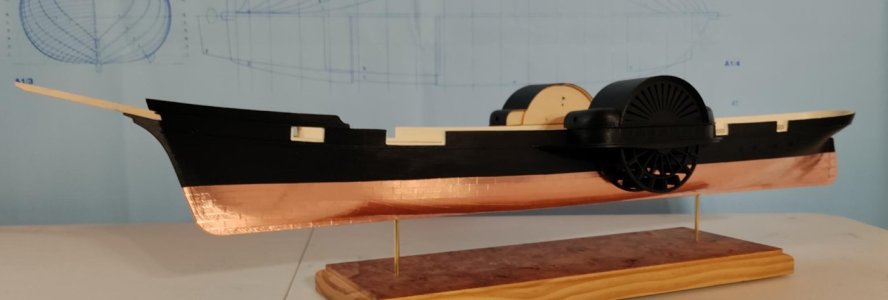
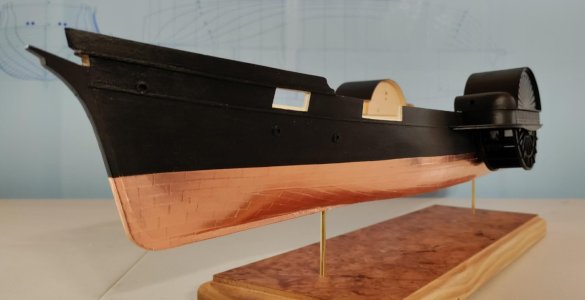
Good morning, Jack Sparrow! I'm joining our shipmates for your build! My two cents on coppering the hull: go with copper tape and no nail pattern. I was going to paint my 1:96 scale Model Shipways Harriet Lane and was lucky enough to find another builder working on the same kit who went with copper rather than tape. I sourced my tape from Blue Jacket Shipcrafters in the narrowest width they had - 3/16". When it came time to do the work, I broke out the instruction book from my ModelShipways USS Syren kit (it's on the shelf waiting it's turn) to help understand the process. I also found a neat YouTube video on how to tape for gore lines. I then started the process of making the numerous 1/2" long copper plates. Yes, I know that the scale dimensions of 18" x 48" are incorrect on the width. As I recall my reading from a long discussion of copper plating on this forum the standard dimension was 12" or 16" by 48". So, yes, I took a shortcut and decided not to reduce the width of each plate by 1/16" actual, or 6" scale. There is a long discussion on this forum about representing weathered copper. To my taste the unweathered copper looks smashing. I have not hade any of my plates even try to come loose, btw. They stuck well and I burnished them with a piece of balsa. Also, the tape was easy to take off when I needed to fix some errors with the amount of overlap.

It turned out like this:Beauty shot forward three fourth port with bowsprit.jpgBeauty shot forward three fourth port.jpg

I look forward to watching your progress!

Blessings.
Chuck
 
Last edited:
Good morning, Jack Sparrow! I'm joining our shipmates for your build! My two cents on coppering the hull: go with copper tape and no nail pattern. I was going to paint my 1:96 scale Model Shipways Harriet Lane and was lucky enough to find another builder working on the same kit who went with copper rather than tape. I sourced my tape from Blue Jacket Shipcrafters in the narrowest width they had - 3/16". When it came time to do the work, I broke out the instruction book from my ModelShipways USS Syren kit (it's on the shelf waiting it's turn) to help understand the process. I also found a neat YouTube video on how to tape for gore lines. I then started the process of making the numerous 1/2" long copper plates. Yes, I know that the scale dimensions of 18" x 48" are incorrect on the width. As I recall my reading from a long discussion of copper plating on this forum the standard dimension was 12" or 16" by 48". So, yes, I took a shortcut and decided not to reduce the width of each plate by 1/16" actual, or 6" scale. There is a long discussion on this forum about representing weathered copper. To my taste the unweathered copper looks smashing. I have not hade any of my plates even try to come loose, btw. They stuck well and I burnished them with a piece of balsa. Also, the tape was easy to take off when I needed to fix some errors with the amount of overlap.

It turned out like this:View attachment 480453View attachment 480454

I look forward to watching your progress!

Blessings.
Chuck
looks great. everything is neat and tidy.
 
Is this a single plank or a double? I used a lot of putty and sanding on my single plank Connie from Billing Boats. You can’t tell because the ship is painted.
 
Is this a single plank or a double? I used a lot of putty and sanding on my single plank Connie from Billing Boats. You can’t tell because the ship is painted.
It's a single plank and I probably will put copper sheathing on the lower part of the hull so in reality I don't need perfection, just a smooth shape such that there are no bumps or dips showing through the sheathing.
 
Last edited:
Welcome aboard my build log of the USS Constition. I welcome comments and glad to have you on board.
It is the hardest build I have ever done. I would even call this a scratch build because of the amount of construction that there is to do.

I know that there are several build logs of the Constitution and I had planned to only start mine when I was putting on the sails, but I decided I would start now. I will post pics when I finish the sanding stage of the hull. There really isn't much to see right now.

As I am close to finish the planking of the hull, I am thinking forward about the following:
(i) What color to paint the deck
(ii) Whether I should copper the hull with copper metallic paint or add copper tape.

The pictures that I have seen of the deck show a sort of greyish color.
I really like the color of the deck furnishing. I am going to call that a caramel color.
No rivets in my boat and no trunnels. As someone put it the Constitution is a bit of a Jackolope because it has gone through so many transformations over the years. Therefore I plan on doing some kit bashing too, well as much as my abilities allow me to do.


View attachment 479495
It's great to see your log, I really enjoyed this part of the build. I agree with you it's a very challenging, time consuming project with so many scratch parts.
I had a look at buying the copper plates, they look good but where out of my price range. I am pleased with the results I got using the copper tape and it went on a lot quicker than I expected.

Tony
 
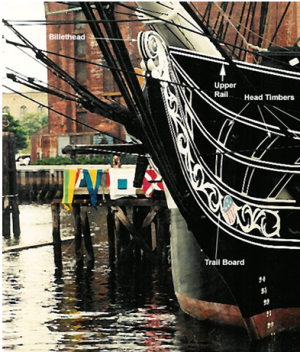
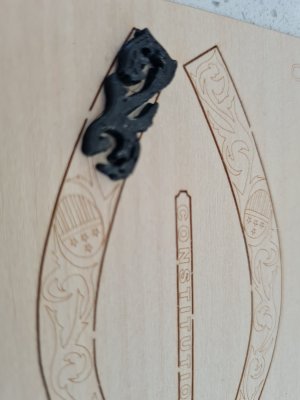
I am taking a break from the planking and decided to explore some parts that I will need to 3D print, the decorations on the trailboard.
I broke the part into 5 pieces, and I test printed the first part to see if I can get a reasonable reproduction of that part.
1730122501741.png


It`s ok for the x and y direction, but I made it too thick in the z direction. Also, I will have to do some manual adjustments to clean up the part, Well at least I found a process for doing this. I will also move the curves around a little bit on the part because I want better resolution.

pic.jpg
 
I am taking a break from the planking and decided to explore some parts that I will need to 3D print, the decorations on the trailboard.
I broke the part into 5 pieces, and I test printed the first part to see if I can get a reasonable reproduction of that part.
View attachment 480584


It`s ok for the x and y direction, but I made it too thick in the z direction. Also, I will have to do some manual adjustments to clean up the part, Well at least I found a process for doing this. I will also move the curves around a little bit on the part because I want better resolution.

View attachment 480585
That piece also has to bend to fit the bow.
 
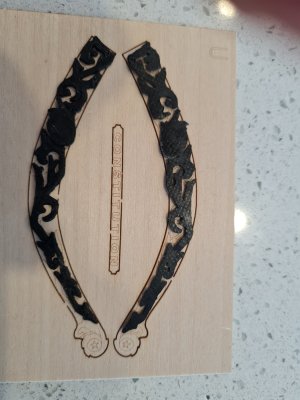
Well here is my version of the decorations on the trail boards. I used Bob Hunt's picture that he has of these decorations and I broke it up into 4 separate pieces. I still have the last piece at the top to do, and that will take me a little bit of time because it is the most complicated of all the pieces. I also have a bit of sanding to do and to paint them white. There is also a decoration that is in red white and blue, the oval like piece, and there are stars on that too. Not sure yet how I will do that. I may just paint a dot white. I think it was worth the effort to make these. The manual method is not one that I would be very successful at, particularly since I have to make 2 of each piece.

image.jpg
 
Last edited:
The way to make the shield is with a decal. Mr. Hunt provides a scale size file that you can use, First paint the shield area white. Using your inkjet printer, print the shield image on to decal paper. I did this by printing the image on regular paper to see where it was positioned on the paper as the image is quite small. Then I taped decal paper over the printed image and reprinted on the paper with the taped on decal paper. If you do it right, the image will be printed onto the decal paper. Coat the decal paper with the decal spray and let dry. Cut the decal very close to the image and apply with water and some decal solvent to soften the decal up a bit so it cam conform to the surfaces better. You can see how I did all this on my build log here on post #685. Use this same method to apply the shield on the eagle on the transom.

Hope this helps, Jon
Oh ok. I got it. It's a decal that has been glued onto the shield. That makes a lot of sense. Thanks for the information.
 
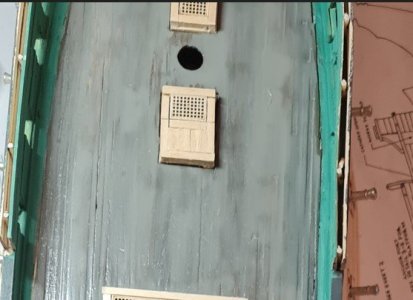
Well, I went ahead and painted the deck to match the photo shown below. The first pic is my deck and the second is the real USS Constitution.I still have to finish the framing around the coamings and to stain and varnish them.
I don`t know if I like it... I foresee a lot of deck sanding in my immediate future.

deck.jpg

deck2.jpg
 
Last edited:
Well, I went ahead and painted the deck to match the photo shown below. The first pic is my deck and the second is the real USS Constitution.I still have to finish the framing around the coamings and to stain and varnish them.
I don`t know if I like it... I foresee a lot of deck sanding in my immediate future.

View attachment 482288

View attachment 482289
Maybe you could scrape it with a razor blade. I’ve seen some do that to get more of a weathering look. Also, Minwax makes a gray stain that lets the grain show through. I’ve used it on rough picture frames that turned out well.
 
I wish that I had posted these earlier. The photo below shows six levels of weathering for hatch covers for my current modeling project. The wood is ordinary lumberyard pine, each lamination is 1/16in wide. The effect was achieved by adding mixed acrylic colors to methyl alcohol to form a water thin mixture. The mix was applied with an air brush. This technique allows staining without hiding the planks.

Roger

IMG_2831.jpeg
 
Last edited:
Back
Top