• Ships of Scale has incorportated an extra level of security when you log In. Please follow on-screen prompts to acknowledge that you are not a robot via a "Check Box" or a "Pictorial Check Box Puzzle". This is needed due to higher level of AI Activity Security.
  • SUBSCRIBE TO SHIPS IN SCALE TODAY!

    The beloved Ships in Scale Magazine is back and charting a new course for 2026!
    Discover new skills, new techniques, and new inspirations in every issue.

    NOTE THAT OUR NEXT ISSUE WILL BE July/August 2026
  • Win a Free Custom Engraved Brass Coin!!!
    As a way to introduce our brass coins to the community, we will raffle off a free coin during the month of August. Follow link ABOVE for instructions for entering.

My 1/72 scale aircraft

Update on the Fokker DVII…
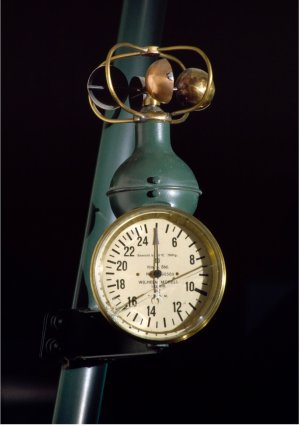
The struts were painted and I added the outboard gauge…


Then the upper wings were finished…


Well…until I decided to add one more thing…


Always loved the angled stripes on wings. ;)
Time to add struts for the upper wing…


Once these dry I can start adding the upper wing. I have found if you put these outer struts in first, on a lot of airplanes, you can add the inner ones after the fact. Not all, but some. I take advantage of that when I can! ;)

See ya soon…
 
Last edited:
Fokker DVII finished!


And now with the first one I built…


I think the new one will go well with the squadron. ;)
And now I have 6 on this shelf…


And that is 6 per side for the WW1…


Which is why I built the Fokker DVII. ;)
Now I have to get back to my jets…I think…too many choices…

See ya next time…
 
Last edited:
As always, very smart work. Doubly so in 1/72. I’m jest a little envious! :D

Given the beautifully tight rigging on the albatross, I’m surprised that you didn’t rig the Fokker’s undercarriage.
 
As always, very smart work. Doubly so in 1/72. I’m jest a little envious! :D

Given the beautifully tight rigging on the albatross, I’m surprised that you didn’t rig the Fokker’s undercarriage.
Thank you! Working in WW1 aircraft in 1/72 scale is a bit crazy! Yet I keep punishing myself …ROTF.
You are correct, there are two cables on the landing struts. And there is also one from the vertical stabilizer to the horizontal stabilizer on each side. These tiny aircraft are no fun to rig, but I do it for realism. However, sometimes I leave some of the rigging off. The reason is two fold. One because it involves drilling a hole at each end of the cable and using super glue…and I am allergic to superglue fumes and if not careful pay for it with the flu like symptoms, which is why I hate the new PE stuff. And the resin parts are not much better in that regard.
Second is it makes the model difficult to handle or dust. I have had to repair rigging on a few of my models before.
In conclusion, I may still add them in the future because it completes the look of the scale. ;)
 
Thank you! Working in WW1 aircraft in 1/72 scale is a bit crazy! Yet I keep punishing myself …ROTF.
You are correct, there are two cables on the landing struts. And there is also one from the vertical stabilizer to the horizontal stabilizer on each side. These tiny aircraft are no fun to rig, but I do it for realism. However, sometimes I leave some of the rigging off. The reason is two fold. One because it involves drilling a hole at each end of the cable and using super glue…and I am allergic to superglue fumes and if not careful pay for it with the flu like symptoms, which is why I hate the new PE stuff. And the resin parts are not much better in that regard.
Second is it makes the model difficult to handle or dust. I have had to repair rigging on a few of my models before.
In conclusion, I may still add them in the future because it completes the look of the scale. ;)

Dean, there seems to be quite a few hypoallergenic CA glues available now - have you tried any? (search "hypoallergenic ca glue")
 
Dean, there seems to be quite a few hypoallergenic CA glues available now - have you tried any? (search "hypoallergenic ca glue")
Yes, thank you. I was using a brand I found that worked. Then I ordered some that was much cheaper from Walmart, and it was a Chinese ripoff and I had a reaction…sigh! So the real stuff is not cheap. I have to order more. ;)
 
drilling a hole at each end of the cable

Yes, very difficult in tiny scale. I cheat in 148. I just tie my fishing line direct to the strut ends. Good enough for me.

I do secure the knots with CA, but like you, I react badly to it so I have to buy the expensive stuff. I keep it in the fridge. It seems to make it last longer.
 
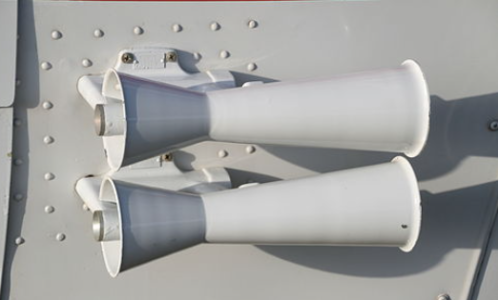
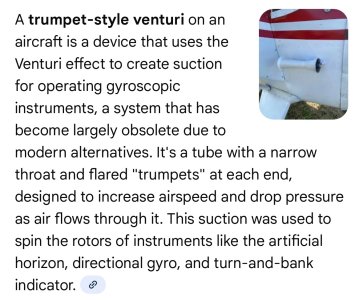
Dean, what’s the little gadget attached to the left hand N strut (part A10)? Nice work, up to your usual high standards.

Roger
 
I decided on one more change…the elevator was bothering me in black…so I painted it dark grey. ;)


I think this works better with the scheme.

In addition, to demonstrate how small these WW1 aircraft are once again…


They become difficult to handle once all parts are on. They are so small it’s easy to break a small part off if you don’t grab it in a spot where your fingers will not touch anything else. Which is the typically the fuselage.
 
Last edited:
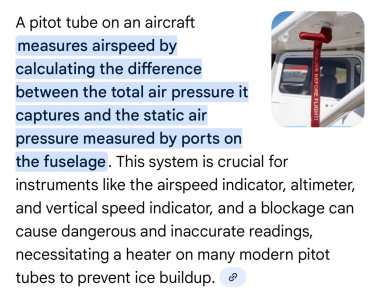
I'm not an A & P (airframe and power) certified person, but I believe the modern aircraft use a form of pressure sensing to determine airspeed.
They used a pitot tube forever…not sure about modern fighters? I think they all still use one. The Camel used one in WW1, and they have been in use ever since, as far as I know.
 
Last edited:
Back
Top