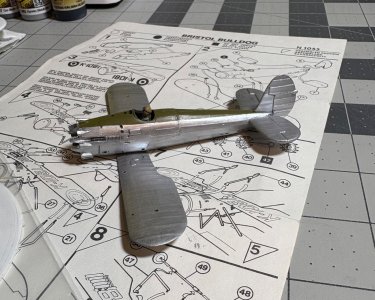
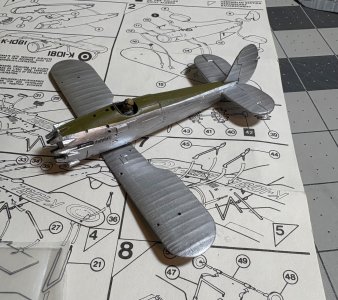
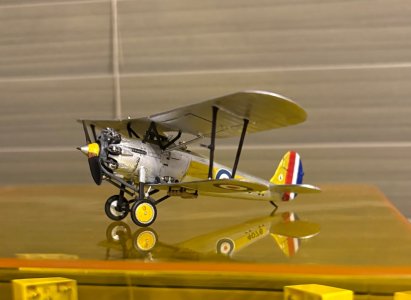
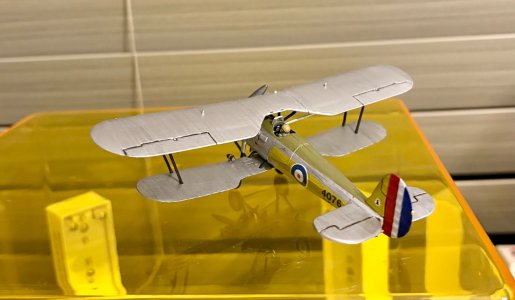
Thank you. Yes, fortunately I still have a steady hand!Your micro painting is remarkable, I know it takes a very steady hand.
-

Win a Free Custom Engraved Brass Coin!!!
As a way to introduce our brass coins to the community, we will raffle off a free coin during the month of August. Follow link ABOVE for instructions for entering.
-

PRE-ORDER SHIPS IN SCALE TODAY!
The beloved Ships in Scale Magazine is back and charting a new course for 2026!
Discover new skills, new techniques, and new inspirations in every issue.
NOTE THAT OUR FIRST ISSUE WILL BE JAN/FEB 2026
- Home
- Forums
- Ships of Scale Build Logs
- Super Detailing Static Models / Other Genres
- Historical Trailways, Guns, Aircraft, and Cars
You are using an out of date browser. It may not display this or other websites correctly.
You should upgrade or use an alternative browser.
You should upgrade or use an alternative browser.
A beautiful object that deserves some attention. The details looks neat, Dean.I started working on the motor, as it’s one of the interesting aspects of the Bulldog.
Reference pic…
View attachment 537880
The lack of detail needed to be addressed. So I added the valve springs in 4 places on each cylinder head with a drop of glue on the end of a toothpick. Prior to that I sanded the head flat and added some bolts with PVA glue and a needle tip to the cover. Then it was time to paint and do a little dry brushing. So far it’s looking promising, and better than out of the box.
View attachment 537875View attachment 537876View attachment 537877
At this scale, I can’t get as detailed as I would like. So there is an obvious compromise between what I would like and what’s feasible!. Although I do have options I may consider.

Regards, Peter
Not being 100 percent happy with the head geometry, I added some 3d protrusions for the cover and valve rocker arm guides to the cylinder head with PVA glue on a needle.
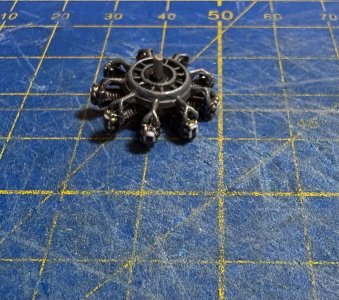
Then once dried I painted on top of that…
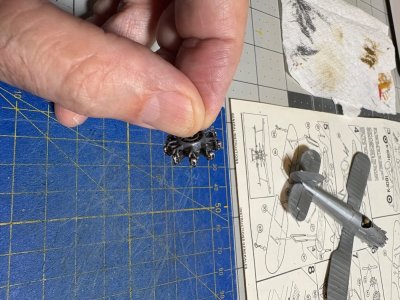
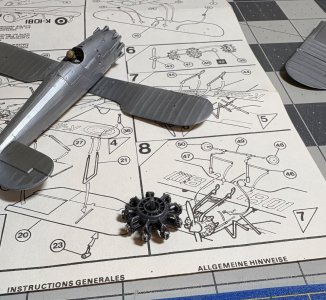
This is a very small difference that may go unnoticed had I not mentioned it. Was it worth the effort? I don’t know, but it made me happy!
Next I added the surround for the motor that attaches to the fuselage. I have never seen anyone take the time to putty the horrible gaps and I think this will be a vast improvement…
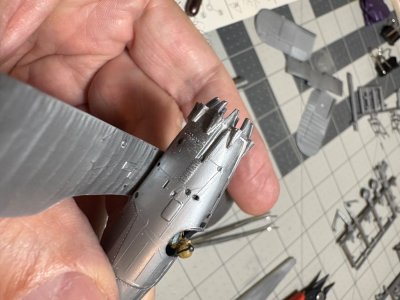
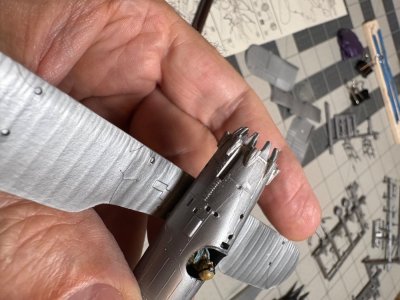
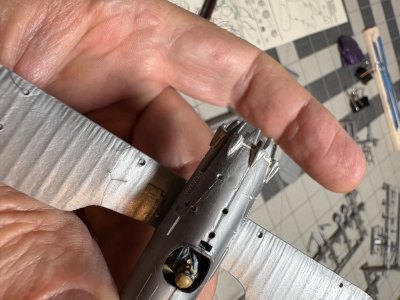
I add putty with a toothpick, then I come back with a wet paint brush, dipped in water, and I brush the putty to smooth it out.
Next was the horrible excuse for machine guns…
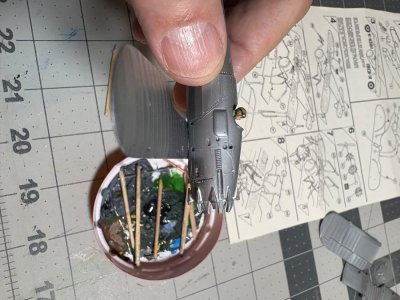
They are so small you can barely see them!
Looking at the real airplane, that was not the case at all. So I carved them out and cut the barrels off some spare machine guns I had from previous builds and I glued those on.
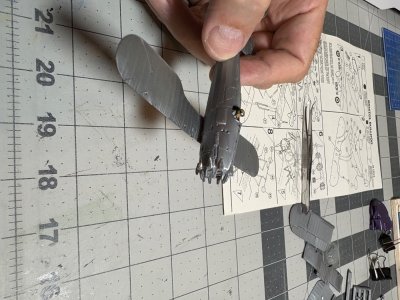
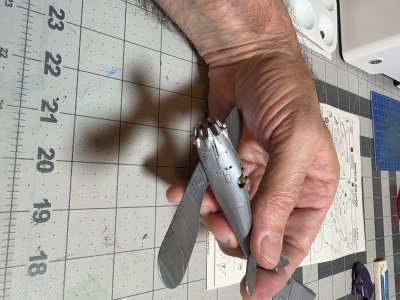
This is another definite improvement over the kit offering.
I think I’m ready to start the paint on the airplane now!
See ya next time…

Then once dried I painted on top of that…


This is a very small difference that may go unnoticed had I not mentioned it. Was it worth the effort? I don’t know, but it made me happy!

Next I added the surround for the motor that attaches to the fuselage. I have never seen anyone take the time to putty the horrible gaps and I think this will be a vast improvement…


I add putty with a toothpick, then I come back with a wet paint brush, dipped in water, and I brush the putty to smooth it out.
Next was the horrible excuse for machine guns…

They are so small you can barely see them!
Looking at the real airplane, that was not the case at all. So I carved them out and cut the barrels off some spare machine guns I had from previous builds and I glued those on.


This is another definite improvement over the kit offering.
I think I’m ready to start the paint on the airplane now!
See ya next time…
Last edited:
Thank you Peter!A beautiful object that deserves some attention. The details looks neat, Dean.
Regards, Peter
Huge improvement with the machine guns.
Thanks Daniel! I was hoping I had some with the vented covers, that would have looked nice. Maybe I paint some black areas to simulate?Huge improvement with the machine guns.
What time is it, Dean? Oh, never mind. You don't have a finished grandfather clock because you are making tiny planes 

 .
.
Sorry. Low hanging fruit...


 .
.Sorry. Low hanging fruit...
Well I’m not working on my ship or any of my other projects either. It seems I’m obsessed with my aircraft collection these days. I started building aircraft models when I was a teen. I haven’t outgrown it, just got better at it!What time is it, Dean? Oh, never mind. You don't have a finished grandfather clock because you are making tiny planes

.
Sorry. Low hanging fruit...

Last night I was excited to get some decals on the airplane and clear coat, so I can start all the fine detailing.
Unfortunately decals have a shelf life. I suspect these were from the 1969-72 era…once placed in water, to my horror they disintegrated! They crumbled into a million little floating pieces.
This is one that was only in there about 30 seconds…
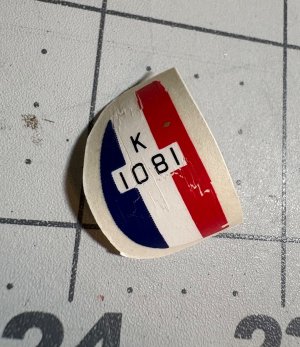
As you can see it’s already starting to crack and fall apart! The others completely fell apart in the water…sigh
They don’t make these kits anymore, however there may be some after market decal kits for it. I need to search.
Anyway, decided not to let the build stall, I dug around in my box of spare 1/72 scale decals and found pieces that would work. I did not have the decal for the tail, so I just painted it.
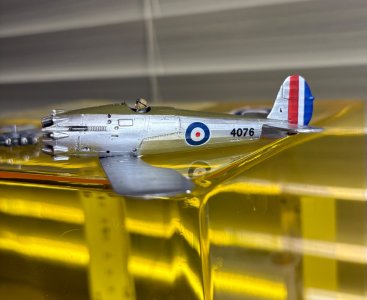
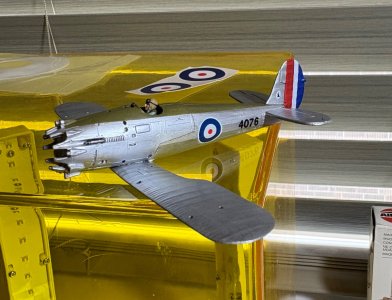
So I’m moving forward despite the temporary set back. I still need a set of roundels for the upper wings. The ones behind the airplane are from the kit, I only saved them for size reference. Since those were common markings for the RAF, I should have no problem finding some online.
Next I will clear coat what I have, to protect the decals, and then do a wash on all the bolt heads, etc. and then start adding pieces as I paint them.
Ps - word to the wise…when purchasing an old antique kit, be prepared to find new decals for it!
See ya next time.
Unfortunately decals have a shelf life. I suspect these were from the 1969-72 era…once placed in water, to my horror they disintegrated! They crumbled into a million little floating pieces.
This is one that was only in there about 30 seconds…

As you can see it’s already starting to crack and fall apart! The others completely fell apart in the water…sigh
They don’t make these kits anymore, however there may be some after market decal kits for it. I need to search.
Anyway, decided not to let the build stall, I dug around in my box of spare 1/72 scale decals and found pieces that would work. I did not have the decal for the tail, so I just painted it.


So I’m moving forward despite the temporary set back. I still need a set of roundels for the upper wings. The ones behind the airplane are from the kit, I only saved them for size reference. Since those were common markings for the RAF, I should have no problem finding some online.
Next I will clear coat what I have, to protect the decals, and then do a wash on all the bolt heads, etc. and then start adding pieces as I paint them.
Ps - word to the wise…when purchasing an old antique kit, be prepared to find new decals for it!
See ya next time.
Last edited:
The painted replica looks also nice, Dean.Last night I was excited to get some decals on the airplane and clear coat, so I can start all the fine detailing.
Unfortunately decals have a shelf life. I suspect these were from the 1969-72 era…once placed in water, to my horror they disintegrated! They crumbled into a million little floating pieces.
This is one that was only in there about 30 seconds…
View attachment 538025
As you can see it’s already starting to crack and fall apart! The others completely fell apart in the water…sigh
They don’t make these kits anymore, however there may be some after market decal kits for it. I need to search.
Anyway, decided not to let the build stall, I dug around in my box of spare 1/72 scale decals and found pieces that would work. I did not have the decal for the tail, so I just painted it.
View attachment 538026View attachment 538027
So I’m moving forward despite the temporary set back. I still need a set of rounders for the upper wings. The ones behind the airplane are from the kit, I only saved them for size reference. Since those were common markings for the RAF, I should have no problem finding some online.
Next I will clear coat what I have, to protect the decals, and then do a wash on all the bolt heads, etc. and then start adding pieces as I paint them.
Ps - word to the wise…when purchasing an old antique kit, be prepared to find new decals for it!
See ya next time.
For my Balder I used decal water transfer paper in my inktjet-printer. Sealed with a few layers of clear varnish worked out very well. I have sheets for ‘white’ and ‘transparent’.
Just scan the old transfer, scale up the colors and …… voila.
Regards, Peter
Thanks for the tip Peter! I might have to get some of that paper!The painted replica looks also nice, Dean.
For my Balder I used decal water transfer paper in my inktjet-printer. Sealed with a few layers of clear varnish worked out very well. I have sheets for ‘white’ and ‘transparent’.
Just scan the old transfer, scale up the colors and …… voila.
Regards, Peter
There is also for laser printers.Thanks for the tip Peter! I might have to get some of that paper!
Hey Dean, I ordered 'Water Slide' paper from Amazon and like Peter said works great. I used it to make additional decals for my B-17 Air Sea rescue version.
Looks like I will be needing some of that for the future…possibly near future!Hey Dean, I ordered 'Water Slide' paper from Amazon and like Peter said works great. I used it to make additional decals for my B-17 Air Sea rescue version.
After the decals and some clear coat. I added a wash to the bolts and vents, etc. and I ended up using the paint scheme from a squadron I found online that had some yellow. So more painting and clear coat was added. The wheels and spinner on the propeller will match. I like the additional color.
Then I added the wheel frame, and the tail skid. So I decided to put the motor in now as well. There are two exhaust pipes that come out of the bottom of the radial manifold. Will add those soon.
So much more to add before I start on the upper wing. It should go quick hopefully.
A few pics of my current progress…
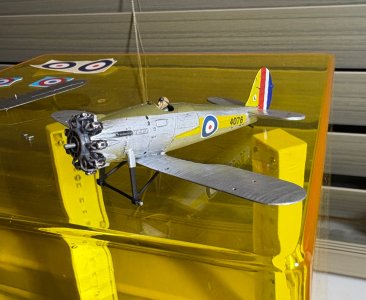
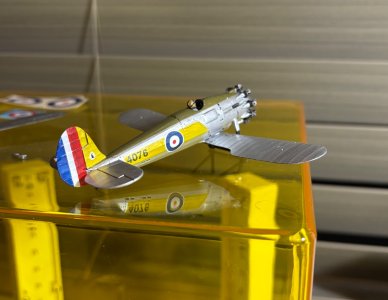
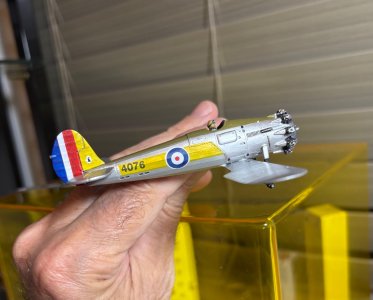
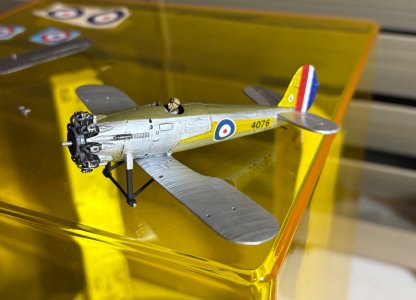
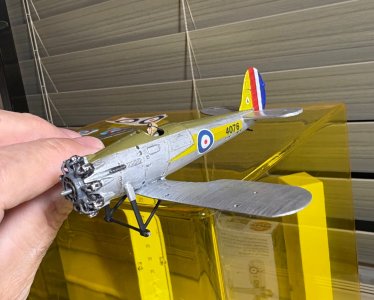
It’s taking shape and looks like it will end up being a nice addition.
See ya next time…
Then I added the wheel frame, and the tail skid. So I decided to put the motor in now as well. There are two exhaust pipes that come out of the bottom of the radial manifold. Will add those soon.
So much more to add before I start on the upper wing. It should go quick hopefully.
A few pics of my current progress…


It’s taking shape and looks like it will end up being a nice addition.
See ya next time…
Last edited:
Moving forward…
I carved the end of the exhaust pipes to make a hole…
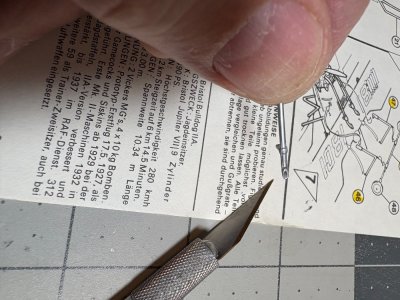
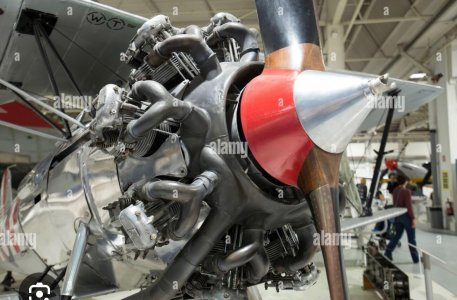
The propeller has a flange at the base of the spinner…not like that on the actual photos…
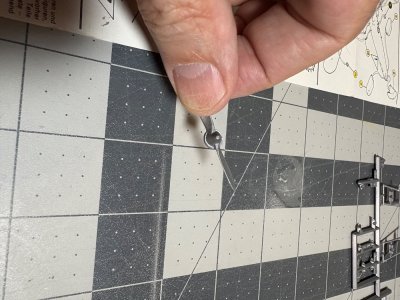
So I carved and sanded the flange off the spinner…and then painted the propeller and spinner and added the pin on the end of the spinner…
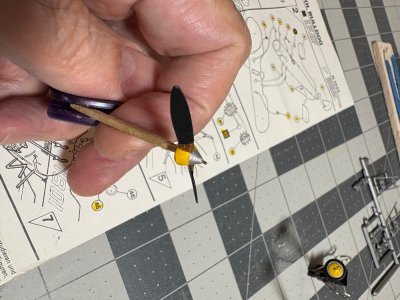
Then the exhaust was painted and added, the bomb rack and bombs, the wheels and radiator…
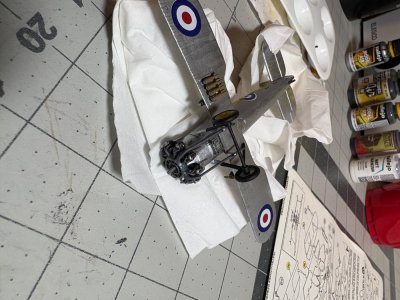
Then I dry brushed the exhaust to add some heat soaked areas…
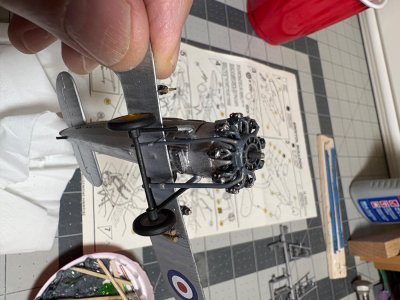
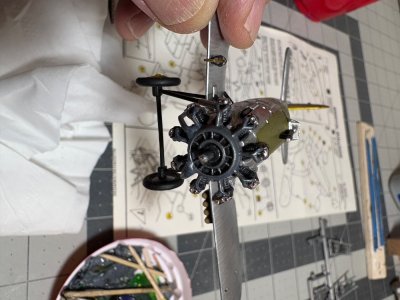
Then I had to make a windshield because I lost it…sigh. So I fabricated one using a spare windshield that I cut and heavily modified. Then I added the scope in front of it, the 4 struts on the wings and fuselage, the generator, and another unit on the other side of the wing (not sure what it is)…
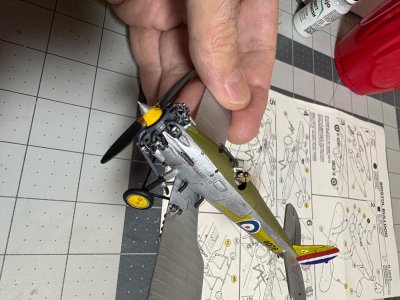
I also did some final painting on the cylinder heads…I finally got the look I was after.
Here are some current progress pics…
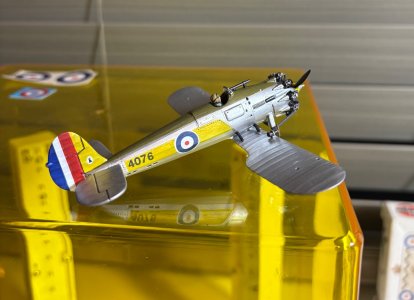
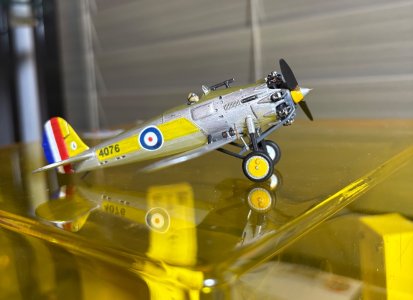
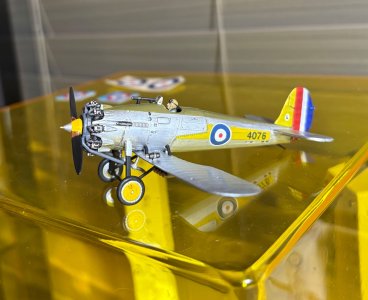
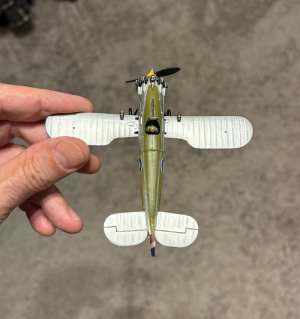
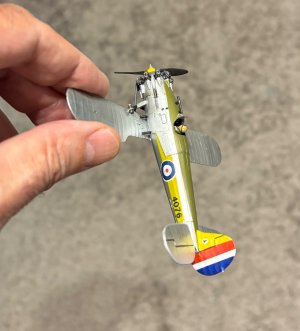
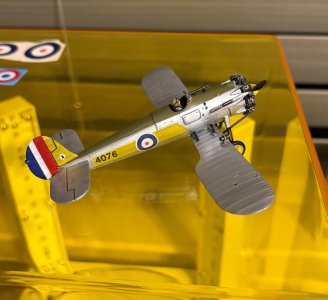
Next step is the upper wing assembly…
See ya next time…
I carved the end of the exhaust pipes to make a hole…

The propeller has a flange at the base of the spinner…not like that on the actual photos…


So I carved and sanded the flange off the spinner…and then painted the propeller and spinner and added the pin on the end of the spinner…

Then the exhaust was painted and added, the bomb rack and bombs, the wheels and radiator…

Then I dry brushed the exhaust to add some heat soaked areas…


Then I had to make a windshield because I lost it…sigh. So I fabricated one using a spare windshield that I cut and heavily modified. Then I added the scope in front of it, the 4 struts on the wings and fuselage, the generator, and another unit on the other side of the wing (not sure what it is)…

I also did some final painting on the cylinder heads…I finally got the look I was after.
Here are some current progress pics…


Next step is the upper wing assembly…
See ya next time…
Last edited:
Looks very fine and accurate. Very nice painted.
Thank you Adi!Looks very fine and accurate. Very nice painted.


