Newbie mistake - Lowell Grand Banks Dory

I can understand that! I opted to not use the 3 pieces for the keel boards. When test fitted they had a notch to port and starboard of the center line that did not appear on the 1-piece........so I took the easy way out. I have a laser and I suppose I could have cut new ones, but since the alternative was available, I chose that. Now I'm asking why they did this in the first place! Thanks Don for responding.
Happy building! I think they gave the two hull bottom options 1) if a new builder wasn’t feeling brave or 2) if a builder messed up the 3-board build and needed an emergency backup so the whole kit wasn’t totaled. I almost did option 1 LOL!!

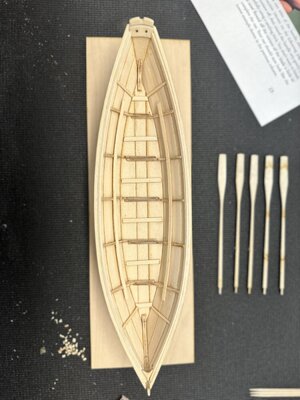
I haven’t gotten back to mine yet. Need to do the gunwales next and decide if I want to do the frame head irons or not (don’t think I have any card stock around).B34D4AE9-90F2-403F-B5E7-713A16620E52.jpeg
 
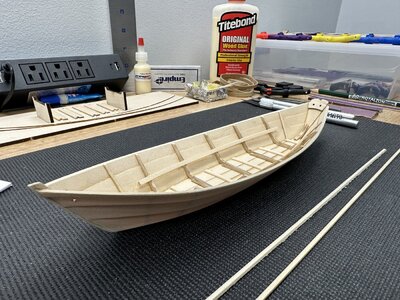
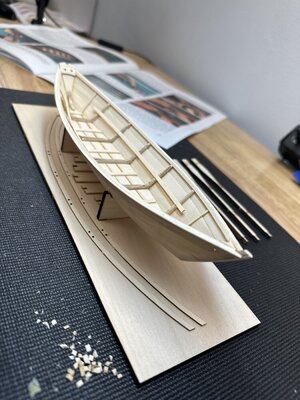
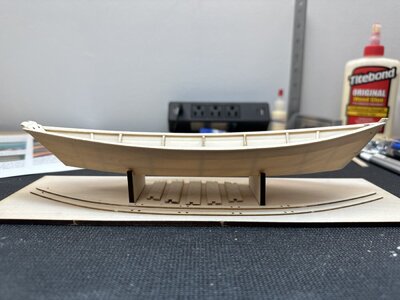
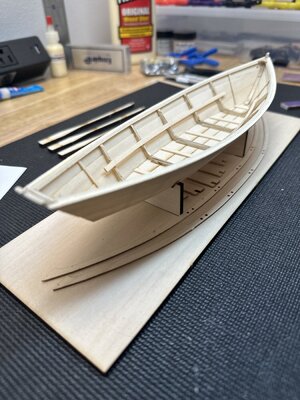
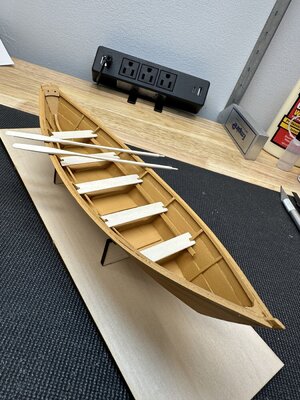
The question before the committee is: to fix or not to fix? Newbie mistake but somehow I set the transom way too high and now the stern cleat is well above the sheer strake and will sit above the cap rail too once in place. I’ve reviewed dozens of photos of this model (and even some of real dories) and this is definitely wrong. Which bugs the heck out of me. But the way I see it, there are two choices facing me currently:

1) Tear the transom out and refit. Risk of greater damage to model is moderate to high considering the fragility of the strakes…but if it works will make me less grumpy for messing up.

OR

2) Press onward, be forever reminded of my novice learning curve and when asked why the stern looks so high simply tell people “the fisherman/boat-builder was drunk when he built it”

Photos for reference. I’ve already test fit the remaining parts. It’s sitting too high.

View attachment 362092
View attachment 362093View attachment 362094
Hallo @Don Graves
we wish you all the BEST and a HAPPY BIRTHDAY
Birthday-Cake
 
Hello Don Graves! Happy birthday to you! You are very careful to assemble the boat!! Sorry for my english, I use google translator..
 
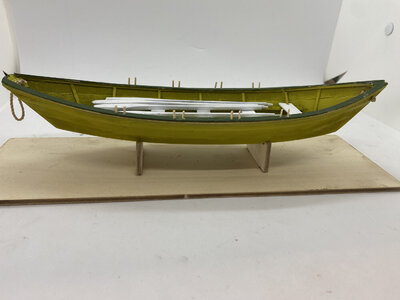
After many months I’ve managed to get some time in the shipyard and progress a little more on the dory. Finally reached the point of the first painting. Definitely nervous but have decided to prime it first to seal the wood and then paint the yellow. So close to the finish line and yet still several steps to go. Hard to slow myself down and keep a steady pace being so eager to complete my first build, but thankfully multiple other life priorities are helping! Here are photos of the current state of things.IMG_3406.jpegIMG_3405.jpegIMG_3407.jpegIMG_3408.jpeg
 
Just looked over your build log - As Kurt said, very clean and neat work. It's always worth a "redo". You will look at this little boat for a long time to come. The satisfaction that will come in knowing you did your best, will set you on the right course. It's okay to look back and wish, "I should have - could have" as long as you did your best at that time, with the experience you had.
By taking your time and not "settling", you have set yourself up to be an accomplished ship builder - great work here!
Thank you! I knew the hobby would be challenging but wow I truly had no idea! Even for a simple dory there are lots of complexities in learning the basic techniques. The greatest lessons so far have been “research research research” along with “test fit everything”. Just because parts are laser cut doesn’t mean they will fit how they should. As a total novice to the hobby, this lesson I learned with that transom. Just because the instructions say “A” doesn’t mean it will be right later. Despite the frustrations it really has been fun! I also struggle with wanting everything to be perfect, but I need to recognize and embrace that I am the best modeler I can be today and that through practice and additional builds I will become better.
 
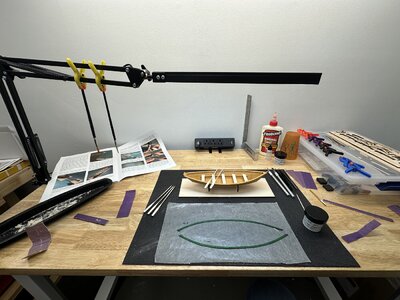
Been a while since I shared an update, and clearly I forgot my own plans! LOL! Only within the last couple weeks have I returned to the bench to continue working on the Dory. Never did prime it, just went straight to color. Whoops. I mean, it looks pretty good but I can see the value in a rattle can primer or post-sanding sealer to keep that wood grain in line. Inside looks rough with texture. Outer hull I was easily able to sand back after the first coat and then do two more. Working on the cap rails now. Thwarts all sanded and sitting. Also working on the oars…which I do not enjoy but hey, all part of the process.

THANK YOU to all here who offered thoughts and feedback, let alone great support, along my first journey! I was VERY glad I stepped back and purchased the shipwright series. This first “simple” model has been challenging enough but a much better confidence builder and excellent starting point to learn the needed skills. Maybe after the Thanksgiving holiday I’ll be wrapped up enough with this one that I’ll begin setting up my shipyard to start the Sailing Pram.
IMG_3752.jpegIMG_3755.jpeg
 
After many years of plastic models, I just finished my first dory also. Also too late to find out about sanding sealer, but off to Ace hardware to get a nice can that should last many years. If you did not know, you can contact model-expo, send them a pic of your completed Dory and they will credit your account. I did that and had to pay only $20 for the sailing pram. I also purchased "Ship Modeling Simplified" by Frank Mastini, which I recommend for Newbies like myself Dory2.jpg
 

After many years of plastic models, I just finished my first dory also. Also too late to find out about sanding sealer, but off to Ace hardware to get a nice can that should last many years. If you did not know, you can contact model-expo, send them a pic of your completed Dory and they will credit your account. I did that and had to pay only $20 for the sailing pram. I also purchased "Ship Modeling Simplified" by Frank Mastini, which I recommend for Newbies like myself View attachment 408079
Nice! I’m struggling on the last piece currently. Can’t get the cap rails to bond to the dory. There isn’t much wood for the bottom of the rail to contact (and it’s painted…again, whoops). I either need to scrape off all the paint along the top of the hull to give the wood glue something to bond to….or go insanely excessive and use some Liquid Nails which will definitely work but be super over-kill. But I’m so close to the finish line!
 
Nice! I’m struggling on the last piece currently. Can’t get the cap rails to bond to the dory. There isn’t much wood for the bottom of the rail to contact (and it’s painted…again, whoops). I either need to scrape off all the paint along the top of the hull to give the wood glue something to bond to….or go insanely excessive and use some Liquid Nails which will definitely work but be super over-kill. But I’m so close to the finish line!
Scrape off the paint. it will be covered anyway.
Is it the shape you need it to be before you install it?
 
Nice! I’m struggling on the last piece currently. Can’t get the cap rails to bond to the dory. There isn’t much wood for the bottom of the rail to contact (and it’s painted…again, whoops). I either need to scrape off all the paint along the top of the hull to give the wood glue something to bond to….or go insanely excessive and use some Liquid Nails which will definitely work but be super over-kill. But I’m so close to the finish line!
You could try pinning it using short pieces of brass wire and kept in place with a medium super glue followed with an accelerator. Work from one end to the other.
 
Back
Top