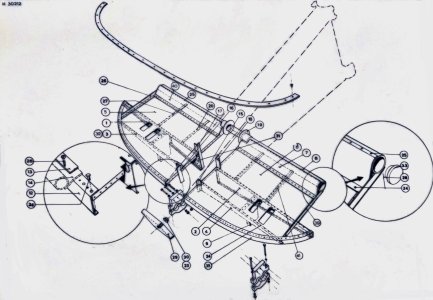
NHI Kolibri N-3, scale 1:48, scratch build

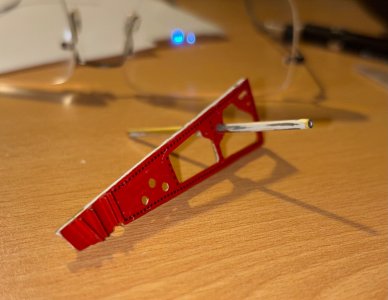
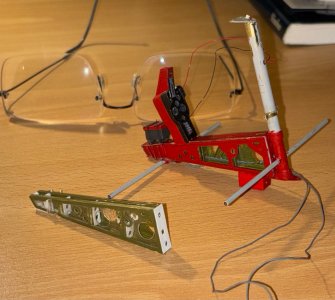
Whilst progressing the construction of the torsion box, I became more and more concerned about the torsional stability of the center box. Evergreen is a rather easy material to work with, easy to cut, easy to connect, using adhesive, but it doesn't provide much stability. I think that it's due to the geometry of the center box; the box is rather narrow and slender and due to the envisioned build sequence, I need to have one of the sides of the box open for as long as I can. This means I don't have much of a resistance against torsion. Long story short, I restarted the build of the torsion box, using brass as material for the RH web and the closing panels, upper and lower, fwd and aft.

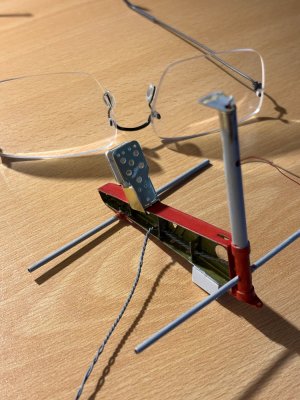
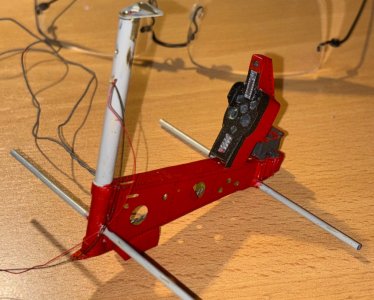
Also some progress was made with the rotor mast; I added provision for the attachment of the rotor head/gearbox and drilled a number of holes for the feed through of the tail rotor shaft and the cross tube of the landing gear.

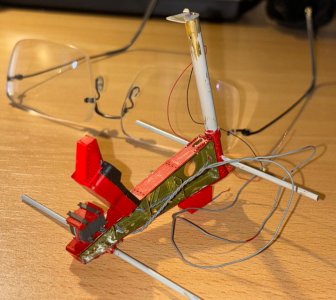
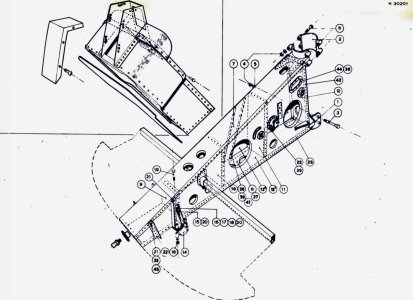
Iso view of torsion box and instrument panel:
IMG_0951.jpeg

Iso view of rotor mast assembly :
IMG_0863.jpeg

My interpretation of the torsion box and the rotor mast (btw, all is CA bonded):
IMG_0202.jpeg
 
Whilst progressing the construction of the torsion box, I became more and more concerned about the torsional stability of the center box. Evergreen is a rather easy material to work with, easy to cut, easy to connect, using adhesive, but it doesn't provide much stability. I think that it's due to the geometry of the center box; the box is rather narrow and slender and due to the envisioned build sequence, I need to have one of the sides of the box open for as long as I can. This means I don't have much of a resistance against torsion. Long story short, I restarted the build of the torsion box, using brass as material for the RH web and the closing panels, upper and lower, fwd and aft.

Also some progress was made with the rotor mast; I added provision for the attachment of the rotor head/gearbox and drilled a number of holes for the feed through of the tail rotor shaft and the cross tube of the landing gear.

Iso view of torsion box and instrument panel:
View attachment 488197

Iso view of rotor mast assembly :
View attachment 488198

My interpretation of the torsion box and the rotor mast (btw, all is CA bonded):
View attachment 488199
A well thought out re-do, Johan. That looks very promising. But still a complex structure.
Regards, Peter
 
A well thought out re-do, Johan. That looks very promising. But still a complex structure.
Regards, Peter
Thanks, Peter.
It's a darn complex build, I really underestimated the complexity of this little (humming) bird, but it's still a very fun thing to build, with a lot of learning.
My guesstimate is that it'll take longer to build than my Bluenose...

Regards, Johan
 
Whilst progressing the construction of the torsion box, I became more and more concerned about the torsional stability of the center box. Evergreen is a rather easy material to work with, easy to cut, easy to connect, using adhesive, but it doesn't provide much stability. I think that it's due to the geometry of the center box; the box is rather narrow and slender and due to the envisioned build sequence, I need to have one of the sides of the box open for as long as I can. This means I don't have much of a resistance against torsion. Long story short, I restarted the build of the torsion box, using brass as material for the RH web and the closing panels, upper and lower, fwd and aft.

Also some progress was made with the rotor mast; I added provision for the attachment of the rotor head/gearbox and drilled a number of holes for the feed through of the tail rotor shaft and the cross tube of the landing gear.

Iso view of torsion box and instrument panel:
View attachment 488197

Iso view of rotor mast assembly :
View attachment 488198

My interpretation of the torsion box and the rotor mast (btw, all is CA bonded):
View attachment 488199
That is some very nice metal work you have going on there Johan. Will you be reinforcing the CA only bonds?
 
That is some very nice metal work you have going on there Johan. Will you be reinforcing the CA only bonds?
That's currently not foreseen, but it heavily depends on the bond staying intact while under load. I don't expect that under display circumstances it will be an issue, but handling forces applied during the build are cause for concern.
On how to reinforce/repair a faulty bond I don't have an answer for as of yet.
 
Dear Johan. I am very late to this build and I apologize for that. I obviously have no idea of the mechanics and workings of such a craft, but I can only admire your efforts. With your known resilience and quest for finding answers, I have no doubt that it will be a great success and I fully admire and endorse the filial connection of the build.
 
Dear Johan. I am very late to this build and I apologize for that. I obviously have no idea of the mechanics and workings of such a craft, but I can only admire your efforts. With your known resilience and quest for finding answers, I have no doubt that it will be a great success and I fully admire and endorse the filial connection of the build.
Hello Heinrich,
No apologies needed: it's good to see you found some time to return to SOS; your presence and contributions are sorely missed.
This little humming bird might be a bit more than I can stomach, while I initially thought it to be an easy build, I now have to come to the conclusion that despite it's deceiving simple looks, the Kolibrie is a true helicopter with inherent complexity. It doesn't help matters either that I intend to implement working flight controls. The good thing is that I have no intentions to make it speed build.
In the meantime, feel free to visit my blog anytime.
 
Progress on this little gem is agonizingly slow; some parts had to be remade, new parts require quite some time in the shop and also need extensive fit checks. All too frequently redo's are the result of these fit checks.
Admittedly, I'm also job hopping; if not because of inadequate part quality, then it's to give my eyes and hands a well deserved rest; those parts can still be pretty small.
Apart from parts for the flight controls, I'm currently working on the instrument panel, which sits on the fuselage centerbox. Since I don't have any dimensions, just sketches, it boils down to a lot of guestimating.
Right now it's a sheet metal part assembly; I considered some sheet forming, but decided against it, due to the radius being around 1mm, which is too much in my humble opinion.
Current status: loose fitted on the center box, holes for instruments, lights and switches (pre)drilled. The top cover still needs to be formed.

IMG_0364.jpeg
 
Progress on this little gem is agonizingly slow; some parts had to be remade, new parts require quite some time in the shop and also need extensive fit checks. All too frequently redo's are the result of these fit checks.
Admittedly, I'm also job hopping; if not because of inadequate part quality, then it's to give my eyes and hands a well deserved rest; those parts can still be pretty small.
Apart from parts for the flight controls, I'm currently working on the instrument panel, which sits on the fuselage centerbox. Since I don't have any dimensions, just sketches, it boils down to a lot of guestimating.
Right now it's a sheet metal part assembly; I considered some sheet forming, but decided against it, due to the radius being around 1mm, which is too much in my humble opinion.
Current status: loose fitted on the center box, holes for instruments, lights and switches (pre)drilled. The top cover still needs to be formed.

View attachment 494183
Although the scale is now 1:24 its still VERY small when you see this tiny centre box. I understand that your eyes and hands need from time to time some rest, Johan.
Re-do’s are related to scratch but they also take you some time to new levels and skills.
I have the privilege to see your ‘little gem’ in real life. What you have in mind comes step by step alive!
Regards, Peter
 
Progress on this little gem is agonizingly slow; some parts had to be remade, new parts require quite some time in the shop and also need extensive fit checks. All too frequently redo's are the result of these fit checks.
Admittedly, I'm also job hopping; if not because of inadequate part quality, then it's to give my eyes and hands a well deserved rest; those parts can still be pretty small.
Apart from parts for the flight controls, I'm currently working on the instrument panel, which sits on the fuselage centerbox. Since I don't have any dimensions, just sketches, it boils down to a lot of guestimating.
Right now it's a sheet metal part assembly; I considered some sheet forming, but decided against it, due to the radius being around 1mm, which is too much in my humble opinion.
Current status: loose fitted on the center box, holes for instruments, lights and switches (pre)drilled. The top cover still needs to be formed.

View attachment 494183
Johan, your ability to scratch fabricate with sheet metal at this small scale is truly impressive. Incorporating electronics in the mix, weather just lights or any other servos is fantastic.
 
Achieving some progress on this hummingbird: I somehow managed to construct the instrument panel with here and there some AL-FI along the lines and I also added the battery to the torsion box. Other additions are the rivets; our well-known modeler @Peter Voogt adviced me to try Archer Transfers, https://www.archertransfers.com/pages/surface-details-aircraft, which he used to great effect on his Balder model. Admittedly, they don't come cheap, but they really enhance the model.
Next up are some parts for the mechanical systems, I order to allow me to close the torsion box, followed by the tail beam.

The first picture shows the addition of the rivets, without being painted.
IMG_0382.jpeg

The following pictures show the torsion box assembly, partially complete with the battery upfront, immediately aft of the battery sits the instrument panel, dry fit for the moment.IMG_0431.jpeg

IMG_0434.jpeg

The last picture shows, bottom left, my first effort of the torsion box, made from Evergreen polystyreen parts and my second attempt, top right, made from brass- and polystyrene parts I order to obtain a stiffer and more robust torsion box.
IMG_0437.jpeg

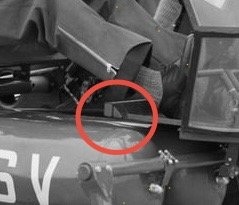
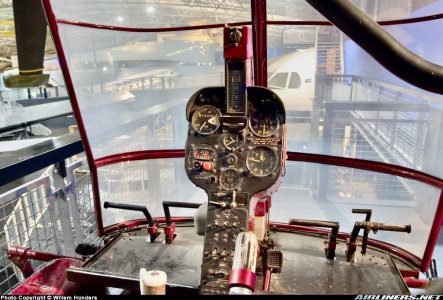
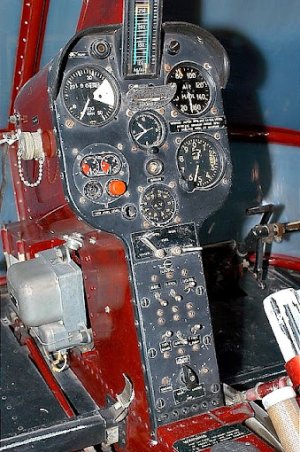
For reference I added two pictures from the Kolibrie, currently on display at Texel Airport:
(pictures aren't mine, I borrowed them from Airlines.net)
IMG_0781.jpegIMG_0004.jpeg
 
Achieving some progress on this hummingbird: I somehow managed to construct the instrument panel with here and there some AL-FI along the lines and I also added the battery to the torsion box. Other additions are the rivets; our well-known modeler @Peter Voogt adviced me to try Archer Transfers, https://www.archertransfers.com/pages/surface-details-aircraft, which he used to great effect on his Balder model. Admittedly, they don't come cheap, but they really enhance the model.
Next up are some parts for the mechanical systems, I order to allow me to close the torsion box, followed by the tail beam.

The first picture shows the addition of the rivets, without being painted.
View attachment 495479

The following pictures show the torsion box assembly, partially complete with the battery upfront, immediately aft of the battery sits the instrument panel, dry fit for the moment.View attachment 495480

View attachment 495481

The last picture shows, bottom left, my first effort of the torsion box, made from Evergreen polystyreen parts and my second attempt, top right, made from brass- and polystyrene parts I order to obtain a stiffer and more robust torsion box.
View attachment 495482

For reference I added two pictures from the Kolibrie, currently on display at Texel Airport:
(pictures aren't mine, I borrowed them from Airlines.net)
View attachment 495484View attachment 495483
The instrument panel looks great with those tiny meters. It’s a complex center part. And a nicely detailed battery with clamps and nuts.:)
Glad that the rivets worked out so good. Archer has a great range of rivers and decals.
Regards, Peter
 
Last edited:
Back
Top