Kurt Konrath
Kurt Konrath
What are your paint plans? Two tone exterior and a painted interior perhaps.
Ship is look good so far.
Ship is look good so far.
 |
As a way to introduce our brass coins to the community, we will raffle off a free coin during the month of August. Follow link ABOVE for instructions for entering. |
 |
 |
The beloved Ships in Scale Magazine is back and charting a new course for 2026! Discover new skills, new techniques, and new inspirations in every issue. NOTE THAT OUR FIRST ISSUE WILL BE JAN/FEB 2026 |
 |
Thank you. Progress is going to be slow over the holidays. There is still a lot to go for such a small model.Very good progress, Rodney.
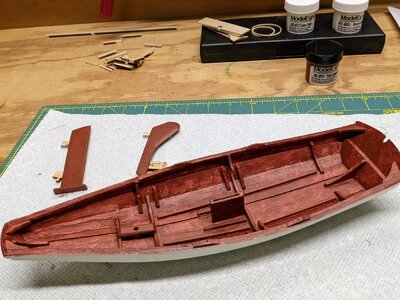
That's true. I actually wanted to wait until it was finished, but with the holidays and now having to clean up from them who knows when that might be.I am sure back in the days they didn't have airbrushes and had to hand paint many coats to get a nice look.
They rarely show photos of the in work and bad look that comes with unfinished work.
WIth you patient and steady progress I see that you are trawling for a pram prize which awaits off the bow line that you are taking. Well done. Rich (PT-2)That's true. I actually wanted to wait until it was finished, but with the holidays and now having to clean up from them who knows when that might be.
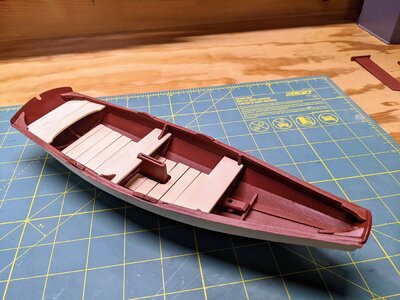
His is a fine looking pram at this stage. I am looking forward to seeing the progress and completion photos. Small sailing craft resonate better with me than the large ships of war. Perhaps because of my younger years doing a lot of sailing in "dinghies" and competitively racing 'round the markers. Rich (PT-2)Progress at last. I finished the painting over the weekend, and this morning managed to get the floorboards and thwarts. I had a hard time getting the floorboards all lined up and I'm not terribly happy with them, so if anyone else has tips on dealing with essential tremors while building model ships, let me know. Overall, this went well with lots of sanding and fitting.
View attachment 281844
Thank you. I enjoy these little ones as well. It's fun to see them come to life.His is a fine looking pram at this stage. I am looking forward to seeing the progress and completion photos. Small sailing craft resonate better with me than the large ships of war. Perhaps because of my younger years doing a lot of sailing in "dinghies" and competitively racing 'round the markers. Rich (PT-2)
Are there any drawings or details showing that area and what may be needed to guide your interpretation of the strange grammar and words.? You have likely already done this but sometimes a second or third look can help. RichHI I TOO AM DOING THIS ONE AS A BREAK I CAME ACROSS A PROBLEM IN THE INSTRUCTIONSPAGE 9 IT SAYS ( BACK TON THE LOWER STERN TRANSOM MAKE TO ANGELED CUTS BUT NO DETAILS WHERE AND HOW DEEP AND WHY DID YOU DO THIS) ANY HELP WOULD BE GREATLY APPRECIATED.THANKS. GOD BLESS STAY SAFE YOU AND YOURS DON
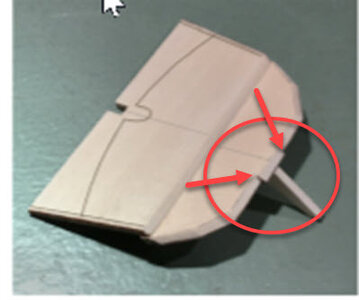
So the basic purpose of these cuts is so that when you file or sand the bevel on the lower transom you get a nice clean line where that little bit extends.HI I TOO AM DOING THIS ONE AS A BREAK I CAME ACROSS A PROBLEM IN THE INSTRUCTIONSPAGE 9 IT SAYS ( BACK TON THE LOWER STERN TRANSOM MAKE TO ANGELED CUTS BUT NO DETAILS WHERE AND HOW DEEP AND WHY DID YOU DO THIS) ANY HELP WOULD BE GREATLY APPRECIATED.THANKS. GOD BLESS STAY SAFE YOU AND YOURS DON
Happy to help. Feel free to reach out.GREAT EXPLANATION THANKS GREATLY. GOD BLESS STAY SAFE YOU AND YOURS DON
Those cuts are a cleaver and skillful way of precisely "ending" the bevel on each side. I'll have to remember this when the need arises. RichSo the basic purpose of these cuts is so that when you file or sand the bevel on the lower transom you get a nice clean line where that little bit extends.
View attachment 281904
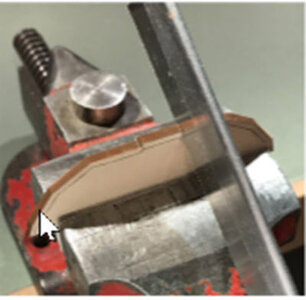
So in this picture you can see the cut line on the front of the transom. Basically you are just cutting on the front side down to the line and it remains flush with the top on the back. All you need to do is draw back on the saw a couple of times maintaing the angle and that should do it. So then when you sand in the next image you end up with a nice clean line here.
View attachment 281905
So in this image you can see the finished bevel up to the cuts that were made.
I'm not sure if this helped any, if not, let me know and I'll try to explain it better.
Rodney
It is a challenge to continually be thinking ahead and in a comprehensive manner to do things in the sequence that you see best and not blindly following the instructions. Easy to say, hard to do. RichThe instructions have you build the tiller assembly after painting the hull and rudder. I built it while I was waiting for the paint to dry on the rudder, but I would urge anyone else working on this to build the tiller before painting the rudder and doing a dry fit first. Make sure there is some play in the fit. I found out the hard way that after painting the rudder, the gap that is supposed to slide over the top of the rudder was too tight. The tiller is very fragile to begin with and trying to sand it at this point is very difficult. It would have been far easier to sand down the rudder for a nice loose fit before painting it.
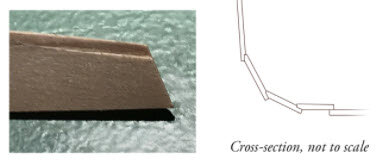
This picture and drawing at the bottom of the page is what is being described. The grove is cut at the front and back on the bottom of the plank so it slides over the plank below it.HI ANOTHER QUESTION HAS COME UP AGAIN BRAIN NOT FUNCTIONING TO GOOD BUT I THINK IT IS STILL THERE ON PAGE 12 OF INSTRUCTIONS I CAN NOT GRSP WHAT THEY ARE SAYING ( YOU WILL NEED TO CUT A SMALL GAIN ON THE IBSIDE FACE ALONG THE OPPOSITEEDGE TO THE BEVEL EACH IS A SLOPING RABBIT CUT ALONGTHE LAST SCALE FOOTAT EACH END OF PLANK THIS GAIN IS A SCALE 1 INCH WIDE) OK MIND NOT ENGAGED CAN YOU HELP PLEASE. GOD BLESS STAY SAFE YOU AND YOURS DON
