-

Win a Free Custom Engraved Brass Coin!!!
As a way to introduce our brass coins to the community, we will raffle off a free coin during the month of August. Follow link ABOVE for instructions for entering.
-

PRE-ORDER SHIPS IN SCALE TODAY!
The beloved Ships in Scale Magazine is back and charting a new course for 2026!
Discover new skills, new techniques, and new inspirations in every issue.
NOTE THAT OUR FIRST ISSUE WILL BE JAN/FEB 2026
You are using an out of date browser. It may not display this or other websites correctly.
You should upgrade or use an alternative browser.
You should upgrade or use an alternative browser.
Norwegian Sailing Pram - (Modelshipways)
- Thread starter RodneyB
- Start date
- Watchers 11
-
- Tags
- model shipways
I like this small kit also very much - I am looking forward to see your work on this model
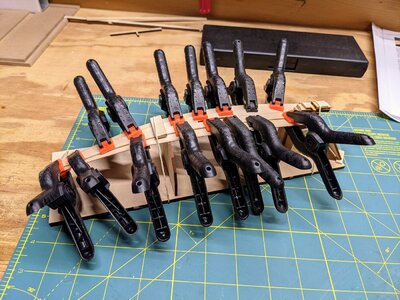
So I made a little progress this morning followed by a little disappointment. I completed the stem and stern transoms and was fairly pleased with the results. After fitting them in the Transom supports on the base and attempting to bend the first piece of planking, the stern transom support snapped. At first I figured I applied too much pressure, but when I looked at the pieces, I saw they ran the thinnest part of the support along the grain. That's about as weak as you can make something. So I've glued that back together and then I'm going to glue some supports running along it to provide some support. In my opinion, this was a design flaw in the kit as they know the transom support is going to receive a good bit of pressure. No worries, it can be fixed. Just a minor bump.
Anyway, here's today's progress.
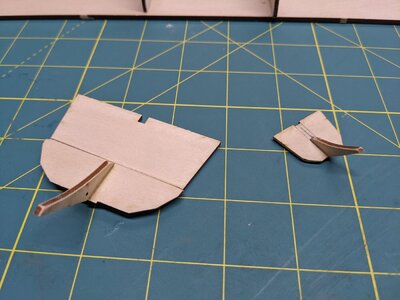
Anyway, here's today's progress.

This is one sound, which we all hate when we hear it !!!
"Snapp" - immediately you know, that you did something wrong......
"Snapp" - immediately you know, that you did something wrong......
I wouldn't have felt as bad if there had been a snap, but it literally fell apart along the grain line. Fortunately that's a stronger glue bond than end grain. It's fixed and I'm able to work today.This is one sound, which we all hate when we hear it !!!
"Snapp" - immediately you know, that you did something wrong......
This is very enjoyable. the advantage is you can see significant progress very quickly, not to mention it's great fun and nice looking when it's done. Also my wife doesn't complain as much about where a small boat will go.Enjoying watching your progress. I had a good time with this kit as well.
I've made a good bit of progress this week. The basic hull is complete. There are a few minor issues, but overall it came out fairly well.
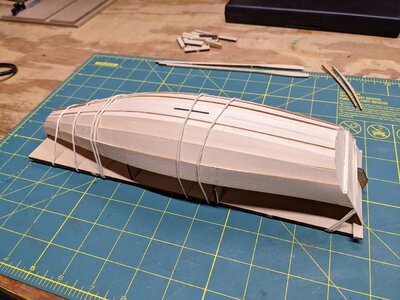
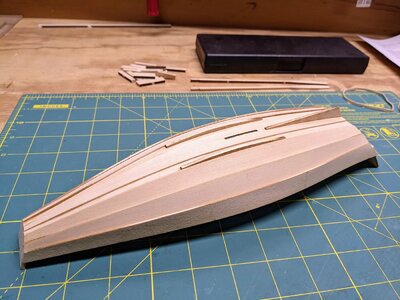
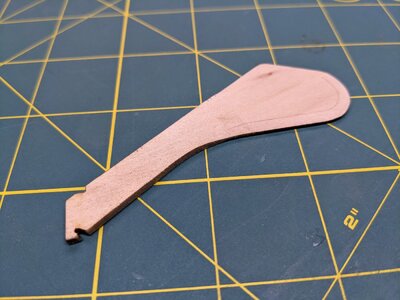
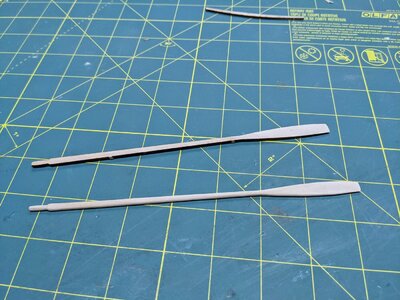
While waiting for the hull to dry I shaped the rudder, and one of the oars. I think the oar came out very nice. The rudder can still use a little work.
Now it's on to the internal structures.


While waiting for the hull to dry I shaped the rudder, and one of the oars. I think the oar came out very nice. The rudder can still use a little work.


Now it's on to the internal structures.
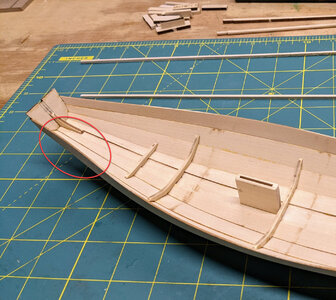
I've run into a problem and I'm not really sure how to fix it. Actually you can see it in one of the photos above. I didn't actually notice this until I was putting on the inwales. But the top plank is slightly deformed, I assume from the rubber band when I was bending it. But it slightly bowed the top plank. Any ideas on how to fix this?

Kurt Konrath
Kurt Konrath
As John R said, wet and use some scrap pieces as mold with braces from inside may help get the curve back as it should.
Another thought is use stiffer rib on outside and clamp to it, if the stiff rib holds proper curve.
Wet and dry with high heat in few minutes and it should hold reasonably well.
I have several of these small kits, mostly from Midwest Products. They have discontinued there ship kit line so all are older or used have built kits I find on Evil Bay.
Overall the clinker planking makes it look like a fun little boat to sail. I'm sure that the deformed top plank can be straightened back out with a little moisture and maybe a light touch of heat to further help soften the fibers. Rich (PT-2)As John R said, wet and use some scrap pieces as mold with braces from inside may help get the curve back as it should.
Another thought is use stiffer rib on outside and clamp to it, if the stiff rib holds proper curve.
Wet and dry with high heat in few minutes and it should hold reasonably well.
I have several of these small kits, mostly from Midwest Products. They have discontinued there ship kit line so all are older or used have built kits I find on Evil Bay.
Thanks, I'll give that a try.Overall the clinker planking makes it look like a fun little boat to sail. I'm sure that the deformed top plank can be straightened back out with a little moisture and maybe a light touch of heat to further help soften the fibers. Rich (PT-2)
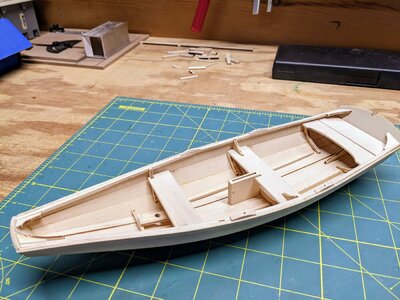
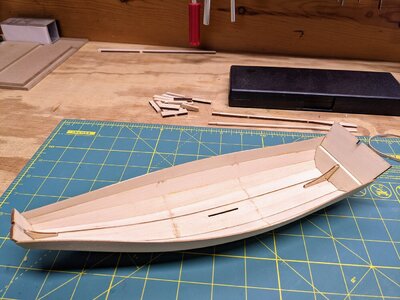
I've made great progress. The dagger board case is in. The bottom frames, quarter knees, inwales and thwart frames are all complete. I've also cut down and shaped the transom. It's taken a few days, but to be honest, I spent most of the time waiting for glue to dry. Overall, I'm fairly pleased.
Rather than post individual photos, I'll just post this latest one with everything in place.
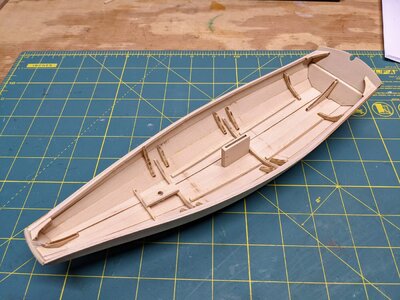
Rather than post individual photos, I'll just post this latest one with everything in place.

This looks very well built and in place. Rich (PT-2)I've made great progress. The dagger board case is in. The bottom frames, quarter knees, inwales and thwart frames are all complete. I've also cut down and shaped the transom. It's taken a few days, but to be honest, I spent most of the time waiting for glue to dry. Overall, I'm fairly pleased.
Rather than post individual photos, I'll just post this latest one with everything in place.
View attachment 271137
Very good progress, Rodney.


