Occre Polaris already halfway done [COMPLETED BUILD]

Joined
Jun 20, 2022
Messages
48
Points
78

Location
Graz
My nearly first attempt for a wood kit is the Occre Polaris. I already started with Amati greek bireme before, but stopped it because I realized that I'm not ready for it. Maybee I will continue later with it.

I ordered the Polaris starterset (https://occre.com/en/collections/modelismo-naval/products/polaris-starter-pack) together with the coloring set (https://occre.com/en/products/pack-...[URL]https://occre.com/en/products/pin-pusher and the precision set https://occre.com/en/products/precision-set.
Additionally I bought the work stand https://occre.com/en/collections/accesorios/products/soporte-trabajo
.
I think the tools are ok for the price (they cost 10€ if you order the starting pack).
The pin pusher is really fine for me, in comparison I already had (Amati) this one is much easier to handle for me.
But the idea was the precision set. This photo etched parts are realy fine.

The parts in the package and the manual are really good quality. For me the size of the manual is not ideal, the complete manual is in A3 format (don't know the american equivalent but about double letter format). For the sketches this format makes of course sense but I would have prefered the rest of the manual in a smaller format. I'm accustomed to a smaller format by plastic modelling and don't have that much place better said I have to tidy up :)
The German translation of the manual is partly not understandable, so I work with the English one.

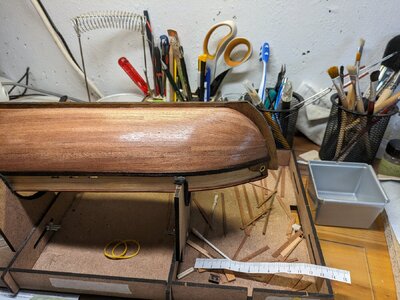
I'm already halfway through the build. For the first steps I will make a short summary.
Step A:
Didn't had a problem with that, created some straight woodblocks from waste wood to get the parts in a 90° angle and used a lot of clamps. I uses white glue like suggested in the manal.
Step B:
Also no problems there, I worked exactly like shown in the manual
Step C:
Used my Amati plank bender for the railing. Sanding away that much material (parts C1-C4) was new for me, coming from plastic modelling. But this is the fine about wood working...you can really "work" more with the materials.
Step D-F:
planking of course something completely new. I did it like the manual shows it, no tapering of the planks. Also used the plank bender here. I destroyed some planks with bending them to much (even after soaking them in water over night)...some more practice needed here.
I worked partly with nails, partly with clamps. Within this long running blanking job I was sometimes not sure what will be the outcome of this. In the photos of the manual, the youtube videos and photos in SOS forum the hull was never looking so coarse. But after sanding it down (a lot, really a lot of sanding) it, I'm ok with it. For the first try its ok. What to learn for the next modell: Both sides should be more identical. In the end I needed about half a blank more on one side. I don't know were it came from but I managed to get a really big gap between the first blank and the railing on one side. But as there is a second blanking...no big problem.
Most of the nails I inserted before I removed, some were sanded down.
I'm a little frustrated now that I haven't started a build log sooner to have a before / after sanding comparison.
Step G-H:
I'm quite sure if it would have been better to attach the keel before starting with the second planking. My problems with this you will see later.
The second planking I did with contact clue like suggested and again without tapering. As I'm not having much time at once I masked the hull for each plank, added the contact glue and removed the tape. Sounds a lot of work, but is was working fine. In this step I had to remove some planks again (very hard with contact glue!, the planks are not useable any more) and did some more sanding of the first planking.
Step I:
Here I needed some pause for reflection with this I3 strips...the manual says the this strip (sorry, don't know how it is called) should be 20mm from the edge of the hull. That might be so at bow and stern But in the middle I think it has to be less, otherwise the strip would be much further under the three openings.
1705407204057.png
Step J:
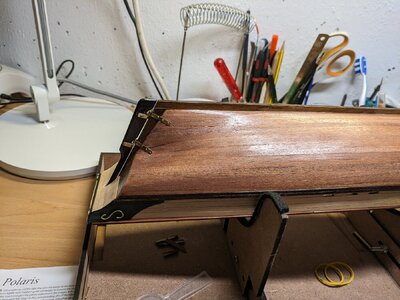
At this step glued the keel and it looks...
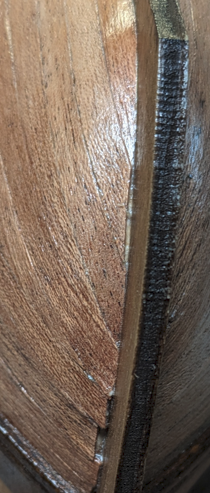
1705407922062.png
...like that. I guess I can only create really small pieces and hope to be able to glue them without many glue spots. Any other suggestions for now and how to handle that for future builds? In In the instruction of the next ship (already ordered the Occre Buccaneer at black friday) it is the same sequence. Keel is glued after the second blanking.


...to be continued soon (a few steps as summary, but then a build log)
 
My nearly first attempt for a wood kit is the Occre Polaris. I already started with Amati greek bireme before, but stopped it because I realized that I'm not ready for it. Maybee I will continue later with it.

I ordered the Polaris starterset (https://occre.com/en/collections/modelismo-naval/products/polaris-starter-pack) together with the coloring set (https://occre.com/en/products/pack-...[URL]https://occre.com/en/products/pin-pusher and the precision set https://occre.com/en/products/precision-set.
Additionally I bought the work stand https://occre.com/en/collections/accesorios/products/soporte-trabajo
.
I think the tools are ok for the price (they cost 10€ if you order the starting pack).
The pin pusher is really fine for me, in comparison I already had (Amati) this one is much easier to handle for me.
But the idea was the precision set. This photo etched parts are realy fine.

The parts in the package and the manual are really good quality. For me the size of the manual is not ideal, the complete manual is in A3 format (don't know the american equivalent but about double letter format). For the sketches this format makes of course sense but I would have prefered the rest of the manual in a smaller format. I'm accustomed to a smaller format by plastic modelling and don't have that much place better said I have to tidy up :)
The German translation of the manual is partly not understandable, so I work with the English one.

I'm already halfway through the build. For the first steps I will make a short summary.
Step A:
Didn't had a problem with that, created some straight woodblocks from waste wood to get the parts in a 90° angle and used a lot of clamps. I uses white glue like suggested in the manal.
Step B:
Also no problems there, I worked exactly like shown in the manual
Step C:
Used my Amati plank bender for the railing. Sanding away that much material (parts C1-C4) was new for me, coming from plastic modelling. But this is the fine about wood working...you can really "work" more with the materials.
Step D-F:
planking of course something completely new. I did it like the manual shows it, no tapering of the planks. Also used the plank bender here. I destroyed some planks with bending them to much (even after soaking them in water over night)...some more practice needed here.
I worked partly with nails, partly with clamps. Within this long running blanking job I was sometimes not sure what will be the outcome of this. In the photos of the manual, the youtube videos and photos in SOS forum the hull was never looking so coarse. But after sanding it down (a lot, really a lot of sanding) it, I'm ok with it. For the first try its ok. What to learn for the next modell: Both sides should be more identical. In the end I needed about half a blank more on one side. I don't know were it came from but I managed to get a really big gap between the first blank and the railing on one side. But as there is a second blanking...no big problem.
Most of the nails I inserted before I removed, some were sanded down.
I'm a little frustrated now that I haven't started a build log sooner to have a before / after sanding comparison.
Step G-H:
I'm quite sure if it would have been better to attach the keel before starting with the second planking. My problems with this you will see later.
The second planking I did with contact clue like suggested and again without tapering. As I'm not having much time at once I masked the hull for each plank, added the contact glue and removed the tape. Sounds a lot of work, but is was working fine. In this step I had to remove some planks again (very hard with contact glue!, the planks are not useable any more) and did some more sanding of the first planking.
Step I:
Here I needed some pause for reflection with this I3 strips...the manual says the this strip (sorry, don't know how it is called) should be 20mm from the edge of the hull. That might be so at bow and stern But in the middle I think it has to be less, otherwise the strip would be much further under the three openings.
View attachment 421599
Step J:
At this step glued the keel and it looks...

View attachment 421600
...like that. I guess I can only create really small pieces and hope to be able to glue them without many glue spots. Any other suggestions for now and how to handle that for future builds? In In the instruction of the next ship (already ordered the Occre Buccaneer at black friday) it is the same sequence. Keel is glued after the second blanking.


...to be continued soon (a few steps as summary, but then a build log)
You should be able to clean out the gaps with a razor knife, carefully insert small pieces of wood, glue them in place, sand, stain and varnish the areas and they will blend it okay. Leaving them as they are isn't a good option. Because these gaps are likely to occur when adding the keel after the planking, I always put the keel on first, and carefully fit the garboard strake of planking, trimming it to fit the keel. That always seems to work out better. You have to discover which techniques work best for YOU. It's not just about building the ship model. It's also about building a better ship modeler.
 
Last edited:
Very good work on the first model - any many thanks for starting the building log
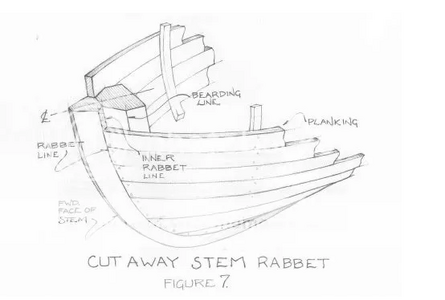
Usually the keel has some small notches in which the end of the planking is resting - the so called rabbet / bearding line
So the stem and keel rabbet should be cut before the planking

Take a look at the attached pdf which is explaning a lot, maybe also helpful for the the next project

and also interesting the following web-page

Screenshot 2024-01-17 111814.png


Attachments

  • Planking Project.pdf
    1.9 MB · Views: 94
You should be able to clean out the gaps with a razor knife, carefully insert small pieces of wood, glue them in place, sand, stain and varnish the areas and they will blend it okay. Leaving them as they are isn't a good option. Because these gaps are likely to occur when adding the keel after the planking, I always put the keel on first, and carefully fit the garboard strake of planking, trimming it to fit the keel. That always seems to work out better. You have to discover which techniques work best for YOU. It's not just about building the ship model. It's also about building a better ship modeler.
I think it will work best, when I first extend the gaps a little bit. I can glue wood pieces in reasonable size in this way. Or would it be better to try with really small pieces.
What are your thoughts to this?
 
Very good work on the first model - any many thanks for starting the building log
Usually the keel has some small notches in which the end of the planking is resting - the so called rabbet / bearding line
So the stem and keel rabbet should be cut before the planking

Take a look at the attached pdf which is explaning a lot, maybe also helpful for the the next project

and also interesting the following web-page

View attachment 421758


Thank you for the document. I already tried to read and understand it before, but I have to admit that it was too much information and I laid it aside with "not necesary for a beginner model kit, maybe after the first build I understand it better".

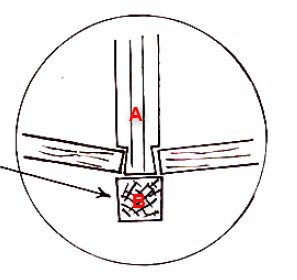
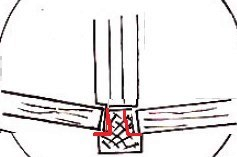
Diffent from the sketch in the pdf the keel starts 'between' the blanks in this kit. So the best solution here would be cut away a bit from the keel (part B) not the false keel (Part A) [I hope I got the terms correct]. With that I would be able to hide not so perfect cut pieces below the keel.
1705493712329.png1705493535204.png

So with the next kit (Buccaneer) either
  1. I got especially the second blanking done better (do the blanking with an already glued or at least somehow fixed keel)
  2. I try the "expert version" and cut away a little bit from the keel to get the first and second planking in this gap. I'm not sure if I'm able to cut it away without destroying the keel but the page you linked gives good advices for it.
...will decide when doing the next kit, I hope to remember :)
 
Last edited:
My nearly first attempt for a wood kit is the Occre Polaris. I already started with Amati greek bireme before, but stopped it because I realized that I'm not ready for it. Maybee I will continue later with it.

I ordered the Polaris starterset (https://occre.com/en/collections/modelismo-naval/products/polaris-starter-pack) together with the coloring set (https://occre.com/en/products/pack-...[URL]https://occre.com/en/products/pin-pusher and the precision set https://occre.com/en/products/precision-set.
Additionally I bought the work stand https://occre.com/en/collections/accesorios/products/soporte-trabajo
.
I think the tools are ok for the price (they cost 10€ if you order the starting pack).
The pin pusher is really fine for me, in comparison I already had (Amati) this one is much easier to handle for me.
But the idea was the precision set. This photo etched parts are realy fine.

The parts in the package and the manual are really good quality. For me the size of the manual is not ideal, the complete manual is in A3 format (don't know the american equivalent but about double letter format). For the sketches this format makes of course sense but I would have prefered the rest of the manual in a smaller format. I'm accustomed to a smaller format by plastic modelling and don't have that much place better said I have to tidy up :)
The German translation of the manual is partly not understandable, so I work with the English one.

I'm already halfway through the build. For the first steps I will make a short summary.
Step A:
Didn't had a problem with that, created some straight woodblocks from waste wood to get the parts in a 90° angle and used a lot of clamps. I uses white glue like suggested in the manal.
Step B:
Also no problems there, I worked exactly like shown in the manual
Step C:
Used my Amati plank bender for the railing. Sanding away that much material (parts C1-C4) was new for me, coming from plastic modelling. But this is the fine about wood working...you can really "work" more with the materials.
Step D-F:
planking of course something completely new. I did it like the manual shows it, no tapering of the planks. Also used the plank bender here. I destroyed some planks with bending them to much (even after soaking them in water over night)...some more practice needed here.
I worked partly with nails, partly with clamps. Within this long running blanking job I was sometimes not sure what will be the outcome of this. In the photos of the manual, the youtube videos and photos in SOS forum the hull was never looking so coarse. But after sanding it down (a lot, really a lot of sanding) it, I'm ok with it. For the first try its ok. What to learn for the next modell: Both sides should be more identical. In the end I needed about half a blank more on one side. I don't know were it came from but I managed to get a really big gap between the first blank and the railing on one side. But as there is a second blanking...no big problem.
Most of the nails I inserted before I removed, some were sanded down.
I'm a little frustrated now that I haven't started a build log sooner to have a before / after sanding comparison.
Step G-H:
I'm quite sure if it would have been better to attach the keel before starting with the second planking. My problems with this you will see later.
The second planking I did with contact clue like suggested and again without tapering. As I'm not having much time at once I masked the hull for each plank, added the contact glue and removed the tape. Sounds a lot of work, but is was working fine. In this step I had to remove some planks again (very hard with contact glue!, the planks are not useable any more) and did some more sanding of the first planking.
Step I:
Here I needed some pause for reflection with this I3 strips...the manual says the this strip (sorry, don't know how it is called) should be 20mm from the edge of the hull. That might be so at bow and stern But in the middle I think it has to be less, otherwise the strip would be much further under the three openings.
View attachment 421599
Step J:
At this step glued the keel and it looks...

View attachment 421600
...like that. I guess I can only create really small pieces and hope to be able to glue them without many glue spots. Any other suggestions for now and how to handle that for future builds? In In the instruction of the next ship (already ordered the Occre Buccaneer at black friday) it is the same sequence. Keel is glued after the second blanking.


...to be continued soon (a few steps as summary, but then a build log)
Good afternoon. Awesome start and I’m looking forward to your build. Occre builds plank first and then fits the stem. The risk is gaps and chips, especially with the veneer. I had similar issue with my Xebec. Your planking looks really good and Kurts suggestion will sort out those small gaps. Great work so far. Cheers Grant
 
Step J:
I had some problems with gluing the horizontal strips. I tried with white glue first, but had no idea how to fix them. (Maybe thinking before doing would be a good idea) So I removed the glue and did it with CA glue. Some of the strips are so long that I had a prolem nevertheless because I was not able to fix the whole length long enough. Thick CA is maybe the wrong one as it also has a longer time to dry? So I had to add more CA glue with a needle at different locations.

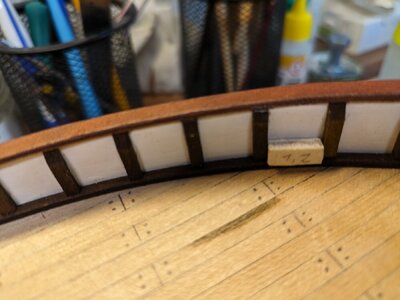
The vertical strips (stanchions?) I did different from the manual as I was afraid to ruin the white background with sanding and coloring the strips after glueing them in position.
So I measured every strip, sanded all in the same angle with my wonderfull Proxxon TG 125, colored them and then glued them with the help of this 1,2cm block in the correct distance.
1705519352209.jpeg

Step K-L:
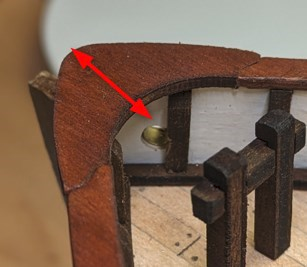
Tried a long time how to best assemble the rail as it is not clear in what position the bow piece has to be positioned
1705521068406.png
Then again the question what glue to use. As I found no way to fix the rail in place I used CA glue again. Of course with the same problem...a few gaps and some rework needed.

The rudder worked without problems.

For the hole of the rudder and the two anchors I first drilled a hole and then milled it to the correct size with my Proxxon IBS/E

Step M-N:
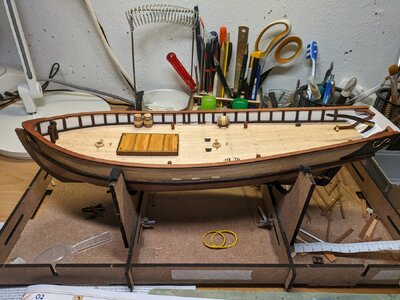
Here I stand now.
1705521786477.jpeg
1705522103706.jpeg
1705522128014.jpeg


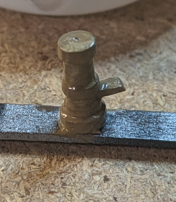
All the pieces are glued to the deck strenghtened with wire. All, no not all...I was not able to drill a hole in the metal piece for the pump
1705521961741.png

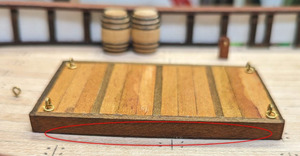
A small not so nice point is the gap here:
1705522040806.png
 
Last edited:
Gute arbeit, Mapoo. You have a very sharp eye for detail. All of the problems you mention are small, which is good! I always struggle with applying just the right amount of PVA to hold part, often using too much glue. Ohla uses a chisel pointed metal tool to scrap away excess glue in her build videos.
 
You are working very clean and accurate - really good work
And we can see, that you learn a lot and check your work in detail
This small gap, I guess, is caused by the longitudinal curve of the deck - but you can easily sand down fore and aft to get the same curve
Einfach die Unterkante der Decksform anpassen
 
Very small update, not much time today


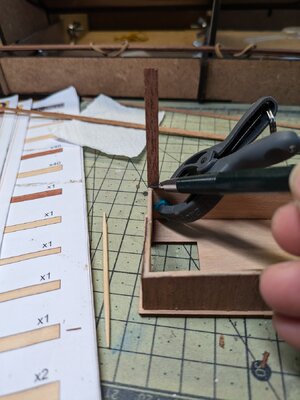
Marking the correct length
1705607519385.jpeg
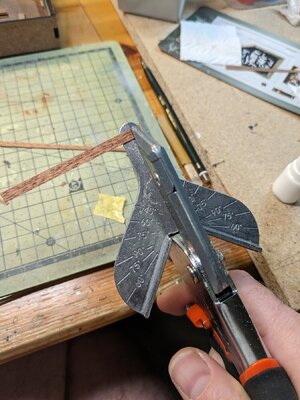
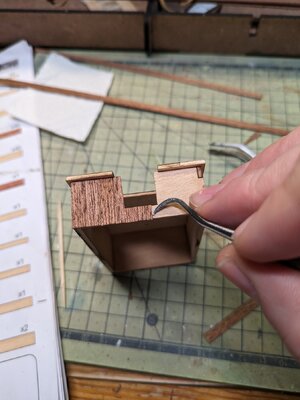
cutting (cheap tool from Amazon)
1705607590300.jpeg
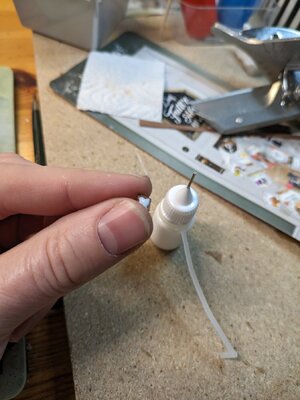
adding white glue (small bottle with a very fine opening...again from Amazon)
1705607635587.jpeg
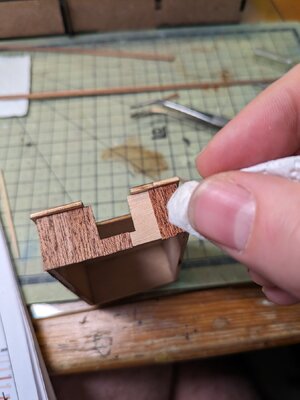
remove the glue excess first with a tool and then with a wet tissue
1705607691237.jpeg1705607732114.jpeg
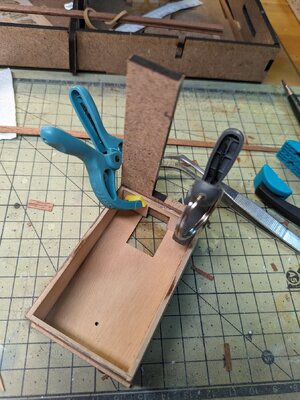
...and fix it
1705607829397.jpeg
 
Thanks for the link to your build log, Mapoo. To me, it looks like you're doing an excellent job. I, too, get bogged down in the small details as I want everything to turn out as perfectly as possible so I understand your concerns about small gaps, etc..

Your rudder came out very nice and I love the color of your hull. Is that the stain from the color pack that you bought with the kit?

The Polaris has been sitting in my Ebay watchlist for a couple of weeks now. I was considering that as my next build. I'd better study your build log carefully in case I do buy it. :)

Thanks for letting me take a chair in your log. I appreciate it.

Toni (Buccaneer in progress)

Hi,

only the rudder is coloured with walnut dye. The hull is just varnished with occre satin varnish (many layers).
I was not sure if the rudder will fit until I added it to hull it because the space between the wood and the metal pin is smaller than shown in manual.


But to my suprise the rudder is working and on photos taken from far away it even looks fine ;)
1705664890636.png
 
Last edited:
Thanks for the link to your build log, Mapoo. To me, it looks like you're doing an excellent job. I, too, get bogged down in the small details as I want everything to turn out as perfectly as possible so I understand your concerns about small gaps, etc..

Your rudder came out very nice and I love the color of your hull. Is that the stain from the color pack that you bought with the kit?

The Polaris has been sitting in my Ebay watchlist for a couple of weeks now. I was considering that as my next build. I'd better study your build log carefully in case I do buy it. :)

Thanks for letting me take a chair in your log. I appreciate it.

Toni (Buccaneer in progress)
Polaris is very much a beginner's kit, and a good one at that, teaching you the fundamentals of skills that you will need going forward.

But for that reason it may not represent much of a challenge if you've two or three builds behind you.

Occre's Golden Hind is a good "sophomore" build to follow on from Polaris but needs a bit of "kit bashing" particularly the rather tatty brass windows, doors and companionways/ladders. There are good Amati substitutes for most of the less good Occre parts.
 
Best way it to complete the model. No matter what. You will learn so much. Of course we all want to save money or …..
I made piles of sawdust, countless frustration and not want to show anyone.
I still made mistakes, make sawdust and bin is full.
Keep going.
Choose 2nd one afterwards.
 
I've had trouble in the past, trying to drill some of the kit supplied metal parts, but a quality drill bit in a Proxxon bench drill does the trick for me. Some cheap micro drill bits do not have a 'proper' point, which cuts through wood, but NOT metal.
 
My nearly first attempt for a wood kit is the Occre Polaris. I already started with Amati greek bireme before, but stopped it because I realized that I'm not ready for it. Maybee I will continue later with it.

I ordered the Polaris starterset (https://occre.com/en/collections/modelismo-naval/products/polaris-starter-pack) together with the coloring set (https://occre.com/en/products/pack-...[URL]https://occre.com/en/products/pin-pusher and the precision set https://occre.com/en/products/precision-set.
Additionally I bought the work stand https://occre.com/en/collections/accesorios/products/soporte-trabajo
.
I think the tools are ok for the price (they cost 10€ if you order the starting pack).
The pin pusher is really fine for me, in comparison I already had (Amati) this one is much easier to handle for me.
But the idea was the precision set. This photo etched parts are realy fine.

The parts in the package and the manual are really good quality. For me the size of the manual is not ideal, the complete manual is in A3 format (don't know the american equivalent but about double letter format). For the sketches this format makes of course sense but I would have prefered the rest of the manual in a smaller format. I'm accustomed to a smaller format by plastic modelling and don't have that much place better said I have to tidy up :)
The German translation of the manual is partly not understandable, so I work with the English one.

I'm already halfway through the build. For the first steps I will make a short summary.
Step A:
Didn't had a problem with that, created some straight woodblocks from waste wood to get the parts in a 90° angle and used a lot of clamps. I uses white glue like suggested in the manal.
Step B:
Also no problems there, I worked exactly like shown in the manual
Step C:
Used my Amati plank bender for the railing. Sanding away that much material (parts C1-C4) was new for me, coming from plastic modelling. But this is the fine about wood working...you can really "work" more with the materials.
Step D-F:
planking of course something completely new. I did it like the manual shows it, no tapering of the planks. Also used the plank bender here. I destroyed some planks with bending them to much (even after soaking them in water over night)...some more practice needed here.
I worked partly with nails, partly with clamps. Within this long running blanking job I was sometimes not sure what will be the outcome of this. In the photos of the manual, the youtube videos and photos in SOS forum the hull was never looking so coarse. But after sanding it down (a lot, really a lot of sanding) it, I'm ok with it. For the first try its ok. What to learn for the next modell: Both sides should be more identical. In the end I needed about half a blank more on one side. I don't know were it came from but I managed to get a really big gap between the first blank and the railing on one side. But as there is a second blanking...no big problem.
Most of the nails I inserted before I removed, some were sanded down.
I'm a little frustrated now that I haven't started a build log sooner to have a before / after sanding comparison.
Step G-H:
I'm quite sure if it would have been better to attach the keel before starting with the second planking. My problems with this you will see later.
The second planking I did with contact clue like suggested and again without tapering. As I'm not having much time at once I masked the hull for each plank, added the contact glue and removed the tape. Sounds a lot of work, but is was working fine. In this step I had to remove some planks again (very hard with contact glue!, the planks are not useable any more) and did some more sanding of the first planking.
Step I:
Here I needed some pause for reflection with this I3 strips...the manual says the this strip (sorry, don't know how it is called) should be 20mm from the edge of the hull. That might be so at bow and stern But in the middle I think it has to be less, otherwise the strip would be much further under the three openings.
View attachment 421599
Step J:
At this step glued the keel and it looks...

View attachment 421600
...like that. I guess I can only create really small pieces and hope to be able to glue them without many glue spots. Any other suggestions for now and how to handle that for future builds? In In the instruction of the next ship (already ordered the Occre Buccaneer at black friday) it is the same sequence. Keel is glued after the second blanking.


...to be continued soon (a few steps as summary, but then a build log)
Welcome on board and thanks for sharing your build. I have built the Occre Endeavour and attached the keel after the first layer of hull planking but before applying the 2nd layer. I felt this would give me a better finish as I was able to butt the 2nd layer against the keel. I also drill some holes through the keel into the bottom of my build and pushed small panel pins in to make the keel more stable. The attached image shows the final result. Keep up the good progress.

1705946102850.png
 
Welcome on board and thanks for sharing your build. I have built the Occre Endeavour and attached the keel after the first layer of hull planking but before applying the 2nd layer. I felt this would give me a better finish as I was able to butt the 2nd layer against the keel. I also drill some holes through the keel into the bottom of my build and pushed small panel pins in to make the keel more stable. The attached image shows the final result. Keep up the good progress.

View attachment 423117
Hi, I think I will do it like that with my next build. How have you added such keels pins?
 
Hi, I think I will do it like that with my next build. How have you added such keels pins?
I glued the keel to the hull and then just drilled holes up through the keel into the hull. I then cut the heads off panel pins, put some glue in the holes and then pushed the panel pin in.
 
Back
Top