Oneida from dlumberyard

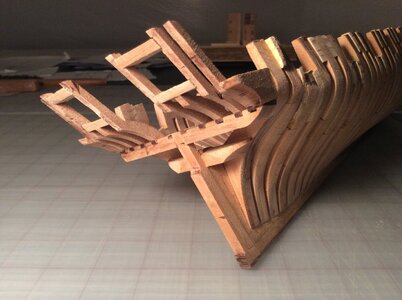
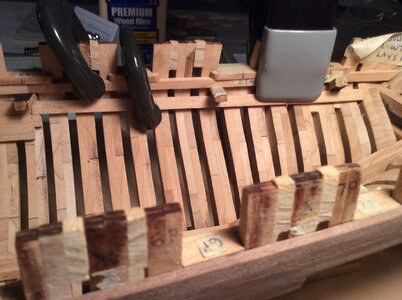
2 more stern cants to go. Photo show a cardboard transom I'm using to help me stay on track.

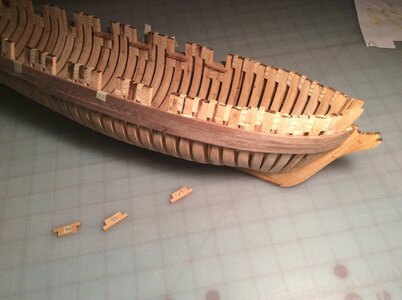
Once the cants are done I need to do more sanding on inside.

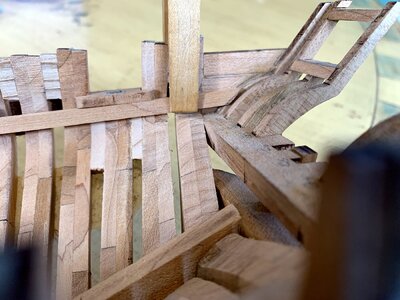
After that ,I start construction on transom and its associated parts plus the rest of stern. I'm going thru Dave Stevens build plus one other build that show the stern from various angles .

Last 2 Stern cants.JPG
 
Last edited by a moderator:
After attaching clamp to Caustic I'm now going to do same to Oneida. Sanding and shaping frames first . Inside and out. Doing rough shaping to be followed up with fine sanding . Stern will then need to be built and attached. Clamps soon to follow.

Spent time getting outside at bow on its way to next grit of sandpaper . She's shaping up! The photo of the last stern frame shows some work at the top of starboard frame reducing its size so it will fall in line. Port side shows its current thickness before sanding.

IMG_1068.jpgIMG_1069.jpgIMG_1070.jpg
 
Back working on my builds. Have added Wales and fitting port sills. Waterways and clamps next , then deck work.
Good holiday to you all
 

Attachments

  • image.jpg
    image.jpg
    193.9 KB · Views: 8
While working on fitting sills at port openings I'm checking on how waterway will run from frame to frame. This necessitates some sanding here and there.
My current last grit of sandpaper is 120g on frames. I understand that each of us has their preference to where to end
their sanding.

I have some 220g sandpaper and tried it on frames clean up the 120g. The look and character of the finish is something . Seems that the wood gets a bit darker.

Amazing.
 
This build has shown me how many considerations come into place when all the various members come together. Studying the various interactions and seeing that they are placed per plans and their outcome if the controls have been achieved or not.
The photo shows waterway temporarily tucked under sill to see how it terminates and allow for deck work. You'll notice that there is a space between waterway and transom. Deck beam 17 will rests on top of transom and under waterway. The beam is over 4mm in height ,the space measured on my model is about
3mm so I will be studying this to come up with a solution to maintain the run of the deck and attach the beam.

This model will be a good teacher to help me learn from for future builds.
 

Attachments

  • IMG_0025.jpg
    IMG_0025.jpg
    260 KB · Views: 15
Im fitting first run of deck clamps. With waterway temporarily clipped in place I'm using small pieces of deck beams to help with setting clamp.
You might notice the piece of deck to right is not going in correct direction. I will be shaping top of this first clamp so the beam will seat correctly.


I also noticed that I joined this forum a year ago today.

I'm fortunate to have this forum and be a part of a great groups of model ship enthusiasts. Thank you for your posts and suggestions.
Regards

Rick
 

Attachments

  • IMG_3308.jpg
    IMG_3308.jpg
    210.7 KB · Views: 11
Im fitting first run of deck clamps. With waterway temporarily clipped in place I'm using small pieces of deck beams to help with setting clamp.
You might notice the piece of deck to right is not going in correct direction. I will be shaping top of this first clamp so the beam will seat correctly.


I also noticed that I joined this forum a year ago today.

I'm fortunate to have this forum and be a part of a great groups of model ship enthusiasts. Thank you for your posts and suggestions.
Regards

Rick
Dear Rick
Your work looks great Thumbsup
congratulations for your one year birthday with us :) , and indeed we have a quality professional and humane group.
 
Mav, your Oneida looks great! POF without a jig is a tough build! What kind of wood is that? I have a kit in Pau Marfim and that is some HARD wood - sanding is a workout!
 
Mav, your Oneida looks great! POF without a jig is a tough build! What kind of wood is that? I have a kit in Pau Marfim and that is some HARD wood - sanding is a workout!
Thank you for your comments. Relied heavily on Dave Stevens build log for this. Maple is the primary wood for the kit. She is a sturdy vessel !
 
Last edited:
Last part of deck clamps in place. I’ve detached the breasthook pieces and temporarily placed them on clamps to see how it looks.
Will be doing last sanding of inside of hull ahead of starting deck work.

image.jpg
 
Last edited by a moderator:
Spending time studying Dave’s build log on deck. This will be a nice challenge working with all the deck members.
 
As learn how to build this model I'm also learning the names of the various wood members . When I learn a new term I make a note of it on the plans as I go along for future reference .
 
Must be a good feeling to start on the deck framing after doing all that hull framing! Looking great!
 
Ciao a tutti

Con il dissuasore e il legno di Knightshead in posizione, ho proceduto con la sagomatura del legno di falco. Questo è un legno interessante da modellare per adattarsi tra la testa del cavaliere e l'ultima sopraelevazione.

Ho deciso di fare un po' di levigatura in quest'area per aiutarmi a vedere come si adatta quest'ultimo pezzo.

Ho scoperto che il mio braccio può riposare all'interno dello scafo mentre eseguo questo compito di levigatura. Ho sperimentato e ho scoperto che l'utilizzo di piccole strisce di legno (larghe circa 1/4", spesse 1/16" e lunghe circa 3-4") con carta vetrata attaccata, grana 40 e 80 funzionano in queste aree. esempi all'interno di questo forum su tipi di blocchetti e bastoncini abrasivi che mi sono stati molto utili.

La levigatura che sto facendo mostra se la mia modellatura del legno ha avuto successo dove due pezzi si uniscono e dove ci sono gli spazi vuoti.

Saluti

View attachment 241357
Buongiorno Mav , scusami , sono a progetto quei distanziatori in quella zona? ti allego un'immagine della carpenteria navale inglese , e solo una mia curiosità nulla di più ,Grazie

Hello Mav, sorry, are those spacers planned in that area? I am attaching a picture of the English naval carpentry, and just my curiosity nothing more, Thanks
 

Attachments

  • iiiiii.jpg
    iiiiii.jpg
    32 KB · Views: 7
Last edited by a moderator:
Back
Top