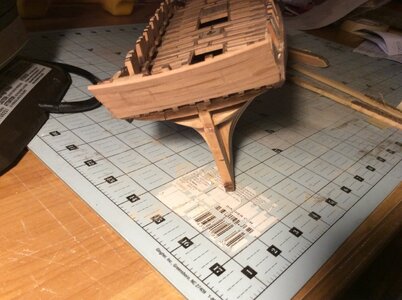
Oneida from dlumberyard

Buongiorno Mav , scusami , sono a progetto quei distanziatori in quella zona? ti allego un'immagine della carpenteria navale inglese , e solo una mia curiosità nulla di più ,Grazie

Hello Mav, sorry, are those spacers planned in that area? I am attaching a picture of the English naval carpentry, and just my curiosity nothing more, Thanks
Hello Frank48
Yes, The spacers were part of kit .
 
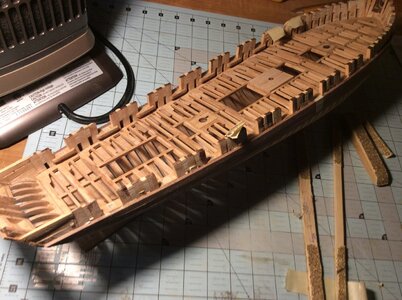
Working on deck. Spent time studying layout figuring out spacing , coordinating with knees ,waterways and other members. Will get last 3 beams in place with bresthook then follow up with knees carlings and ledgers.

image.jpg
 
Since my last post I’ve gotten deck to point where the ledges are now my next step. This part of the build was fun as I needed to study location of deck beams along with associated knees and carlings.
When the ledges are in I can sand the deck and add the waterways.

image.jpg
 
The ledges are now in place. This model has been very educational in teaching me how to keep all the components in mind as she is assembled. How I’ve needed to think about where they need to end up port side to starboard so each is equal to the other.
I found a part of the bulwarks on the starboard side near the stern that was out of line . I’m sanding the inside of the bulwarks to re-align this area .
It is fun and challenging. I spend time studying what needs to be done and create a list of things to do that constantly changes.
I’m also adding planks at counter timbers.
Regards to all.
Stay well

image.jpg

image.jpg
 
Thinking of DLumber Kits for next build, are the frame pieces laser cut, or do you cut and build yourself, based on the frame plan? thx Paul
 
Paul, the frames, keel, deck beams and deck pieces including the knees and ledges are all laser cut plus the cannon and long gun carriages are also. Probably more but I haven’t worked on my in a long time. But it is a challenging kit - everything needs to be massaged and worked to fit and what screwed me up is there is no jig - not insurmountable as MavRik and others have shown - but I need to unglue my bow cants and re do them as they are not correct. You will build arm strength from the sanding required both inside and outside the hull but it is a fun and rewarding process. Lots of really nice wood in this kit. Sorry for butting in on your log MavRik, your excellent skills and workmanship always gets me excited about this kit!
 
Lou, thanks, I have a long way too go on my CAF HMS Surprise, just starting to see whats out there for the next POF build.
Paul, the frames, keel, deck beams and deck pieces including the knees and ledges are all laser cut plus the cannon and long gun carriages are also. Probably more but I haven’t worked on my in a long time. But it is a challenging kit - everything needs to be massaged and worked to fit and what screwed me up is there is no jig - not insurmountable as MavRik and others have shown - but I need to unglue my bow cants and re do them as they are not correct. You will build arm strength from the sanding required both inside and outside the hull but it is a fun and rewarding process. Lots of really nice wood in this kit. Sorry for butting in on your log MavRik, your excellent skills and workmanship always gets me excited about this kit!
 
LIKE LOU SAID I HAD TO STOP THE BUILD WITH NO JIG MY SKILLS AT THAT TIME WERE NOT WHERE I AM TODAY, BTW I WILL NOT DUE ANOTHER POF WITHOUT A JIG. GOD BLESS STAY SAFE ALL DON
 
Don thanks, other than the jig, how is the overall quality, I belive some of their kits have jigs. Although the new HMS Blandford is looking promising. Paul
 
OTHER THEN THE JIG OVERALL QUALITY IS VERY GOOD, THERE OTHER SEMI.KITS HAVE THEN HAHN TYPE JIG UPSIDE DOWN DAVE S CAN SHOW YOU OR GO TO THERE WEB SITE AND LOOK IF YOU ARE JUST STARTING OUT POF CHECK OUT THERE CAUSTIC IT WAS A FUN BUILD JUST MAKE SURE THE UTUBE BUILD IS STILL THERE IT IS AN AGBSOLUTE MUST. HOPE THIS HELPS. GOD BLESSBSTAY SAFE ALL DON
 
Paul, the frames, keel, deck beams and deck pieces including the knees and ledges are all laser cut plus the cannon and long gun carriages are also. Probably more but I haven’t worked on my in a long time. But it is a challenging kit - everything needs to be massaged and worked to fit and what screwed me up is there is no jig - not insurmountable as MavRik and others have shown - but I need to unglue my bow cants and re do them as they are not correct. You will build arm strength from the sanding required both inside and outside the hull but it is a fun and rewarding process. Lots of really nice wood in this kit. Sorry for butting in on your log MavRik, your excellent skills and workmanship always gets me excited about this kit!
No worry here. Thank you for helping out another forum member .
 
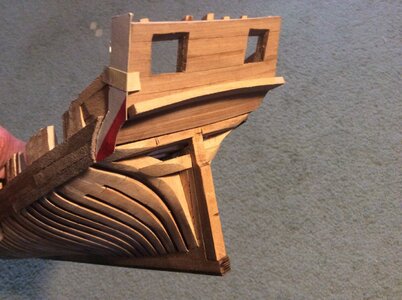
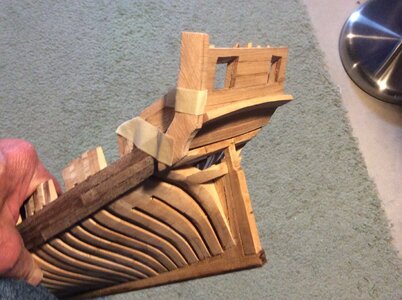
Spent time on the stern area. Adding planking and cutting out wood to expose gun ports.
I also shaped the arched molding below the gun ports from a nice thick piece of milled stock Dave provides in the kit.
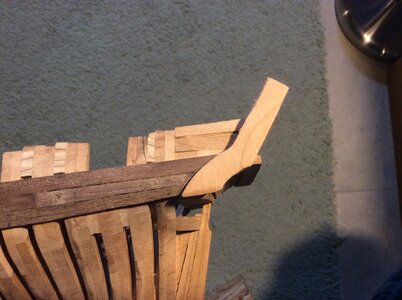
You may also notice a template taped in place to be used to shape the counter timber at the corner.
In the other photos is one of the actual pieces of wood I’m shaping to fit.

image.jpg

image.jpg

image.jpg
 
Added clamps above waterway for forecastle . Also planked outside above wales at bow. I’ve starting to cut planks inside at stern on counter timbers. Plank edges overlapping gun ports need to be sanded flush with sides.
Lots of sanding to do getting bulwarks ready for cap rail .
Regards to everyone

image.jpg

image.jpg
 
Sanding planks that overhang flush with sides of gun port. Have glued the counter timber piece at stern . Both are in process needing final sanding . Counter timber needing to be reduced in thickness and width.

image.jpg

image.jpg
 
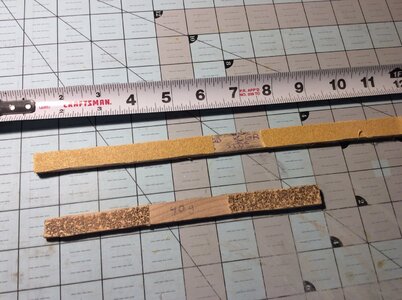
Wanted to show you useful tools I use for sanding. Though each has their favorites , theses hand made sanders come in handy for some applications when I don’t use dremel. My 40 grit sanders really take off the wood.Good work out too. Having a good amount ofsanding to do on a kit like this , I’ve learned when to use them.

The wood sticks are leftover spacers provided in kit.

Regards

Rick

image.jpg
 
Back
Top