• LUCZORAMA SHIPWRECK SCAVENGER HUNT GIVEAWAY. 4 Weeks of Fun • 1 Legendary Prize ((OcCre’s Fram Ship)) • Global Crew Welcome!
    **VIEW THREAD HERE**

Pins for First Planking

Crikey Kurt,
Thank you so much for taking the time and effort to put this comprehensive analysis of my mistakes and the route to take to rectify them.
There is a lot of reading to do, which I will do and then try to amend my model.
I wish I had researched and read before I started the build. All I did was follow the Manufacturers visual and written instructions which come with the model. But they do not cover the many pitfalls you experience when building.
I am sure I am not the only one to have made so many errors, but I am learning and grateful to you ALL for your wonderful contributions. Now for some reading.
Thank you, I will keep you posted.
Dennis
With the forum's help, you'll be a first class modeler in no time. You simply won't believe how much better your second model will be. When you start out, you don't realize you need rigging and planking books to help you out. Instructions ASSUME you KNOW how to build a wooden ship model. We all started where you are now (except for @dockattner ... he's some sort of dragonborn prodigy).
 
Last edited:
Welcome to the oldest hobby in the world.
And yes I agree with Kurt, Paul (Dockattner) is an one in a million rare premolar-dist. Just don't try to match him.
 
You may want to consider trying to pickup (and read :) ) Ship Modeling Simplified by Mastini and Historic Ship Models by Mondfeld. They are both great books with TONS of information. Both are available here in the US from Amazon for less than $20 USD. These 2 books will give you much of the information you need on building ships. I hope that helps!
 
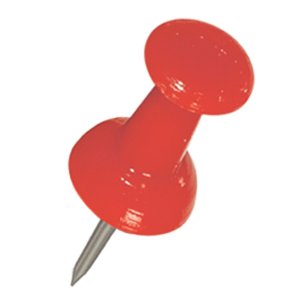
Has anyone used 'push pins'; placed into the frame member to hold the plank in place?

push pin.jpg
 
Yes, they work well for some applications, but one needs to be careful when inserting the pins into frame as the pins may split the bulkhead particularly if the frame is made out of plywood. Use the head of the pin to hold a plank down and the shaft of the pin to hold the plank against the adjacent plank. At least that is how I use the pins.

...henry
 
Hi, I am new to this wonderful hobby and am building my first model, Polaris by OcCre, I have received several helpful emails from members but a thought has occurred while sanding the first planking layer. The OcCre videos and other vids show the pins in place and consequently you have to file them flat to get a flat surface for the next layer of planks.
My question is when I was carrying out the first planking I inserted the nails as shown on the plans, which is a lot of nails, but could I nail the pins in to say three quarter of their length rather than the whole way and when the glue has dried remove the nails. When the nails are hammered in flat it is difficult to remove them without damaging the planks.

Hello Dennis,

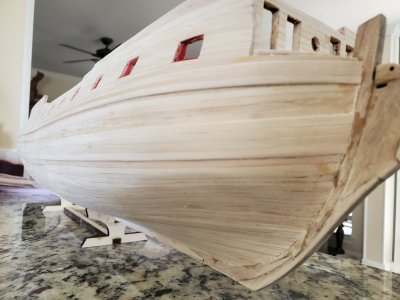
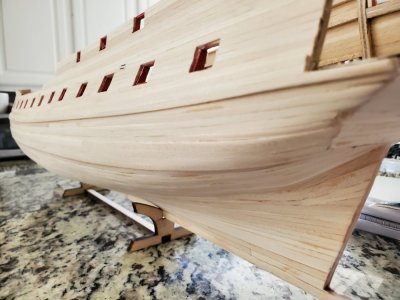
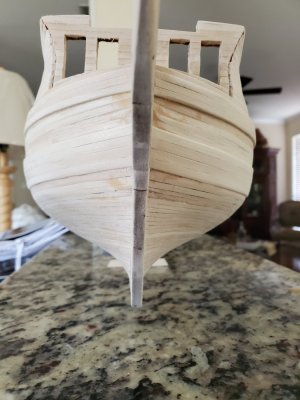
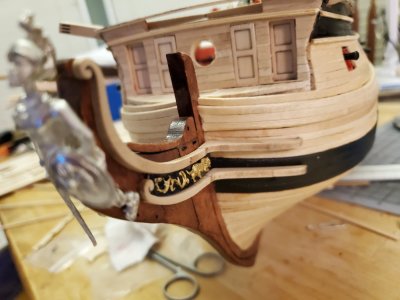
You're correct, your photo's certainly show an 'ugly' hull. But then, why would anyone expect perfection on a first outing? 'We' have spent a few thousand years making wooden ships and boats. An early version is in the museum in Aberdeen (the home of the 'Aberdeen bow that became 'the' standard on clippers) Anyway - that early boat is just a lump of wood, joints all over the place. A bit like yours.

Moving on to now, I think there are 2 things in particular that would help,
First - ignore the instructions about using pins. No-one in their right minds should be advocating embedding metal pins into the hull. Any attempts at abrasives will leave the heads or shanks as raised spots, and they are all too likely to signal through to the eventual surface. Use pins as temporary alignment, as others have said, but remove them all so that the entire surface is equally dense everywhere to await any abrasive you may need to use.
Second, I'm again echoing other replies, but fitting planks is just that - fitting - not 'applying' and not 'sticking them on'
in 1 to 1 scale practice each plank is shaped into its place, both along its length - made wider or narrower so that the flow of planking is uniform, with extra width at the ends created by fitting shorter, shaped planks. Various treatises on planking go into detail, but beware! read several, as some are wrong, or misguided, or simplistic, or written about a different style developed by builders in other countries.

Your pins should be keeping the shaped plank in place, and not pressuring it into place. That means the junction of planking to stem and stern needs attention, and the angle of the edges needs to be bevelled to allow the planks to snug up to each other.

When you've done the inner layer, the outer layer becomes simple.


While writing, I'll quickly bang on again about having a preference for full size practice, where frames are every couple of feet down the hull, and planks are attached with treenails, made from boxwood, or even bamboo. Treenails will sand back beautifully, correct frame spacing automatically gives a correct outer appearance of fixings. Mind - not for the faint hearted, and a knowledge of layout may be needed to translate diagrams into frame shapes. Also, you may not live long enough to finish the ship....


J
 
Yes, they work well for some applications, but one needs to be careful when inserting the pins into frame as the pins may split the bulkhead particularly if the frame is made out of plywood. Use the head of the pin to hold a plank down and the shaft of the pin to hold the plank against the adjacent plank. At least that is how I use the pins.

...henry
Thanks, that's how I would see using them
 
Thank you Allan & Jeff, I will now read the tutorials on planking, but in my limited knowledge I am struggling to understand how you can clamp the first layer of planks in place as there are many curved surfaces which do not lend themselves to clamping. I have three types of clamp but only one is extendable, but even then I cannot work out how to clamp them.
I tell anyone go and watch Chuck Pissaro's wonderful YouTube short videos on planking accurately. The essence if compound curve planking is to shape the plank so well that it requires no clamping of any type. Careful measurement of the taper comes first. That means we'll measured and faired bulkheads.
Pqy attention to the rabbet on the bow. Then taper the plank. After that it needs to be curved upwards using a flat board with cuvedvtemplates on it. A little moisture then a small travel iron. It's much easier that it sounds. Now it kinda looks like the shape of the ski. Now you curve the plank to the bulkheads as always. If you do this right it will lay across the bulkheads without a need fir any clamping at all.
I usedbtgis method on the Confederacy. It was SO easy. Chuck should pay me a royalty!
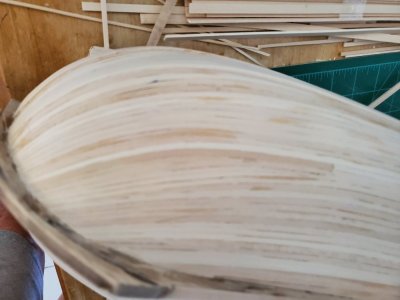
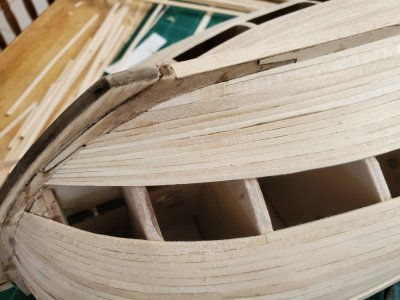
Hers a picture.
I tell anyone go and watch Chuck Pissaro's wonderful YouTube short videos on planking accurately. The essence if compound curve planking is to shape the plank so well that it requires no clamping of any type. Careful measurement of the taper comes first. That means we'll measured and faired bulkheads.
Pqy attention to the rabbet on the bow. Then taper the plank. After that it needs to be curved upwards using a flat board with cuvedvtemplates on it. A little moisture then a small travel iron. It's much easier that it sounds. Now it kinda looks like the shape of the ski. Now you curve the plank to the bulkheads as always. If you do this right it will lay across the bulkheads without a need fir any clamping at all.
I usedbtgis method on the Confederacy. It was SO easy. Chuck should pay me a royalty!

20241003_131018.jpg

20241003_090735.jpg

20240930_151840.jpg

20241003_130947.jpg

20241003_131009.jpg
 
Chelseafan is right 100%. If you spend the time to groom and shape each plant to fit, no clamps or pins are required. It does take a lot of time and patience, however, and these are not things in great abundance with most new modelers. The results speak for themselves.
 
Chelseafan is right 100%. If you spend the time to groom and shape each plant to fit, no clamps or pins are required. It does take a lot of time and patience, however, and these are not things in great abundance with most new modelers. The results speak for themselves.
Now you are being a little harsh towards new builders Kurt without knowing a thing about them and their knowledge. In my case its lack of knowledge which led to my mistakes. You amongst many others have subsequently given me the benefit of your vast knowledge which will change the way I build my future models.
The result from my perspective will be much better planning taking the time necessary to do a good job and hopefully a better model.
So please be lenient with new builders, some of us will get better.
No insult meant for new builders. As a new builder myself, I was tempted to rush things, and that would show in the quality of planking. My last sentence appears out of context upon re-reading it. I should have said that if the time is invested in shaping each plank and fitting it, the results will be much better, and seams will look tight. My bad.
 
Spackle, thats a term I have not come across before and when I google it, the answer that comes up in the UK is Polyfilla. I was going to use wood filler but now I am changing that to Polyfilla based on your recommendation.
Polyfilla spackle is not sold as powder btw - it comes ready-mixed in tubs. Good product I have found - but remember, it air-dries to set - this isn't a plaster-based filler.
 
Back
Top