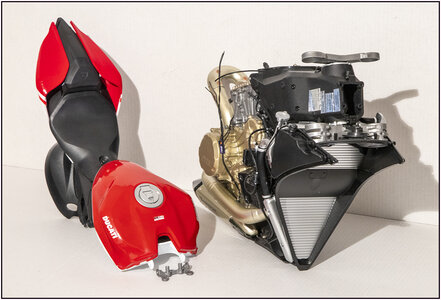
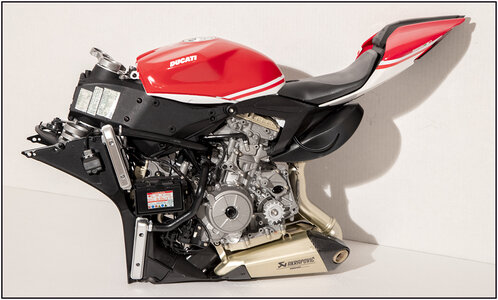
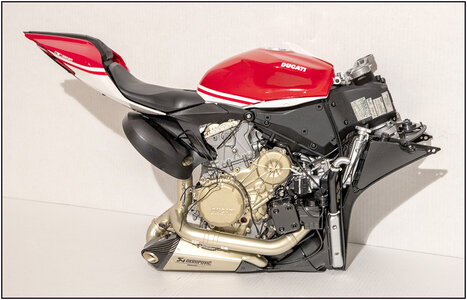
Pocher 1:4 Ducati Superbike 1299 Panigale S Anniversario + Hardware-kit of Paul Koo [COMPLETED BULD]

Main Chassis:

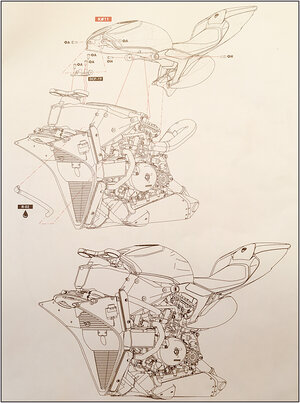
The main chassis is build from different components. You have to build them separate and they will fit together step by step.

Chapter 9:
068 Hfst 9.jpg

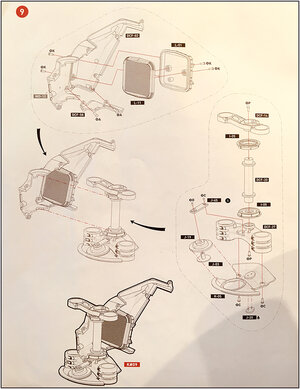
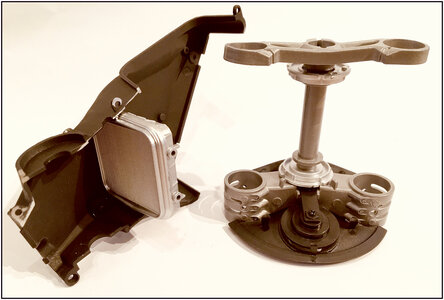
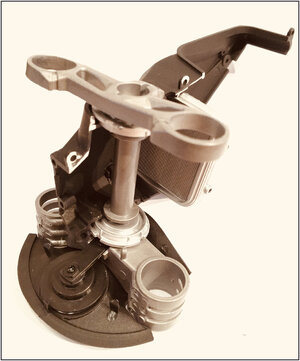
Half of the air-box and the steering head:
069 AirBox.jpg
From the air-box one side flattened.

Fit together:
070 AirBox-StearAxle.jpg
It will be fit on the engine later.

For other builders: the wholes in the top and bottom of the metal axle (DCF-20), before fitting the top and under metal crown-plates, must be tapped with the 2,3mm tap. Otherwise you can’t drive the screws till the end with the risk breaking of the head.

The previous model had many grey, unsprayed parts. Now they're all painted nice aluminum/metal.
Like the ball head bearings and the little radiator.

Regards, Peter
 
Last edited:
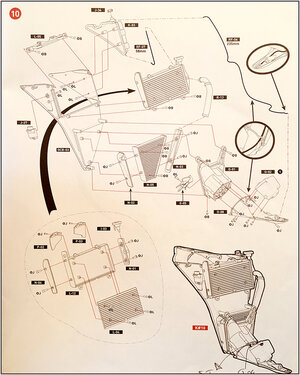
Cooling system:
Chapter 10:

071 Hfst 10.jpg

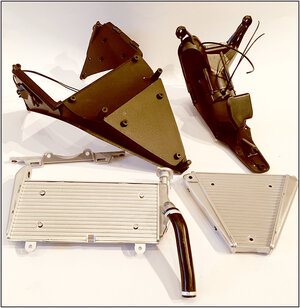
The composite main parts:
072 Cool1.jpg
Metal frame, cooling fan and 2 radiators

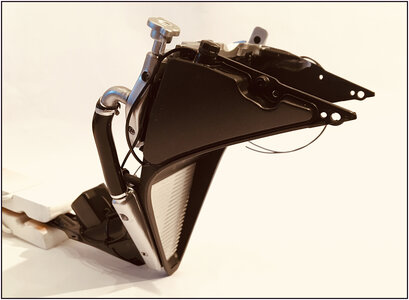
Fit together:
073 Cool2.jpg

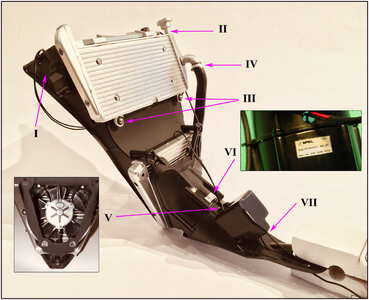
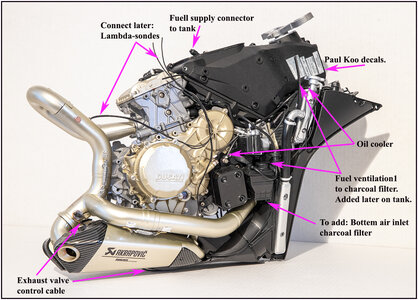
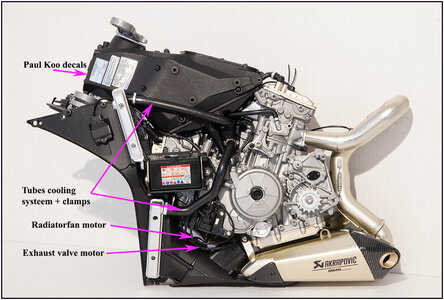
The Paul Koo extra’s:
I: wiring the Ohlins shock arsorber unit;
II: connection to the oil cooler;
III: rubber washers + M2x4 button-head Allen screws;
IV: hose clamps;
V: wiring the Radiator Fan;
VI: Radiator Fan label (9x4mm)
VII: Exhaust valve motor control cable.
074 Cool3.jpg
Also here, the radiator parts are now painted.

Regards, Peter
 
Last edited:
This kit looks like a lot of fun. Back in the '70s, I worked for a motorcycle shop which sold Triumphs and Nortons so I do have some knowledge and I also owned a '75 Triumph Trident. So, I looked on Ebay and purchased this kit and the Paul Koo accessory kit. A huge box arrived last week. Very big and heavy. Looking forward to building it and your build log should be quite helpful.
Kent
Hi Kent,
Nice you found a kit on eBay.
Perhaps you go faster then me with the build. I compare it with The Lee.
Have you also bought Paul Koo’s DvD? It gives many pictures as a extra help and shows a lot of extra details to build with stuff of your self, like cables, tubes, concector’s etc.
It’s fun to have a Bike in 1:1 and now also one in 1:4 :)
Regards, Peter
 
After two week intensive build on The Lee, some time for The Duc:
Chapter 11, part 1:
075 Hfst 11-1.jpg
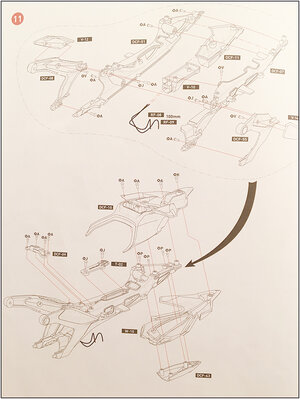
The Main frame:
The frame is composed of different metal parts. Again, it is important to tap the screw holes.
In 2 steps:
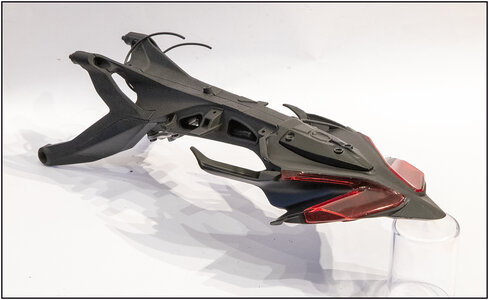
076 Frame1.jpg
077 Frame2.jpg
I had to take the pictures with a tripod because these parts are matte black. The parts are so much darker, but then the details were not reflected.
At the end of the chapter a photo with 'normal' exposure and what that looks like.

Another shot from the bottom:
078 Frame3.jpg
All in all a clever piece of casting of these parts, with many details.
Regards, Peter
 
Last edited:
Chapter 11, part 2:
079 Hfst 11-2.jpg

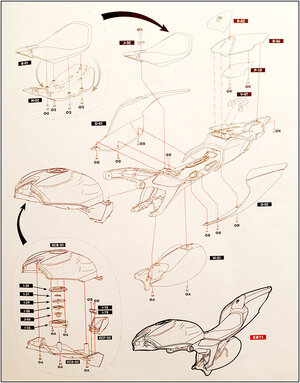
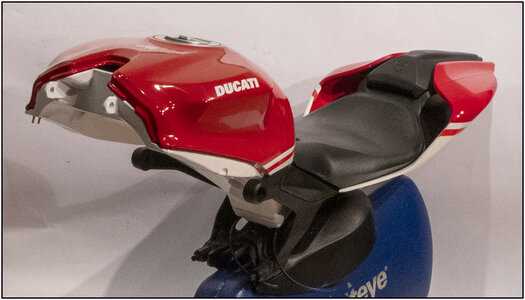
Fueltank and seat:
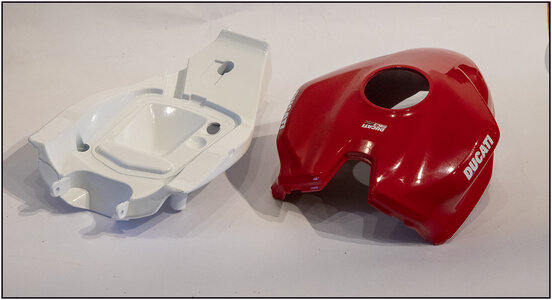
The tank consists of 3 metal parts that are neatly painted and equipped with very clear small decals:
080 Tank1.jpg

Assembled and mounted on the frame:
081 Tank2.jpg
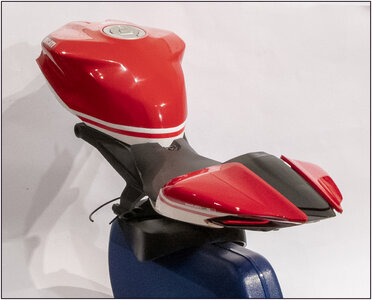
The 3 saddle parts also split on it. These are made of soft rubber.

From 'the ass':
082 Tank3.jpg

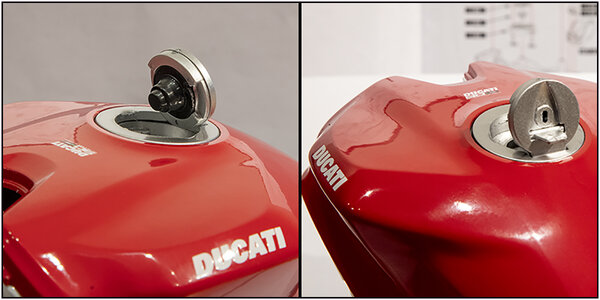
The tank cap can be opened. Drilled out the keyhole myself:
083 Tank4.jpg
Regards, Peter
 
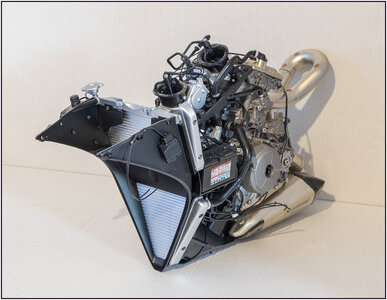
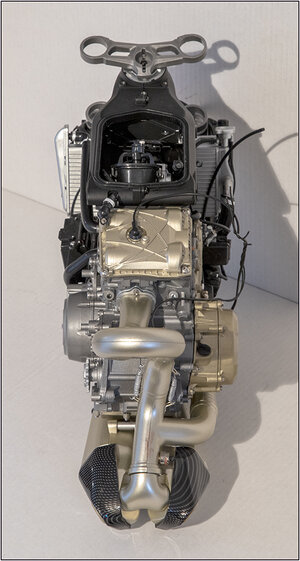
Merge previously composite parts:
Chapter 12, part 1:

084 Hfst 12-1.jpg

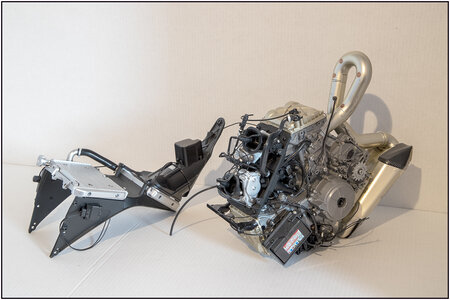
The engine block and the cooling unit are the first to be merged.
The 2 parts:
085 Samen.jpg
Mounted:
086 Samen1.jpg

Before the necessary cables and pipes are connected, I first added the front frame and stearinghead.
The parts:
087 Samen2.jpg
Mounted:
088 Samen3.jpg
This front frame encloses the fuel system.

Both sides with the cables and pipes that can now be connected:
089 Samen4.jpg
090 Samen5.jpg
Regards, Peter
 
Today I was informed by my supplier of a 3rd version of the Ducati:
https://www.pocher.com/uk-en/ducati-1299-panigale-r-final-edition.html
The 1st version was in 2016, the regular red Pocher typenr. HK107.
The 2nd version of which I'm building, Pocher typenr. HK110.
The 3rd version, Pocher typenr. HK117.
It took a while for Hornby to arrange the acquisition and deliver of the HK110.
So now use the molds again with some adjustments to the "Final Edition" (from this Duc).
I don't know if Hornby's going to come up with another version after that (there final-edition).
With me, the HK117 does not come into the display case. He looks too much like the HK110.
Are you interested or have mishandled the first 2 versions, you can already place a pre-order.
Regards, Peter
 
Last edited:
Chapter 13, Part 1:
097 Hfst 13-1.jpg

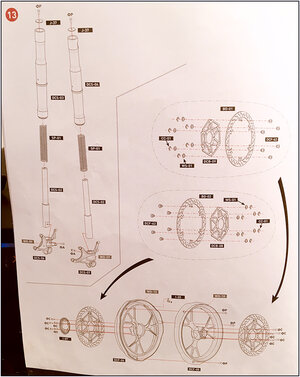
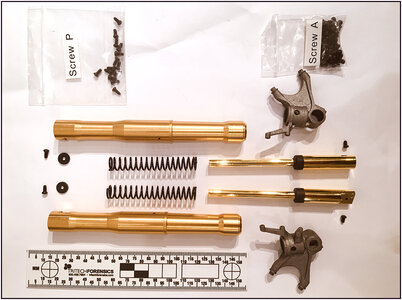
We are now ready for the working parts of the Ducati. Because it is quite interesting how these are constructed and how the individual parts are made, I also made some pictures of the parts. And sometimes a few steps. With some Tips&Tricks.

Step 1:
Fork legs:

The parts:
098 Vork2.jpg

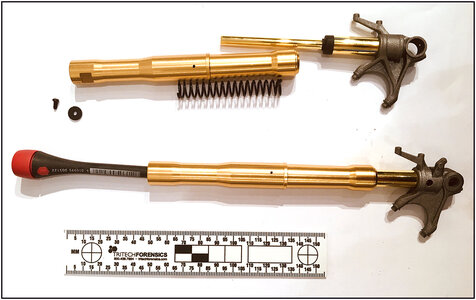
When mounting the 'upside-down' outside forkleg on the inner legs, you have to use the screwdriver to put a clever piece into the outer leg. Then the screw with ring has exactly straight in and has to come right for the designated hole into the top of the inner leg. That takes quite a few attempts:
099 Vork3.jpg
More convenient is to grab the screw with a spring-four claw by the head and then insert the screw in and have the first (quarter) stroke made. So that it does turn straight into the thread:
100 Vork4.jpg

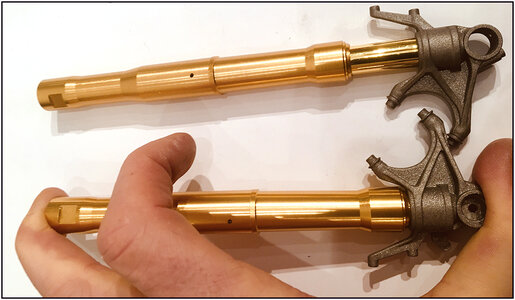
Put together, the fork leg has this spring travel. There's a lot of tension on that, I almost got cramps in my hand.
101 Vork5.jpg

Continue tomorrow....
Regards, Peter
 
Chapter 13, Part 1:
View attachment 198372

We are now ready for the working parts of the Ducati. Because it is quite interesting how these are constructed and how the individual parts are made, I also made some pictures of the parts. And sometimes a few steps. With some Tips&Tricks.

Step 1:
Fork legs:

The parts:
View attachment 198373

When mounting the 'upside-down' outside forkleg on the inner legs, you have to use the screwdriver to put a clever piece into the outer leg. Then the screw with ring has exactly straight in and has to come right for the designated hole into the top of the inner leg. That takes quite a few attempts:
View attachment 198374
More convenient is to grab the screw with a spring-four claw by the head and then insert the screw in and have the first (quarter) stroke made. So that it does turn straight into the thread:
View attachment 198375

Put together, the fork leg has this spring travel. There's a lot of tension on that, I almost got cramps in my hand.
View attachment 198376

Continue tomorrow....
Regards, Peter
This looks like a really nice kit - I'm tempted (particularly as I've just finished the Jaguar engine!)

Ted
 
Step 2:
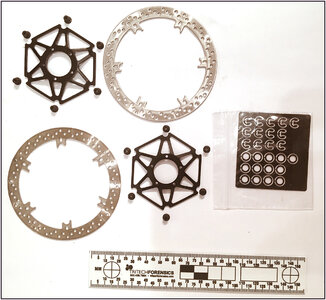
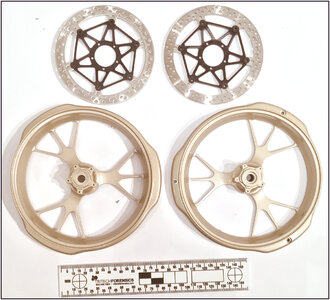
Disk-brakes:

De parts, al metal:
102 Rem1.jpg

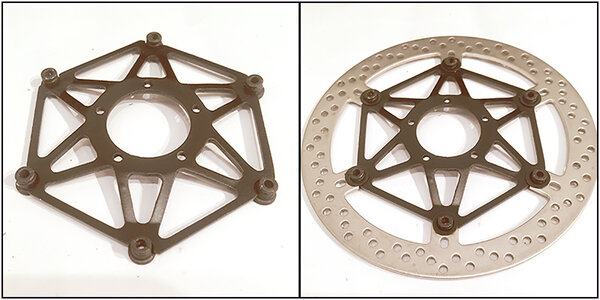
Also the Ducati has floating brake discs. The discs themselves are connected to the frame with 6 canisters:
103 Rem2.jpg
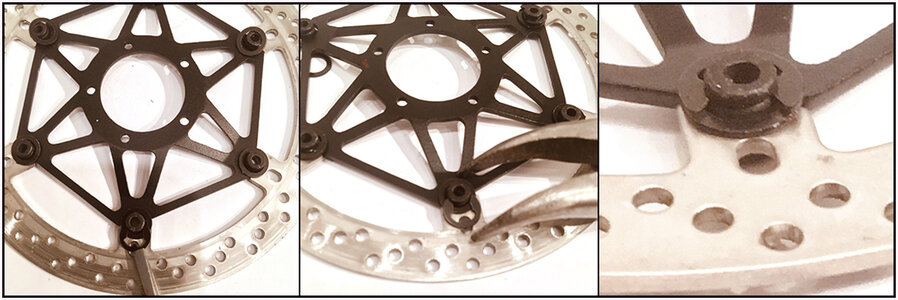
The easiest way to work is to slide the 6 little canisters, down with their flanges, into the 6 recesses of the frame. Then place the brake disc, only possible in one way, and provide the 6 canisters with the rings.
They are then fixed with 6 ring clips:
104 Rem3.jpg
Preferably do not slide them into place with a small screwdriver. Chances are great you'll shoot off one of the 12 and stick the screwdriver in your fingers. With a pointed tan, this is much more controlled. Note the clip's arms fall under the flange edge. Otherwise, it is guaranteed one will jump off.

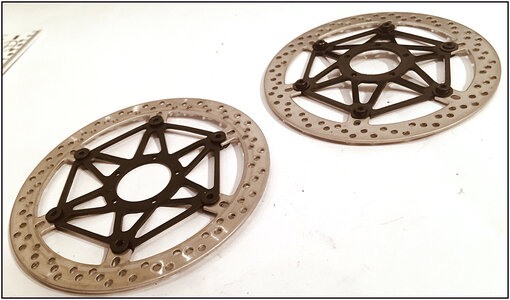
After a little tinkering you have the 2 brake discs floating on the frames:
105 Rem4.jpg

Step 3:
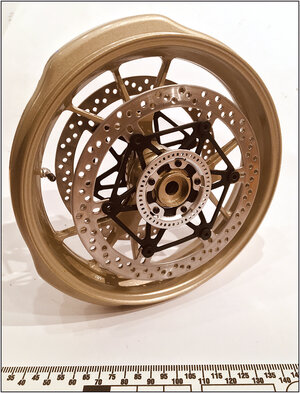
The front rim:

The parts:
106 Rem5.jpg

Not to much work to put these together:
107 Rem6.jpg
Also with the ABS sensor ring and a perpendicular air valve.
These 2 are made of plastic. By the 2016 model they were grey in color. I had already planned to spray these myself, because they looked very cheap. But Pocher/Hornby listened to the reviews and sprayed the frames with those parts themselves. Top!

Regards, Peter
 
Last edited:
Back
Top