Thanks Mark!Great kit Dean, enjoy!
-

Win a Free Custom Engraved Brass Coin!!!
As a way to introduce our brass coins to the community, we will raffle off a free coin during the month of August. Follow link ABOVE for instructions for entering.
-

PRE-ORDER SHIPS IN SCALE TODAY!
The beloved Ships in Scale Magazine is back and charting a new course for 2026!
Discover new skills, new techniques, and new inspirations in every issue.
NOTE THAT OUR FIRST ISSUE WILL BE JAN/FEB 2026
- Home
- Forums
- Ships of Scale Build Logs
- Super Detailing Static Models / Other Genres
- Historical Trailways, Guns, Aircraft, and Cars
You are using an out of date browser. It may not display this or other websites correctly.
You should upgrade or use an alternative browser.
You should upgrade or use an alternative browser.
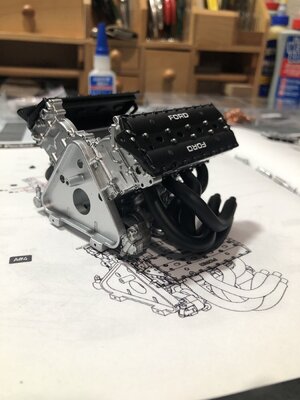
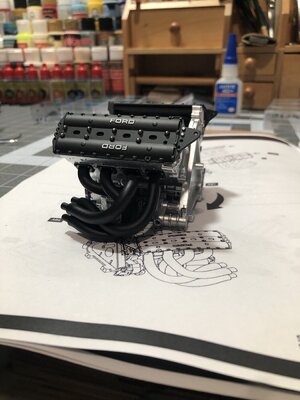
Nice to see how the motor is growing. And adding some personal details, Dean. A great kit for further customizing.It’s becoming a motor…the two halves and bottom joined with one end…
View attachment 375102
View attachment 375103
Until next time…
By the Duc I mostly tapered the holes. Considering my previous experience. But some oil or wax is a good option.
Regard, Peter
Thanks Peter! Tapering the holes is an option I will try, along with continuing to lubricate the threads. Some holes don't even seem to have threads. It feels like I am making the threads with the bolt on some of the die cast pieces...sigh! Hoping not to break a screw, as they are tiny.Nice to see how the motor is growing. And adding some personal details, Dean. A great kit for further customizing.
By the Duc I mostly tapered the holes. Considering my previous experience. But some oil or wax is a good option.
Regard, Peter
Next was the upper mid section with intake and injectors…once again injectors were all silver, so I painted them to match pictures I found…
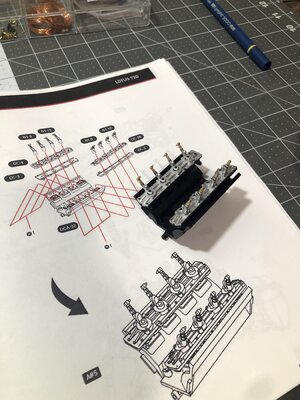
Then that was assembled to the motor and the transmission end was screwed on, which required chasing threads first…sigh!
And finally bolt heads painted and mild weathering was added for more realism…
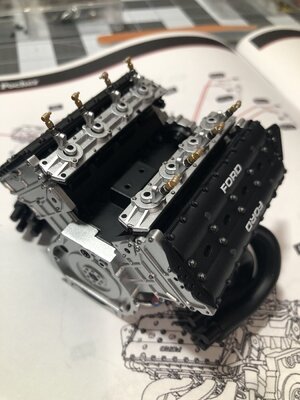
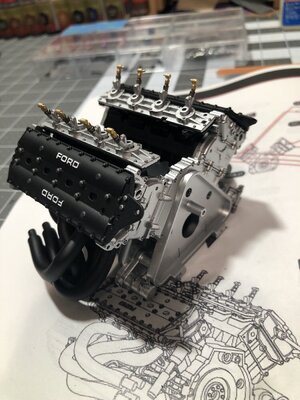
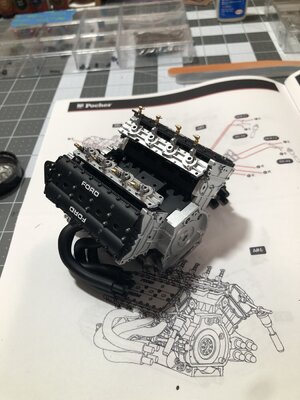
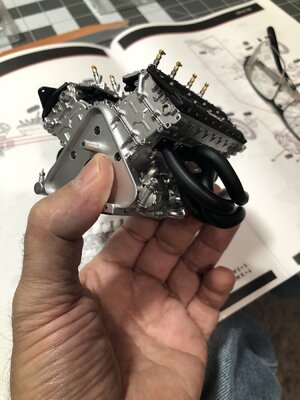
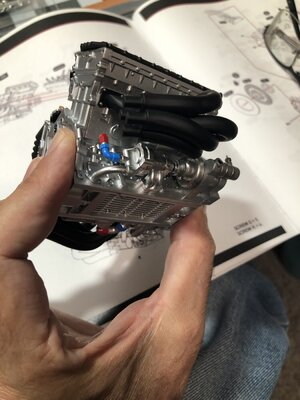 Well that’s it for now… I will finish this sub assembly tonight. A few more parts to go…

Then that was assembled to the motor and the transmission end was screwed on, which required chasing threads first…sigh!
And finally bolt heads painted and mild weathering was added for more realism…


 Well that’s it for now… I will finish this sub assembly tonight. A few more parts to go…
Last edited:
The detail is remarkable, great job on your painting modifications too!
Thank you Daniel! It looks very promising as far as detail goes. I am just adding a little extra detail here and there to enhance it.The detail is remarkable, great job on your painting modifications too!
Later I will be adding details left off…
To finish this step, you add brackets to the motor that hold the upper shock, and then slide on the upper shock for now.
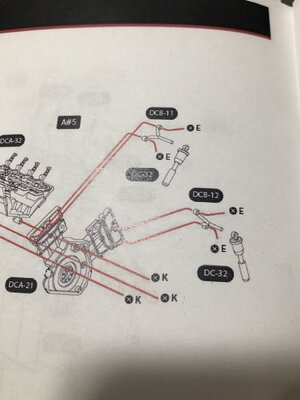
The parts were once again all silver. They painted all the die cast kit parts a base color, so it’s up to you to add more detail by doing additional painting.
Here is the upper shock as supplied…
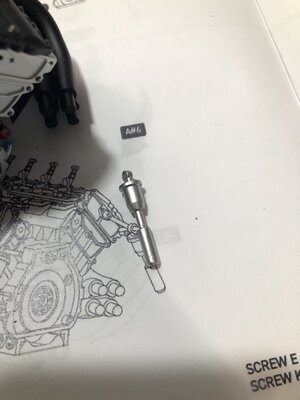
However there is a rubber stop that is for when the shock bottoms out. It should be black. So I painted it black, and then added some mild weathering to the metal, giving it a mild varnished look where applied.
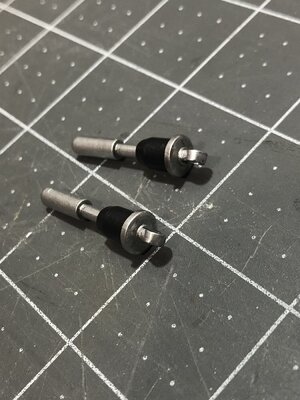
Once again, in my opinion, these extra details go a long way towards adding realism.
Now the brackets are screwed to the heads and I painted the black screws to match my bolts.
So this is assembly #6, which will be put aside to start the transmission. Also I put an injector velocity stack on one to see what it’s going to look like. Already getting excited.
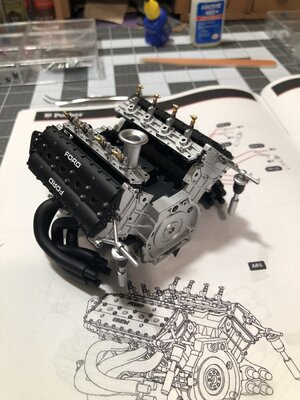
Thanks for stopping in…

The parts were once again all silver. They painted all the die cast kit parts a base color, so it’s up to you to add more detail by doing additional painting.
Here is the upper shock as supplied…

However there is a rubber stop that is for when the shock bottoms out. It should be black. So I painted it black, and then added some mild weathering to the metal, giving it a mild varnished look where applied.

Once again, in my opinion, these extra details go a long way towards adding realism.
Now the brackets are screwed to the heads and I painted the black screws to match my bolts.
So this is assembly #6, which will be put aside to start the transmission. Also I put an injector velocity stack on one to see what it’s going to look like. Already getting excited.

Thanks for stopping in…
Last edited:
Just a while and we can hear the roaring sound of that Cosworth V8-engine……..To finish this step, you add brackets to the motor that hold the upper shock, and then slide on the upper shock for now.
View attachment 375205
The parts were once again all silver. They painted all kit parts a base color, so it’s up to you to add more detail by doing additional painting.
Here is the upper shock as supplied…
View attachment 375202
However there is a rubber stop that is for when the shock bottoms out. It should be black. So I painted it black, and then added some mild weathering to the metal, giving it a mild varnished look where applied.
View attachment 375203
Once again, in my opinion, these extra details go a long way towards adding realism.
Now the brackets are screwed to the heads and I painted the black screws to match my bolts.
So this is assembly #6, which will be put aside to start the transmission. Also I put an injector velocity stack on one to see what it’s going to look like. Already getting excited.
View attachment 375204
Thanks for stopping in…
Soon enough she will get the distributor, plug wires and injector hoses. But that is after the engine and transmission are joined.Just a while and we can hear the roaring sound of that Cosworth V8-engine……..
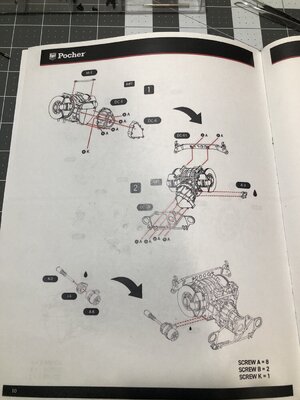
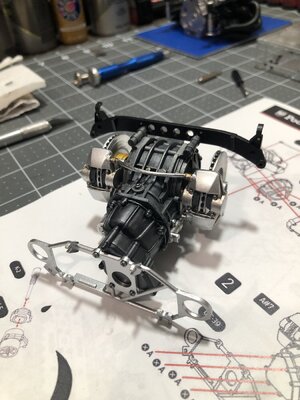
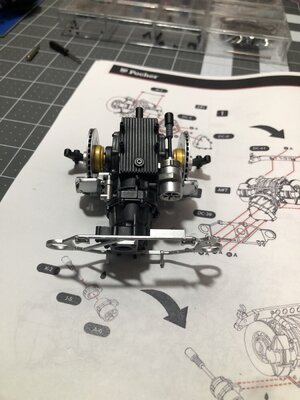
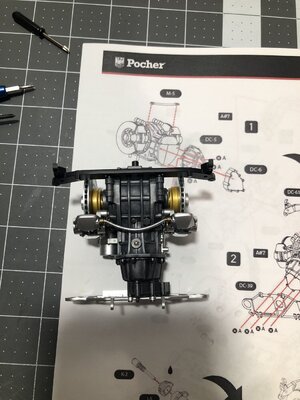
Time to start on the transmission and rear end.
First gathering all the pieces…
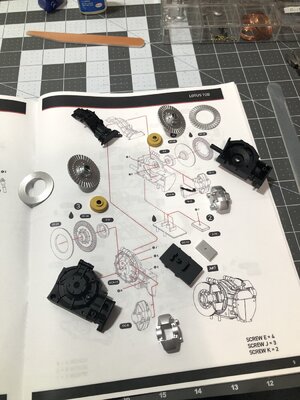
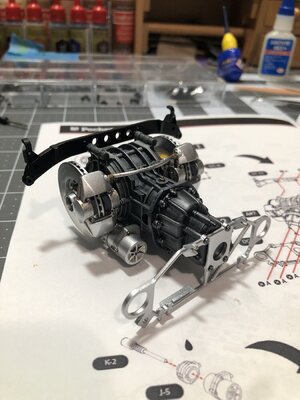
Transmission is black, pics I have for reference show a dark grey or dark silver. Will paint them accordingly.
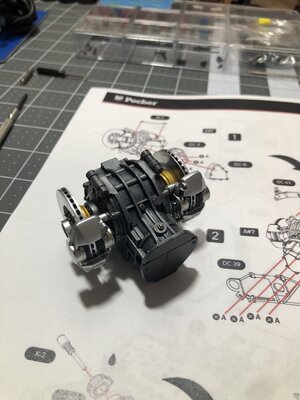
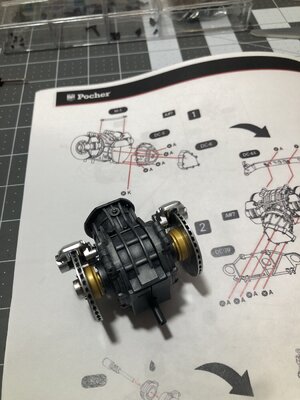
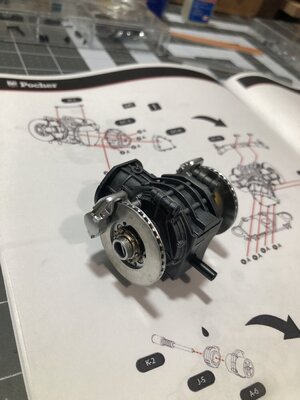
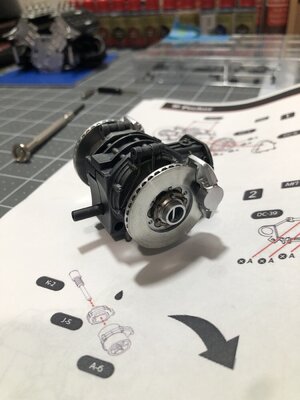
First order of business was the rotors…
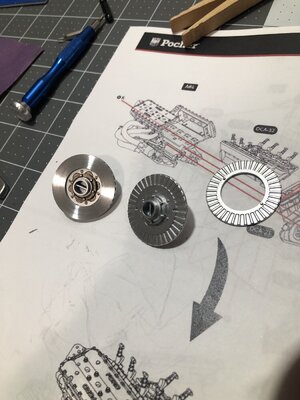
I painted the hub, bolts, and did some weathering… and then turned them in a drill and sanded the faces where the brake pads contact.
Then I dry brushed the transmission…started with a dark grey, then dry brushed a metal color on top. Very happy with this look.
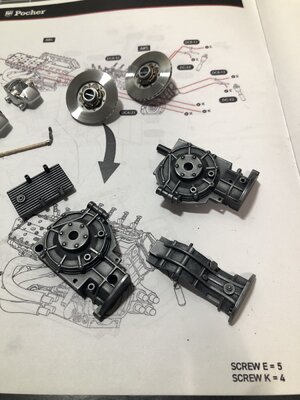
Then I added some details to the calipers, and painted the fittings and line that is attached to the one caliper.
Then it was time for final assembly.
Some pics…
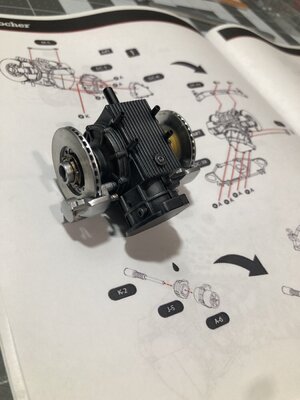
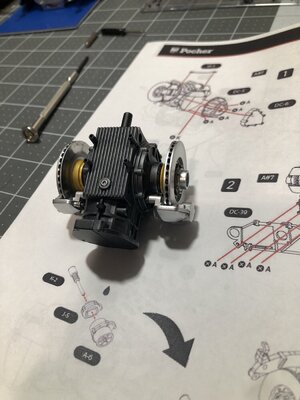
Thanks for checking in…
First gathering all the pieces…

Transmission is black, pics I have for reference show a dark grey or dark silver. Will paint them accordingly.
First order of business was the rotors…

I painted the hub, bolts, and did some weathering… and then turned them in a drill and sanded the faces where the brake pads contact.
Then I dry brushed the transmission…started with a dark grey, then dry brushed a metal color on top. Very happy with this look.

Then I added some details to the calipers, and painted the fittings and line that is attached to the one caliper.
Then it was time for final assembly.
Some pics…


Thanks for checking in…
Last edited:
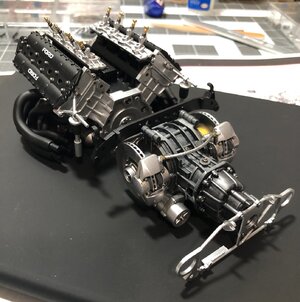
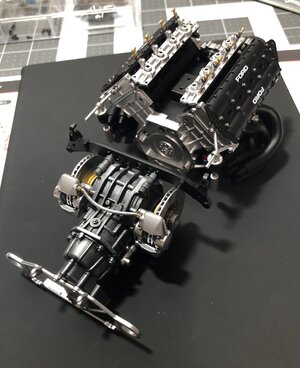
The painting/brushing looks very good, Dean. In particular at the transmission housing it’s highlighted the details very well.Progress pics of current sub assemblies…
View attachment 375419
View attachment 375420
Soon they will be joined, but there is much more to add first!
It starts to be a impressive engine.
Regards, Peter
Thank you Peter! Dry brushing is one of my favorite techniques. This is becoming a fun project!The painting/brushing looks very good, Dean. In particular at the transmission housing it’s highlighted the details very well.
It starts to be a impressive engine.
Regards, Peter
Last edited:
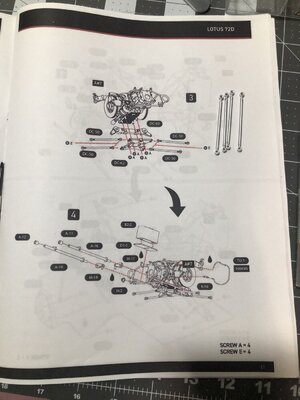
Now for page 11…
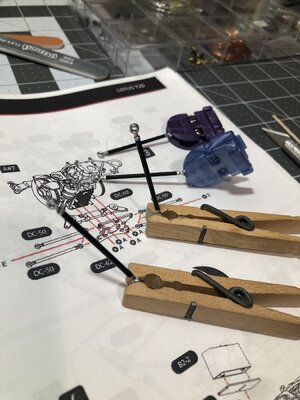
The strut arms are black with the end turnbuckles being silver or metal.
So first step was to paint them properly and add a wash to the joint where the turnbuckles and adjustment hex meet…
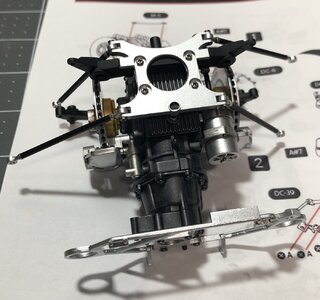
Next the bracket for them and the other structural piece were mounted to the bottom and the struts attached…
Now I have to go to the next step on this page, which has many parts to add, including the battery, and some hydraulic lines, etc.

The strut arms are black with the end turnbuckles being silver or metal.
So first step was to paint them properly and add a wash to the joint where the turnbuckles and adjustment hex meet…

Next the bracket for them and the other structural piece were mounted to the bottom and the struts attached…

Now I have to go to the next step on this page, which has many parts to add, including the battery, and some hydraulic lines, etc.
Wow Dean, that's a nice looking kit. At that scale, you should think about adding working crank and pistons like I did in my 1/12 Alfa and will be doing in my current 1/12 Bentley blower. I know many older 1/8 Pocher kits have working engine innards. A bit of 3d modeling and printing would do it.
- Joined
- Jan 9, 2020
- Messages
- 10,566
- Points
- 938

Hi Dean. Congratulations on the added venture. I think the JPS and Gold Leaf color schemes are the truly standout ones from that era. I also favor the Lotus - not because of Andretti or Fittipaldi, but because of Senna who recorded his first race win in one - albeit a much later model, of course.
Thanks Francois! I can only imagine what you would do with it!Wow Dean, that's a nice looking kit. At that scale, you should think about adding working crank and pistons like I did in my 1/12 Alfa and will be doing in my current 1/12 Bentley blower. I know many older 1/8 Pocher kits have working engine innards. A bit of 3d modeling and printing would do it.
But my opportunity for inner motor parts has passed. I will be adding additional wires and harnesses, among other things I see missing. So I am not just building out of the box, so to speak.
Thank you Heinrich! Being a Formula One fanatic, and loving the older models…this is right up my alley!Hi Dean. Congratulations on the added venture. I think the JPS and Gold Leaf color schemes are the truly standout ones from that era. I also favor the Lotus - not because of Andretti or Fittipaldi, but because of Senna who recorded his first race win in one - albeit a much later model, of course.
I really wish Pocher would make the Eagle Gurney-Westlake, another beautiful car design!
Here is a few pics…
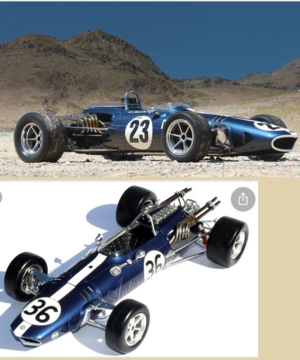
So many beautiful cars to chose from…sigh!
Last edited:

