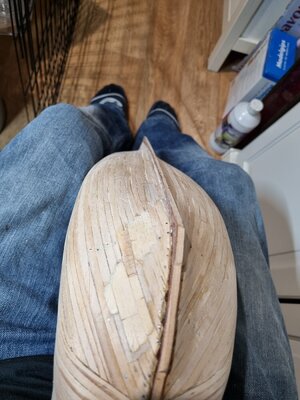
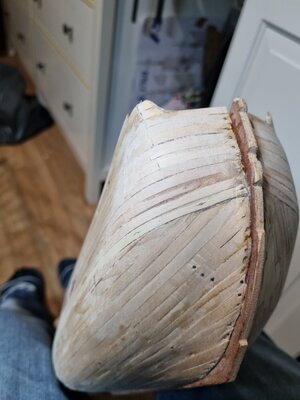
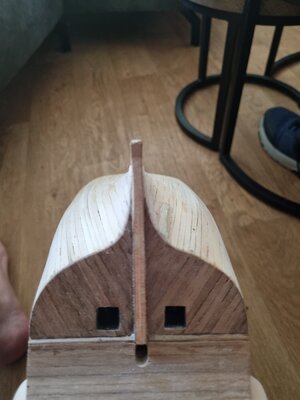
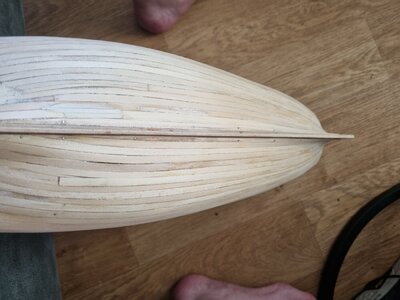
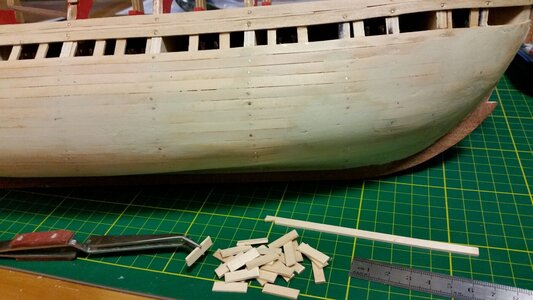
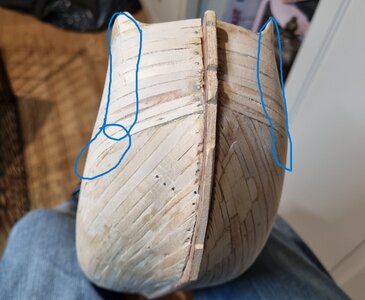
Prins Willem V.O.C 1651 from Corel.

Hey Heinrich.
I'm not stopping the log for real it was just a bad joke. I'm just angry about corel for ther bad drawings. I know it's a learning process but taking the hole hull apart and replank the hole ship?
And I know that all of the people on the forum want to help me.
So I'm absolutely not angry about them.
In a couple of weeks I finished the airbrush clinics and can reset my shipbuilders mind. ( it a Christmas present from my best friend who is a artist in airbrushing) Then I can start with a fresch mindset. So the PW has to wait a little while before I smash it against the wall ROTF( joke again).

For all of you guys.. thanks for trying to help me.
Re-plank the whole hull? Oh no. Just the section that has the problem, the area that has the hard bend, and 1-2 frames forward and aft of that. It's a patching process. When you are ready to begin this process, we can step you through removing a section of the hull without disturbing the rest of it, adding balsa blocks between the frames of the problem area, sanding those to shape, and re-planking the area to form a new shape for the bow.

We understand the disappointment that comes with learning that the instructions have gaps in the process of building. EVERY kit has that problem. It's something no one tells you when you start building wooden model ships. In plastic model ship instructions, you aren't told where and how to use filler to hide seams or use airbrushing in layers to achieve a professional level of color, detail, and weathering. The pitfalls in wooden ship kits are totally different, and act as pit traps for the new builder. One of the greatest purposes of this forum is to help guide builders through the process of learning the techniques not taught in the instructions. All of us here have had to stop a project that has jumped the tracks and rework a part of the ship or rigging. The question becomes, do I have the patience to learn how to back up and rework something? Do I have a strong enough desire to overcome huge setbacks, and recover? If these models were easy in this regard, there would be a lot more of them. Like Heinrich said, the model teaches you more about yourself, your strength of will, and your patience to work through tough problems doing something you have never done before. If you can work through an entire build with devotion to research and problem solving, you will not have a greater fan base than the fellow builders who are here on this forum, because we are all on that same ladder of learning at different levels, all climbing slowly ever upward.
 
Hello everybody,

It was a long time ago that I was active on the forum. I was busty with other projects. I made a diorama of a Indian god and a couple of plastic kits.
I bought a 3D printer and that cost me some time to learn this.
The Prins Willem was a forgotten project.
But a couple of weeks ago, I was visiting @Steef66 and I brought my PW with me. We looked, and talk about the ship and what was the best option to restore it.
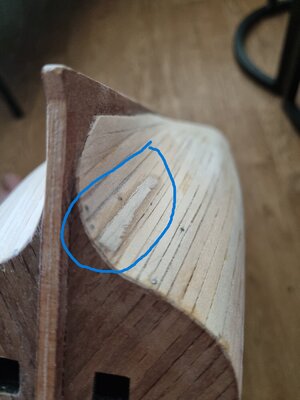
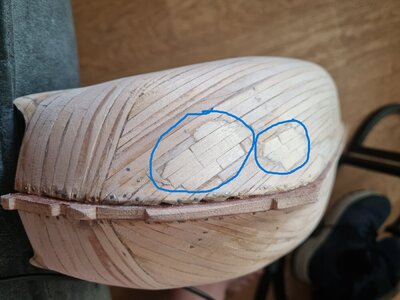
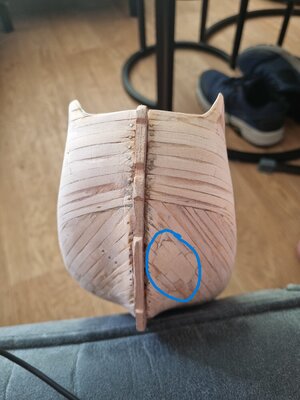
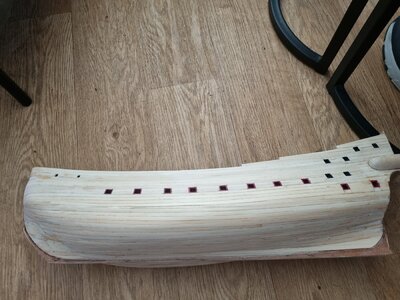
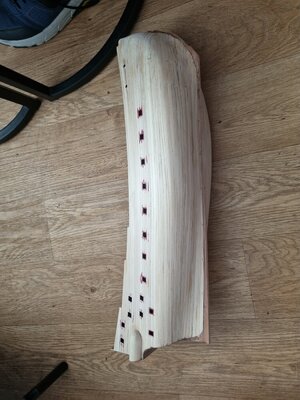
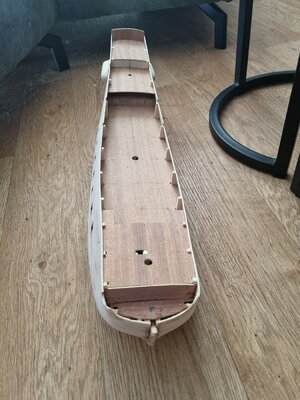
There were a couple of spots that need some attention. We mark the spots, and when I was back home I repaired this spots with the same wood. Sanded The wood down and this is the result. It's not a very nice view, but there comes a 2nd layer of wood on top.
17a.jpg19a.jpg21a.jpg

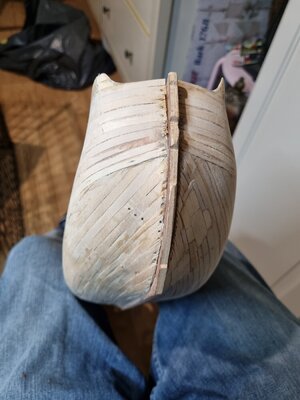
All the other oddities I closed with Wood glue and sawdust. And sanded the hole hull

2.jpg3.jpg16.jpg18.jpg20.jpg23.jpg2.jpg

I

24.jpg

26.jpg
 
Last edited:
What the first layer of planking looks like doesn't matter as long as the hull form is smooth with no hard bends or flat spots where there shouldn't be. After you add the final planking veneers, all the patchwork and filler will not be visible. Take lots of time filling in flat spots and sanding the filler to fair it into the curves pf the hull. This model is perfectly workable.
 
Hello Dirk, I for one am very happy to see you back on the forum and busy with the Prins Willem again. There is nothing that beats the help of an experienced modeler. I am very happy to hear that @Steef66 Stephan helped you to close the hull. Now you have a solid base from which you can continue!
 
Real good job Dirk, looks real great. Like I said before.

On these pictures I see something I didn't see on whatsapp.
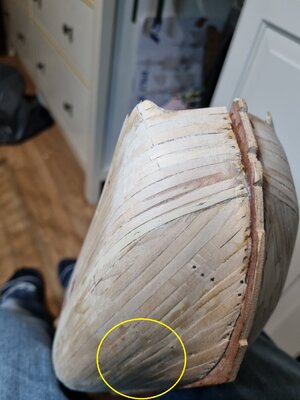
Just give a little bit attention to the bottom (yellow marking) because I see some planks lying lower then the next to it. Just sand it down to same high. It is better when you put your next layer of planks on it. When the glue is dry after the second layer, on these spots there could come bubbles in the planking (because there was a bad glue connection). The Newport I'm making came to me with these bubbles under the planks, that's why I redo the planking on it.

16.jpg

Also there where the first layer hits the keel needs always attention. Make sure that the transition to the keel is seamless. This will be save a lot of work on the second layer.

The best way to see if planks are on the same high is when you hold the scraper on it, you see the light under the blade on places where it needs some attention.
 
Real good job Dirk, looks real great. Like I said before.

On these pictures I see something I didn't see on whatsapp.
Just give a little bit attention to the bottom (yellow marking) because I see some planks lying lower then the next to it. Just sand it down to same high. It is better when you put your next layer of planks on it. When the glue is dry after the second layer, on these spots there could come bubbles in the planking (because there was a bad glue connection). The Newport I'm making came to me with these bubbles under the planks, that's why I redo the planking on it.

View attachment 324582

Also there where the first layer hits the keel needs always attention. Make sure that the transition to the keel is seamless. This will be save a lot of work on the second layer.

The best way to see if planks are on the same high is when you hold the scraper on it, you see the light under the blade on places where it needs some attention.
I agree Stephan. I would use a coarse grit sandpaper (I use 80) and sand cross-grain at an angle of approximately 45 to 60 degrees to eliminate the highs and lows of the first layer.
 
Just give a little bit attention to the bottom (yellow marking)
It's rare to say, but when I look at it from here it looks smooth but feels bumpy.
Alot of gaps I closed with woodglue and sawdust and then sanded it.
It looks like shadow between the planks but is't closed and Smooth.

In overall of the hull I will do it again with the scraper knifes. This works verry fast and finished everting smooth as a mirror.
Thank for the tip.Thumbsup

Also there where the first layer hits the keel
Thumbsup


Hello Dirk, I for one am very happy to see you back on the forum and busy with the Prins Willem again
Thank you. I have some other project that pays my attention so I won't post every week on the forum.
I have 2 dioramas to build so my time on the Prins Willem is limited. :(
But the fun is back and I'm happy building again.:D
 
the hull form is smooth with no hard bends or flat spots where there shouldn't be.
There were some hard bends but with a scraper and some sandpaper I limited them to a minimum.
Better then this I can't get it because the wood gets to thin and will crack.
Thanks for the tips
 
There were some hard bends but with a scraper and some sandpaper I limited them to a minimum.
Better then this I can't get it because the wood gets to thin and will crack.
Thanks for the tips
Aside from sanding the planking to half its thickness and risking puncturing the hull, the only other option at that point is to add filler to either side of the high spot and fair the whole area into the overall hull shape. If that isn't enough, then the frames themselves are too far out of shape. With the first planking, you can still take the extreme measure of cutting the planks between a set of frames, shim and reshape the frame edges, then patch over the gaping hole with plank strips, re-sand and fair the patch, and finish waves and dips with filler. An extreme case like this should have been detected much earlier, but a beginner can sometimes mis-shape frames when fairing them and end up with a problem he or she thinks is unsolvable. A mistake like that is a valuable learning experience, in addition to being a royal pain in the ass. ANY shape or structural problem at this early stage can be corrected with sticks, glue, sanding blocks, and PATIENCE. If you have problems with hull shape AFTER finial planking, THEN you have a real problem.

ARRRRRrrrrr!!!! Pirate Flag Ship-1
 
It's rare to say, but when I look at it from here it looks smooth but feels bumpy.
Alot of gaps I closed with woodglue and sawdust and then sanded it.
It looks like shadow between the planks but is't closed and Smooth.

In overall of the hull I will do it again with the scraper knifes. This works verry fast and finished everting smooth as a mirror.
Thank for the tip.Thumbsup


Thumbsup


Thank you. I have some other project that pays my attention so I won't post every week on the forum.
I have 2 dioramas to build so my time on the Prins Willem is limited. :(
But the fun is back and I'm happy building again.:D
You want the hull to appear bumpy (because of all the color variations) but feel like smooth glass before you put on the final planking. This is the parts where you fill, sand, inspect, fill, sand, inspect, fill, sand, inspect, fill, sand, inspect, fill, sand, inspect, fill, sand, inspect, fill, sand, inspect, fill, sand, inspect, fill, sand, inspect, fill, sand, inspect. you get the idea. Work patiently. If you don't, your hull will look bad.

Don't worry about the gaps. Fill them. This hull is glass smooth after sanding with 80, then 100 grit, and this is the second to the final filling pass. I found a couple more flat spots using sunlight to reveal them. It LOOKS bumpy because of the colors of the green filler and wood, and the variations in thickness of the filler. But if you close your eyes, it feels like a baby's butt. Your hull will look similar. It will surprise you how much area filler will need to cover, but don't let that discourage you. You won't see it later. You can see how random the low spots were, where the filler is thickest and the wood planking completely hidden. The brass pins were sanded flush since digging them out with the tip of a razor knife proved unnecessary. Small depressions made by pin heads have no effect on the final planking, and most were filled.

There were small bends at different angles and shallow spots from the middle are of the hull as it transitioned to the bluff bow just below the waterline. The planks both bend and twist in this area, and they individually just don't want to do both at the same time. After filling and sanding, during inspections, watch for asymmetry between port and starboard by looking down each end of the hull.
071 Install Side Planks.jpg

The transition area at the third frame forward from the transom created a hard bend across the frame.
067 First Sanding of Filler.jpg
 
Last edited:
Hi Dirk, I have just stumbled on your build and fully agree with the advice of others.I would add one thing, when sanding irregularities out, I keep checking over the hull with finger pressure.With practice, you will soon know when the planking is getting thin by how easy it flexes with finger pressure.When you have any area that gives under light pressure, stop sanding and crack the filler out and build the low spots up.

Kurt is quite right in what he says, your hull looks perfectly useable and with work, will be the ideal base for the next layer.The key is PATIENCE.When you think you have it perfect, walk away and inspect it again a few days later,I guarantee will will find an area you have missed.
 
Kurt is quite right in what he says, your hull looks perfectly useable and with work, will be the ideal base for the next layer.The key is PATIENCE.
I know wat I have to do. And I know he's right.
In my last post, in the last rule, I'm saying...
I'm sill checking and sanding.
The pictures you see ar from 6 months ago
Only my last 2 posts are from yesterday.
I'm sill checking and sanding,
checking and sanding,
sill checking and sanding,
checking and sanding,
sill checking and sanding,
checking and sanding,
sill checking and sanding,
checking and sanding.

The pics from yesterday ar not the end results of the hull.
 
Last edited:
The top bends may be okay, depending on hull design, but the lower ones should certainly be considered smoothing.
I know that. I'm not finished smoothing the hull..
Let me explain the hole situation again...
Because people (maybe) better understand

I started the build of this ship in a 2000% motivation mode.
When I posted the picturs of the hull alot of people complain abouth it because ther were alot of big errors in the hull. And they were right..
I tried to fix them but it din't work at that time.
I was frustrated and kicked the ship into the closet.
I was so angry abouth it that I never want to work on this ship again and sale it.
So I focused myself on other types of modeling..Dioramas, Historical Tanks and 3D printing.

But......
I have good contact with @Steef66 and we made an apointment to see what... and how... I can do abouth it..
He helpt me out, he marked some spots on the hull and told me how to fill the big foul on the frondsinde of the hull.
I fixed tis error and it took altot sanding and scraping.
I was glad and super motivated that this error was almost completely gone.
@Steef66 gives me advice on the lowerside of the hull in one of my last posts. (We use scraping tecnics with some sort of razorblade to make the planks flat.
Thats why we talk about scraping instead of sanding).

Now... (almost)everybody comment abouth the lower side of the hull. And that the planks has to be sanded..
But...... ik know that already and I'm working on that.

Thanks again for all the tips.
 
I know you are Dirk, all I am saying is be careful how much sanding you do, too much and you will go through the planking, been there done that along time ago, and had to add another layer of planking.
 
Back
Top