I used a flat short-bristled brush to paint mine on. If I wanted to fill a crack or something I just loaded the brush to lay it on thick. Since it’s already colored, it seems like you can lay it on heavy, then sand it back to where you want it without sacrificing your finish color.I love the painting pointers Namabiiru, keep them coming. For the Higgins boat I was after a smooth hard-shell look. My results so far point out a lack of proper sanding in the beginning, you can see like a sharp stick in the eye the hills and valleys that show up under certain lighting. Using Vallejo Model Air paints which are already thinned out for use in an airbrush, was also a surprise with how thin it was requiring way too many coats to cover the different shades of wood and putty fillers. On the positive side of this experiment, because of the repeated use of my airbrush, I started learning the tricks to its proper use, there are numerous little things one can do in terms of adjustments, intermediate cleaning between color changes, pressure settings, and needle and tip sizes for the type of paints. All which I am a beginning to get better at. Your suggestion of the Acrylic Gouache sounds interesting, if its thick enough to act like a filler I could apply it with a spatula over the lower groove areas and after drying a light sanding with 400 + paper then respray?
-

Win a Free Custom Engraved Brass Coin!!!
As a way to introduce our brass coins to the community, we will raffle off a free coin during the month of August. Follow link ABOVE for instructions for entering.
-

PRE-ORDER SHIPS IN SCALE TODAY!
The beloved Ships in Scale Magazine is back and charting a new course for 2026!
Discover new skills, new techniques, and new inspirations in every issue.
NOTE THAT OUR FIRST ISSUE WILL BE JAN/FEB 2026
You are using an out of date browser. It may not display this or other websites correctly.
You should upgrade or use an alternative browser.
You should upgrade or use an alternative browser.
Yellow is a very difficult color to apply. In the future I would first apply a white primer to the surface before the yellow.I love the painting pointers Namabiiru, keep them coming. For the Higgins boat I was after a smooth hard-shell look. My results so far point out a lack of proper sanding in the beginning, you can see like a sharp stick in the eye the hills and valleys that show up under certain lighting. Using Vallejo Model Air paints which are already thinned out for use in an airbrush, was also a surprise with how thin it was requiring way too many coats to cover the different shades of wood and putty fillers. On the positive side of this experiment, because of the repeated use of my airbrush, I started learning the tricks to its proper use, there are numerous little things one can do in terms of adjustments, intermediate cleaning between color changes, pressure settings, and needle and tip sizes for the type of paints. All which I am a beginning to get better at. Your suggestion of the Acrylic Gouache sounds interesting, if its thick enough to act like a filler I could apply it with a spatula over the lower groove areas and after drying a light sanding with 400 + paper then respray?
Yep, a lesson I've learned the hard but effective way.Yellow is a very difficult color to apply. In the future I would first apply a white primer to the surface before the yellow.
Good evening all. Here are some more as built photos focusing on the painting of the fuselage. I have also begun the install of the interior furnishings.
See what you think.
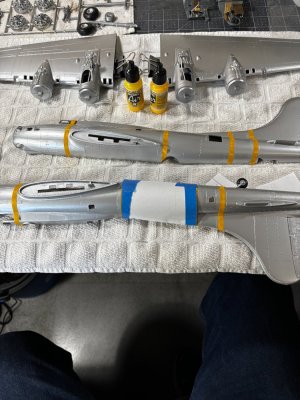
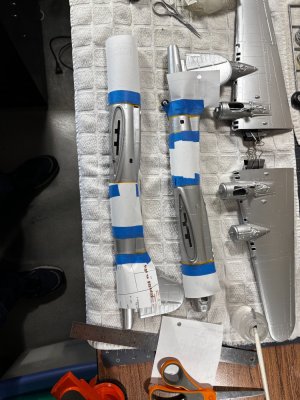
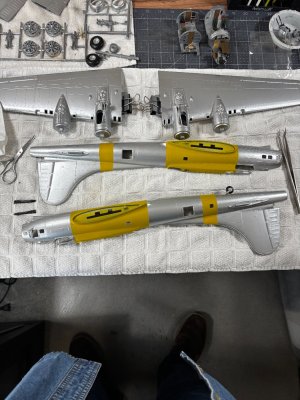
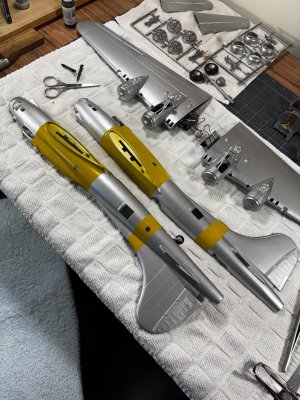
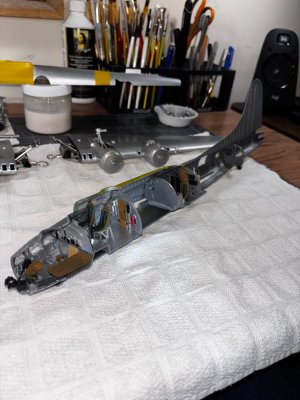
Once I get both half's glued together, I can place 1/8" black art tape along the edge of the yellow to look like the file photo below.
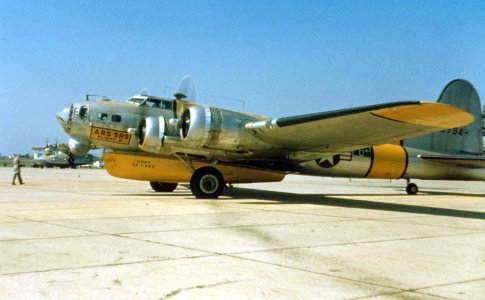
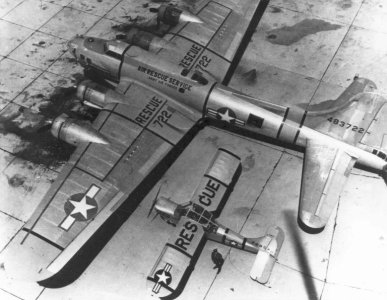
Till next time, thanks for watching.
See what you think.


Once I get both half's glued together, I can place 1/8" black art tape along the edge of the yellow to look like the file photo below.


Till next time, thanks for watching.
Really nice result with the yellow markings, Daniel. Ordinarily, I would recommend closing up the hull and attaching the wings so you can clean up any seams before painting, but you're pretty far along at this point. I think you will have a hard time getting the art tape to stay down in some spots where there are tight curves (not to mention the straight ones peeling up over time). I'd recommend a couple of other options: Best option would be to paint them, but masking them at this point would be really tricky. Ideally, one would lay down the black (or better yet, very dark grey) first, use art or masking tape strips to mask where you want the black stripes, lay down your silver base coat, then mask and spray the yellow, but that would mean starting from scratch. Too much work. Ugh! The second option is to get yourself some decal paper, print a big black decal and cut it into strips (or print stripes and cut them out, but more work this way IMHO). I think the latter is the easiest at this point and you will like the outcome much better than art tape. And since you're going to have to print some custom decals anyway...
Another trick for masking markings is to re-shoot your previous color along the edges of your masking to seal them before spraying your next color. This will prevent paint runs, which are particularly common when you have molded-in panel lines, rivets, etc. Looks like you got a nice crisp result with your yellow, but you may want to try this if you decide to paint your black markings (if the black runs into the yellow, it's going to be very difficult to cover)
Another trick for masking markings is to re-shoot your previous color along the edges of your masking to seal them before spraying your next color. This will prevent paint runs, which are particularly common when you have molded-in panel lines, rivets, etc. Looks like you got a nice crisp result with your yellow, but you may want to try this if you decide to paint your black markings (if the black runs into the yellow, it's going to be very difficult to cover)
I've had experience with art tape producing excellent results on my Bluenose schooner. The trick to keeping it down is overcoat it with clear poly urethane, that is assuming I can get the tape properly placed. If that doesn't work, then double masking a line is the next step. I did use the 'coating the edge' of the yellow masking tape with clear which prior to spraying the yellow which helps prevent under runs of paint. Free handing the black boarder is out of the question so hopefully the black art tape works.I think you will have a hard time getting the art tape to stay down in some spots where there are tight curves
Sometimes success can bring on new problems. First the successes full elements, I found some window molding in the garage that is perfect for the rubberized gasket fitted on the boat's coaming. I trimmed it to fit, all is well. Then located the best spot for the magnets.
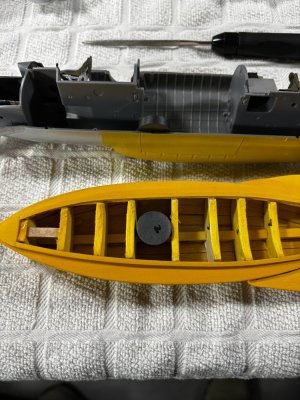
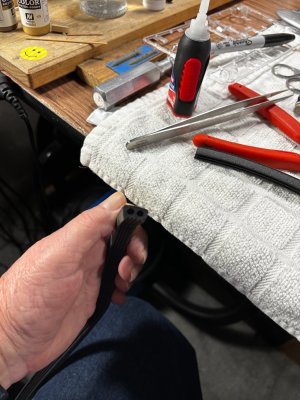
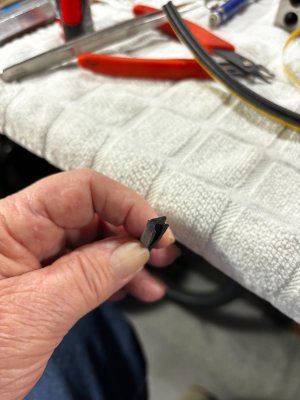
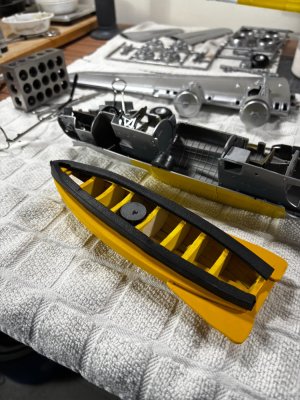
Next is the magnet mate up test which looks good but a bit over scale.
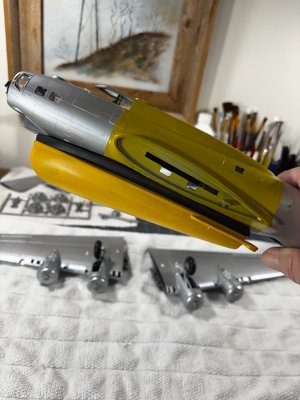
So now for the problem. I dry fitted the wings and wheels to the fuselage and while it looks pretty good there is not enough clearance between the bottom of the boat and the ground. Check it out.
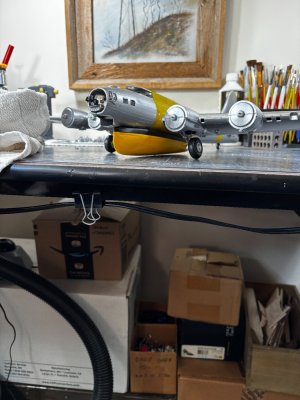
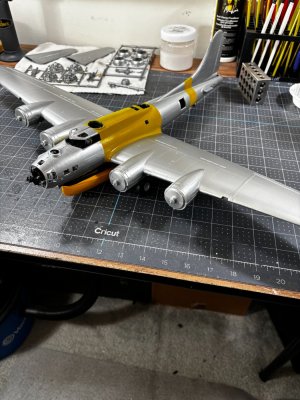
At 1:48 scale I should have about a 1/2" clearance where now I only have about 1/8". There is a flat spot built into the tire to simulate a real-life shape; I have even turned the tire 180 deg to grab a little more height. Look closely at the ground level photo and you can see the flat spot turned up. Somehow, I will extend the landing gear downward 1/4 to 3/8"using some discarded sprue. I will also need to fill in some of the longitudinal joint and paint over it.
Thanks for watching.


Next is the magnet mate up test which looks good but a bit over scale.

So now for the problem. I dry fitted the wings and wheels to the fuselage and while it looks pretty good there is not enough clearance between the bottom of the boat and the ground. Check it out.


At 1:48 scale I should have about a 1/2" clearance where now I only have about 1/8". There is a flat spot built into the tire to simulate a real-life shape; I have even turned the tire 180 deg to grab a little more height. Look closely at the ground level photo and you can see the flat spot turned up. Somehow, I will extend the landing gear downward 1/4 to 3/8"using some discarded sprue. I will also need to fill in some of the longitudinal joint and paint over it.
Thanks for watching.
Kurt Konrath
Kurt Konrath
Lessons learned the hard way tend not to be forgotten unlike those easy simple mistakes that can be easlily corrected.Yep, a lesson I've learned the hard but effective way.
I do use the blue tape, but I find the best results by doing most of my masking with paper and blue tape but on the very edge I use Tamyia tape (which is yellow) that I burnish down. I find it molds extremely well to the contures of whatever you are masking and leaves a very sharp demarcation and will (usually) not pull the underlying tape off.I've had experience with art tape producing excellent results on my Bluenose schooner. The trick to keeping it down is overcoat it with clear poly urethane, that is assuming I can get the tape properly placed. If that doesn't work, then double masking a line is the next step. I did use the 'coating the edge' of the yellow masking tape with clear which prior to spraying the yellow which helps prevent under runs of paint. Free handing the black boarder is out of the question so hopefully the black art tape works.
Rob
Another option perhaps is to thin down that gasket material? Also you may want to consider using smaller really strong neodymium magnets like these. They will hold the boat tightly against the hull of the planeSometimes success can bring on new problems. First the successes full elements, I found some window molding in the garage that is perfect for the rubberized gasket fitted on the boat's coaming. I trimmed it to fit, all is well. Then located the best spot for the magnets.
View attachment 487926View attachment 487927View attachment 487928View attachment 487929
Next is the magnet mate up test which looks good but a bit over scale.
View attachment 487930
So now for the problem. I dry fitted the wings and wheels to the fuselage and while it looks pretty good there is not enough clearance between the bottom of the boat and the ground. Check it out.
View attachment 487931View attachment 487932
At 1:48 scale I should have about a 1/2" clearance where now I only have about 1/8". There is a flat spot built into the tire to simulate a real-life shape; I have even turned the tire 180 deg to grab a little more height. Look closely at the ground level photo and you can see the flat spot turned up. Somehow, I will extend the landing gear downward 1/4 to 3/8"using some discarded sprue. I will also need to fill in some of the longitudinal joint and paint over it.
Thanks for watching.
Rob
Last edited:
Not sure if I am clear here Rob. When I talk about art tape it's not for masking but stays on the model permanently as in pin striping. This pin striping will boarder the yellow and will be black in color.I do use the blue tape, but I find the best results by doing most of my masking with paper and blue tape but on the very edge I use Tamyia tape (which is yellow) that I burnish down. I find it molds extremely well to the contures of whatever you are masking and leaves a very sharp demarcation and will (usually) not pull the underlying tape off.
Rob
Thought about that too Rob but trimming the gasket material in that direction would produce an uneven edge, right now the first uneven edge (vertical cut) is hidden from view. I thought about using the stronger neodymium magnets as well but did not want to take the chance of inadvertently leaning in too close to them because I have a pacemaker implant and I try to stay away from strong magnetic fields, who knows you know. Still, I do very much appreciate your helpful suggestions.Another option perhaps is to thin down that gasket material? Also you may want to consider using smaller really strong neodymium magnets like these. They will hold the boat tightly against the hull of the plane
Rob
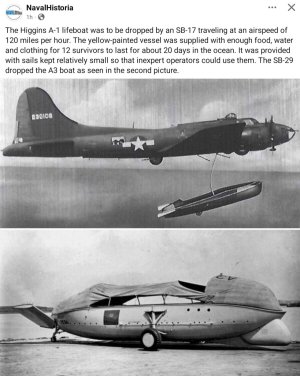
Great pictures Graham, the bottom photo is the lifeboat used with the B29, its much bigger than the B17's boat. My dad had said you could almost park a B17 under each wing of a B29.
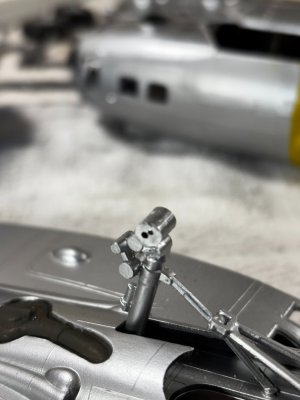
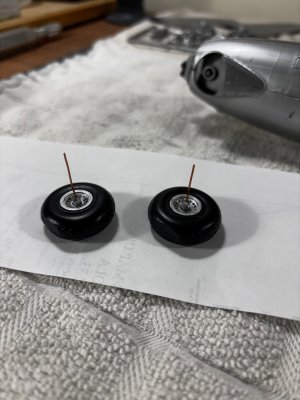
Slowly a little more progress is emerging. I have partially solved the clearance problem between the bottom of the boat and the ground. I say partially because while I have increased the clearance by a quarter inch for a total of 3/8" it still is not quite enough. My solution was to clip off the old axel stub from the landing gear, groove out a semicircular spot and glue in a piece of round sprue which after I drilled a hole in it became the new center of the wheel hub that will receive the new wheel axel.
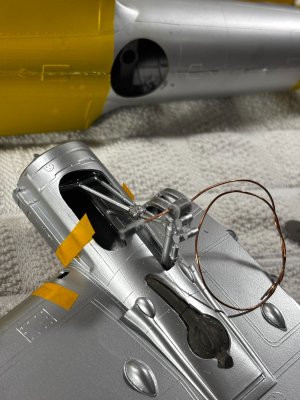
I saved the clipped axel, glued it into the wheel, and drilled a hole in it to receive the new wire axel. What you see here are brass axels which proved to be too weak, so I replaced them with a clipped piece of very stiff paper clip. Worked like a charm.
Next up more painted surfaces on the wings and the addition of my black pin stripping which came out looking very well. I think the decals will be what will make or break the overall appearance on this ship.
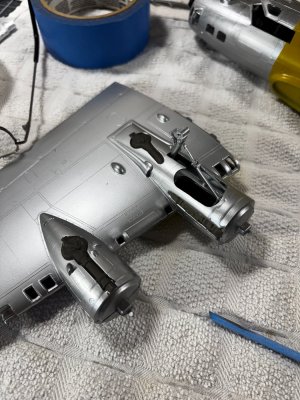
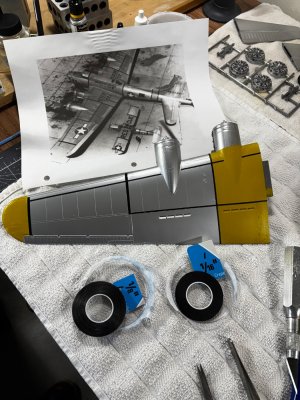
I have some olive drab paint to place on the nacelles and the front hood as an anti-glare from sun light. I would love to just hand paint it on but will probably end up spraying it on after an hour or two of masking them off, ugh. I have been in a battle with the uglies of painting the yellow on the fuselage, between puttying the seam and having it not set up like it was supposed to and trying to match the tone of the yellow which is influenced by the silver sub coat, sanding the top if it off, respraying well it has certainly been an experience in what not to do. Here is a view from a distance, right now I don't want to get too close to it.
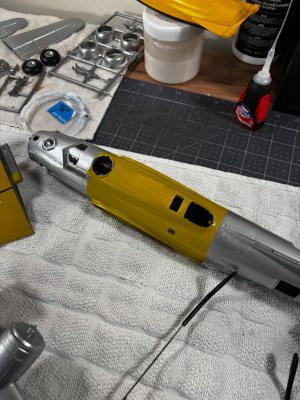
Thanks for stopping by.


I saved the clipped axel, glued it into the wheel, and drilled a hole in it to receive the new wire axel. What you see here are brass axels which proved to be too weak, so I replaced them with a clipped piece of very stiff paper clip. Worked like a charm.

Next up more painted surfaces on the wings and the addition of my black pin stripping which came out looking very well. I think the decals will be what will make or break the overall appearance on this ship.


I have some olive drab paint to place on the nacelles and the front hood as an anti-glare from sun light. I would love to just hand paint it on but will probably end up spraying it on after an hour or two of masking them off, ugh. I have been in a battle with the uglies of painting the yellow on the fuselage, between puttying the seam and having it not set up like it was supposed to and trying to match the tone of the yellow which is influenced by the silver sub coat, sanding the top if it off, respraying well it has certainly been an experience in what not to do. Here is a view from a distance, right now I don't want to get too close to it.

Thanks for stopping by.
Nice pin-striping! Perfect!
You got to remember during war this painting was far from perfect. The color varied tremendously and often they used whatever they had on hand. So I think your planes color is quite acceptable!
Rob
Rob
Thanks Paul, art tape is a wonderful invention.Nice pin-striping! Perfect!
Thanks, Rob, I believe I must be 'painting challenged'. Ha! it's just a battle to keep a positive attitude towards it.You got to remember during war this painting was far from perfect. The color varied tremendously and often they used whatever they had on hand. So I think your planes color is quite acceptable!
Rob
As I said before, I believe yellow is a very difficult color to apply well. It really needs a white primer or base coat and multiple layers. On those B-17s I am sure they just sprayed (or even hand painted) any yellow they could find over whatever base color the B-17 had (later on in the war most B-17s were left unpainted).Thanks, Rob, I believe I must be 'painting challenged'. Ha! it's just a battle to keep a positive attitude towards it.
Rob
Well, I'm glad I took the time to mask off the anti-glare areas and spray it out, there's practically no way I could make this be as smooth as it is with a brush. I will need to spray off the quarter sections of the engine cowlings as well.
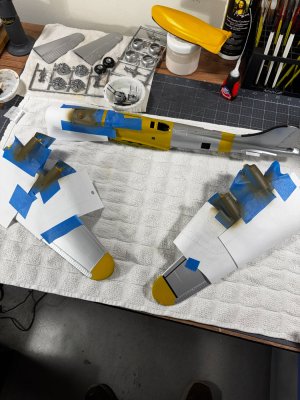
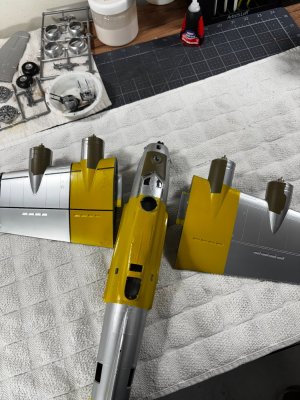
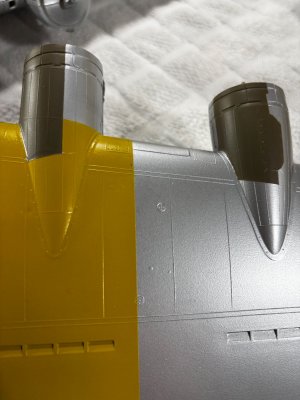
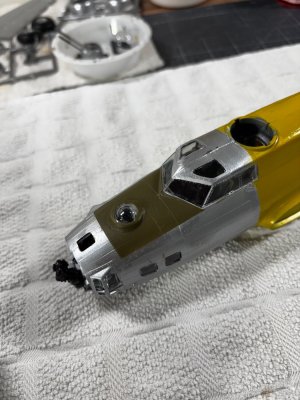
The next trick will be painting the windshields support framework an aluminum color. They made the framework integral with the clear windows. These close ups are very unforgiving, I constantly have to go back and do touch ups where the surfaces get nicked and bumped.
For now, it's back to the pinstriping and more painting.
Thanks for having a look.


