Richard's 19" canoe [COMPLETED BUILD]

Joined
Jul 2, 2020
Messages
4,110
Points
588

Location
Eugene, Oregon
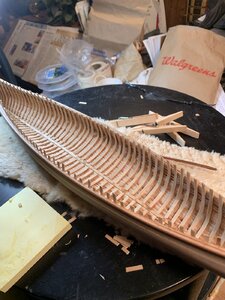
I had a similar problem using hot glue, not well though as several stations were too high and others broke loose. I used some TightBond as a measure to get the loose ones in place. Bad vertical alignment and poor cutout/sanding of the frames from my poor eyesight caused planking alignment problems that do not go away. I have proceeded as a learning experience before doing a second one. After planking up and around to the bottom two of the stations have come loose again but the planking is holding things in place except for not providing a solid base to lay down the last closing strips. There will be a massive sanding job next to try and fair out the exterior and interior faces. All part of live and learn I tell myself not to be too harsh with this one. Some of my strips were not well butted on the edges or aligned so that there is a lot of "corbeling" which hopefully I can sand out. No photos of this mess. Too embarrassing to put up in SoS. Maybe later ones. PT-2
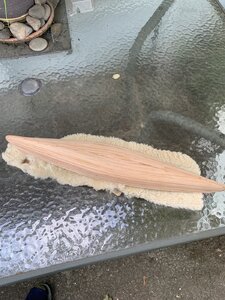
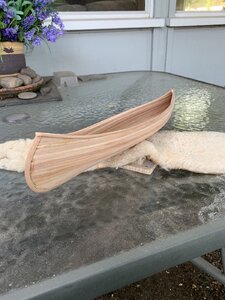
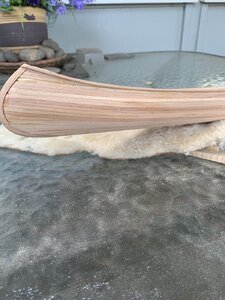
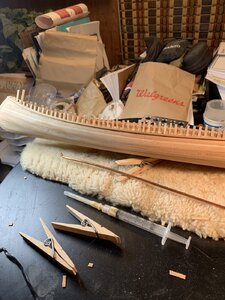
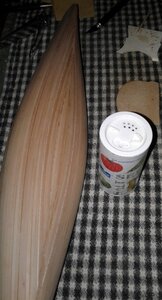
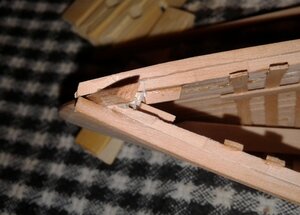
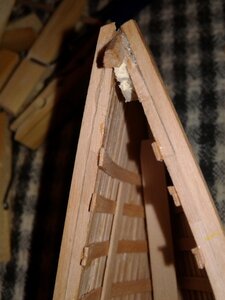
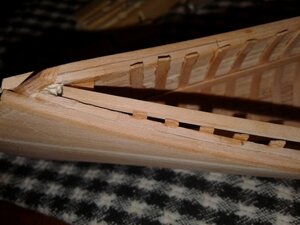
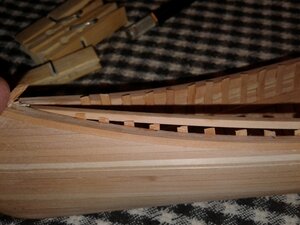
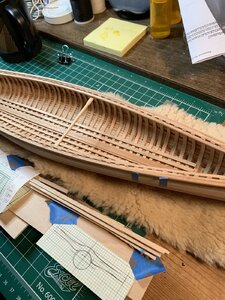
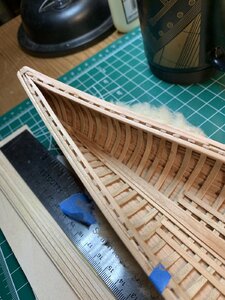
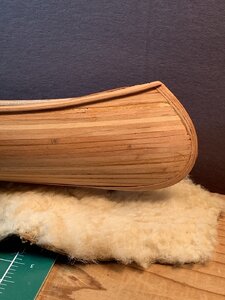
Well now that the planking and exterior sanding are done as well as the stems, outer gunrail, and some interior sanding here is my hull 8/24 with the ribs next. PT-2Canoe Sanded 2.24 A.jpgCanoe Sanded 2.24 B.jpgCanoe Sanded 2.24 C.jpgCanoe Sanded 2.24 D.jpgCanoe Sanded 2.24 E.jpg
 
Looking really good Richard.
You did very well with laying the planking strips and laminating: nice joint lines.
Everything nice and clean. Well done.

If may make a construction comment: the little gaps between the planking and the laminated stems are an easy fix.

Regards.
G
 
Looking really good Richard.
You did very well with laying the planking strips and laminating: nice joint lines.
Everything nice and clean. Well done.

If may make a construction comment: the little gaps between the planking and the laminated stems are an easy fix.

Regards.
G
Thank you for your observations. I assume that you are referring so some additional sanding of the stems for a better mating/flush with the planking joint. I can address that tomorrow. Each day seems to bring a new item previously not noticed but then to be addressed. To be candid, some of my planking seams were wider than I liked so I used your suggestion of adding some adhesive (via a syringe and 18 gauge needle) along the seam and after a light finger smear to smooth it out, a light sanding and resultant sawdust provided the hiding bandage and improved appearance. I don't know how those will show up in the final finishing stages.. Closing the bottom was another problem not seen in these photos and I had to add a couple of "filler" strips where there was too much vertical offset, inside or out, for a flush surface; particularly inside under the inner keel strip which now sits well and the shimming under filler is not visible. This should help with setting the ribs and final appearance. I am not sure how to get the ribs into the very narrow bow and stern areas but that will evolve as I work there. I will likely us my electric plank bender to give them satisfactory mating curve before gluing them in.
 
She's got some lovely coloring there PT-2, super nice work so far Thumbsup
Thank you. There is a lot to be done and I'll try not to rush things along getting to shore as a harbor and docks are not the home place for a canoe which belongs in a quiet wooded enclave before a glowing evening camp fire to illuminate the finish. But then low illumination hides the builders blunders. PT-2
 
Thank you. There is a lot to be done and I'll try not to rush things along getting to shore as a harbor and docks are not the home place for a canoe which belongs in a quiet wooded enclave before a glowing evening camp fire to illuminate the finish. But then low illumination hides the builders blunders. PT-2
OK, here are a couple of crude photos after the ribs set and CV setting up. Second shows my copper wire sixth- finger for my hand to press those small critters into the tight bow and stern areas. The syringe of Tightbond was not used for the ribs but has largely replaced toothpick applications of grog rations to the needy. I will have to see if the same method works for CV glue.. . .very questionable. Thursday night will be trimming the ribs, shaping the inner keel pieces and inner wales before gluing anything in place. The paddle goes on. I will pass faux nails up on thisone as I spent a lot of 80 grit sanding time cleaning up my poor planking and think that the hull is too thin for the wire nails. I'll consider them for the next canoe where I should do a better job of stetting the strips requiring less sanding for a clean outer surface. PT-2Ribs 8.26.jpgRibs and copper helper.jpg
 
You did pretty good with the ribs.
Did you soak the ribs in water for any length of time?
Just for information: here is my fancy "rib pre-bender" for the ribs in the mid-section area: if the rib absolutely needs to be pre-bent (depending on what the lumber looks like - grain direction. It works quite well and it helps getting that approximate curve, you can then apply more pressure with the fingers as the rib is installed (wet, but wiped to get extra water out: so that the lumber is not dripping wet).

20200827_052606 aa.jpg

G
 
Last edited:
You did pretty good with the ribs.
Did you soak the ribs in water for any length of time?
Just for information: here is my fancy "rib pre-bender" for the ribs in the mid-section area: if the rib absolutely needs to be pre-bent (depending on what the lumber looks like - grain direction. It works quite well and it helps getting that approximate curve, you can then apply more pressure with the fingers as the rib is installed (wet, but wiped to get extra water out: so that the lumber is not dripping wet).

View attachment 175585

G
I did soak the ribs in hot water before putting the CV on the back side and then gently pushed them in with my fingers or the copper wire "pusher" in the stems' ends. I had thought about using the electric bender but did not do that. A couple came loose after drying so with their bent cooled shape they were easy to reinstall. I will remember to use a bending form next time around as it can be simulated from the curve of the stations. Not all of the spacing matched my measured marks but I adjusted as I went along laying successive strips in the middle of the spaces created as best as I could by eye. I made a mistake in soaking all of the ribs at the same time so probably half were wetter than they should have been. I wiped them off before applying the glue. I also laid them on one side stations' marks and then on the opposite following midships to stems: stations, half stations, quarter stations fillers. I had to space the order out for my finger size and clips holding setting ribs in place. I also partially trimmed the ribs down so that I could get my hand and fingers in without dislodging those in place figuring that access to placement was more important that your recommendation to do only one side at a time and trim later. Now the close trimming and dry fitting the innerwales along with trimming and fitting the inner keel pieces. which think that I will lay in before the innerwales to keep as much working space as possible. Not the best of rib performance but I can accept that for my first run at this and not keeping every rib precise which the CV doesn't allow. . . at least as I have been using it.

Question. . . you say to use the Instant CV for the innerwales. I have previously had disasters with that as it runs everywhere. My thought is to clamp away some distance, maintaining the curve, and glue only a few in the middle between those spaced clamps. I don't want to glue them in!!!! What is your procedure with this stage????
PT-2

I cut a strip to length by doing a couple of dry-fittings. Then apply glue to every rib along the sheer. To place the inner gunwale, I clamp the strip at one end and work my way to the other. It is usually a bit tricky because of the curves from the top of the stem down towards the mid section and then back up to the top of the stern.
It is difficult to explain except that I proceed very carefully.
You can also apply glue to a few ribs, clamp the strip all the way to the other side, like if you were to dry-fit it the rest of the way, then wait for the glue to dry. Then remove all the clamps through the length that did not receive glue, then apply glue to the next few ribs and repeat the process.

There is also a third method if you are afraid the strip will move down from the top of the stem and stern as it is being clamped to follow the curve of the sheer.
Since I am at this stage on the canoe I am working on, I figure I would use this method to place my inner gunwale.
Here it goes:

1) glue small blocks at the top of the stem and stern to unable the strip to move down when it is placed to follow the curve. The block should be installed so that the inner wale is sitting either leveled with the sheer or slightly higher as you will have to sand the inner gunwale down to line up with the outwale as well as remove any glue from the ribs onto the sheer.
The blocks:

20200828_200032 aa.jpg

or you can use the part of the stem piece from the mold use to lay the planking:
You can create a small ledge in it for the end of the inner gunwale to rest on: like this:

20200828_200110 aa.jpg


2) cut the inner gunwales to length: I would suggest to work on 1 side at a time. Once cut do a final dry-fit...install

3) install the inner gunwale starting at one resting on either the blocks or the ledge into the stem piece.

20200828_200406 aa.jpg

From there you can apply glue at the top portion of the ribs (area in contact with the inner wale) clamp the strip down as you line it up (leveling it) with the sheer.
Here is a view of the strip place at the top of the stem / stern. All you have to do is push it down to line it up with the sheer. Because it rest on the blocks or the ledge, it will not move down and you can just go along the sheer clamping away to the other end.

20200828_200428 aa.jpg

4) clamped and waiting for the glue to dry ... then, the other side....

20200828_205152 aa.jpg

Hope this helps.

G
 
Last edited:
I cut a strip to length by doing a couple of dry-fittings. Then apply glue to every rib along the sheer. To place the inner gunwale, I clamp the strip at one end and work my way to the other. It is usually a bit tricky because of the curves from the top of the stem down towards the mid section and then back up to the top of the stern.
It is difficult to explain except that I proceed very carefully.
You can also apply glue to a few ribs, clamp the strip all the way to the other side, like if you were to dry-fit it the rest of the way, then wait for the glue to dry. Then remove all the clamps through the length that did not receive glue, then apply glue to the next few ribs and repeat the process.

There is also a third method if you are afraid the strip will move down from the top of the stem and stern as it is being clamped to follow the curve of the sheer.
Since I am at this stage on the canoe I am working on, I figure I would use this method to place my inner gunwale.
Here it goes:

1) glue small blocks at the top of the stem and stern to unable the strip to move down when it is placed to follow the curve. The block should be installed so that the inner wale is sitting either leveled with the sheer or slightly higher as you will have to sand the inner gunwale down to line up with the outwale as well as remove any glue from the ribs onto the sheer.
The blocks:

View attachment 175871

or you can use the part of the stem piece from the mold use to lay the planking:
You can create a small ledge in it for the end of the inner gunwale to rest on: like this:

View attachment 175872


2) cut the inner gunwales to length: I would suggest to work on 1 side at a time. Once cut do a final dry-fit...install

3) install the inner gunwale starting at one resting on either the blocks or the ledge into the stem piece.

View attachment 175873

From there you can apply glue at the top portion of the ribs (area in contact with the inner wale) clamp the strip down as you line it up (leveling it) with the sheer.
Here is a view of the strip place at the top of the stem / stern. All you have to do is push it down to line it up with the sheer. Because it rest on the blocks or the ledge, it will not move down and you can just go along the sheer clamping away to the other end.

View attachment 175874

4) clamped and waiting for the glue to dry ... then, the other side....

View attachment 175875

Hope this helps.

G
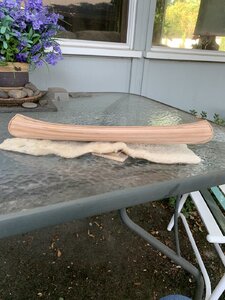
Yes, for my next canoe. What I did during my dry fit was to moisten, not soak, the inwale and use my electric strip bender to approximate the thwartships curve and then the rise to the stems at each end. It made my installation much easier than I anticipated. However, being new and trying to look at things from both sides for alignment with the clamps the inwales still slipped down somewhat making a sanding job of both wales to even out the inner faces of the rib 's tops. That is still to be slowly worked at s if I am too vigorous it dislodges the rib top and I have to go back to add a small amount of CV and hold it in position.

I went ahead and have installed the inner keel parts and have added two "floor boards" on each side spaced the same amount as their width. I did this thinking that when paddling I never sat on the seat but on my knees to better control the hull with my backside against the front of the seat. Good for control but hard on the knees therefor floorboards on top of the ribs which don't present the rib edge point pressure. Thwart installed between the yoke and stern seat positions, and tomorrow will be cutting out the yoke and frames for the seats. I may take and send a status photo shortly. PT-2
Three from Friday evening. PT-2Canoe 8.28 A.jpgCanoe 8.28 B.jpgCanoe 8.28 C.jpg
 
I cut a strip to length by doing a couple of dry-fittings. Then apply glue to every rib along the sheer. To place the inner gunwale, I clamp the strip at one end and work my way to the other. It is usually a bit tricky because of the curves from the top of the stem down towards the mid section and then back up to the top of the stern.
It is difficult to explain except that I proceed very carefully.
You can also apply glue to a few ribs, clamp the strip all the way to the other side, like if you were to dry-fit it the rest of the way, then wait for the glue to dry. Then remove all the clamps through the length that did not receive glue, then apply glue to the next few ribs and repeat the process.

There is also a third method if you are afraid the strip will move down from the top of the stem and stern as it is being clamped to follow the curve of the sheer.
Since I am at this stage on the canoe I am working on, I figure I would use this method to place my inner gunwale.
Here it goes:

1) glue small blocks at the top of the stem and stern to unable the strip to move down when it is placed to follow the curve. The block should be installed so that the inner wale is sitting either leveled with the sheer or slightly higher as you will have to sand the inner gunwale down to line up with the outwale as well as remove any glue from the ribs onto the sheer.
The blocks:

View attachment 175871

or you can use the part of the stem piece from the mold use to lay the planking:
You can create a small ledge in it for the end of the inner gunwale to rest on: like this:

View attachment 175872


2) cut the inner gunwales to length: I would suggest to work on 1 side at a time. Once cut do a final dry-fit...install

3) install the inner gunwale starting at one resting on either the blocks or the ledge into the stem piece.

View attachment 175873

From there you can apply glue at the top portion of the ribs (area in contact with the inner wale) clamp the strip down as you line it up (leveling it) with the sheer.
Here is a view of the strip place at the top of the stem / stern. All you have to do is push it down to line it up with the sheer. Because it rest on the blocks or the ledge, it will not move down and you can just go along the sheer clamping away to the other end.

View attachment 175874

4) clamped and waiting for the glue to dry ... then, the other side....

View attachment 175875

Hope this helps.

G
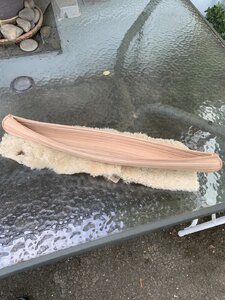
What is the bluish cast on the strips? Looks like it may have encountered a turquois laden stream but certainly a different presentation. PT-2
 
Three from Friday evening. PT-2

Looking very good indeed.
Now think about varnishing the inside: it makes it easier to do it soon.

____________________
When sanding the top of the sheer with a the ribs sticking out: I cut the ribs as close to the gunwales as possible with a sharp knife and then sand lightly to get started. Once every is leveled (gunwales, planking and rib-tip) then, harder sanding (although i would not use anything rougher than 180 or 220) so that the top surface is one smooth plane.
If the tip of a rib moves, it can easily be moved back in place and glued again.

G.
 
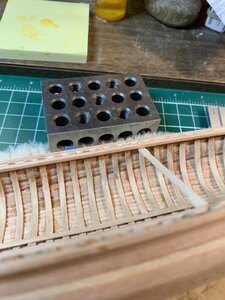
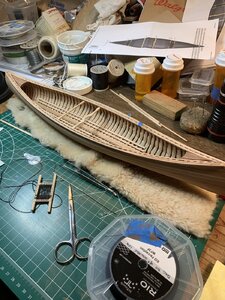
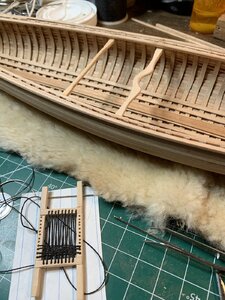
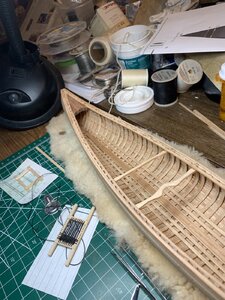
Today was production of two decks from some Bubinga that I had, the yoke, and frames for two seats drilled for lacing which is only about half done on the stern seat. That is tedious so I quit for the night and will resume tomorrow. I will do a finish touchup sanding and then put a coat of finish on the interior as you suggest before anything else will be mounted other than dry fit checks. I may cut and bend a Canoe 8.29 A.jpgCanoe 8.29 B.jpgCanoe 8.29 C.jpgtrim on the inboard faces of the decks which are slightly convex and simple in a more traditional manner. There will be plenty of opportunity for embellishments with a second canoe. PT-2
 
Seat frame = cherry
Paddles = birch

In the end, are you using water based or oil based varnish?
The water based will give you a lighter tone. The varnish is cloudy white-(ish)
Oil based will darken the cherry. The varnish is clear and darker.
But I am sure you already know that...

G
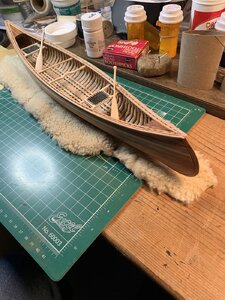
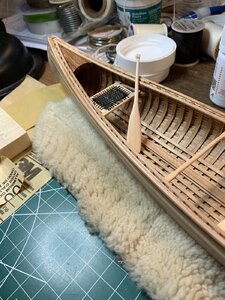
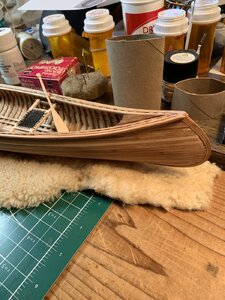
Yes, waterbased Varthane Ulltimate Polyurethane. I didn't know it was white or that the finish would be essentially the same color as the wood but two coats are now applied Canoe 8.31 A.jpgCanoe 8.31 B.jpgCanoe 8.31 C.jpgCanoe 8.31 D.jpgand the third tonight with the paddles and seat frames receiving their first coat. I am going to use some Varathane Spar Urethane (outdoor) for the seats and paddles which should darken them as you mention. I don't have the range of wood that you have so I used the basswood plank left over for the interior accessories. Here are four photos of the canoe such as it is for this time into the pond. I hope to improve the still existing imperfections next time and will try a different method of weaving the seats. . . probably with two thinner strips with weaving in only one to reduce the vertical displacement which with my over and under lacing pulls the lines out of place and not in a neat square/rectangular spacing. I did use watered down white glue to hold the lines in place. My brass rods arrived this morning but I had already decided not to use them as faux nails on this as I think the hull strips are too thin after my sanding to even the faces out. Your suggestions are always welcome to help me along. PT-2
 
I don't know what caused the duplication of photos but maybe if they were horizontal you could see things in 3-D :) PT-2
 
Back
Top