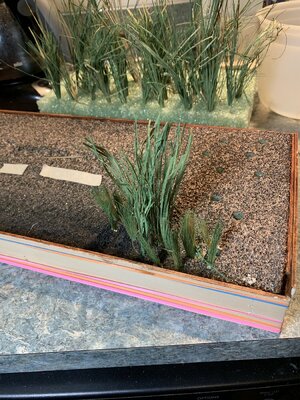
After looking at some shallow and deeper water marshes and plants I have decided to take mine from the dried out Autumn setting into a more lush and green growing early Summer by using some plant color green spray paint on the reeds, rushes and grass to mix with some actual small ones that I extracted and have clear spray coated with an acrylic to see how they are preserved. I will put a frame around the carved out foam base to form a dam the front so that I can approximate the amount of resin that I will need to use for the "water". Once that is known I can punch some holes to set the water reeds before the first resin layer is added. Plantings above the water will be set into holes with glue and then banked back with ground cover.Following and during the last finish coats I bought a 2-inch thick green foam floral base board to shape into my marsh diorama; went to the local reservoir lake to get some small plant materials to spray with acrylic to fix them; then making not of the large cat tails and rushes went home to use some dead Iris leaves to shred into small strips for faux rushes, and cut up two cheap bristle paint brushes to make into marsh grass. The cut off bristles are place between two coffee sticks, the ends glued, and then can be cut into smaller clumps when dry. I'll attach some photos of the "build presentation progress" of materials assembly/prep. After the new insertion procedure when I tried to delete the thumbnail it deleted the full size as well... I went back to reattach that but I don't know how to delete the duplicated photos!!!!!! Please ignore what you will recognize as a prior photo already seen and proceed, trying to keep the process in mind and order.I still cannot find where to put the cursor between or after photos to add comments captioning each photo!!!!!!!!!! Sorry for my mess inflicted on your time. I will begin to "plant some of the faux flora and also determine how much resin will be needed for the water in front of the marsh beach. Possibly by putting a temporary front frame to support a plastic wrap tub and pour some water in to determine the volume. Hopefully it will not leak. PT-2
View attachment 182875View attachment 182876View attachment 182877View attachment 182878View attachment 182877View attachment 182880View attachment 182882
-

Win a Free Custom Engraved Brass Coin!!!
As a way to introduce our brass coins to the community, we will raffle off a free coin during the month of August. Follow link ABOVE for instructions for entering.
-

PRE-ORDER SHIPS IN SCALE TODAY!
The beloved Ships in Scale Magazine is back and charting a new course for 2026!
Discover new skills, new techniques, and new inspirations in every issue.
NOTE THAT OUR FIRST ISSUE WILL BE JAN/FEB 2026
- Home
- Forums
- Ships of Scale Group Builds and Projects
- Group Build Archives
- Canoe Group Build
- Canoe Build Logs
You are using an out of date browser. It may not display this or other websites correctly.
You should upgrade or use an alternative browser.
You should upgrade or use an alternative browser.
Richard's 19" canoe [COMPLETED BUILD]
- Thread starter PT-2
- Start date
- Watchers 8
-
- Tags
- completed build
After using a plants green enamel the reeds and rushes are ready for planting below the resin waterline. After that is set I'll do an additional pour to fill up the front of the base frame and proceed to set the rest of the marsh plants with additional ground cover.Following and during the last finish coats I bought a 2-inch thick green foam floral base board to shape into my marsh diorama; went to the local reservoir lake to get some small plant materials to spray with acrylic to fix them; then making not of the large cat tails and rushes went home to use some dead Iris leaves to shred into small strips for faux rushes, and cut up two cheap bristle paint brushes to make into marsh grass. The cut off bristles are place between two coffee sticks, the ends glued, and then can be cut into smaller clumps when dry. I'll attach some photos of the "build presentation progress" of materials assembly/prep. After the new insertion procedure when I tried to delete the thumbnail it deleted the full size as well... I went back to reattach that but I don't know how to delete the duplicated photos!!!!!! Please ignore what you will recognize as a prior photo already seen and proceed, trying to keep the process in mind and order.I still cannot find where to put the cursor between or after photos to add comments captioning each photo!!!!!!!!!! Sorry for my mess inflicted on your time. I will begin to "plant some of the faux flora and also determine how much resin will be needed for the water in front of the marsh beach. Possibly by putting a temporary front frame to support a plastic wrap tub and pour some water in to determine the volume. Hopefully it will not leak. PT-2
View attachment 182875View attachment 182876View attachment 182877View attachment 182878View attachment 182877View attachment 182880View attachment 182882
- Joined
- Feb 18, 2019
- Messages
- 717
- Points
- 353

This is interesting as it is as much about the canoe as it is about the display, which is an art in itself.
Thank you Richard.
G.
Thank you Richard.
G.
After the very nice canoe now another diorama. That looks very interesting. Especially the technique of the botanical design is very exciting. And I guess water is added as well. 
matz
matz
Yes a faux water using fiberglass resin will be a new venture. As marsh water is typically calm I won't worry about whitecaps. PT-2After the very nice canoe now another diorama. That looks very interesting. Especially the technique of the botanical design is very exciting. And I guess water is added as well.
matz
I learned a lesson today about materials compatibility. . . the floral foam base does not like fiberglass resin and seems to melt back at the edge meeting the wooden frame at the pond. I used a quarter of a pint per pour and watched it flow out from under the board. Taped it up trying to seal the leaks to little avail. Even waiting as long as I felt comfortable before making the pour I lost about half each time. It can sit as it is tonight laminated to the paper bag beneath and I'll resume trying to close the dam and fill the pond!!! PT-2Yes a faux water using fiberglass resin will be a new venture. As marsh water is typically calm I won't worry about whitecaps. PT-2
Looking at the solidified resin around and under the marsh board it will be another challenge how to cut it away in a salvageable manner. I had to see the eye doc today so I could nothing with it other than pick it up and see what I will have to take on Wednesday morning. Lesson learned the hard way in that I should have tried an experimental pour before going the whole way. Worse case may be to wrap another frame around the present one when the pond is done. I would rather begin to do some serious marsh restoration planting. It is more creative and rewarding. PT-2I learned a lesson today about materials compatibility. . . the floral foam base does not like fiberglass resin and seems to melt back at the edge meeting the wooden frame at the pond. I used a quarter of a pint per pour and watched it flow out from under the board. Taped it up trying to seal the leaks to little avail. Even waiting as long as I felt comfortable before making the pour I lost about half each time. It can sit as it is tonight laminated to the paper bag beneath and I'll resume trying to close the dam and fill the pond!!! PT-2
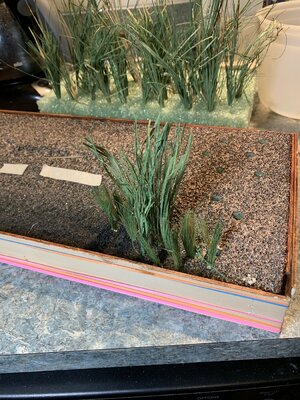
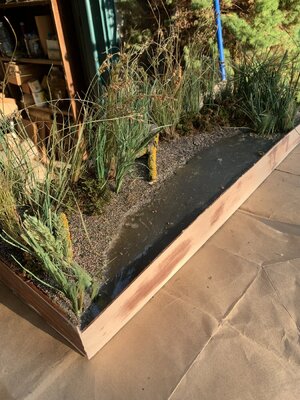
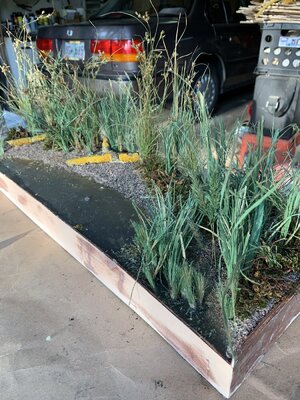
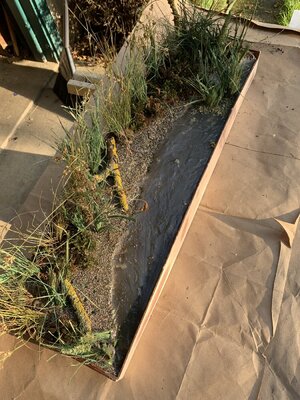
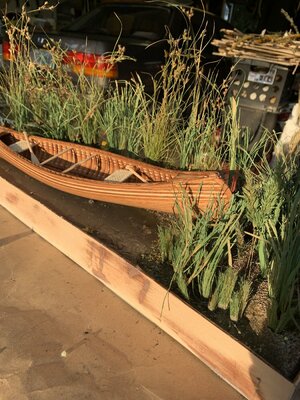
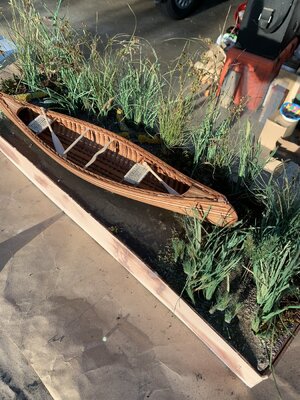
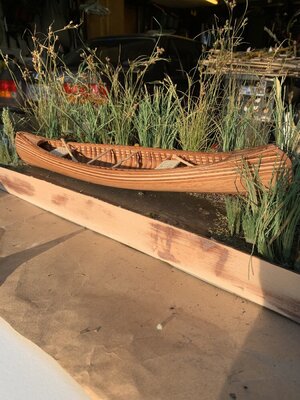
After two days of sanding surgery to remove flood of resin under and around the board I planted the marsh. Photos in front of my garage with the setting sun rapidly dropping down:Looking at the solidified resin around and under the marsh board it will be another challenge how to cut it away in a salvageable manner. I had to see the eye doc today so I could nothing with it other than pick it up and see what I will have to take on Wednesday morning. Lesson learned the hard way in that I should have tried an experimental pour before going the whole way. Worse case may be to wrap another frame around the present one when the pond is done. I would rather begin to do some serious marsh restoration planting. It is more creative and rewarding. PT-2
Three of the board and plantings at the water's edge. The four views with the canoe set in place as a trial run before dusk sets in. Still have to repair and refinish the fame and then try a focused set of photos with a black background.
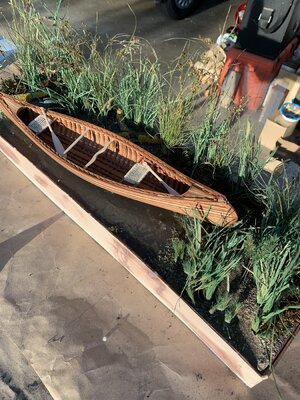
Last edited by a moderator:
- Joined
- Feb 18, 2019
- Messages
- 717
- Points
- 353

Looking good.
G.
G.
Thank you. While refinishing the wood frame I have to find a wood base and get an acrylic cover made as the faux flora can only tolerate so much dust and cobwebs unlike their actual big brothers. PT-2Looking good.
G.
Really good looking diorama - great way of presentation
With the frame refinished I am looking for a board to place it upon and then encase the results in an 8"x10"x25" acrylic cover similar to the one for the previous 19" on the forest bank. Thanks for your reaction to the early just planted marsh with the canoe set in for a check. PT-2Really good looking diorama - great way of presentation


