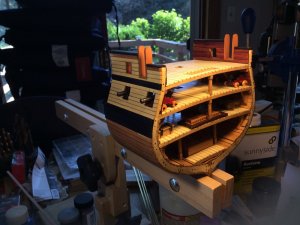
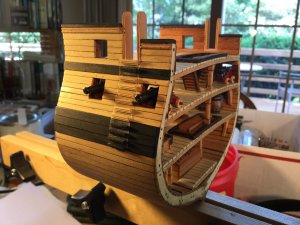
Royal Navy Ship of the Line Cross Section by DocBlake - (Mamoli's "Constitution") - 1:93 scale [COMPLETED BUILD]

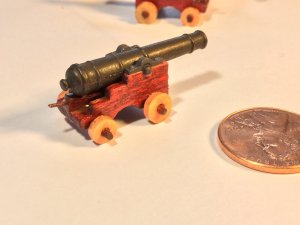
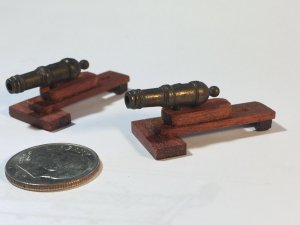
I'm working on the long guns on the gun deck. I used some boxwood trucks I had left over, and replaced the metal axles in the kit with walnut axles. I colored the carriage with a red Sharpie, then gave it a coat of poly. I'm not sure how much hardware and rigging I'll use at this very small scale...maybe none. I will place cap squares, though. The red Sharpie on walnut turns out pretty nice, I'd say!View attachment 40297
G'day Dave
I never thought to use a sharpie to do the 'painting', thanks for the great idea.
My grandfather had a saying. 'If you learnt something today, the day wasn't wasted. Thanks to you, my day wasn't wasted.
Happymodeling
 
There is only one caveat: Sharpie ink can "bleed" a little with polyurethane. If you don't want your trucks to turn a little "pink" using the same brush to poly the red parts and then the trucks, seal all the Sharpie colored wood first, let it dry and then do the trucks . The second coat doesn't matter, since the red is sealed.
 
All four long guns are completed. The kit provided cap squares that actually looked pretty good so I used them. I'm not planning any further hardware or rigging for the cannon carriages. At this small scale, it will be impossible to rig blocks that aren't 18 scale inches long! In my opinion, nothing ruins the appearance of a rigged gun more than out of scale blocks. Ditto for eyebolts and rings that are out of scale.donegun.JPG
 
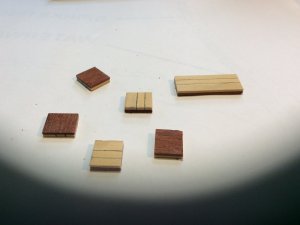
I decided to fit the gunport lids to the ports before setting the cannons into position. These will be pinned and glued into position later, just before applying poly to the exterior hull. I took 3 planks of boxwood that matched the planking width at the level of the ports and placed them tightly together side by side on some double sided tape stuck to my work surface. I glued a single piece of bloodwood to cover. when dry, I sanded the bloodwood flush with the planking and cut the individual lids from the blank. They will be pinned and glued after the hinges are applied and the rest of the model is finished..gunport lids.JPG
 
Very good explanation, how to do identical lids.....thanks
BTW: I agree with you about rigging the guns.....if the blocks are out of scale - it is looking credible
 
Don: Those are stock kit parts. They are 1mm thick, not including the simulated bolt thickness. Even at that, they are a bit out of scale for this tiny little model. I think something like these would look great on the battle station guns. The plans call for cap squares that look similar.
 
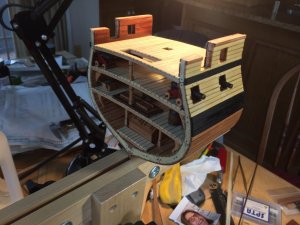
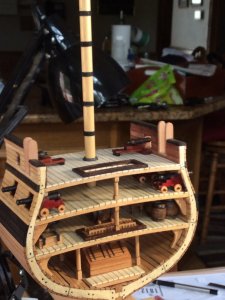
Progress to date. The upper deck has been framed and planked, with the passageway opening to the gun deck framed out. Ladders will lead below. The inboard bulwark planking is bloodwood. Next up is to fit the cap rails and frame in the entryways on either side of the cross section. I also need to fabricate new wooden carriages for the carronades, install the rosewood trim around the stairway opening and place the stanchions for the rope rail. There is a bitt with belaying pins that needs to be remade and installed. Then I turn my attention to the outside of the hull. If you look closely you can see the holes where the pins fixing the gun port lids will attach.thirddeck.JPG
 
Nice work Dave, she is a beauty.
Mike
 
The carronades for the spar deck are cast metal, and are the same design as currently in use on the real ship. These were introduced during the 1927 refit of the Constitution and are not original to the ship. I opted to rebuild them in the style used for the British 36 pound carronade dubbed "the Smasher". I plan a minimalist approach (no rigging or fittings) because of the small scale. The wood is better than cast metal, anyway. I also completed the woldings on the stub mast.carronades.JPG
 
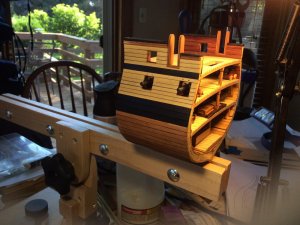
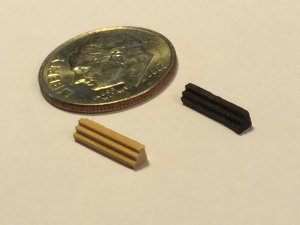
I've been busy with other projects, but it's time to put this one to bed! I've been procrastinating because I need to add the boarding stairs and I think this is going to be a really stressful, difficult part of the build. The first step is to cut the individual treads from ebony and boxwood. The treads are 2mm X 2mm X 10mm, which is very small! I first cut the tread profile on my Byrnes saw, then cut out each individual tread. Here's a shot of the treads stuck to the side of the hull with my go-to temporary adhesive : double-sided tape. Placement of the treads is really finicky. I think I'll take a few days to work up the courage to start gluing them in place!treads.JPGboarding.JPG
 
Yes.....the situation will not change (but I know very well the situation) -> make it, the steps are looking good.
But keep in mind - only a small dip of glue and no shaking fingers and and and......... :cool:
 
Back
Top