-

Win a Free Custom Engraved Brass Coin!!!
As a way to introduce our brass coins to the community, we will raffle off a free coin during the month of August. Follow link ABOVE for instructions for entering.
-

PRE-ORDER SHIPS IN SCALE TODAY!
The beloved Ships in Scale Magazine is back and charting a new course for 2026!
Discover new skills, new techniques, and new inspirations in every issue.
NOTE THAT OUR FIRST ISSUE WILL BE JAN/FEB 2026
You are using an out of date browser. It may not display this or other websites correctly.
You should upgrade or use an alternative browser.
You should upgrade or use an alternative browser.
Royal William Euromodel 1:72 by Vince P. -- FINISHED
- Thread starter Vpirozzi
- Start date
- Watchers 23
-
- Tags
- euromodel royal william
Excellent work. Very nice log. Easy to follow your progress.
- Joined
- Nov 26, 2018
- Messages
- 546
- Points
- 343

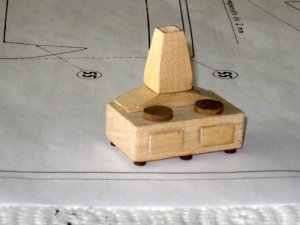
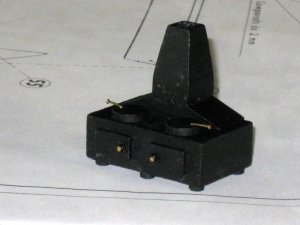
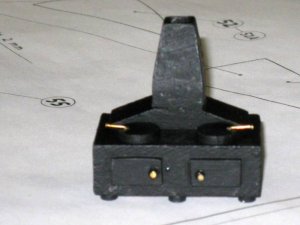
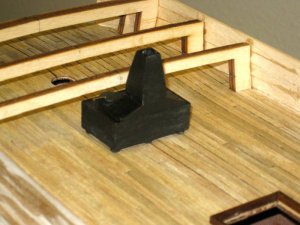
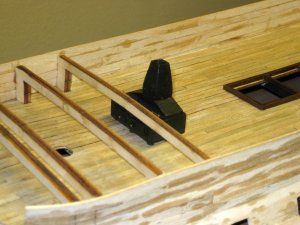
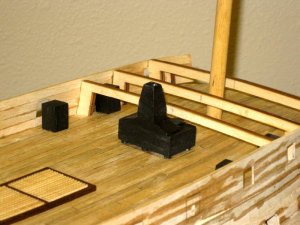
Constructing the ship's stove. Like the main deck staircase, this will be covered up with the upper decks. The kit provides drawings for these things, but no supplies, in case the builder desires to add as much detail as wanted. This is one of the main reasons why I bought this kit. To build just the basic kit, just the stove chimney would be needed. The whole stove is a nice touch so I built it out of bits and pieces from my lumber stash. I placed it on the deck temporarily to show where it goes. The chimney stack comes up through the forecastle deck.
Vince P.
Vince P.


- Joined
- Nov 26, 2018
- Messages
- 546
- Points
- 343

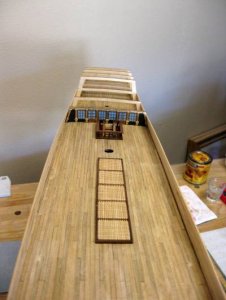
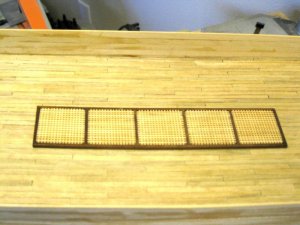
The main deck gratings completed and in place. If you are going to use PVA glue to construct them, dilute it to at least 50/50 glue and water. It makes it much easier to work with and still holds everything in place. I just dunked the little slots in the glue and pressed each piece into place. I did not immerse the entire grate after construction. Each is finished in one coat of a natural oil based finish, since I think the natural wood color is perfect. When placing the gratings, the ribs running along the top of the grate should run in line with the length of the ship.
Next up: Construct a main deck gun so I can set the height of the main deck ports and cut them out.
Vince P.
Next up: Construct a main deck gun so I can set the height of the main deck ports and cut them out.
Vince P.


- Joined
- Nov 26, 2018
- Messages
- 546
- Points
- 343

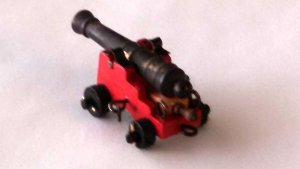
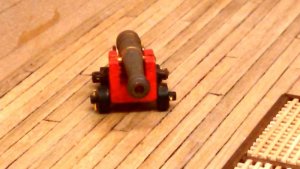
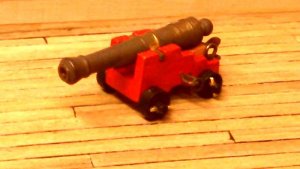
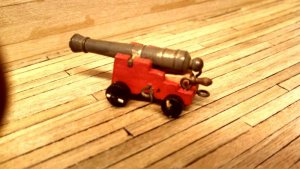
One main deck gun constructed. I need this gun for setting the height of the gun deck ports off of the deck. I decided to enhance the construction from the basic kit design and supplies. I tapered the carriage from 10.5mm wide to 10.5 at front and 9.0 at rear. Also tapered front of carriage slanting backward from bottom up. I also added the qoin for elevating the barrel and the cotter pins for the truck wheels. If you are going to add the cotter pins, the front axle needs to be lengthened to 19.25mm and the rear to 18.0mm. I aged the brass barrel and eye bolts with a blackener. The only thing missing at this point is the trunion bands to hold the gun barrel on the carriage. I did not have any suitable material to make this, but have some copper strips coming. Will add later.
Vince P.
Vince P.


- Joined
- Nov 26, 2018
- Messages
- 546
- Points
- 343

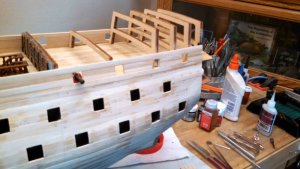
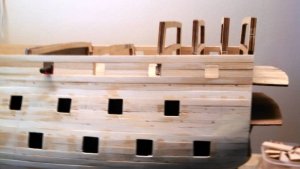
Since the Quarter and Forecastle decks are to be positioned soon, it is necessary to cut out the gunports below them on the main deck. Plan sheet #8 gives locations horizontally, but the height off the deck should be measured from an actual gun assembly. I noticed a note from KeithW. that no mention is made of the different gunport sizes in the plans. This is not correct as they are clearly marked with dimensions on the plans.
Vince P.
Vince P.


- Joined
- Nov 26, 2018
- Messages
- 546
- Points
- 343

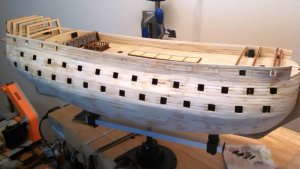
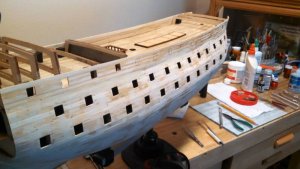
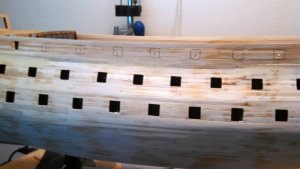
All of the main deck gun ports are either just marked or cut out. Since I am adding another duplicate layer of first planking inside the bulwarks to strengthen it, I only marked those ports. The long run of unsupported bulwarks on the main deck between the forecastle and the quarterdeck requires some reinforcement. I am adding another layer of first planking on the inside of the bulwarks. This will double the thickness and strengthen the wall. Once the duplicate layer is added (next up), I will cut out the ports. The others below the quarter and forecastle decks are cut out and the gun supports are in place. On all the ports that are in front of bulkheads, I cut them out too, but will close them off with a cover.
Vince P.
Vince P.


- Joined
- Nov 26, 2018
- Messages
- 546
- Points
- 343

Thanks Denis, I too have gained some tricks from you over the years. That is part of the fun. Glad we are back at it again.Hi Vince
Just a fantastic build from you as a master model builder.
Reminds me of your SOS build.
I have to say I have pinched one or two tricks off you like bleaching your planking that I used on my RW.
Denis.
- Joined
- Nov 26, 2018
- Messages
- 546
- Points
- 343

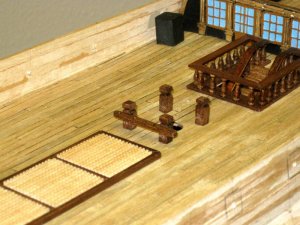
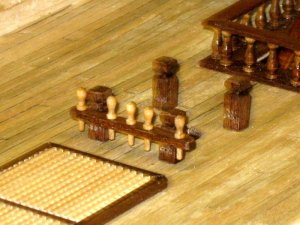
Placing the bitts and fife rail around main mast.
The plans do not show belaying pins in the fife rails and they are not included in the kit. The original ship was launched as the HMS Prince in 1670 which was just about the time that belaying pins started to be used. The Royal William was launched in 1719 as a rebuild of the Prince. There is more likelihood that the RW had belaying pins than not, so I added them. The foremast will have 2-3-2 configuration and both the main and mizzen will have a 1-3-1 configuration. I will not add the taller anchor bitts until the quarter deck is in place because they have to be at the same height and I will use the quarterdeck as the reference.
Vince P.


- Joined
- Nov 26, 2018
- Messages
- 546
- Points
- 343

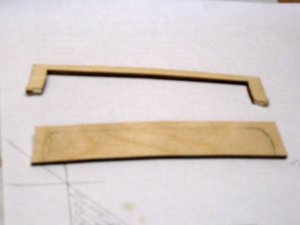
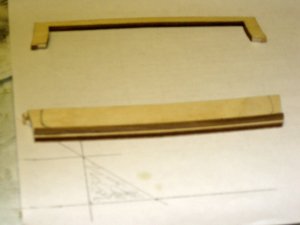
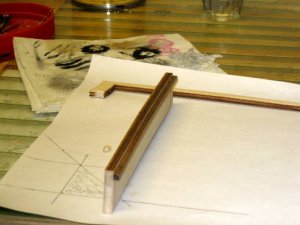
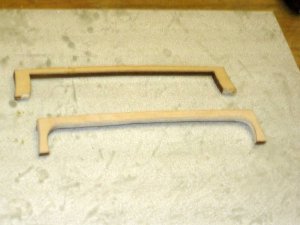
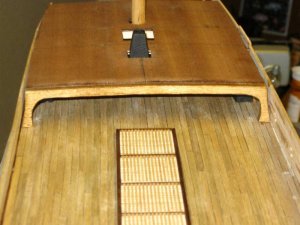
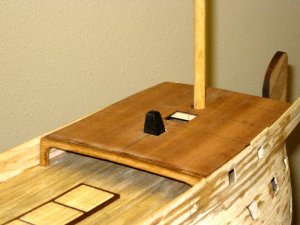
Placing the forecastle deck. It sits on top of bulkheads "B, C, D, E, F", but the upper section of bulkhead "B" had to be cut away at the level of the main deck. This leaves a considerable length of the forecastle hanging with no support at the aft end. Ships had support members called "Breast Beams" to support the overhanging ends of upper decks. Here this has to be made from scratch. I used the cut off top of bulkhead B to mark off the convex slope of the deck onto the lumber used to make the beam. I used a piece of plywood that was one of the cutouts from the laser cut bulkheads. I measured the width and height needed from the ship and cut it out with a jig saw. I then took a piece of 4x4mm stock and curved it to match the deck curvature and glued it across the top with a recess equal to the thickness of the false forecastle deck. This will provide a rebate across the top of the beam to support the false decking and apply the correct curvature. It was then finished with a coat of golden oak.
Before placing the deck, the stove was placed and a cutout made to the deck for the stack. The foremast was also inserted to make sure alignment was correct since the mast goes through 4 decks. Once the deck was aligned and secured, the breast beam was placed and secured as well. The spaces you see at the edges where it meets the bulwarks will be filled with the 2 inner layers of planking to be added to bulwarks.
Vince P.


- Joined
- Nov 26, 2018
- Messages
- 546
- Points
- 343

- Joined
- Nov 26, 2018
- Messages
- 546
- Points
- 343

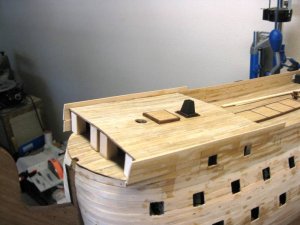
The forecastle deck is finished, planked, and the foreword supporting blocks in place to hold up the deck and as a backing for the prow deck in the future. The double frame around the stove chimney has been added along with the grating. There is some inclination to place other deck fixtures at this point such as bits and fife rail, but I will not do this just yet. The whole hull will have to be inverted at some point to add the second finish layer of planking and anything protruding up to or past the bulwarks could get in the way or be damaged. I had no choice with the stove, as it had to be placed before the deck was installed.
I think next up will be to add the second layer of first planking to the inside of the bulwarks and then extend the first planking up beyond the main deck along the entire hull to correspond with the aft upper decks.
Vince P.
I think next up will be to add the second layer of first planking to the inside of the bulwarks and then extend the first planking up beyond the main deck along the entire hull to correspond with the aft upper decks.
Vince P.


- Joined
- Nov 26, 2018
- Messages
- 546
- Points
- 343

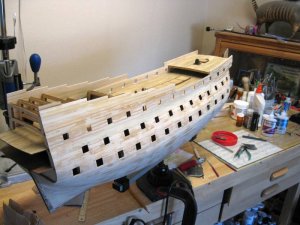
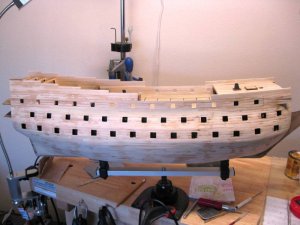
The first layer of planking all the way up to the upper deck bulwarks is completed. I have added some length to the upper deck bulwarks planking just to make sure the metal siding pieces will fit, and then I can cut off the excess later. All of the main deck gun ports are also cut and the doubled layer of planking on the inside of the main and forecastle bulwarks has been added. I am not sure exactly what is the next step until I do some research, but I am thinking of applying the finish layer of walnut planking to the inside of the main and forecastle bulwarks and then installing the quarterdeck.
Vince P.
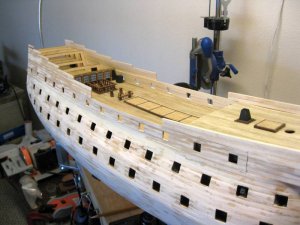
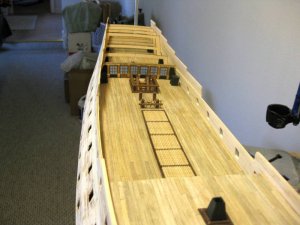
Vince P.


- Joined
- Nov 26, 2018
- Messages
- 546
- Points
- 343

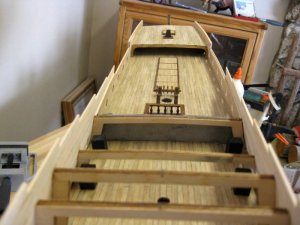
I have placed the finished layer of walnut planking on the inside of the main and forecastle deck bulwarks. Since the gun ports are planked over again, it is necessary to cut them out again. When cutting them out you have to be super careful to not damage the hard walnut planks. Applying just a little inward pressure with the knife will splinter the walnut. I had to do most of the cutting either from the inside out or use cutting strokes from inside to outside. I think the next step will be placing the quarterdeck.
Vince P.
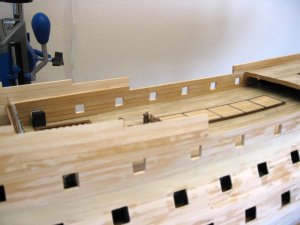
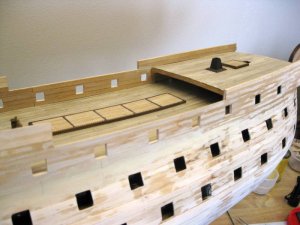
Vince P.


Great stuff Vince, keep it coming please.

- Joined
- Nov 26, 2018
- Messages
- 546
- Points
- 343

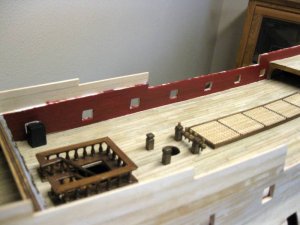
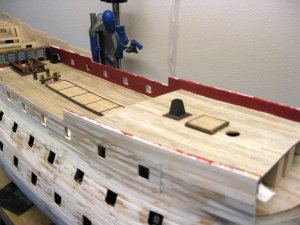
I have painted the inside of the main and forecastle bulwarks a red color. Since I could not find a color that was satisfactory, I mixed some bright red, brown, and black paint until I got the desired results. I am satisfied that this color is pretty close to the darkened and brown tinted color of the actual paint used for ships of the period. As morbid as this sounds, the color should be close to blood. The whole purpose to painting them was to offset the bloody mess created by combat conditions aboard ships of the line. Once the framing is added to the ports, the upper railings, and the deck waterways, it will look all neat and pretty.
Vince P.
Vince P.


- Joined
- Nov 26, 2018
- Messages
- 546
- Points
- 343

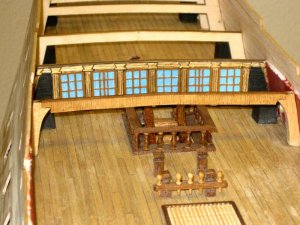
Before placing the false quarterdeck, it is necessary to fabricate a breast beam similar to the one under the aft end of the forecastle. The quarterdeck extends considerably forward of the supporting bulkheads and therefore needs this supporting beam. Unlike the forecastle, I recessed the beam slightly under the quarterdeck to make clearance for the main deck guns placed just at the forward end of the quarterdeck. I used scrap pieces of plywood stock left over from the bulkheads to construct the beam.
Next up is to place the main deck and forecastle waterways.
Vince P.
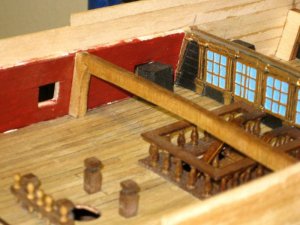
Next up is to place the main deck and forecastle waterways.
Vince P.


- Joined
- Nov 26, 2018
- Messages
- 546
- Points
- 343

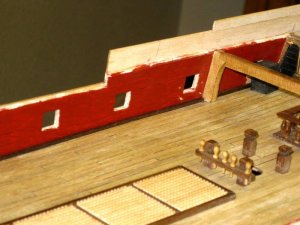
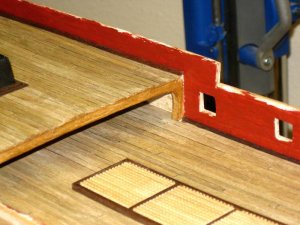
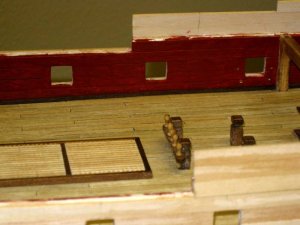
The main and forecastle deck waterways have been added. They are just raised strips of wood running along the bulwarks where they join the deck. Walnut 2x2mm strips were used. The plans don't really show these because they are covered by the railings when looking down on the decks, but in plan sheet #8 there are what looks to be waterways in the hull cross section views.
Also, if you are going to full rig the deck guns as I am, the last gun aft in the open on the main deck on each side will pretty much be coveed by the quarterdeck, so the eyebolts on the bulwarks for the rigging need to be placed now. There ar 4 eyebolts per gun. The upper ones can be added later, but the holes should be drilled now. The lower ones should be placed now.
Next up is placing the false quarterdeck.
Vince P.


- Joined
- Nov 26, 2018
- Messages
- 546
- Points
- 343

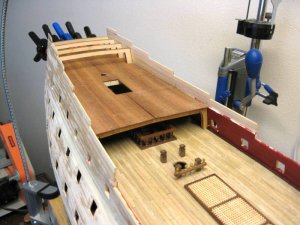
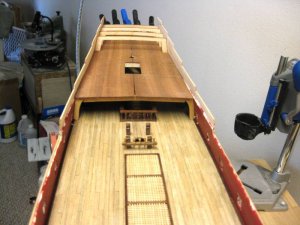
The false quarterdeck has been placed. As you can see, that lovely staircase and fancy painted bulkhead are all but covered up now. If you wanted to take shortcuts, you could eliminate the staircase and fancy bulkhead. The kit allows you to add or skip as much detail as you would like. If you do add the details as outlined in the plans though, as I said, you have to supply your own materials. I plan to add as much detail as possible.
Next up is to plank the quarterdeck.
Vince P.
Next up is to plank the quarterdeck.
Vince P.


