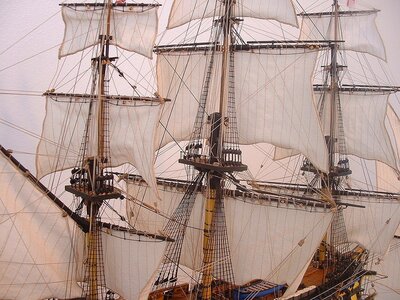
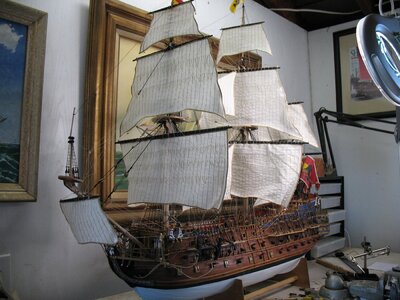
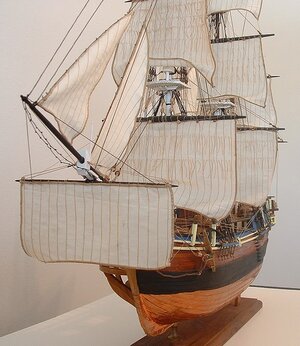
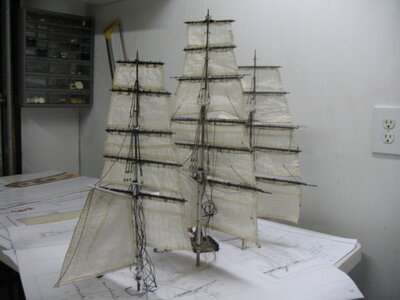
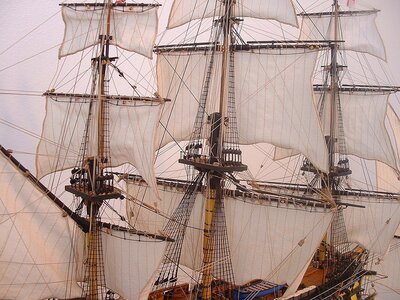
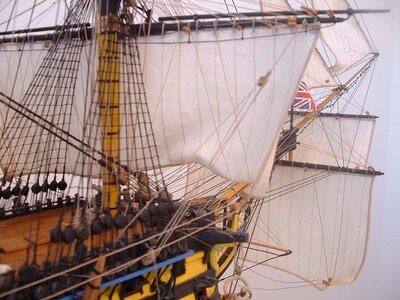
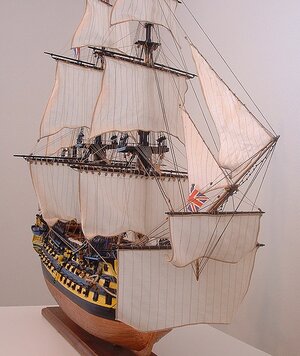
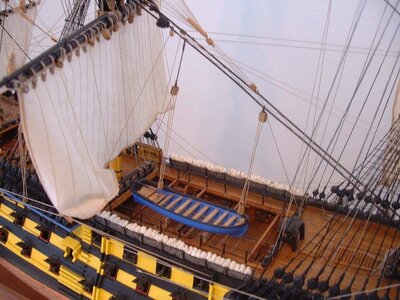
Sails or No Sails

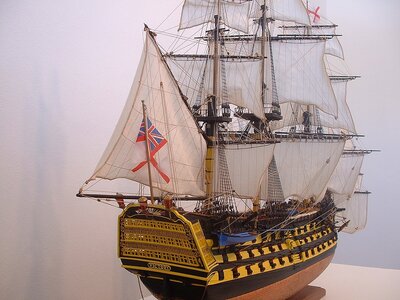
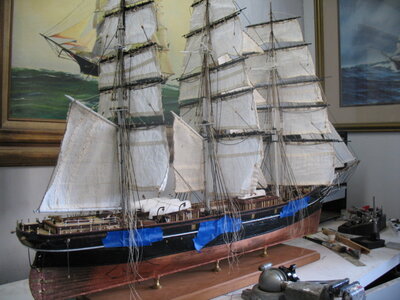
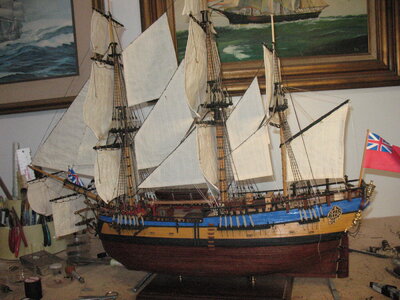
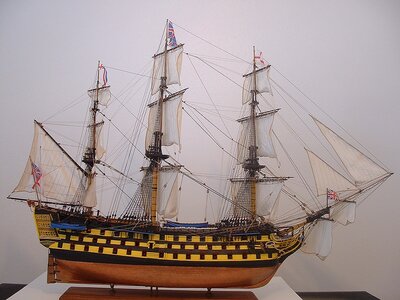
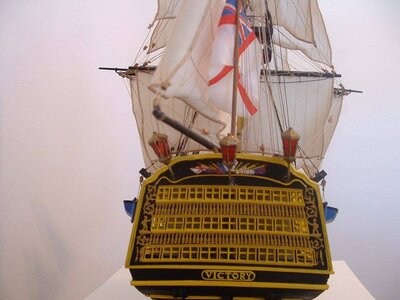
Mmmm, It is a testing subject. As many have said, sails can make or break a model. Getting the right weight, sewing the right seams (or marking them for smaller scales); if the sail isn't correct in its shape and accoutrements then it just looks wrong and now one will look at the ship.
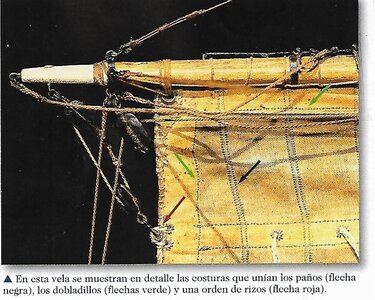
Weight is a real issue. In scale they need to be very light indeed, but not so light that they are see through and then the perennial discourse on colour; well they were never white even when new and invariably never a single colour as each sail was made up a a number of canvas elements sewn together with double and triple thicknesses at seams and reinforcements.
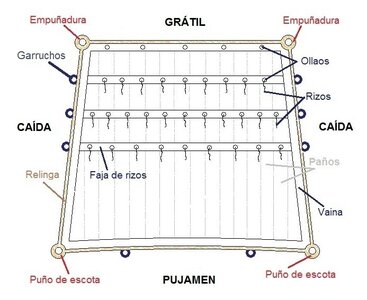
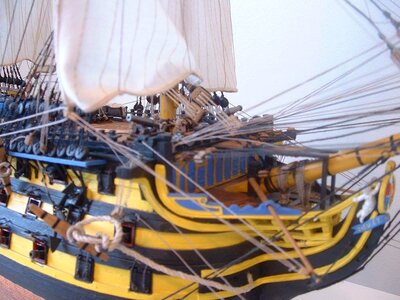
Of course there is also the other issue to consider. You almost double the rigging when you add sails. Bow, Leech, Clew, Bunt lines, brails and perhaps even reef tackle all have to be added once sails are added to the ship.
Then do you billow sails or to let them be limp; there's the problem of getting the sheets and tacks tight on billowing sails...
All things to be considered when making the decision.

So my recommendation for what its worth: make a practice mast with main yard on a flat board and rig it with standing and running rigging, then add sails made to the best of your ability (perhaps cut and sewn to fit your model) and see how you go with it and the rest of the rigging before committing it to your model.
Hi Peter, I fully agree with all your points. It is a DO it or NOT doing it. I was born into a big sailor/fisherman family in North Denmark. Still, minor Fishing Boat or Cutter, have to be rigged with sail -today always furled -as the new world of electronics is now on. They had to have sails as the crew was 3 or 4, and nowone were machine Ingeniers.
I personally used an old shirts- mostly found on the fleamarket. I agree with you too, that trials etc should be done. The sewings I never did myself. My mother was an expert doing this, and now here in Spain I have to highly specialist with the latest equipment.
Fro0m my7 notes lately I find very few correctly made sails and in most cases badly furled. LEACH Rope is nearly missing in all. Then the fasting points in each corner etc. I could go on.
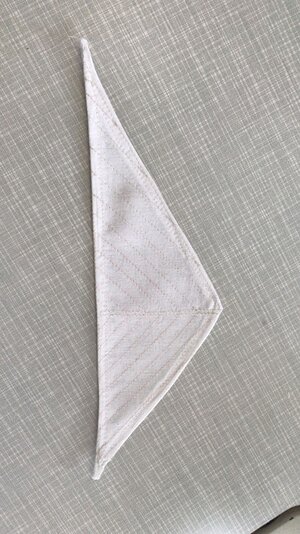
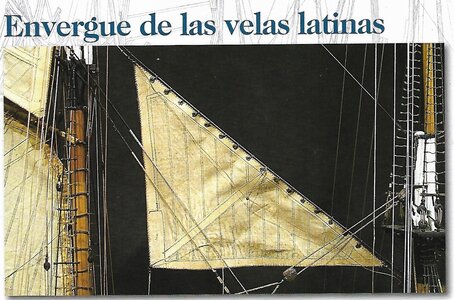
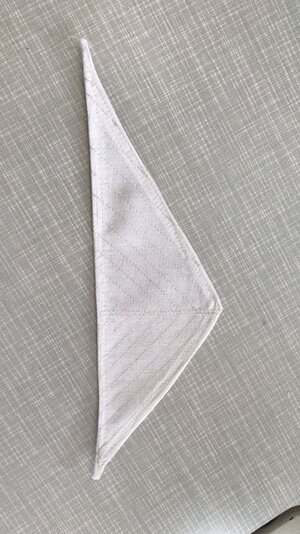
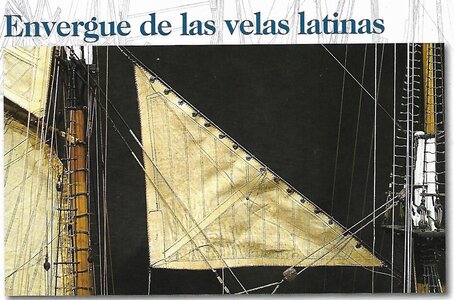
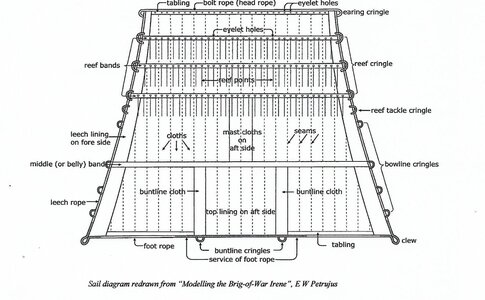
I have prepared a file, on how to make each sail correctly -a part from canvas, where each builder is using his own- It starts with For staysaek, Staysail/square) between masts, then square sail gererally and finally the Spànger or Gaffsails.
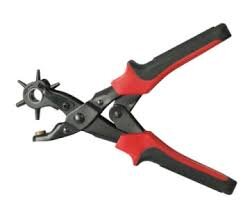
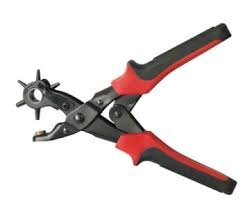
I forgot to ,mention that in a shoemaker shop, I found tw3o very good tools
I am in doubt the public here. managements??
below a small sample- elcapi

06-STAYSAILS.jpg

07-STAYSAILS.jpg

04_PROF TOOLS_XXX (1).jpg

05- mail-female.jpg

11-sqursail-detallado.jpg
 
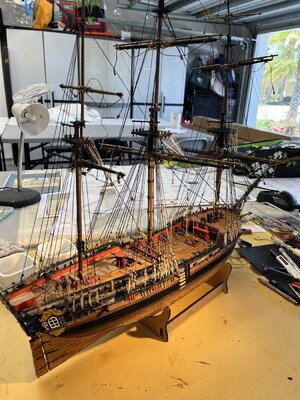
I am at the stage of the masts, yards, rigging and sails on my Occre Endeavour. I have a sail set and trying to decide whether to attach the sails or not. Part of me is of the view that it is a sailing ship so sails are essential, another part is that the sails will hide much of the model rigging. My better half is in the NO Sails camp to save trapping dust. Any thoughts? Also if I were to put sails on when am I best to do that. Currently the yards are not attached to the masts, so is it better to attach the sails to the yards and then instal the yards OR attach the yards to the masts and then attach the sails. Not done this before but putting sails on the yards and then attaching the yards to the masts semi possibly easier but welcome any views from those with experience. Thanks.
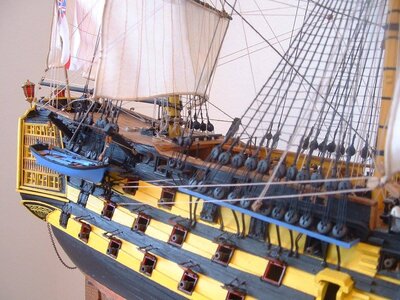
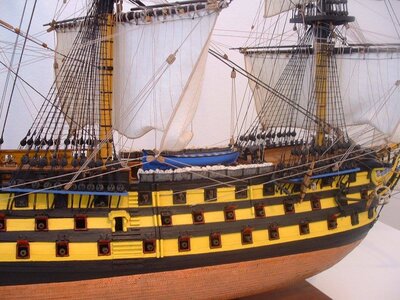
I came across a relevant observation somewhere. Square rigged ships look better without sails; fore and aft rigs are better with.
I don't know where this leaves a barquentine.
 
Can't believe it has been 3 months since I posted this question ""Sails or No Sails" in early January 2023, but life seemed to get in the way. However it provided a lot of very useful discussion and input and I thank all for their input. Below is a summary of what has worked for me. That is not saying other suggestions and directions provided are in any way incorrect, it is very much up to the modeller.

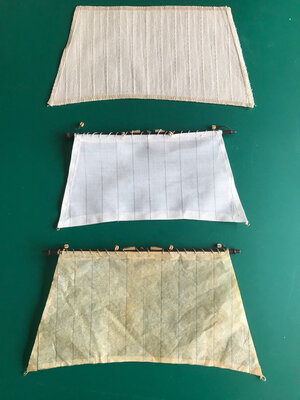
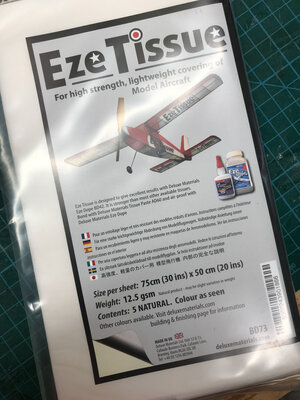
Following feedback I compared 3 approaches 1) Occre provided sails 2) Homemade sails using a finer material 3) Homemade sails using lightweight model aircraft covering. These are shown from top to bottom. In my opinion that Occre provided sails were too heavy for the scale of the model. After help from my better half and a fight with the sewing machine the homemade fabric sails were better but still too heavy in my opinion. My preference was for homemade sails using the model aircraft covering.
I think also my decision was driven by the fact I have decided to installed my sails furled rather than in full sail. For full sail possibly a homemade fabric sail may be more appropriate.

klyall_endeavour sails_1.jpgklyall_endeavour sails_8.jpg

My approach for making the sails was as follows:

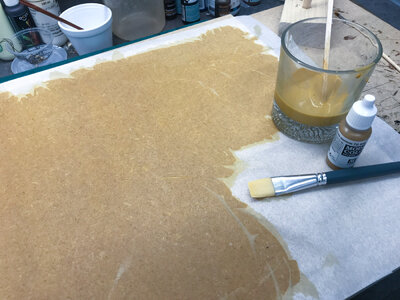
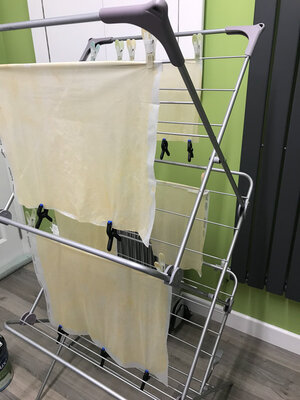
1) I coloured the sails with a dilute wash of 70.856 Ochre Brown by Vallejo. I laid the sail on a piece of clean wood and painted with a wide model brush, and then hung out to dry overnight on a clothes horse, using clips at the bottom to reduce creases.
klyall_endeavour sails_2.jpgklyall_endeavour sails_3.jpg

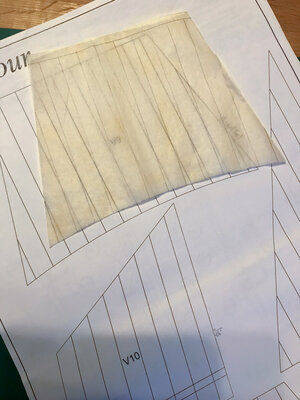
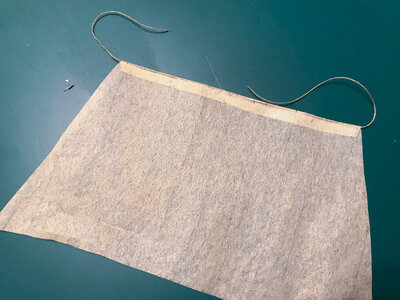
2) Once dry I used the Occre 1:1 sail plans to trace the sail shape and any lines using a lead pencil, and then cut out with a scalpel and ruler for straight edges and scissors for curves at the bottom of the sail. Note that I left about 5mm to 7mm at the top edge of the sail, the reason will be explained in the next couple of steps.
klyall_endeavour sails_4.jpg

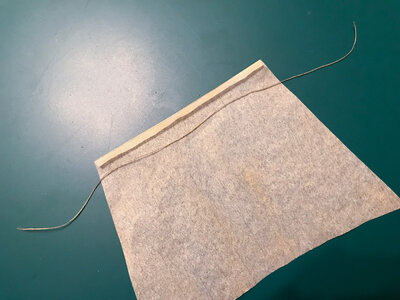
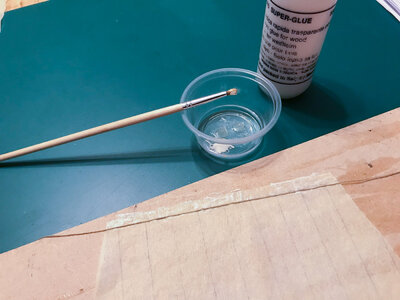
3) I folded along the line and then used PVA glue to paste along the excess. Taking 0.15mm thread I cut a length to insert into the fold and folded over. This gave more strength to the top of the sail when I came to sew the sail to the yard. On one experiment I also cut 3mm wide strips to glue to each side and bottom of the sail. However as I was furling the sails this made it more difficult to furl as it made the fabric stiffer and consequently I abandoned that approach.
klyall_endeavour sails_5.jpgklyall_endeavour sails_6.jpgklyall_endeavour sails_7.jpg

4) I then pierced holes with a pin along the top edge of the sail for the thread to pass through whilst attaching to the yard. I found this easier to achieve BEFORE sewing the sail to the yard and gave me evenly spaced holes.

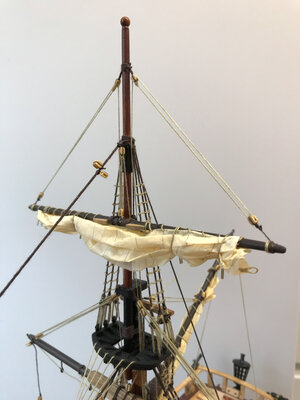
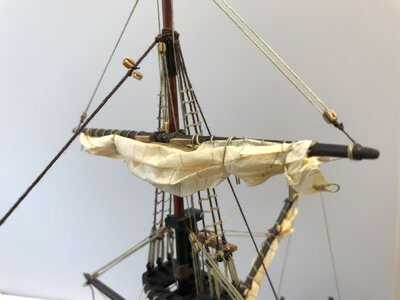
5) Once the sails were attached I furled then by pulling upward starting at the top of the sail, much as would have happened on real ship I would guess. I then used short lengths of thread to tie round the sails. The loose ends of the ties were clamped and then I applied some PVA glue so the ties will point downward. Excess was cut off after the glue had dried.

Below are the results of my efforts. As I said this has worked for me certainly when trying to achieve a furled sail look.

klyall_endeavour sails_10.jpgklyall_endeavour sails_9.jpg
 
Furled sails on this model? GREAT CHOICE! In my humble opinion, all cloth sails, even paper ones, just don't look right unfurled! Rick1011
 
Furled sails on this model? GREAT CHOICE! In my humble opinion, all cloth sails, even paper ones, just don't look right unfurled! Rick1011
My sails look fine to me... Oh. Wait. I forgot to turn the lights on. :D
df-night-waterline-shot-jpg.298967


Actually, furled sails is an excellent choice for a model where you want to show off as much deck features and rigging as possible. For me, making convincing furled sails is more difficult than fully deployed sails. You just can't get the folds fine enough.
 
Can't believe it has been 3 months since I posted this question ""Sails or No Sails" in early January 2023, but life seemed to get in the way. However it provided a lot of very useful discussion and input and I thank all for their input. Below is a summary of what has worked for me. That is not saying other suggestions and directions provided are in any way incorrect, it is very much up to the modeller.

Following feedback I compared 3 approaches 1) Occre provided sails 2) Homemade sails using a finer material 3) Homemade sails using lightweight model aircraft covering. These are shown from top to bottom. In my opinion that Occre provided sails were too heavy for the scale of the model. After help from my better half and a fight with the sewing machine the homemade fabric sails were better but still too heavy in my opinion. My preference was for homemade sails using the model aircraft covering.
I think also my decision was driven by the fact I have decided to installed my sails furled rather than in full sail. For full sail possibly a homemade fabric sail may be more appropriate.

View attachment 369823View attachment 369817

My approach for making the sails was as follows:

1) I coloured the sails with a dilute wash of 70.856 Ochre Brown by Vallejo. I laid the sail on a piece of clean wood and painted with a wide model brush, and then hung out to dry overnight on a clothes horse, using clips at the bottom to reduce creases.
View attachment 369821View attachment 369819

2) Once dry I used the Occre 1:1 sail plans to trace the sail shape and any lines using a lead pencil, and then cut out with a scalpel and ruler for straight edges and scissors for curves at the bottom of the sail. Note that I left about 5mm to 7mm at the top edge of the sail, the reason will be explained in the next couple of steps.
View attachment 369822

3) I folded along the line and then used PVA glue to paste along the excess. Taking 0.15mm thread I cut a length to insert into the fold and folded over. This gave more strength to the top of the sail when I came to sew the sail to the yard. On one experiment I also cut 3mm wide strips to glue to each side and bottom of the sail. However as I was furling the sails this made it more difficult to furl as it made the fabric stiffer and consequently I abandoned that approach.
View attachment 369820View attachment 369825View attachment 369816

4) I then pierced holes with a pin along the top edge of the sail for the thread to pass through whilst attaching to the yard. I found this easier to achieve BEFORE sewing the sail to the yard and gave me evenly spaced holes.

5) Once the sails were attached I furled then by pulling upward starting at the top of the sail, much as would have happened on real ship I would guess. I then used short lengths of thread to tie round the sails. The loose ends of the ties were clamped and then I applied some PVA glue so the ties will point downward. Excess was cut off after the glue had dried.

Below are the results of my efforts. As I said this has worked for me certainly when trying to achieve a furled sail look.

View attachment 369814View attachment 369815
Thanks for coming back. I lost you and others do Computer problems. All my programs disappeared -but not the data - There are still some minor problems to solve.
In fact, I wanted to answer you about the different sails and have to prepare them. It is too late now, but for the next, you can or will do better, as there are some minor mistakes- not your fault, but the manufacturer's manual.
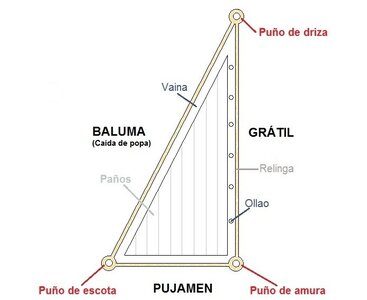
A ship like yours will have the following types of sails: 1-the fore spritsails -here you will have to do some work: 2 the square sails, again this can be much better make: 3 Spritsails between fir & main mast, main mast & mizzen. again to make the correct a few changes will have to be made, as well the mizzen mast sails- all the failures come from the lack of information and MINE-late answer to you.
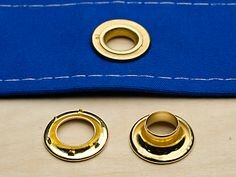
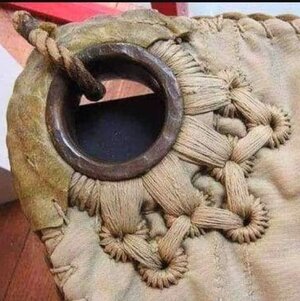
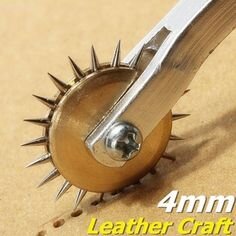
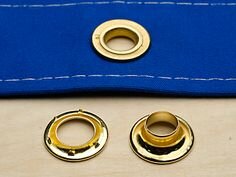
over the next few days, I will send you one, then over the next few days later and so on. what you will have to do, some tools can help. the third last, with a different diameter has a wheel with teeth with different diameters- to find the right one, you will have to insert "the male part through the hole, then add the female part a ring, and now with the same tool to put the press on it, and it will close. I will send you more over the next days

06-STAYSAILS.jpg

07-STAYSAILS.jpg

12-square sail-detalle.jpg

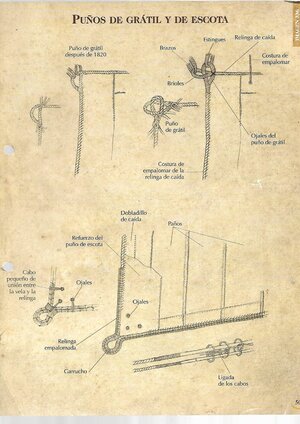
8-squarsail-PUÑOS DE GRATIL Y ESCOTE.jpg

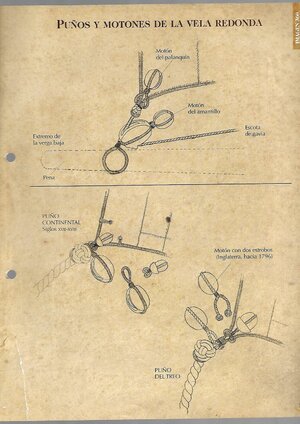
9-squarsail-puños y montones.jpg

15-SQUAR SAILS-GENERAL.jpg

16-staysail-foto.jpg

04_PROF TOOLS_XXX (1).jpg

04-PROF. TOOLS-061 (2).jpg

05- mail-female.jpg

VELA- STAYSAIL- DICIONARIO- DICIONARY-1.jpg
 
Can't believe it has been 3 months since I posted this question ""Sails or No Sails" in early January 2023, but life seemed to get in the way. However it provided a lot of very useful discussion and input and I thank all for their input. Below is a summary of what has worked for me. That is not saying other suggestions and directions provided are in any way incorrect, it is very much up to the modeller.

Following feedback I compared 3 approaches 1) Occre provided sails 2) Homemade sails using a finer material 3) Homemade sails using lightweight model aircraft covering. These are shown from top to bottom. In my opinion that Occre provided sails were too heavy for the scale of the model. After help from my better half and a fight with the sewing machine the homemade fabric sails were better but still too heavy in my opinion. My preference was for homemade sails using the model aircraft covering.
I think also my decision was driven by the fact I have decided to installed my sails furled rather than in full sail. For full sail possibly a homemade fabric sail may be more appropriate.

View attachment 369823View attachment 369817

My approach for making the sails was as follows:

1) I coloured the sails with a dilute wash of 70.856 Ochre Brown by Vallejo. I laid the sail on a piece of clean wood and painted with a wide model brush, and then hung out to dry overnight on a clothes horse, using clips at the bottom to reduce creases.
View attachment 369821View attachment 369819

2) Once dry I used the Occre 1:1 sail plans to trace the sail shape and any lines using a lead pencil, and then cut out with a scalpel and ruler for straight edges and scissors for curves at the bottom of the sail. Note that I left about 5mm to 7mm at the top edge of the sail, the reason will be explained in the next couple of steps.
View attachment 369822

3) I folded along the line and then used PVA glue to paste along the excess. Taking 0.15mm thread I cut a length to insert into the fold and folded over. This gave more strength to the top of the sail when I came to sew the sail to the yard. On one experiment I also cut 3mm wide strips to glue to each side and bottom of the sail. However as I was furling the sails this made it more difficult to furl as it made the fabric stiffer and consequently I abandoned that approach.
View attachment 369820View attachment 369825View attachment 369816

4) I then pierced holes with a pin along the top edge of the sail for the thread to pass through whilst attaching to the yard. I found this easier to achieve BEFORE sewing the sail to the yard and gave me evenly spaced holes.

5) Once the sails were attached I furled then by pulling upward starting at the top of the sail, much as would have happened on real ship I would guess. I then used short lengths of thread to tie round the sails. The loose ends of the ties were clamped and then I applied some PVA glue so the ties will point downward. Excess was cut off after the glue had dried.

Below are the results of my efforts. As I said this has worked for me certainly when trying to achieve a furled sail look.

View attachment 369814View attachment 369815
your furked sails are ASSOLUTLY WELL DONE
 
Can't believe it has been 3 months since I posted this question ""Sails or No Sails" in early January 2023, but life seemed to get in the way. However it provided a lot of very useful discussion and input and I thank all for their input. Below is a summary of what has worked for me. That is not saying other suggestions and directions provided are in any way incorrect, it is very much up to the modeller.

Following feedback I compared 3 approaches 1) Occre provided sails 2) Homemade sails using a finer material 3) Homemade sails using lightweight model aircraft covering. These are shown from top to bottom. In my opinion that Occre provided sails were too heavy for the scale of the model. After help from my better half and a fight with the sewing machine the homemade fabric sails were better but still too heavy in my opinion. My preference was for homemade sails using the model aircraft covering.
I think also my decision was driven by the fact I have decided to installed my sails furled rather than in full sail. For full sail possibly a homemade fabric sail may be more appropriate.

View attachment 369823View attachment 369817

My approach for making the sails was as follows:

1) I coloured the sails with a dilute wash of 70.856 Ochre Brown by Vallejo. I laid the sail on a piece of clean wood and painted with a wide model brush, and then hung out to dry overnight on a clothes horse, using clips at the bottom to reduce creases.
View attachment 369821View attachment 369819

2) Once dry I used the Occre 1:1 sail plans to trace the sail shape and any lines using a lead pencil, and then cut out with a scalpel and ruler for straight edges and scissors for curves at the bottom of the sail. Note that I left about 5mm to 7mm at the top edge of the sail, the reason will be explained in the next couple of steps.
View attachment 369822

3) I folded along the line and then used PVA glue to paste along the excess. Taking 0.15mm thread I cut a length to insert into the fold and folded over. This gave more strength to the top of the sail when I came to sew the sail to the yard. On one experiment I also cut 3mm wide strips to glue to each side and bottom of the sail. However as I was furling the sails this made it more difficult to furl as it made the fabric stiffer and consequently I abandoned that approach.
View attachment 369820View attachment 369825View attachment 369816

4) I then pierced holes with a pin along the top edge of the sail for the thread to pass through whilst attaching to the yard. I found this easier to achieve BEFORE sewing the sail to the yard and gave me evenly spaced holes.

5) Once the sails were attached I furled then by pulling upward starting at the top of the sail, much as would have happened on real ship I would guess. I then used short lengths of thread to tie round the sails. The loose ends of the ties were clamped and then I applied some PVA glue so the ties will point downward. Excess was cut off after the glue had dried.

Below are the results of my efforts. As I said this has worked for me certainly when trying to achieve a furled sail look.

View attachment 369814View attachment 369815
Those sails look really good.Thumbsup
 
Can't believe it has been 3 months since I posted this question ""Sails or No Sails" in early January 2023, but life seemed to get in the way. However it provided a lot of very useful discussion and input and I thank all for their input. Below is a summary of what has worked for me. That is not saying other suggestions and directions provided are in any way incorrect, it is very much up to the modeller.

Following feedback I compared 3 approaches 1) Occre provided sails 2) Homemade sails using a finer material 3) Homemade sails using lightweight model aircraft covering. These are shown from top to bottom. In my opinion that Occre provided sails were too heavy for the scale of the model. After help from my better half and a fight with the sewing machine the homemade fabric sails were better but still too heavy in my opinion. My preference was for homemade sails using the model aircraft covering.
I think also my decision was driven by the fact I have decided to installed my sails furled rather than in full sail. For full sail possibly a homemade fabric sail may be more appropriate.
View attachment 369823View attachment 369817

My approach for making the sails was as follows:

1) I coloured the sails with a dilute wash of 70.856 Ochre Brown by Vallejo. I laid the sail on a piece of clean wood and painted with a wide model brush, and then hung out to dry overnight on a clothes horse, using clips at the bottom to reduce creases.
View attachment 369821View attachment 369819

2) Once dry I used the Occre 1:1 sail plans to trace the sail shape and any lines using a lead pencil, and then cut out with a scalpel and ruler for straight edges and scissors for curves at the bottom of the sail. Note that I left about 5mm to 7mm at the top edge of the sail, the reason will be explained in the next couple of steps.
View attachment 369822

3) I folded along the line and then used PVA glue to paste along the excess. Taking 0.15mm thread I cut a length to insert into the fold and folded over. This gave more strength to the top of the sail when I came to sew the sail to the yard. On one experiment I also cut 3mm wide strips to glue to each side and bottom of the sail. However as I was furling the sails this made it more difficult to furl as it made the fabric stiffer and consequently I abandoned that approach.
View attachment 369820View attachment 369825View attachment 369816

4) I then pierced holes with a pin along the top edge of the sail for the thread to pass through whilst attaching to the yard. I found this easier to achieve BEFORE sewing the sail to the yard and gave me evenly spaced holes.

5) Once the sails were attached I furled then by pulling upward starting at the top of the sail, much as would have happened on real ship I would guess. I then used short lengths of thread to tie round the sails. The loose ends of the ties were clamped and then I applied some PVA glue so the ties will point downward. Excess was cut off after the glue had dried.

Below are the results of my efforts. As I said this has worked for me certainly when trying to achieve a furled sail look.

View attachment 369814View attachment 369815
That looks great !!
 
Can't believe it has been 3 months since I posted this question ""Sails or No Sails" in early January 2023, but life seemed to get in the way. However it provided a lot of very useful discussion and input and I thank all for their input. Below is a summary of what has worked for me. That is not saying other suggestions and directions provided are in any way incorrect, it is very much up to the modeller.

Following feedback I compared 3 approaches 1) Occre provided sails 2) Homemade sails using a finer material 3) Homemade sails using lightweight model aircraft covering. These are shown from top to bottom. In my opinion that Occre provided sails were too heavy for the scale of the model. After help from my better half and a fight with the sewing machine the homemade fabric sails were better but still too heavy in my opinion. My preference was for homemade sails using the model aircraft covering.

I think also my decision was driven by the fact I have decided to installed my sails furled rather than in full sail. For full sail possibly a homemade fabric sail may be more appropriate.

View attachment 369823View attachment 369817

My approach for making the sails was as follows:

1) I coloured the sails with a dilute wash of 70.856 Ochre Brown by Vallejo. I laid the sail on a piece of clean wood and painted with a wide model brush, and then hung out to dry overnight on a clothes horse, using clips at the bottom to reduce creases.
View attachment 369821View attachment 369819

2) Once dry I used the Occre 1:1 sail plans to trace the sail shape and any lines using a lead pencil, and then cut out with a scalpel and ruler for straight edges and scissors for curves at the bottom of the sail. Note that I left about 5mm to 7mm at the top edge of the sail, the reason will be explained in the next couple of steps.
View attachment 369822

3) I folded along the line and then used PVA glue to paste along the excess. Taking 0.15mm thread I cut a length to insert into the fold and folded over. This gave more strength to the top of the sail when I came to sew the sail to the yard. On one experiment I also cut 3mm wide strips to glue to each side and bottom of the sail. However as I was furling the sails this made it more difficult to furl as it made the fabric stiffer and consequently I abandoned that approach.
View attachment 369820View attachment 369825View attachment 369816

4) I then pierced holes with a pin along the top edge of the sail for the thread to pass through whilst attaching to the yard. I found this easier to achieve BEFORE sewing the sail to the yard and gave me evenly spaced holes.

5) Once the sails were attached I furled then by pulling upward starting at the top of the sail, much as would have happened on real ship I would guess. I then used short lengths of thread to tie round the sails. The loose ends of the ties were clamped and then I applied some PVA glue so the ties will point downward. Excess was cut off after the glue had dried.

Below are the results of my efforts. As I said this has worked for me certainly when trying to achieve a furled sail look.

View attachment 369814View attachment 369815
 
Back
Top