• SUBSCRIBE TO SHIPS IN SCALE TODAY!

    The beloved Ships in Scale Magazine is back and charting a new course for 2026!
    Discover new skills, new techniques, and new inspirations in every issue.

    NOTE THAT OUR NEXT ISSUE WILL BE July/August 2026
  • Win a Free Custom Engraved Brass Coin!!!
    As a way to introduce our brass coins to the community, we will raffle off a free coin during the month of August. Follow link ABOVE for instructions for entering.

School for Shipmodel Building School for model ship building

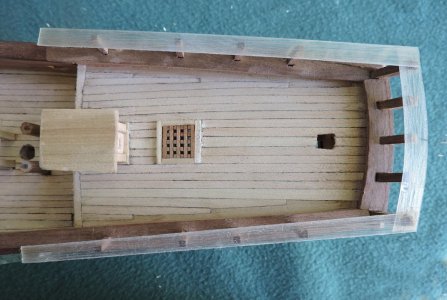
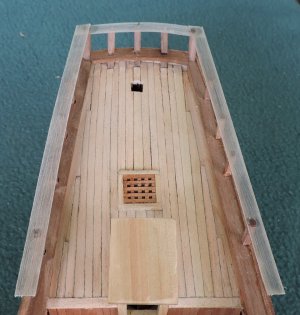
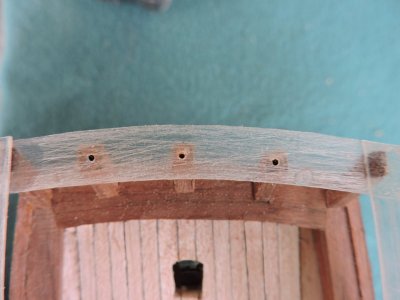
i was unable to finish the railings this week because i broke the last blade on my 10 inch bandsaw. I could not find the size i needed in any local store so i had to order it on line, still waiting for the blades. So this week i will cover how i made the patterns. Using the plastic from product packaging i cut the width of the railing the scuffed it up with fine sandpaper. A drop of glue on the first stanchion and at the stern on the corners held the railings in place.

rail2.jpg
rail3.jpg
 
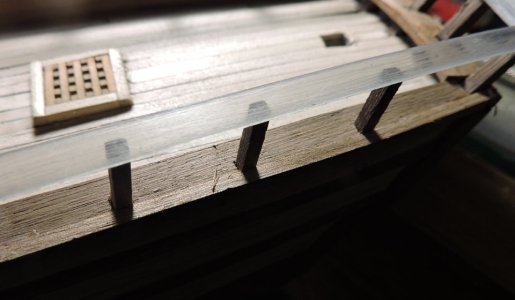
Being able to see through the railing it is easy to drill your hole and hit the top of each stanchion dead center

rail6.jpg

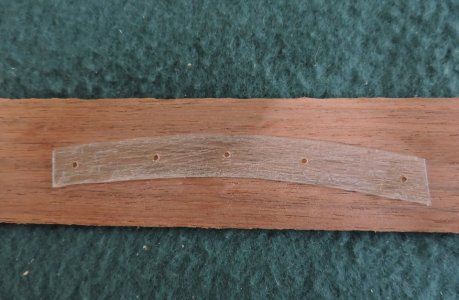
Removing the plastic patterns i stuck them to sheet stock, now you have the shape of the railing and the exact location where you need to drill a hole.

rail7.jpg

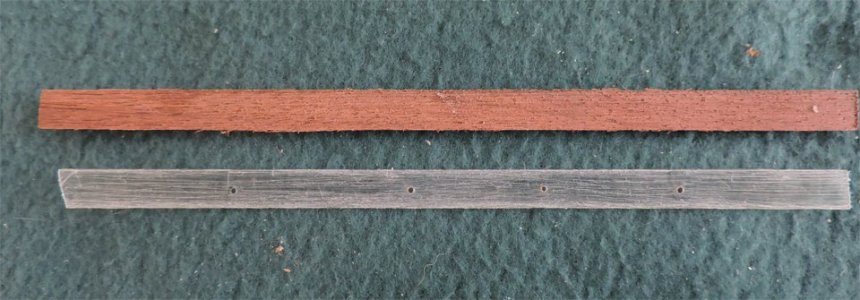
Same with the railings along the sides using the patterns

rail8.jpg


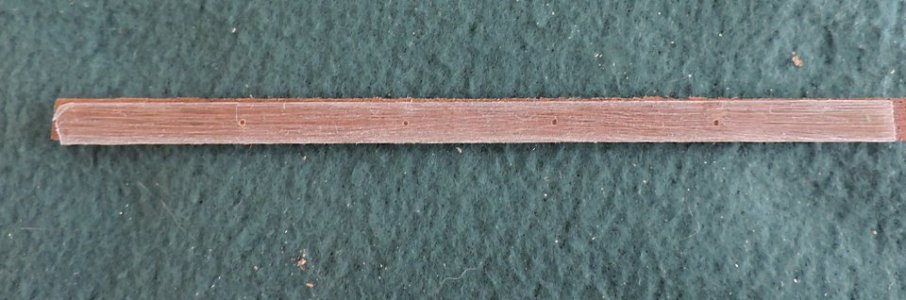
cutting the railing to the width and clamping or rubber cementing the plastic pattern


rail9.jpg

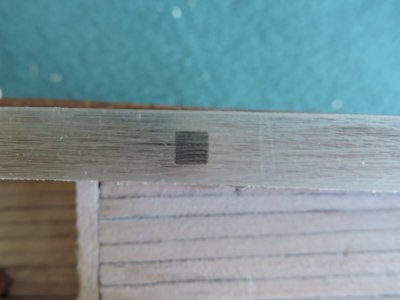
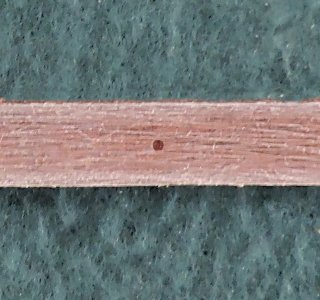
Taking a close look the location of the holes are quite clear.

rail10.jpg
 
As i said a broken blade stopped me from cutting the stern railing and that was the first piece to install. So i will pick up were i left off in the next class.
 
Brilliant! I know that you have been thinking about how to drill these holes and to hit the center of each stanchion. The see through pattern is a great idea.

Roger
 
Thanks Roger i was thinking i use a lot of cardboard patterns and then i thought i need to see through the pattern and BAM! then idea of clear plastic.

There is no class today because i did not get enough done. As a model gets farther along the details get smaller and more detailed and you cannot hide the mistakes. Even though i have been building models for many years it is not uncommon to do parts 2 sometimes 3 times before i am satisfied with the results. For me scratch building is a constant challenge to figure out how to do something and trial and error is the norm.

the railing at the stern

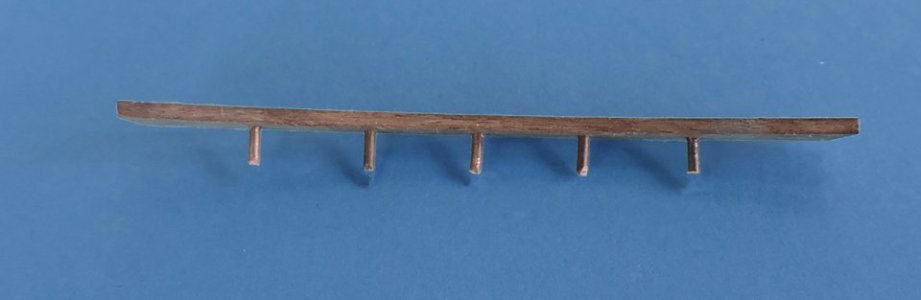
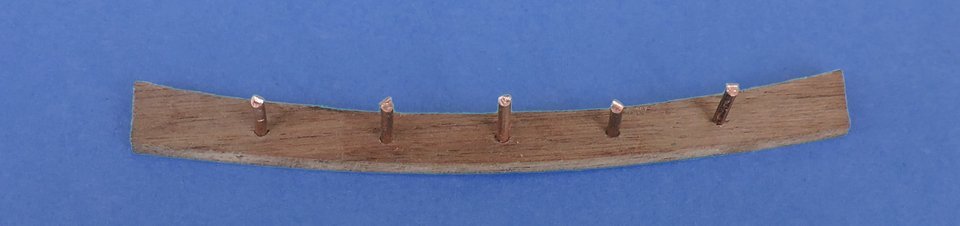
i put the copper wire into the predrilled holes in the railing

rail13.jpg

from the underside i did try a fit into the predrilled holes in the tops of the stern timbers and with a little wiggle here and there the pegs dropped in place.


rail11.jpg

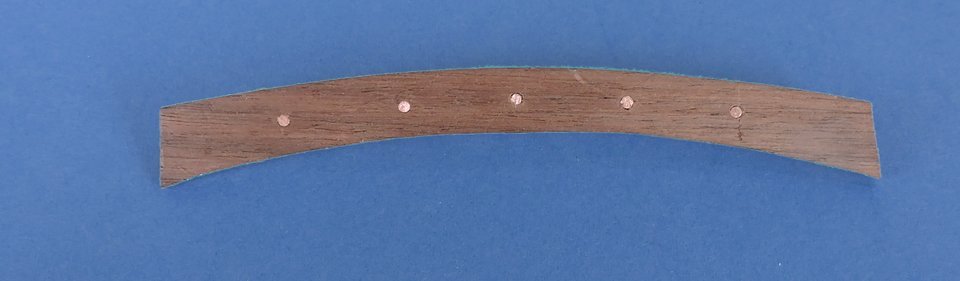
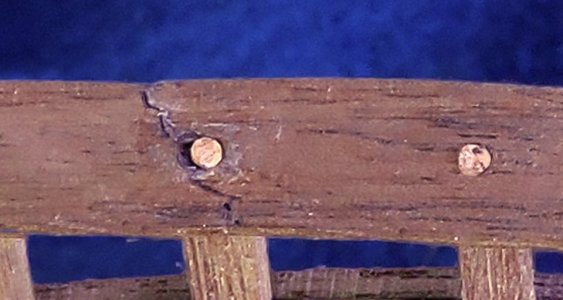
and a top view the copper wire changes depending on the light. Without a direct light the copper is darker looking but as you move the copper will catch the light and show brighter. In time the copper will dull down and blend more into the wood railing.
Years ago i saw a model using silver wire as planking nails, at first glance you did not notice the silver but as you moved the silver caught the light and the nails would appear and disappear.


rail12.jpg
 
Dave,

I use A LOT of 1.75" steel quilters pins to align parts for PVA bonding.
Where I have too much PVA and it gets into the holes with the pins, I have to grip the pin with three hemostats and twist carefully to break the bond.
This is a round about way of suggesting that if you use coarse grit sandpaper to scar some horizontal grooves on the body of the copper wire trunnels a dose of PVA will bond them to their stanchions. It will not be epoxy strong, but nothing that Nature does will break it. If you try, the wood will break first.

Oh, congrats on finding a less complex way to get the alignment done. Mylar should work too. Amazon has frosted sheets that works for a pencil.
 
A NEW PROJECT!

As everyone must know by now, Americans celebrate the 250th anniversary of of the Declaration of Independence this July 4th. So why not celebrate by building a model of the All American Boat. No, I’m not talking about an aluminum Lund fishing boat with its outboard motor or, Ugh, a pontoon boat. According to the late Dean of American Maritime Historians, Howard I. Chapelle it’s the SHARPIE.

In a Smithsonian Institution paper (The Migrations of an American Boat Type) he writes:
“For a commercial boat to gain wide popularity and use, it must be suited to a variety of weather and water conditions and must have some very marked economic advantages over any other boats that might be used in the same occupation.”

He then goes on to explain “that of the 200 boat types employed in American fisheries during the last 60 years of the Nineteenth Century,” the Sharpie was unique in that its use spread down the East Coast to Florida, to the Midwest along the South Shore of Lake Erie, and to areas of the West Coast. Today Sharpies are built and sailed by home builders. They are truly All American boats.

One, would, therefore, think that someone would offer a kit that captures the graceful lines of this remarkable craft. A drawing of a New Haven Sharpie is included below. Such is not the case. There is a Midwest kit of a Sharpie schooner, and the Nautical Research Guild offers plans and instructions for a Generic East Coast Sharpie on their website. Sharpie schooners are not nearly as attractive as the original New Haven built craft and the nicest thing that I can say about the NRG’s craft is that “they certainly succeeded in making it generic!”

Instead, we’ll build this one from scratch. We’ll begin with offsets of an actual boat measured in the late 1920’s by Howard Chapelle, prepare a lines drawing, make molds from the lines drawing and use the molds to build one of three models
1. A beginner version.
2. A more advanced version
3. A lean mean racing machine (about more later)
All three are built to the same set of lines. Differences are in the details. I’m building choice #3 but as we move along I’ll include shortcuts for building#1. #2 lacks the yacht like finish of #3.

Acknowledgments to:
Dave Stevens for establishing the School
Greg Davis for his Gold Metal Gundalow model that reminded me of the possibilities for building models of these Nineteenth American working craft.

My intention is to move at a pace that will allow me to post weekly. Stay Tuned.

Roger

IMG_3123.jpeg
 
Sign me up for some ol’ fashioned scratch building! I’m doing mostly scratch builds now since the cost of entry for many models I’d like to build (Nippon Maru 1/75 from Woody Joe, Dutch speeljaght Leida 1/150 from Corel, and De Zeven Provincien 1/72 from Kolderstock) is out of my range. Happy learning to scratch build in paper and cardstock from my last build, the 17th century Dutch Smalschip 1/48 from plans by Ab Hoving, and moving on to build more Dutch vessels in paper and cardstock. I will be scratch building a wooden Staten Jaght Utrecht, from plans by Ab Hoving and Gil McArdle, two or three builds down the road. Looking forward to the journey!
 
i am sure you have noticed Saturday classes are not as regular as they were in the beginning of the build. It is not that i have been slacking off the build. It is because the start of the build is like rough carpenters come on a job and frame in the structure and it is not quite perfect; it does not have to be as the work will be covered. As the work progresses the workmanship gets more tedious and demanding. Everything from this point on is the "finished work" and it all shows. As the saying goes (it always looks better the second time around) and yes i have done things twice even three times until i got it right. So, i am taking my time and making everything as close to perfect as my skills allow. Plus, it is pointless to show mediocre work my guess you're here to see work done a little better than the average hobby.
There is a discussion going on Reddit about high end or fine art modeling and there are some interesting points to ponder. This school has 96,380 views so i believe model ship builders are interested in what the 1% are doing and how they do it.
if anything, model ship building not only teaches skill it also demands patience
 
"If anything, model ship building not only teaches skill, it also demands patience." Absolutely agree with you, David.
 
picking up where my last post ended and doing things over until you get it right just like exercise you do not just do one pushup and stop you keep doing it over and over building up strength. Same with model building you keep doing thing over and over until you do it right, you slowly build up your skills. It is rare for builders to show what they did wrong, they show what they did right, well not here you learn from mistakes they are the building blocks of success. So lets take a look

cap rail 45.jpg


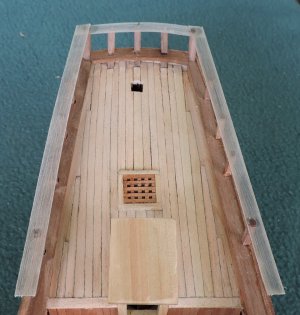
the idea sounded good the see-through patterns worked, almost. I made the railings to the patterns and drilled the holes in the railings locations on the patterns but when but when i came to fit the railings to the stanchions i broke the railing not once, not twice but three times. You cannot recover from such an error you have to start again and make a new one. Lucky i have a template to go back to and i can make railings over and over.

rail3.jpg
 
i can take the easy way out and give up on the copper wire idea but i wanted to produce an effect when viewing the model
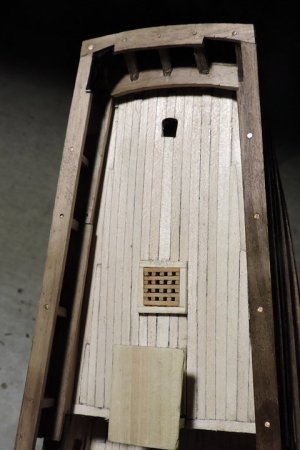
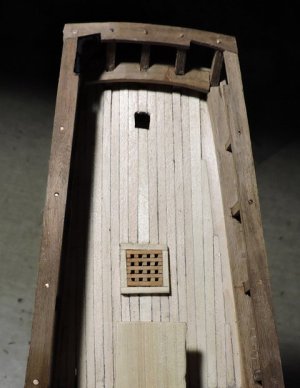
Take a look at the railing on the right side in the first image now you see the copper wire clear and bright in the second image the copper is almost gone the copper in the lower right corner vanished. Same with the railing on the left now you see the copper now you don't. Just the slightest shift in lighting changes what you see or don't see. Doing the railings 3 times for me was worth the effort


cap rail 47b.jpgcap rail 46b.jpg


Model building makes you think does not matter if you're building out of a box or scratch building there will be challenges. So what went wrong and why did the railings keep breaking when i tried to install them? The problem was being too perfect; there is such a thing. The holes for the copper wire were exactly the diameter of the wire so it was a tight fit and no wiggle room. The slightest miss between the holes and the wire prevented all to line up exactly. You cannot just use thinner wire you need the hole in the stanchion one size bigger than the wire in the railing. I also glued the wire in the railing holes first which made them rigid. The fix first tap the wire into the same size holes in the railings (a tight fit) but don't glue them. Next with a Dremel i ground the copper to a taper so there was room for the wire to move in the hole in the stanchions. Finally done.
 
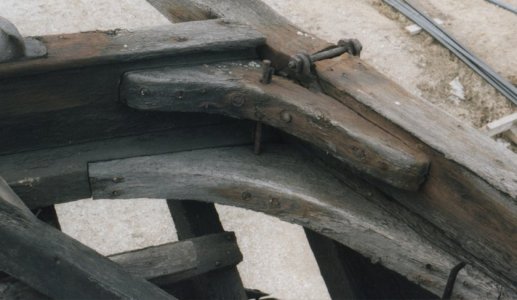
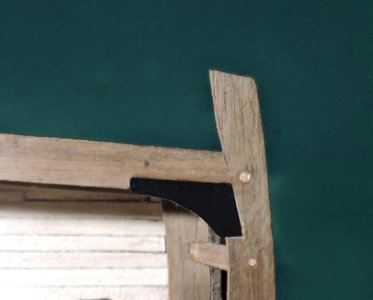
ok class lets go into the shop here is what is next see that lower knee it secures the side railing to the stern railing now i have to make one on the model.

real knee2.jpg

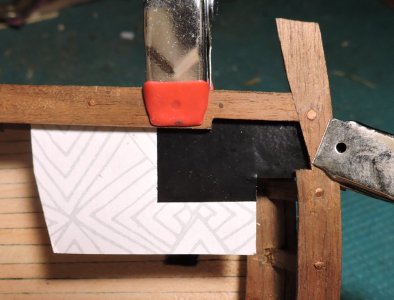
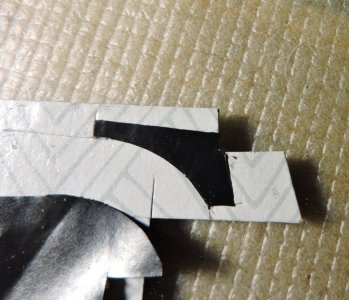
Oh yes it is back to cardboard actually i might of built the model out of cardboard first before i commit parts to wood. I am suing cardboard that has printing on it because i want to stick a piece of electrical tape to it. What is important here is getting those two straight edges copied. i cut along the edges just enough to go through the tape.


aDSCN2314.jpg

now i have my starting edges

aDSCN2316.jpg

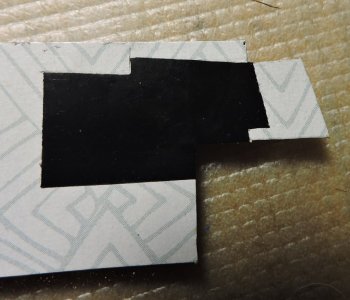
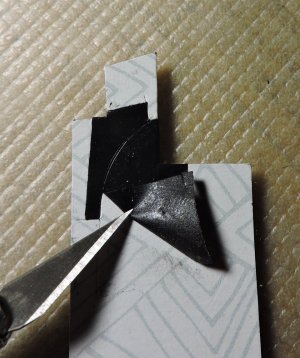
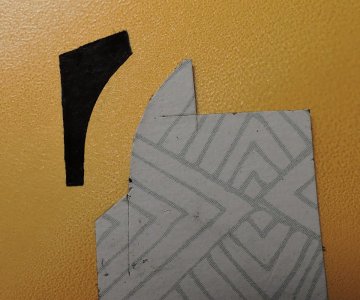
I cut the arch of the knee and peeled up the tape. You can see the cut in the tape.

aDSCN2317.jpg

i got the final template for the knee

aDSCN2318.jpg
aDSCN2321.jpg

one last check before i go to making it in wood, hum just a little big the ends of the knee should line up with the edges of the railing. That's ok i can deal with that when i cut the piece in wood.


aDSCN2322.jpg
 
the knee on the other side is so slightly different i need to make another template to fit. As any model builder, building whatever project be it from a box of parts or a stack of wood the idea is to pay attention to the material you're working with, how it responds to you. Each step along the way sharpens knowledge and that transfers to skill.
See you next Saturday for making those knees and the next part which is harder to do than the knees.
Remember (it always looks better the second time around) so don't struggle to try and save a mistake know when to cut it loose and start again.
 
Back
Top