Sea of Galilee Boat-Scott Miller 26" [COMPLETED BUILD]

Joined
Aug 27, 2021
Messages
390
Points
278

Location
El Paso, Texas
The Admiral gave me this for Christmas :D.

It's a kit frome Scott Miller, a guitar maker as well as a model ship maker. Here is the link: Galilee Boat

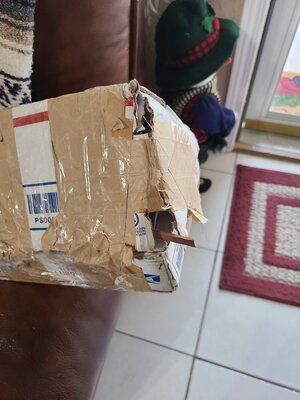
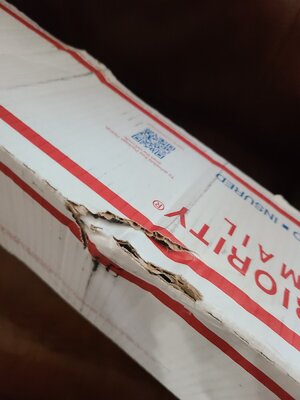
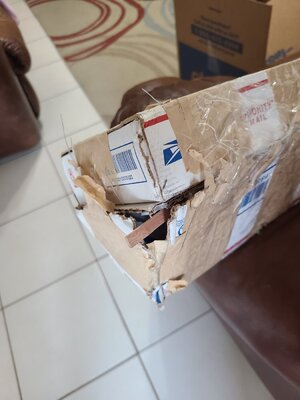
USPS was rough with the package.
20211222_162549.jpg

20211222_162603.jpg

20211222_162658.jpg

Fortunately because Scott did such an excellent job packing the kit no damage was sustained.

@Bluebeard did a great build of this boat, I am using his as a guide for mine.

Glenn
 
Last edited:
Scott is great to work with. He has quickly responded to each email I sent to him, first about the damaged package and lately to answer a question I had about the build.

The purchase process begins with an email to Scott, in his response he explains the process he uses. With me it was simply provide my mailing address and PayPal email. He sent an invoice which I paid then he shipped the kit.

The wood for the boat is mohagony while the rest for the strongback is a mixture of materials well suited for their intended purpose. The mohagony is good quality and nicely milled.
 
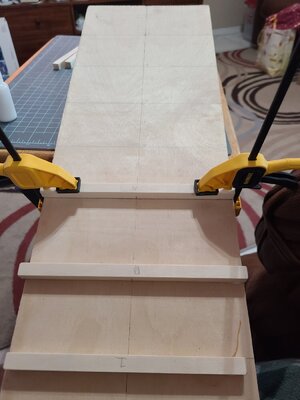
Work begins. First up is build the strongback. Scott tried something new with me, in the past he didn't send the baseboard for the strongback, due to the size it didn't fit the mailer he uses making the shipping cost prohibitive. Instead he would include a stick with the required measurements and you had to procure you own strongback baseboard. With mine he cut the strongback in half lengthwise allowing it to fit the mailer and added biscuit joints so I could easily put it together. I didn't realize this wasn't standard so no photos were taken.

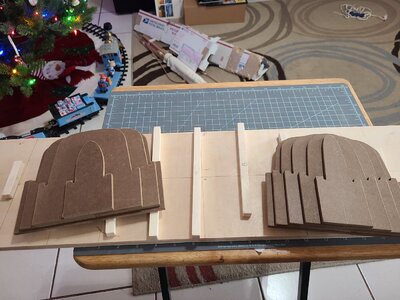
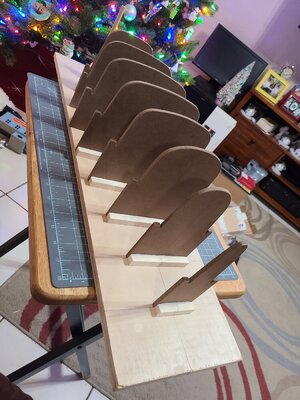
Once the baseboard was joined the supports for the bulkhead frames were glued in place. I took the time to sand these smooth just because I enjoy the process of sanding, it's not necessary as the strongback is not needed after the shell is complete and removed. Each support is marked for its place on the baseboard. These supports also increase the strength of the joint holding together the two halves of the baseboard.
20211226_163927.jpg

I also sanded the edges of the frames. Here they are with the supports prior to anything being glued.
20211226_153643.jpg

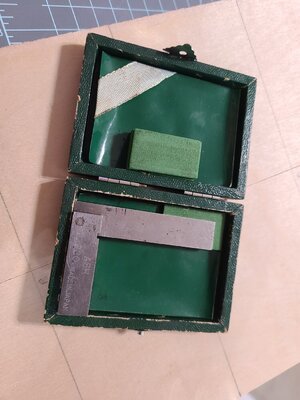
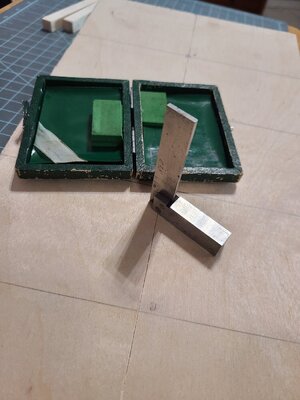
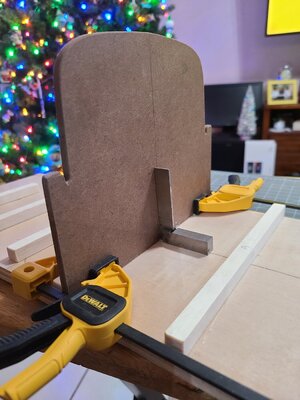
Now I glued the frames in place, checking for square with my small machinists square, an Ebay find.
20211226_163945.jpg

20211226_164004.jpg20211226_171117.jpg

20211226_200840.jpg

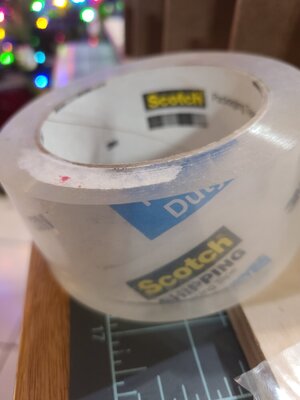
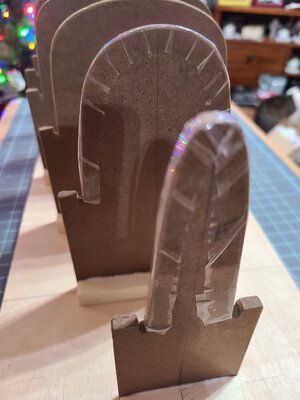
Next I added some Scotch packing tape to aid in removal of the shell, my hopes are that glue won't stick to it very well.
20211226_201450.jpg

20211226_201433.jpg

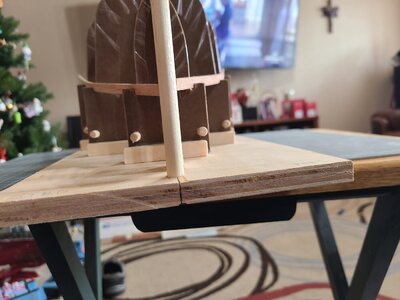
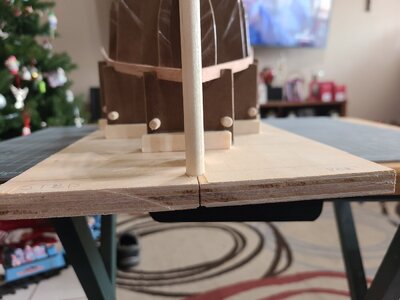
Finally I glued in the dowel at the stern end that is used to support the clamps that hold the planks in place during glue-up.

Thank you for looking.
Glenn
 
Last thing I did to the strongback assembly is install some 1/4" dowels to attach rubber bands to that would be used to hold things in place. You'll see them in the photos upcoming.

Starting on the boat.

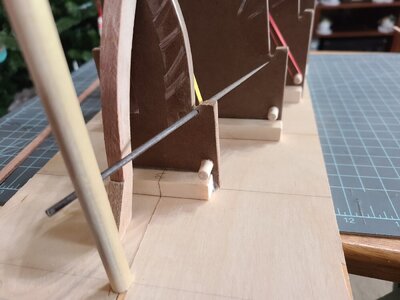
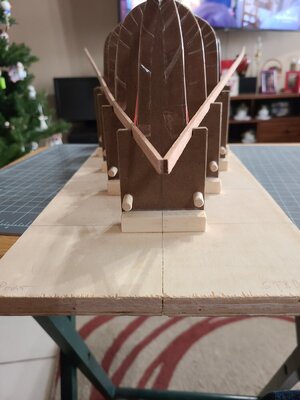
First I checked that the first planks would be even fore and after. At the stern they were uneven. The right one is higher than the left (midway up the dowel).
20211227_143654.jpg

Using a round Swiss filr I cut the notch in the frame deeper to lower the plank. I did this a little at a time so I wouldn't go too low.
20211227_143752.jpg

Now they are even.
20211227_143716.jpg

The two at the bow were even so no adjustments were needed.
20211227_144451.jpg

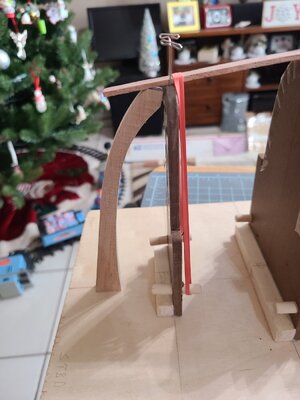
Now it was time to work on the keel. The keel comes prebent and glued to the sternpost. The keel is carefully centered then guide pins installed. Scott includes finishing nails for this but they are a bit large for the hardboard he provided-i think previously he provided plywood frames then the nails would be perfect.
20211227_143826.jpg

With the keel centered I used the planks to determine where the sternpost would be installed. This put the keel too far above the frame so I had to sand the post until everything fit. Sorry but no pics of the process at the stern.

Moving to the bow the same process was used to fit the bowstem in place where they fit the planks. The stem needed to be sanded a bit to fit it into place.
20211227_144001.jpg

After the stem was fitted the keel, bowstem and sternpost were double and triple checked. Once satisfied I glued them all in place-stem to keel then strongback and sternost to strongback. Scrap blocks were glued to stem/stern to strongback junctions as reinforcement.
20211227_184834.jpg

20211227_184831.jpg

Thank you for the likes and looking,
Glenn
 
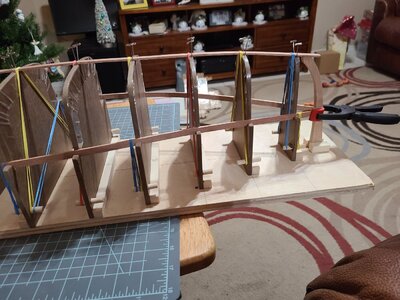
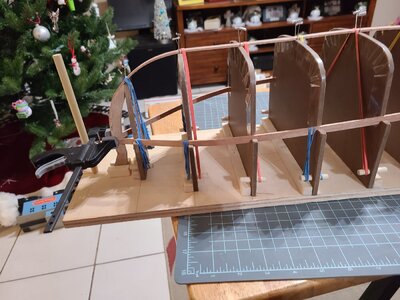
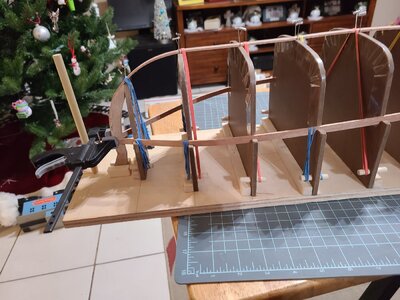
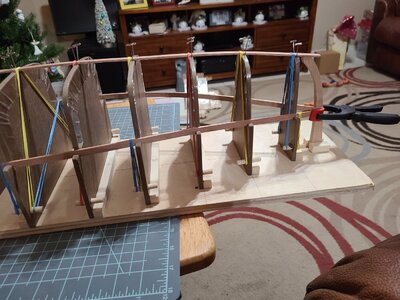
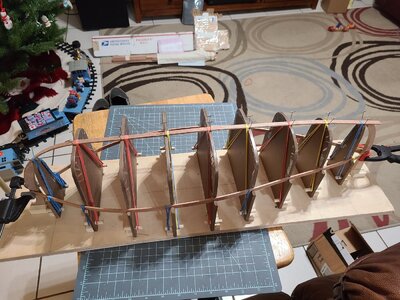
Started planking.

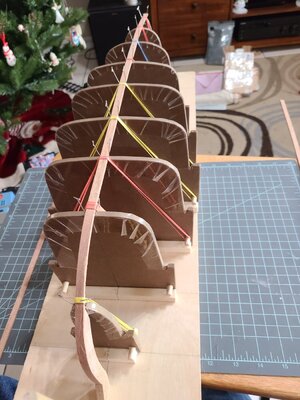
First plank is straightforward, lay plank in slots cut in frame, secure with rubber bands. Fit ends to stem and stern, glue and clamp to dry. I did this and the mohagony bent beautifully without water or heat. I used PVA.
20211227_184831.jpg

20211227_184834.jpg

20211227_184851.jpg

Scott recommends using CA on this build, and it makes sense for the method he suggests of placing each plank in place and holding it with clamps as needed, then "welding" it in place with thin CA.

I really do not like CA. I have used it in the past and simply do not like it for building with wood.

My plan is to use PVA. I will need to preshape the planks so it does not take long to clamp them in place once the glue is applied. The climate here is dry and PVA has a tendency to quickly skin over once it is applied to a surface. Actually I think preshaping is a good practice I need to learn, this is the perfect opportunity.

So on that note I believe I will remove the first two planks and preshape some new ones. There are extra planks included in the kit. Preshaping will also decrease the tendency of the boat to deform when it is removed from the strongback.

Thank you for looking,
Glenn
 
Wow Glenn. You are off to an excellent start on a most fascinating model. I will be watching and following with great interest!
 
Started planking.

First plank is straightforward, lay plank in slots cut in frame, secure with rubber bands. Fit ends to stem and stern, glue and clamp to dry. I did this and the mohagony bent beautifully without water or heat. I used PVA.
View attachment 278660

View attachment 278661

View attachment 278662

Scott recommends using CA on this build, and it makes sense for the method he suggests of placing each plank in place and holding it with clamps as needed, then "welding" it in place with thin CA.

I really do not like CA. I have used it in the past and simply do not like it for building with wood.

My plan is to use PVA. I will need to preshape the planks so it does not take long to clamp them in place once the glue is applied. The climate here is dry and PVA has a tendency to quickly skin over once it is applied to a surface. Actually I think preshaping is a good practice I need to learn, this is the perfect opportunity.

So on that note I believe I will remove the first two planks and preshape some new ones. There are extra planks included in the kit. Preshaping will also decrease the tendency of the boat to deform when it is removed from the strongback.

Thank you for looking,
Glenn
I'm not a big fan of using CA like Scott suggests, so I'm curious to see how it works with PVA for you.
 
Wow Glenn. You are off to an excellent start on a most fascinating model. I will be watching and following with great interest!
Thank you and welcome! I'm fascinated with it as well. Bought the book but have barely passed the forward, it's usually a decision of read or work in shipyard...

I'm not a big fan of using CA like Scott suggests, so I'm curious to see how it works with PVA for you.
I'm curious too, we'll see how it goes.
 
Last edited:
When you say book - can you tell me what the title of the book is and what it is all about, please Glenn?
 
When you say book - can you tell me what the title of the book is and what it is all about, please Glenn?
Be happy to :).

Sea of Galilee Boat book by Shelley Wachsman. Shelley is the gentleman that worked to recover the boat. I've barely started it but what I've read is well written. I purchased my copy from Amazon, it is also available on Kindle and audio.
 
Last edited:
Be happy to :).

Sea of Galilee Boat book by Shelley Waschman. Shelley is the gentleman that worked to recover the boat. I've barely started it but what I've read is well written. I purchased my copy from Amazon, it is also available on Kindle and audio.
I just Googled "Sea of Galilee Boat essay" and came up with some hits of a pdf file by the same author.
 
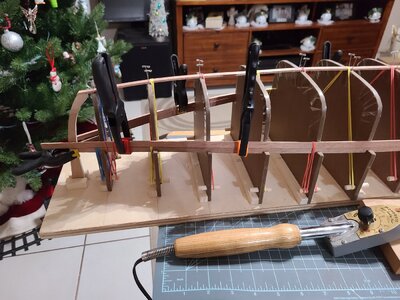
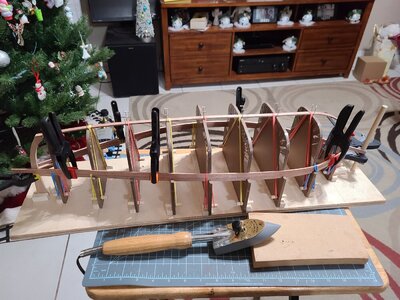
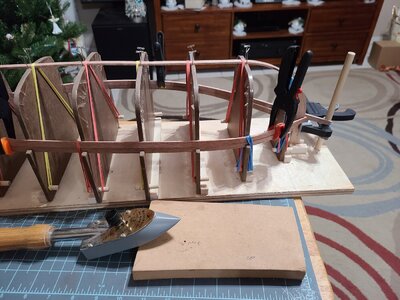
I cut the first strikes loose, they did spring out to nearly straight when they were released. I spent a couple of hours with my old iron used to apply covering to RC airplanes shaping these strikes. While they're not perfect they are close, as close as I could get them. They curve in two directions and I was at a point where I would adjust a bend one way and it would negatively affect the bend in the other direction. I did soak them for about an hour in water but they dried out upon the first application of the iron so most of the bending was with heat only. The iron was borderline high as I darkened the wood a bit. These were then reinstalled.

Next I clamp in the next two strikes after soaking a couple of hours in water. My container is only tall enough to soak about 1/2 of a plank at a time so I turned them end for end periodically. This is more an experiment than anything. These pics show the second plank clamped in place, along with the iron I used.


20211229_201549.jpg

20211229_201553.jpg

I'm not too happy with the iron. It uses a flat surface so the process I was using is heat a length of plank, remove it and quickly bend by hand and hold until cool. I'm going to try putting the handle in a vise and using the side curved surfaces before giving up on it.

Some other methods under consideration are making a container from PVC pipe to soak the entire plank for a full day then clamp in place to dry. Also building a steam box. Finally a Bending Iron intended for luthiers might work, but I don't know if it would be any better than the sides of the iron I currently have.

Thanks for looking and all of the likes.
Glenn

20211229_201542.jpg
 
What I typically do is put the planks in the bath tub, and place a bottle of shampoo or something heavy enough to hold them down under the water. I fill the tub with hot water about an inch deep. Then let them soak for about 10-15 minutes. After that you can remove them and towel dry, then I glue the plank on immediately while it is still damp. I use wood glue on the edge of the planks, and a drop of CA on each frame. I start from one end and hold the plank tightly against the previous plank and let the CA dry enough to move to the next frame, working my way down the hull. This way the plank will stay in place once it’s on and you are just waiting for the wood glue between planks to dry. At the same time the plank will start to slowly dry out. You can pre bend the plank at any areas that have a radius that would work against the glue holding. That can be done with your heating iron if you roll the plank across it as you bend it. Just make sure the plank is damp so you don’t burn it! There are many methods, but those are a few I use. The board being damp helps with the lateral bends across the length of the hull. Pre bend for curves around the side of the hull if they are extreme enough to pull up with CA. Otherwise the CA will hold the plank until it dries. After that it should be frozen in the bent state. Or, you can use nails to hold until the glue cures and then remove them.
 
What I typically do is put the planks in the bath tub, and place a bottle of shampoo or something heavy enough to hold them down under the water. I fill the tub with hot water about an inch deep. Then let them soak for about 10-15 minutes. After that you can remove them and towel dry, then I glue the plank on immediately while it is still damp. I use wood glue on the edge of the planks, and a drop of CA on each frame. I start from one end and hold the plank tightly against the previous plank and let the CA dry enough to move to the next frame, working my way down the hull. This way the plank will stay in place once it’s on and you are just waiting for the wood glue between planks to dry. At the same time the plank will start to slowly dry out. You can pre bend the plank at any areas that have a radius that would work against the glue holding. That can be done with your heating iron if you roll the plank across it as you bend it. Just make sure the plank is damp so you don’t burn it! There are many methods, but those are a few I use. The board being damp helps with the lateral bends across the length of the hull. Pre bend for curves around the side of the hull if they are extreme enough to pull up with CA. Otherwise the CA will hold the plank until it dries. After that it should be frozen in the bent state. Or, you can use nails to hold until the glue cures and then remove them.
@Dean62 thank you for the detailed explanation!! This is similar to the method I settled on for my first build, a POB. Biggest difference is I used nails on the ends rather than CA and no heat.

My challenge is building this shell on the strongback without gluing the two together and without melting the packing tape on the strongback.
I’ve often used a soldering iron on planking. I haven’t started on this boat yet. Maybe after all the relatives are gone, the guitar is finished, and the Soleil Royal is done. And then there’s work and honey dew lists. I have a little trepidation about how the planking will go. I sure don’t like the thought of covering it with ca as per instructions.
 
I’ve often used a soldering iron on planking. I haven’t started on this boat yet. Maybe after all the relatives are gone, the guitar is finished, and the Soleil Royal is done. And then there’s work and honey dew lists. I have a little trepidation about how the planking will go. I sure don’t like the thought of covering it with ca as per instructions.
I won't cover it with CA. Haven't decided yet what I'll use for finish but it won't be CA. Hope you do a log when you do your build.
 
Back
Top