• Beginning at 5:00AM PST (13:00 UTC) on Friday February 14th, all services in the Los Angeles, California, USA Data Center will be offline to perform a Data Center Migration. Due to the nature of this migration, we anticipate up to 24 hours of downtime to safely complete this work. Please be patient during this time and thank you for being a valuable member of our community.

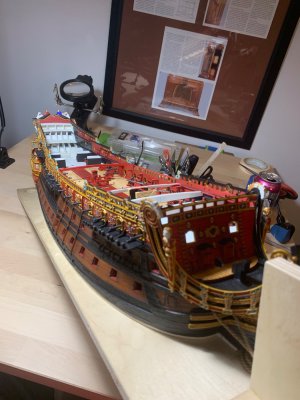
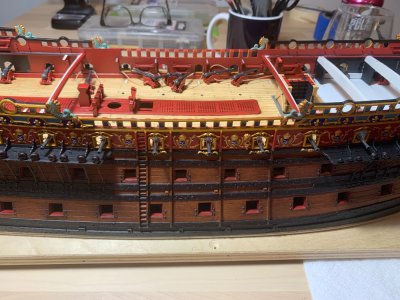
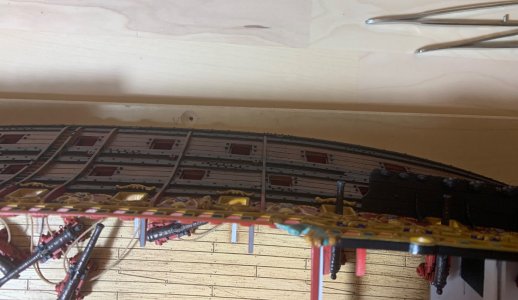
Soleil Royal by Heller - an Extensive Modification and Partial Scratch-Build by Hubac’s Historian

Thank you all for your likes and kind comments. As was the case with the chains, I’ve been experimenting and taking my first baby steps with rigging techniques.

Specifically, I’ve been learning to strop 2mm single blocks for my main deck haul-out tackles. As I mentioned in an earlier post, I will not use scale rope for these, as the line gauge is fine enough to get away with much cheaper thread, of which I have an abundant supply.

Abundance is what I have needed, here, because I have tried a number of different approaches to both minimize any space between the hook and block, while also stropping the block in a neat and tidy fashion.

I was really struggling on that front. And, that’s when I decided to consult with two of my favorite plastics builders: Michael D and Daniel Fischer. Both are outstanding at creating very correct looking rig, using ingenious technique in relatively small scales.

I need 24 of these single block tackles for the visible guns that will be rigged. I had made 9 that were variously unsatisfactory. Dan’s Victory log is particularly illustrative of small things I could do to achieve better results.

Initially, I was using two overhand knots (alternating from one side to the other), with the finest linen thread I posses, in order to strop the hooks. With a spot of CA, and the help of a simple pin jig to hold the block, I’d center the hook on the block and smooth the line into the groove until the CA set. Then, I’d use the same linen thread and an alternating overhand knot technique to seize below the block. A spot of CA seals the seizing and I nip the excess clean. This was my best result using this technique:

IMG_6830.jpeg

It’s okay, but I wasn’t really happy with it. From Daniel, I realized I could secure the hook with one overhand knot and then secure at the top of the block, as before. Now, while Dan often employs the alternating knot technique for simple seizings, he often uses fly-tying thread which, I am given to understand, flattens out as you wrap it. Dan’s simple seizings look great, and I think the flattening aspect of this type of line is the key.

So with those tips in mind, I tried again. Using a binder clip to keep the strop ends taught, I found that I could do a single overhand knot close to the block, followed by six conventional wraps to get a seizing that looked proportional:
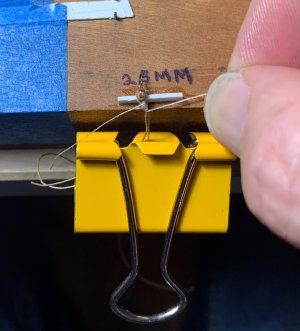
IMG_6832.jpeg

Now, I will be buying a set of alligator hands, as Dan Pariser previously suggested. I will also pick up some fly-tying line to experiment with. For the time being, though, this is both manageable and repeatable. Here is a side by side comparison:
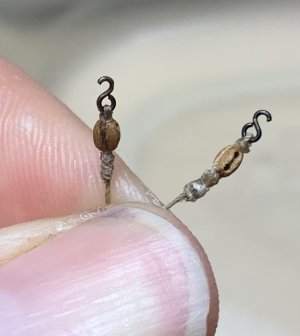
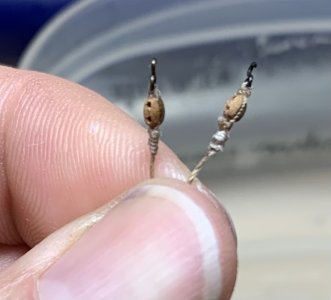
IMG_6830.jpeg
IMG_6828.jpeg

Now that I have an approach that I like, I dipped all of the previous tackles in acetone, so that I could salvage my blocks and hooks:

IMG_6831.jpeg

Any remaining glue residue brushes away with an old tooth brush.

Well, it isn’t much, but it is progress of a sort and I feel good about it. Thank you all for looking in!
 
Good day Marc,
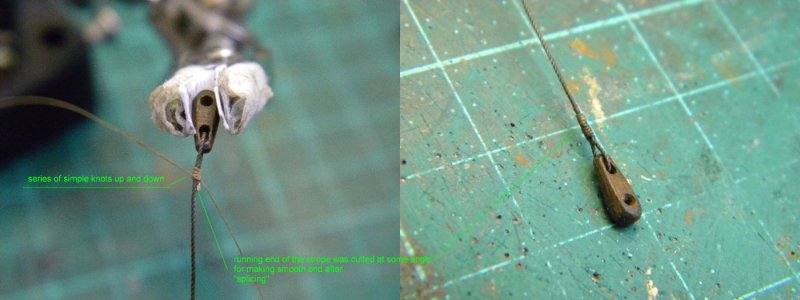
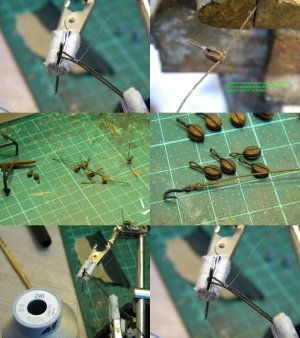
There are a few tips how I made my hooks and how I did my blocks seizing and imitation of splicing,
indeed You need 3rd hand for it, making all process much easy...
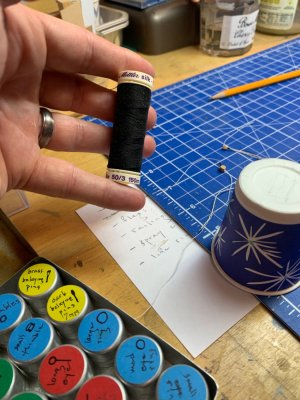
I use guttermann scala for imitation block seizing and splicing,
for imitation splicing I use series of a single overhand knots( but not wraps as next steps in the process, which could be more complicate to perform than making series of simple knots) applied as much as possible close one to another , I use preliminary painted and stained threads which mostly very handy to work with, they became such as kind of soft iron wire, very handy to manipulate with such threads... scala thread often (not always) also painted before use...
may be it will be usefull information for You in your experiments with block rigging...
All the best!
Kirill

f761t2801p194456n18_gwXzYsPZ.jpg

scala 240 for seizing blocks.jpg
 
Last edited:
I have another attempt, I immobilize the blocks on a needle or toothpick,according the size. Yours is the same by the way ;-)


XXXDAn
 
Good day,
Marc,Daniel ,
it looks we are thinking in the same direction regarding how to manage this damn block rigging :)))
I think it is more logical way...
indeed toothpick or needle works very well in some situation, also good results give this "angle" cut of remainas of running end of the strope(when it passed\wrapped around the block, but for that thread need to be preliminary painted or dressed by any other way) - after all it(this cut) gives some kind of conical shape of this "splicing" area...
CA gel gives some freedom to form this cone more presisly by pincet, at least in this short period when CA is getting dry and some positioning still available..
as I noted by experience , CA gel in most cases is the best glue, in others -CA liquid works better.
 
Last edited:
Today I saw on one of the neibor site some very,very promissed idea which very closely imitates real splicing! It was Siggi briliant idea!
Need to try it as soon I will be back home :)
Siggi says this is a 3 mm block and a 0,3 mm rope
What do you think about this method ? Maybe somebody who near his working table, will try and show us how does it work? I think in this case ? better to use non painted thread and paint it later on... if this" pass" replicate 2 -3 times maybe it will be even more close to the real things? but may be it will looks too bulcky if Siggi shown only one time "pass trough"... very interesting

1 2 3 4  DSC02969.jpg.96edd965c0ae96257abff759af19c5f0.jpg
 
Last edited:
I have another attempt, I immobilize the blocks on a needle or toothpick,according the size. Yours is the same by the way ;-)


XXXDAn
Thank you, Dan! I had actually gone through your entire log, backwards, and took screen captures of all technical posts such as these that show how you make the rigging. Thank you for sending the links, though. They will be as helpful to others as they were to me.
 
In response to reading through my travails of researching and learning basic rigging techniques, Dan Pariser offered to give me a first-hand tech session of the various tools, materials and techniques that he employs in his own professional work. As is always the case, this was time well-spent.

Immediate takeaways:

- The helping hands vise with a retro-fitted hardware store spring for tension is an absolute game changer. Intuitively, this is common-sense, but actually using the device makes it crystal-clear how medieval my previous efforts really were. Welcome to the enlightenment!

- Speaking of which, a simple magnifying visor really helps to ease eye-strain - particularly for fools like me who are still stubbornly resisting the very real need for transition lenses.

- Buying a box of small CA gel tubes is a wise investment.

- Along those lines - small disposable paper cups, like the ones you would use to stock a water cooler, are the perfect elevated platform for you to place a dollop of your gel CA. I had been using small squares of tin foil, but it’s easy to lose sight of the glue spot and/or stick the foil to your hand when you aren’t paying strict attention.

IMG_6850.jpeg

- One really should accustom themselves to using bent-nose tweezers for their rigging processes. Self-evident, I know, but I have a tendency to make due with whatever I have laying about. I am usually working way too hard.

- Common, round tooth picks are the perfect CA applicators.

So, Dan showed me a variety of approaches to stropping a block, either with or without hooks. What was especially fascinating was the interplay between polished line (free of whiskers) and either embroidery thread or fly-tying line for seizings.

Embroidery thread, because it has a lay, will grab onto the polished line, while fly-tying line is more prone to slipping. This can make it difficult to advance the seizing. To counteract this, when using fly-tying line, one might begin the seizing with a Lark’s Head knot, and then reversing both leads in the counter-direction, in order to cinch the knot tight:

https://howdidyoumakethis.com/larks-head-knot/

Another important take-away was to begin the seizing at the distance away from the block that you wish the seizing’s length to be. With each successive wrap, the seizing grows tighter as it nears the block.

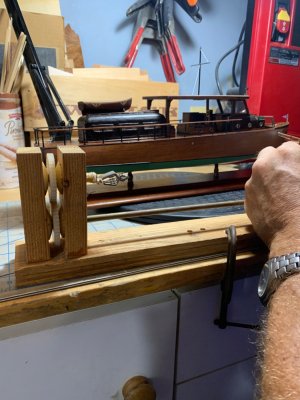
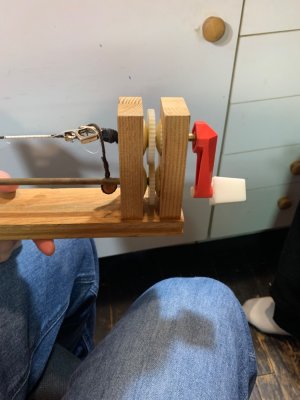
Lastly, a perfectly serviceable and long-lived serving machine can be made for a mere hardware store pittance:

IMG_6851.jpeg
IMG_6852.jpeg

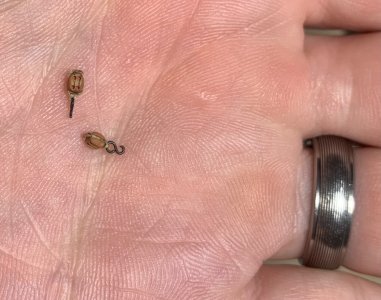
As soon as I got home, I now found it incredibly easy to make hook strops for my 2mm double blocks:

IMG_6880.jpeg

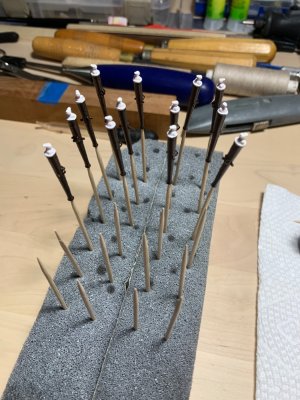
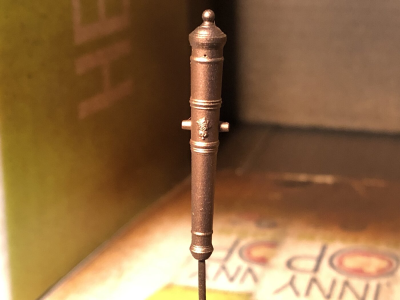
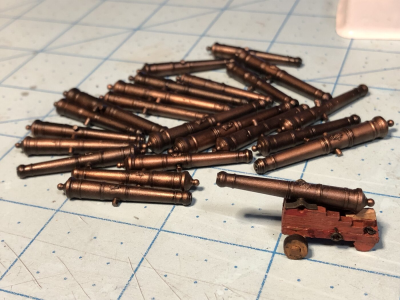
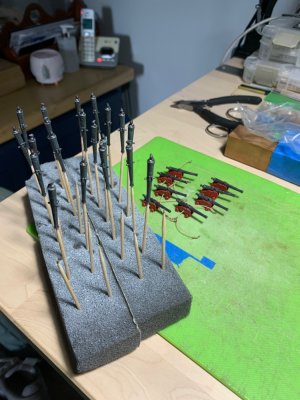
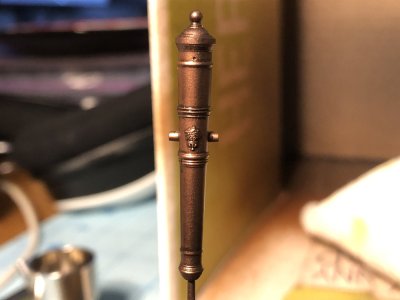
Right now, I’m in the process of painting all of the main deck guns. Their bores have been blacked-out. I have learned from my earlier experience with the lower main deck guns to always keep the gun barrels separate from each other during the painting process. This is especially true for the next step, which is the Citadel ver-de-gris wash. I’ll have a bit of a tedious touch-up process for those lower deck guns, much later in the build.

IMG_6881.jpeg

The cascabels are still white, here, because I am using that end to hold the barrel while I brush on the Citadel dark bronze. I haven’t tried to airbrush this paint, but I suspect that the metallic flake would make it a poor candidate for air-brushing. Once painted, I’ll join the barrels to their carriages. I’ll add cap-squares with CA and strips of black construction paper. Then, I’ll glue the guns down and attach the breaching ropes and tackles.

Dan showed me quite a bit more about knotting techniques and other rigging tips, but I will discuss those things as the build necessitates them. Thank you so much, Dan!

And thank you all for looking-in!
 
In response to reading through my travails of researching and learning basic rigging techniques, Dan Pariser offered to give me a first-hand tech session of the various tools, materials and techniques that he employs in his own professional work. As is always the case, this was time well-spent.

Immediate takeaways:

- The helping hands vise with a retro-fitted hardware store spring for tension is an absolute game changer. Intuitively, this is common-sense, but actually using the device makes it crystal-clear how medieval my previous efforts really were. Welcome to the enlightenment!

- Speaking of which, a simple magnifying visor really helps to ease eye-strain - particularly for fools like me who are still stubbornly resisting the very real need for transition lenses.

- Buying a box of small CA gel tubes is a wise investment.

- Along those lines - small disposable paper cups, like the ones you would use to stock a water cooler, are the perfect elevated platform for you to place a dollop of your gel CA. I had been using small squares of tin foil, but it’s easy to lose sight of the glue spot and/or stick the foil to your hand when you aren’t paying strict attention.

View attachment 477508

- One really should accustom themselves to using bent-nose tweezers for their rigging processes. Self-evident, I know, but I have a tendency to make due with whatever I have laying about. I am usually working way too hard.

- Common, round tooth picks are the perfect CA applicators.

So, Dan showed me a variety of approaches to stropping a block, either with or without hooks. What was especially fascinating was the interplay between polished line (free of whiskers) and either embroidery thread or fly-tying line for seizings.

Embroidery thread, because it has a lay, will grab onto the polished line, while fly-tying line is more prone to slipping. This can make it difficult to advance the seizing. To counteract this, when using fly-tying line, one might begin the seizing with a Lark’s Head knot, and then reversing both leads in the counter-direction, in order to cinch the knot tight:

https://howdidyoumakethis.com/larks-head-knot/

Another important take-away was to begin the seizing at the distance away from the block that you wish the seizing’s length to be. With each successive wrap, the seizing grows tighter as it nears the block.

Lastly, a perfectly serviceable and long-lived serving machine can be made for a mere hardware store pittance:

View attachment 477507
View attachment 477506

As soon as I got home, I now found it incredibly easy to make hook strops for my 2mm double blocks:

View attachment 477505

Right now, I’m in the process of painting all of the main deck guns. Their bores have been blacked-out. I have learned from my earlier experience with the lower main deck guns to always keep the gun barrels separate from each other during the painting process. This is especially true for the next step, which is the Citadel ver-de-gris wash. I’ll have a bit of a tedious touch-up process for those lower deck guns, much later in the build.

View attachment 477504

The cascabels are still white, here, because I am using that end to hold the barrel while I brush on the Citadel dark bronze. I haven’t tried to airbrush this paint, but I suspect that the metallic flake would make it a poor candidate for air-brushing. Once painted, I’ll join the barrels to their carriages. I’ll add cap-squares with CA and strips of black construction paper. Then, I’ll glue the guns down and attach the breaching ropes and tackles.

Dan showed me quite a bit more about knotting techniques and other rigging tips, but I will discuss those things as the build necessitates them. Thank you so much, Dan!
And thank you all for looking-in!
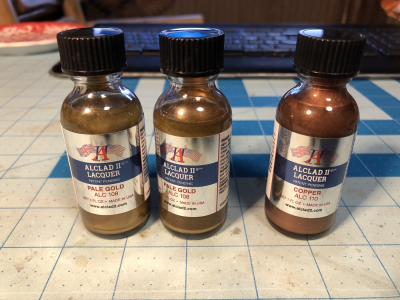
You CAN air brush metallic paint if it is a fine quality paint such as Alclad II.
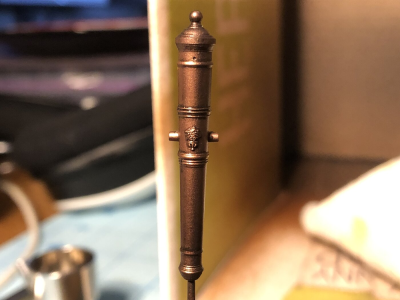
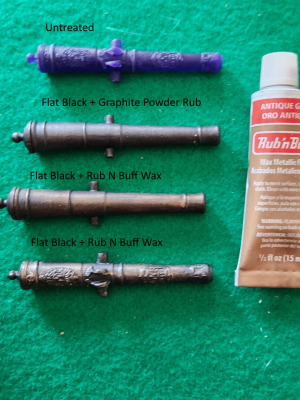
First test barrel. Alclad II copper was airbrushed onto the acrylic flat black barrel just to see what would happen. The copper coverage was heavier than earlier recommended, and it didn't burst into flames from not having the gloss black as a base. Spraying a thinner coat of copper will produce an overall darker color. i just need to learn more airbrush control.
1729003367259.png

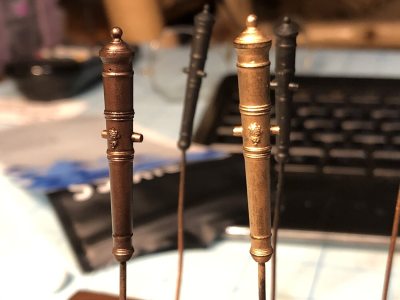
Because the coverage was a bit heavy on this first try, some black panel liner was applied, and BOOM! Instant awesome. The details popped out. The cast tudor crown and rose are actually visible on this small scale now. Even the touchhole came out, and was not clogged with paint.
1729003397894.png
1729003499535.png

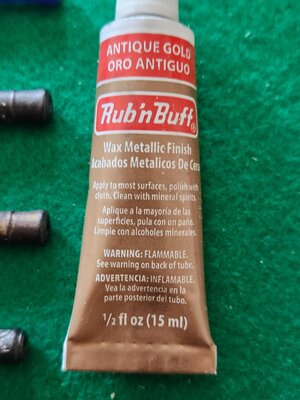
Here is the result using Rub'n Buff gold next to the Alclad II Bronze accented with black panel liner. The gold is a bit more reflective than the photo shows.
1729003456389.png

1729003542826.png
1729003584548.png

Hoss6262 posted this:
1729003650050.png
 
Today, my son is home, sick, and so I stayed home with him. This will afford me a few hours to assemble guns, while otherwise enjoying a lazy afternoon.

Painting of the barrels came out well. The Citadel ver-de-gris wash is a little tricky to use. Unless you are depicting the centuries-old guns currently on display at the Palais des Invalides, then you are going to want to dilute the wash-coat. I like to use a medicine dropper to do this because it is easier to keep track of ratios that are repeatable. I think I ended up at a 50/50 mix, cut with common tap water.

Despite thinning, the wash coat does dry almost immediately, and it is almost impossible to avoid lap lines with a brush. I do think a bristle brush is the best applicator - as opposed to an airbrush - because you can draw color into and out of crevasses, thus modulating the effect.

After everything has dried, I use a Q-tip, covered with a t-shirt scrap to burnish each barrel, and minimize the lap-lines. Particularly stubborn laps can be further softened with a well-worn SOFT toothbrush.

IMG_6982.jpeg

In the light of day, this degree of oxidation looks about right to my eye:

IMG_6984.jpeg

As for assembling, I have a small, round needle file that I use to clear paint from the trunnion blocks. I scrape paint away from the undersurface of the trunnions, as well as the quoin and the cascabel rim, where these two surfaces meet.

I will add cap-squares, at least to the fully visible carriages. If the process is not too tedious, I will do so for the rest of the main deck guns; it’s just a little extra bond-insurance to safeguard against guns breaking free of their carriages.

So, little by little. Catch as catch can. We are getting there! Thank you for stopping by.
 
To darken the crevices and bring out the details, try panel liner used for for plastic models. It's like heavily diluted black or brown and it seeks crevices and dries in a short time, but not too short. Works great. If you need darker details, apply a second wash after the first one dries.

Gray primer, AlClad II copper paint applied with airbrush, one wash with panel liner.
1345 After Black Panel Liner was Applied.jpg
 
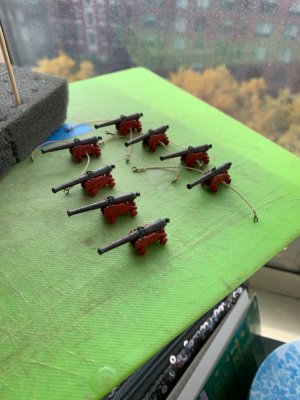
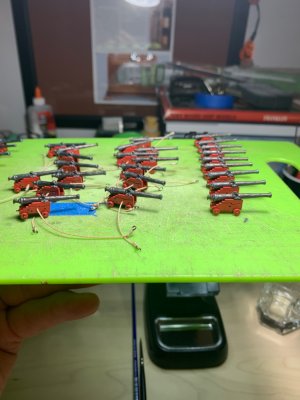
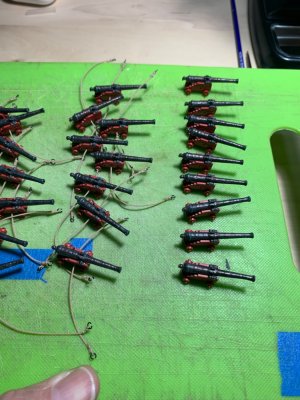
Ultimately, I decided to make cap-squares for all of the main deck guns. With black construction paper and CA applied with a sharpened tooth pick, the process was relatively straight-forward, if a little time-consuming.

I used my new bent-nose tweezers to massage the paper into the glue, and to snug into the trunnions. The glue wicks into the paper and polymerizes it. Truly, paper is an underrated modeling material. The added benefit is that the black construction paper has some tooth to it that approximates the scale appearance of wrought iron. In other words - it’s not a very fine surfaced paper.

I’d be lying if I said that it didn’t bother me at all that I did not really address the raised trunnion mounting blocks on the carriage cheeks. Naturally, with this much scraping of glue and general handling, there is going to be a round or two of paint touch-ups.

At first, I was going to re-touch the red around these silly trunnion blocks. I had a eureka moment, though, and realized that I could paint those blocks black and they would blend into the cap-squares.

I experimented on the less visible guns, and liked what I saw (guns, right):

IMG_7011.jpeg

This may be a slight exaggeration of the scale of the cap-square irons, but at best - the carriages are mostly viewed from above. What you will see is a straight red line delineating the top of the carriage cheeks.

I decided not to paint the paper cap-squares, themselves, because I did not want to lose that wonderful texture:

IMG_7012.jpeg

All-in-all, I think this turned out to be a fairly elegant work-around to a lot of extra work that I wasn’t interested in doing.

Next step: mount and rig the guns. As ever - thank you for your continued interest.
 
Fantastic Marc! I find the paper cap-squares very convincing. And I am not at all bothered by the black blocking. I wouldn't do it at 1:48 but it works rather nicely here - and perhaps better than the red would as the block does not extend to the forward edge of the carriage cheek.

All this to say I'm a fan!
 
Hello to all,

This is just an alive and kicking post.

The past several weeks have been pretty frenetic and filled with ups and downs. Thanksgiving was very nice, however the day after, my sister and I flew to Florida to see our Father’s brother (85), who landed in hospital with serious cardiac issues that necessitated an aortic valve replacement. I am grateful that we were able to see him, because he passed the day after we left on Sunday. Very tragic, as his wife passed in August of this year. My cousins are distraught, naturally.

We then spent Sunday into Monday moving my Father to a new assisted living facility. While this process was fraught with all kinds of logistical problems and oversights, my Dad at least went willingly. He was, in fact, quite delighted with his new accommodations. Unfortunately, owing to his advancing dementia, we can’t even tell him about his brother. I don’t think he can even process that news, at this point.

Overnight, my father took a hard fall, and now I am with him, in hospital, awaiting results of all the scans they did. I think he will be okay. He’s in better condition than I was expecting.

Sooooo, needless to say - there hasn’t been a whole lot of time for modeling. Over a period of weeks, when I had the energy and attention span, I very carefully closed all of my breaching rope rings around their bulwark eye bolts. Druxey’s idea to file a groove into a pair of tweezers gave me just enough purchase to close the rings without completely collapsing their shape. Thanks again, David!

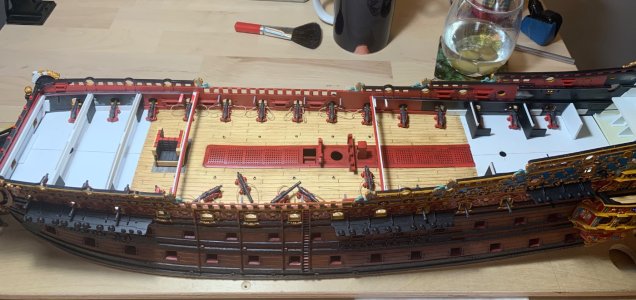
Last night, before this latest misfortune, I was able to glue those guns in place:

IMG_7115.jpeg
IMG_7118.jpeg
IMG_7119.jpeg
IMG_7116.jpeg
IMG_7120.jpeg

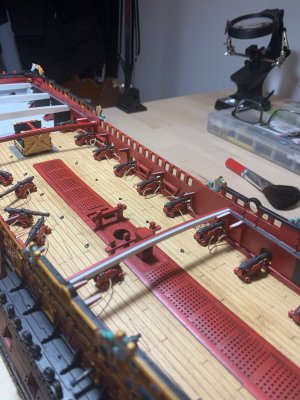
While I am not a saber-rattler, by any means, it is nice to see the ship begin to be armed as befitting her raison d’etre. The next step will be to arrange the breaching ropes in a more realistic fashion that conveys a sense of heft and a natural lay. I will achieve this with dilute white glue. After that, I can attach and arrange the haul-out tackles.

One project that I would like to soon undertake is the design and fabrication of the new f’ocsle break rail, belfry and the quarter deck break rail. All of that gingerbread stuff makes me happy.

Now, I would like to take this opportunity to introduce you all to my friend Eric Wiberg. He has undertaken his own Heller SR modification project, and it is quite a bit more ambitious than my own. He is modeling Soleil Royal, 1671.

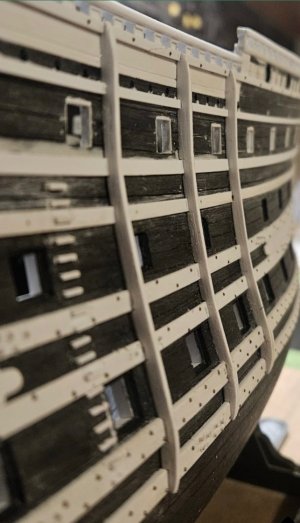
Here, a brief re-cap of his alterations, to date: He has completely re-mapped the wales so that the forward sheer is less pronounced, and the aft sheer rises appropriately for a vessel of this early time period. He has added to and arranged the artillery so that it is correct in number and placement. He has sanded away the kit grain, filled the kit plank lines, and scribed new plank lines that follow the new wale sheer. The wales are correctly graduated in scale, and the upper wales will eventually be ornamented with the famed l’istons d’or.

Eric has created new, correctly scaled timberhead railings that will eventually be bracketed by dolphin hancing pieces. He has re-shaped the main deck ports so that they are correctly square. He has added a waist ladder, skids and scuppers, and he has planked his inner bulwarks.

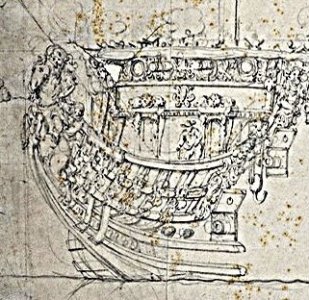
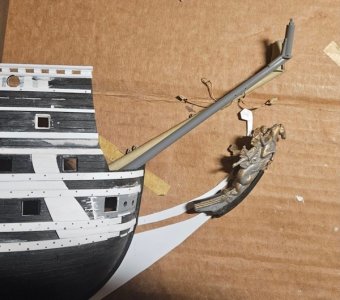
At the moment he is experimenting with the steave of the bowsprit, as he plans to completely re-construct the head, so that it has the more “Dutchy” early appearance of her near contemporary, La Reyne. Here, a few pics to whet your appetite:

IMG_7123.jpeg
IMG_7125.jpeg
IMG_0116.jpeg
IMG_7124.jpeg
IMG_7126.jpeg

A number of people have undertaken these very complex modification builds. Eric possesses the talent and determination to bring this all to fruition. Please come take a look for yourselves:

https://modelshipworld.com/topic/35...berg-heller-1100-started-45-years-ago/page/7/

Until next time, let your friends and family know just how much you love them.

All the best,

Marc
 
Back
Top