• Ships of Scale has incorportated an extra level of security when you log In. Please follow on-screen prompts to acknowledge that you are not a robot via a "Check Box" or a "Pictorial Check Box Puzzle". This is needed due to higher level of AI Activity Security.
  • SUBSCRIBE TO SHIPS IN SCALE TODAY!

    The beloved Ships in Scale Magazine is back and charting a new course for 2026!
    Discover new skills, new techniques, and new inspirations in every issue.

    NOTE THAT OUR NEXT ISSUE WILL BE July/August 2026
  • Win a Free Custom Engraved Brass Coin!!!
    As a way to introduce our brass coins to the community, we will raffle off a free coin during the month of August. Follow link ABOVE for instructions for entering.

Soleil Royal by KevinW - Heller 1:100

Good luck! When you figure out that kits have shortcomings, you eventually conclude that you have to make the changes to bring the model up to your standards, figure out how much detail you want to put into the model, then start the planning process of designing and purchasing materials and part or making parts in that direction. Keep the work flow moving to prevent stagnation. We're looking forward to seeing your build!
 
The tricky bit for me is in drawing a line. Easier to decide on no bashing at all than to try to only go so far.
Easier, yes, but not nearly as satisfying as adding your personal touches. Even a small to moderate amount of mods and additions makes a huge difference in the model's appearance. You don't have to go full scratch-built to get good results.
 
Last edited:
18/10/2026

You know how I was going to not do any bashing….

However, despite my intentions, I am already constantly referencing several top quality SR builds, both Heller and otherwise, seemingly spending an hour or two reading for every 30 minutes of making. Some things are just so easy to improve, especially with 3D printing, that it would be a shame to not do them. (For those who would like them, note there are .stl files attached with this post).

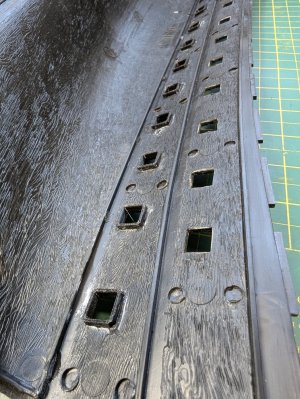
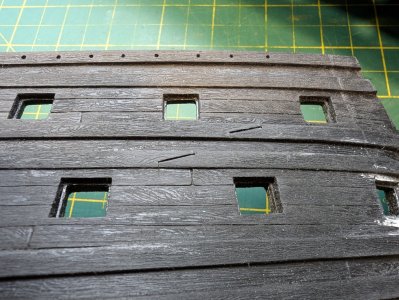
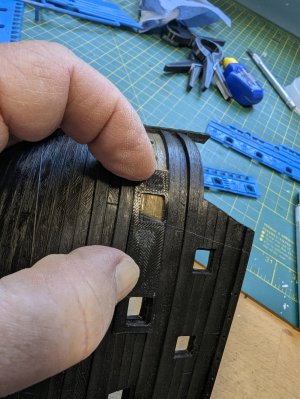
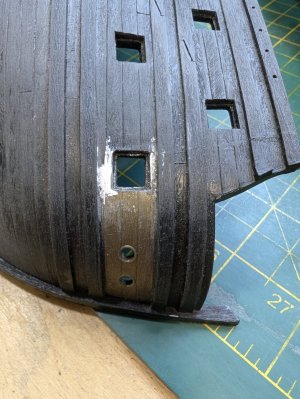
Consequently I’ve begun by thickening the gunports, a fairly standard thing now on plastic kits. Usually, people glue styrene strip to the inner edges of the ports but I’ve printed some inserts that both thicken the hull and create tidier linings all in one. I’ve gone with what looks right in relation to the depth and thickness of the insert, thickening by 2mm for the lower deck, 1mm for the middle and nothing for the upper.

....a 9mm chisel blade fits perfectly....I began making each insert specific to each port but after a few ports, just made a bunch of various sizes with minor variations and used whatever fitted best....
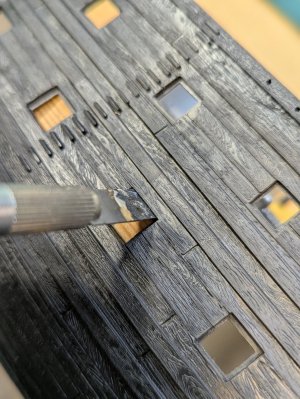
removing the moulded gunport linings.jpg 3D printed inserts added to the lower portholes.jpg scarf joints and inserts.jpg

I’ve also worked in the bow chase ports, spacing them the same as the others on the lower gun deck. I printed a simple template to get the position for this and cut the hole with a heated scalpel blade.

....0.4mm thick, FDM-printed marking template..... wraps easily to the bow.... the hawse hole inserts (parts 27 & 28) do not sit flush with the hull. Adding the chase port helps create a more seamless join...
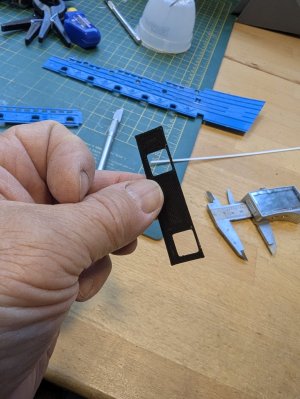
template for chase ports.jpg using chase port template.jpg chase port.jpg

Side fenders are work-in-progress – the ladders are done and the fenders are printing as I write, so they’ll go on over the next week or so.

.... after a few trial and error iterations I opted for 0.8mm wide fenders. It's just what seemed aesthetically right. I will be sanding down the height a little once all of the fenders are in place...
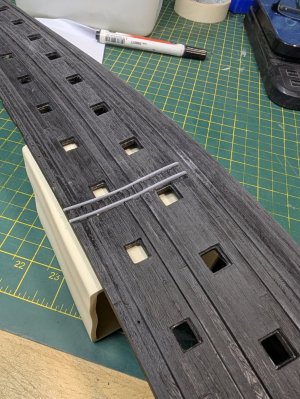
ladder fenders.jpg

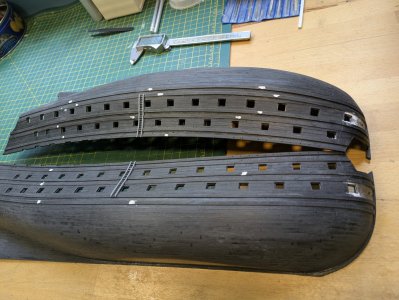
Marc's build (Hubac’s Historian) is one of my major references so like him I’ve sanded back the wood grain a bit. This plastic sands very easily, to the point where I was a little heavy handed on one of the wales. I cut scarf joints on the wales this morning – in fact melted rather than cut, again using a heated 0.4mm x 9mm scalpel blade after grinding the blade end flat. It needs to be just hot enough to go into the plastic with mild pressure. The little blobs of filler are covering up the vertical plank joints which are now redundant.

....starboard side untouched, port side sanded back......current status overall
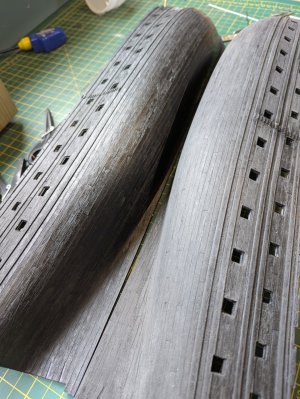
one half sanded the other untouched.jpg grain sanded back scarfs added ladder rails added.jpg

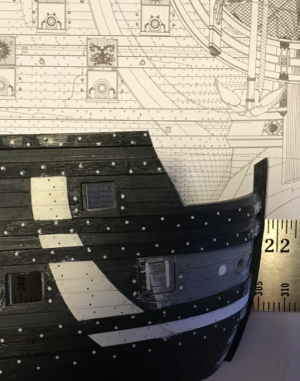
The fact that I’m even thinking about adding rivets is worrying, because there is a point in my thinking where, in reality, my heart has already decided to do it, but my head hasn’t yet agreed. I know how that usually ends up. Similarly, the upper bulwarks are screaming at me to scrape off the thistles and replace them with something equally plausible but which doesn’t encroach into the ladders and fenders. I find that encroachment strange as I can’t imagine any carpenter profiling the ladders and fenders to match the décor, and if the décor was put on last, wouldn't you just come up with something smaller that fitted the space, a fleur-de-lys for instance. Leastways that’s what I’d do! I know there are other points on the model where this occurs again so I'm all ears for alternatives.

....I don't know what the correct name for these is, so for me they are thistles....
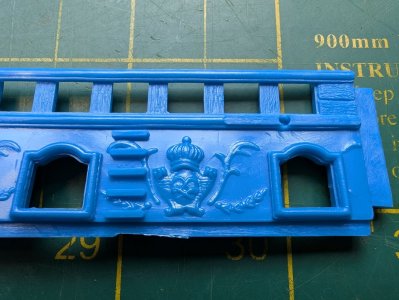
thistle.jpg

Anyway, the trouble is, after 2 or 3 years of doing virtually no model-making, I’m finding it extremely ‘zen’ to have a blend of hands on fettling and fussing, with a bit of easy CAD and printing to sidestep too much repetition. IF I do scrape them off, and it’s a big if, I swear I’ll leave the stern as it is. Except for the QG’s. Obviously these have to be opened out. But it stops there. Really.

Looking ahead a little... the colour scheme will probably be a not-as-good version of the gorgeous paintwork on Duarte's model (Soleil Royal - Heller 1/100 Back to work!), with twists pinched from Marc's and John Ott's respective builds.


Attached are files for the gunport inserts, fenders and chase port position template (place the large end over the final gunport and use the other hole as a cutting guide). Feel free to use/adapt/share.

 

Attachments

The consequence of not bashing is that you never are fully satisfied with the end result. For a modeler, those times where you could have made something a little better in those instances where doing so would have cost little time and effort are never forgotten. That is not say every project has to evolve into a full blown scratch build, only that the smallest improvements bring about an enormous amount of satisfaction compared to their effort. So take the time and let the work bring you the fullest joy that it can.
 
Last edited:
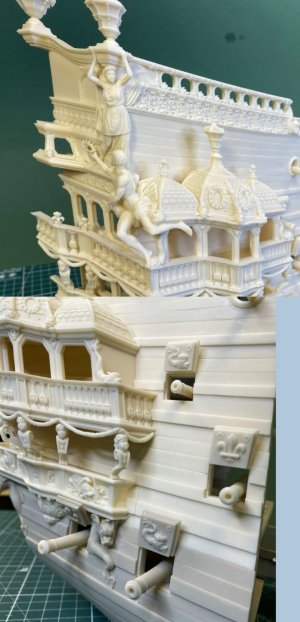
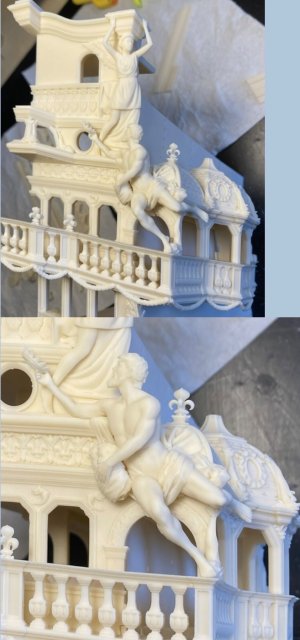
Those carvings between the main decks are supposed to represent a monogramed cartouche, flanked by vertical acanthus leaves that look like antlers, and a horizontal garland of bell-flowers that essentially runs the entire length of the ship.

These garlands are a pretty consistent early ornamental feature in the 1670’s. Here, on a German modeler’s CAD reconstruction of the DR, you can see a swaged garland running beneath the main deck level of the QGs:

IMG_0682.jpeg
IMG_0674.jpeg

It shows up again on the stern drawing for the RL, above the quarter deck windows, and also in a more robust swag beneath the stern chase ports:

IMG_7477.jpeg

The question as to whether carpenters would piece-in fragments of the ornamental program around structural elements is a good one. I prefer to think about the relative ease or difficulty of this in terms of 1:1 scale, rather than what it feels like in 1:96. In 1:1, these carvings are relatively huge.
 
I guess I agree about making the improvements. I do wish I was a little more resistant though! Marc, I hadn't really looked at it that way - at full size they are probably around 8' - 9' across and the acanthus leaves (one of my favourite perennials in our garden!) would be 4" - 5" across, which does change things a bit. That CAD model is fabulous. As an aside, I've started work on mine but I'm having too much fun with the Heller kit right now to slave over a keyboard.

By the way, can you tell me a bit about the thickening here - what was it for, and did you make it flush with the wales?
1792348689780.png
 
What you see there is the anchor lining, and yes, it is flush with the wales. Its purpose is to prevent the anchor flukes from hanging up on the wales. Originally, I had not filled-in the space forward of the lining, between the lower main wales. You can see a fine join line there. It was brought to my attention by Marc Yeu, so I went ahead and made the alteration.
 
Voila:

Ditto "Voila"! My wife has repeatedly told me that I have enough kits in my extensive stash to last past my death. Does she know something?

That said, I am looking for an excuse to purchase the AL kit of the SR!
 
All that you mention, Marc, has me still cogitating. While I'm not a historical perfectionist, I hated that the deck on the Revell Cutty Sark was about 5mm too high, meaning the cabins were too high, it was impossible to do proper gammoning on the bowsprit, and equally impossible to make a nice job of the bulwarks.

The masts are not too much of a concern as I will probably remake them anyway, using the same methods I used for the CS - resin printed with a square carbon fibre rod for strength. The same applies to fittings - all are quick and easy to remake.

The bulwarks, QG's, stern and prow area are the bigger concerns. To answer your question, yes, I would want to improve on these areas because these are the essence of the ship for me. After looking at the bulwarks a lot, remaking is not especially hard but doing so in a way that makes for a strong bond to the hull is less easy, bearing in mind I'd lose the 'welded' benefit of styrene cement.

I'm very conscious that the path I've taken for the Victory (still WIP, all these years on) has made it heavy going. I have remained determined to keep it rooted in the Heller kit, principally by using the Heller hull, which means the parts I make, like the side entrance and QG's, need to conform to the hull. I'm thinking I might want to avoid the same trap for this one by perhaps just using Heller as a reference/dummy model, and making my own hull either in the same scale or bigger. Artesania Latina kindly publish POB frame profiles for their 1/72 kit and I'm wondering how good/true a hull this produces, shape-wise? Any opinions? I don't think I'd actually go POB, more likely is that I'd transpose the templates into CAD and use them to form a printable hull and I would then probably cut my own decks to suit, via laser. If I make my own 3D hull I can make QG's, a stern plate, head rails etc, that will fit perfectly. The fun part will be making the decorations, but with Meshy apparently being amazing now, that might be more interesting than frustrating.
I love your phrase "historical perfectionist". It is a well-known axiom, and that Admiral Gorshkov used as a sign for his desk, that "Better is the enemy of good enough!" You will never build a model to 100% perfection, nor is it really possible given how much ships change over their respective life times, even in 17th century periods. Witness the very-well documented HMS Royal Sovereign/Sovereign of the Seas. Not only did she undergo changes in her decor and her name in Cromwellian times, we cannot even accurately tell whether she had a rounded or straight tuck.

Make the ship model suitable to your tastes. Ask yourself if better is the enemy of good enough, and enjoy the build, especially in knowing that the SR kit does not accurately reflect any of the three SRs or even Tanneron's model.

Be it noted, however, that Marc has built an exceptional model. That is the best that can be strived for.
 
Back
Top