Soleil Royal ZHL kit 1:90 Scale [COMPLETED BUILD]

G'day Mike
Hmmm..... I wouldn't change the 2nd planking to 1mm, because with the 1mm first planking and then your planking it would make the thickness of the planking 7 inches thick at the scale of 1:90. That's a bit too thick if you ask me. Even using the 0.5mm planks that makes them a bit over 5 inches thick at the scale. This size is livable, but 4 inches would be better, so if you do the 2nd planking with 0.25mm planks it would be ok.
The best solution would do only 1 player of planking with 1mm thickness, but at 1:90 scale that would be very very difficult job. This would make the scale planks to be about 3.5 inches think.
Just a thought
Greg

Thanks Greg, I didn't even think of the scale of the model. I may try cutting up some .25mm planks and see how they turn out. I don't think the kit is very accurate historicaly but your right about it being to thick. I have not found may pics of the ship and only a few build logs to compare things to. I would like to keep it as accurate as possible.
 
G'day Mike.
Talking about scale: the average length of planking was about 25 feet, so therefore at 1:90 scale each plank for your model should be about 85mm in length.
So the width of the planks: say they were 8 inches wide, so at your scale the planks would be about 2.25mm wide. That a lot of planks to lay.
That's a huge job in any language!
Happymodeling
Greg
 
Mike she's starting to look like a ship Brother nice work. the only problem with .2 planking is you have to remember you will need to sand no matter how good you lay that second planking down it will need some sanding. at .2 there isn't much meat on the plank. I've nearly sanded through .5 planking and I make a special point to sand my first planks down so smooth that the second round lays very flat, then I roll the planks down to ensure no curling of the edges. I still end up having to sand. The Idea is right on the thickness, but realistically its not always doable even with .5 planking
 
G'day Joe
You are correct when you said there have to be sanding, but if the first layer is as soon as a baby's bottom, as the expression goes, you will only need a very fine sanding on the second layer.
That's my experience when I have done my models.
The secret is a perfect first planking. I have always tried to do a perfect first planking, but it has never came out that way. I'm almost there now after so, so many years.
Happymodeling
Greg
 
Yeah My first plank job usually goes down well and I get it sanded smooth as glass about 90% of the time one thing I didn't do on my first couple of models is edge glue the planking I would only glue it where it contacted a bulkhead. that was a huge mistake I learned the hard way. because as your sanding the plank is flexing over the span between bulkheads and it never seems like your getting it smooth so you keep sanding I've sanded clean through 2mm planking and into bulkheads. I now glue my planks on the edges to each other. If I am building with a second planking I will usually run a bead of CA down every joint between planks to make absolutely sure they stick together. It makes sanding much easier to get a smooth finish. on models with a lot of bulkheads close together its not as bad a problem but it can still happen.
 
G'day Mike.
Talking about scale: the average length of planking was about 25 feet, so therefore at 1:90 scale each plank for your model should be about 85mm in length.
So the width of the planks: say they were 8 inches wide, so at your scale the planks would be about 2.25mm wide. That a lot of planks to lay.
That's a huge job in any language!
Happymodeling
Greg

I figured planks being that long, maybe a little wider. Your right lots of planks but just think of all the treenails o_O.
 
I figured planks being that long, maybe a little wider. Your right lots of planks but just think of all the treenails o_O.
There would be enough treenailes to make any seasoned modeler to go Koo-koo! They will be only 0.35mm in width. I have made it a practice (or being lazy) not to do treenails on models smaller than 1:64 scale. You wouldn't be able to see them at an average distance of 500mm viewing range either.
Happymodeling
Greg
 
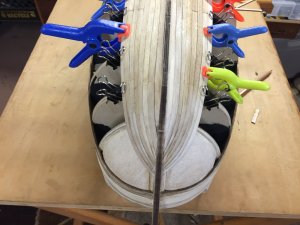
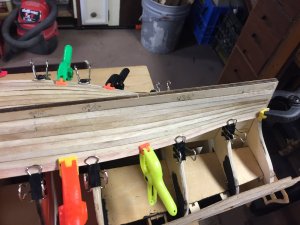
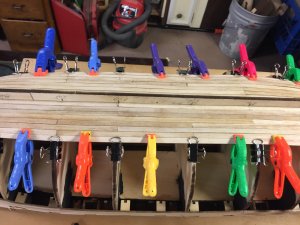
Slow going in the shop this week, still planking away. I cut a rabbit from midship to the stern. It's just deep enough to hold the garboard strake were it comes into the keel, I can then sand the plank flush with the keel. I also put in balsa blocks at the bow to help support the planks. With my small block plane shaping the planks is going smooth, a little soak and heat they bend into shape nicely.


image.jpegimage.jpegimage.jpeg
 
Slow going in the shop this week, still planking away.
G'day Mike.
You wouldn't expect anything else. Slow and planking fits perfectly in every sentence that I can think of.
You are doing a brilliant job on the first planking. Just remember the main thing, this is the base for the finish planking.
I do the same as you, making them as neat as possible and doing it in the process that will be different to the second planking.
I was told years ago by an old modeler: the first planking should be different to the second, so that there are no overlapping of first and second planking. He also told me to put the Wales on the bulkheads first and the fit planks next to them.
Happymodeling
Greg
 
First planking looks good. Slow and steady is the way. Try to learn myself to work slowy saves lots of time in the end. Less to correct. I always take pictures now of the pieces i worked on. They Let me see things that a have to do again because in a way they show more imperfections then my naked eye (with glasses or without them). Keep up the good work.
 
Thanks Greg. These planks are short they will not run the length oh the hull. I have been trying to stagger the butt joints on the straight part of the hull, probably not going to have enough planks. I'll be sure to make sure the second plank doesn't butt at the same place as the first. I was wondering if the Wales should go on before second planking thanks for answering that question.
 
Mike if your gonna use the second planking I wouldn't worry so much about the Butt joints you will never know where they were once covered. I was all set up on the Black Pearl to cut planks to proper length spill them in and all that happy stuff then I was like WHY as long as I lay them down nicely as in nice and smooth tight joints and laying across the bulkheads nicely and everything sands nice and smooth that's all that's really needed the second planks however you will want to lay down proper take your time and get the first ones down nicely and it looks like your doing exactly that. They look great so far.
 
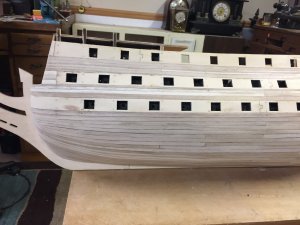
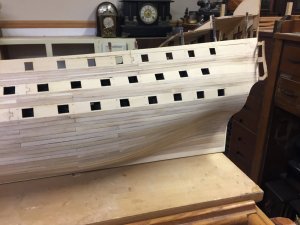
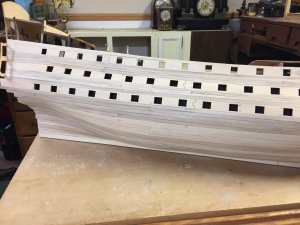
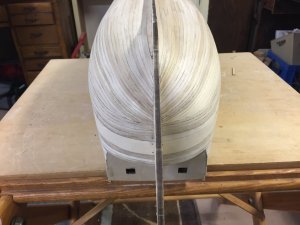
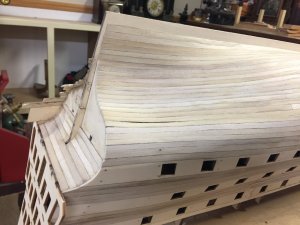
I found some time to get in the shop. Finished up most of the first planking, just have to do the small amount above the bulwarks. I had to cut some planks from some basswood I had, I didn't have enough in the kit. Both sides have been sanded. Next up is to hit the hull with filler and sand again.

image.jpegimage.jpegimage.jpegimage.jpegimage.jpeg
 
sanding is always a drag, I do my level best to make my planking tight and clean as possible so I don't have to sand a lot. spend the time getting her nice and smooth and then do a little fine paper sanding your second planks will go down real nice.
 
Back
Top