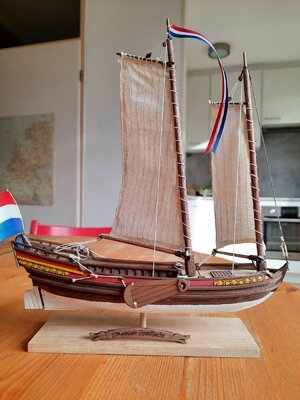
SPEEL-JACHT 1640 - Kolderstok 1:50 Scale

I LOVE these tiny decorations. Fits the boat extremely well!
Vision Aide.jpg

Thanks Doc,
I'm sure you are very familiar with 5/0 paint brushes and a magnifying aid when you painted. Excellent work you did, by the way. First Place Metal
One thing I will remember when painting these tiny fragile decorations is to de-tack the double-sided tape used to hold the pieces while painting. :oops:
 
She looks beautiful Ron. I particularly like the different shade of the walnut between the two wales in contrast to the rest of the hull.

WhatsApp Image 2022-02-04 at 16.08.26.jpeg

She does look good with the sails though. Here is another freshly completed Speeljacht by Matthias Noback.
 
Different shades of Walnut between the Wales? You must be referring to post #113 prior to applying oil. My last post although a lousy picture on my part that area has oil.
 
Hello Ron. No I'm referring to the pic after you have applied the oil. Maybe it is the light that makes the wood appear slightly lighter towards the stern between the wales. But then again, the color of the walnut sometimes play optical tricks on me.
 
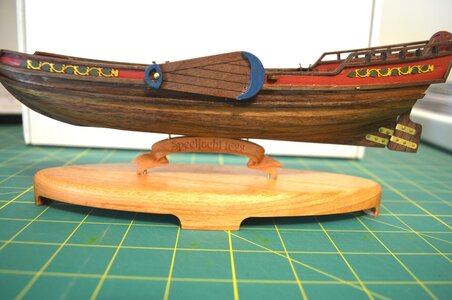
Pedestal.jpg
Thankfully, this little ship doesn't require lots of rigging. :rolleyes: Actually very little but I'm sure I'll make a mess of it. So instead of moving ahead with the setting of the masts and rigging I decided it was time to fabricate the pedestal. It's made from Cherry and coated with a couple coats of Danish Oil. The picture makes it look more yellow than it actually is. (Never claimed to be a photographer).
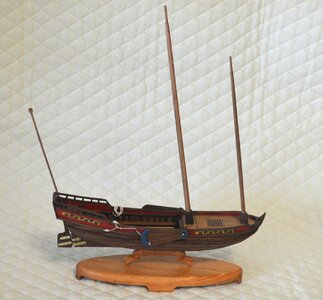
Now I can't put it off any longer......Masts and rigging time. :eek: Guess I'll start easy with the Leeboards then work myself up to a higher stress level. Haven't done rigging for three years since my long departed Kearsarge. Although my next build, The Statenjacht, doesn't have an overwhelming amount either.
I do like Grant's thought though, a tugboat!!

Ron

PS, I did cheat as it's all cut on my CNC.
 
Just beautiful Ron! Your swords "zwaarden" came out very well and is such a nice addition to the model. I also like the stand that you have created for her. What font did you use for the lettering?
 
Just beautiful Ron! Your swords "zwaarden" came out very well and is such a nice addition to the model. I also like the stand that you have created for her. What font did you use for the lettering?
The font is Harrington & .2" high
 
View attachment 289376
Thankfully, this little ship doesn't require lots of rigging. :rolleyes: Actually very little but I'm sure I'll make a mess of it. So instead of moving ahead with the setting of the masts and rigging I decided it was time to fabricate the pedestal. It's made from Cherry and coated with a couple coats of Danish Oil. The picture makes it look more yellow than it actually is. (Never claimed to be a photographer).
Now I can't put it off any longer......Masts and rigging time. :eek: Guess I'll start easy with the Leeboards then work myself up to a higher stress level. Haven't done rigging for three years since my long departed Kearsarge. Although my next build, The Statenjacht, doesn't have an overwhelming amount either.
I do like Grant's thought though, a tugboat!!

Ron

PS, I did cheat as it's all cut on my CNC.

Hello Ron - outstanding and well done! Mess is not part of your skill set for sure. Can’t wait to see your rigging progress.Thumbsup Cheers.
 
What a super-build. The rake on those masts and mast feet look brilliant. :) I have no doubt that your rigging will be a great success!
 
What a super-build. The rake on those masts and mast feet look brilliant. :) I have no doubt that your rigging will be a great success!
I deviated slightly from the instructions which called for 4 pieces of 1.5 x 6mm to be glued around the base of the mast. After a couple of failed attempts I milled a piece of walnut square and bored a tapered hole through the center then slid the mast thru.
Rounded the edges and Beveled the top.
 
I deviated slightly from the instructions which called for 4 pieces of 1.5 x 6mm to be glued around the base of the mast. After a couple of failed attempts I milled a piece of walnut square and bored a tapered hole through the center then slid the mast thru.
Rounded the edges and Beveled the top.
Good morning Ron- good thinking. It always good when our “MacGyverism” come out well. Great model so farThumbsup
 
Back
Top