
That's what a real craftsmanship is all about!!! Excellent!!

-

SUBSCRIBE TO SHIPS IN SCALE TODAY!
The beloved Ships in Scale Magazine is back and charting a new course for 2026!
Discover new skills, new techniques, and new inspirations in every issue.
NOTE THAT OUR NEXT ISSUE WILL BE MARCH/APRIL 2026 -

Win a Free Custom Engraved Brass Coin!!!
As a way to introduce our brass coins to the community, we will raffle off a free coin during the month of August. Follow link ABOVE for instructions for entering.
You are using an out of date browser. It may not display this or other websites correctly.
You should upgrade or use an alternative browser.
You should upgrade or use an alternative browser.
St. Caterina by Schrader – Small Ship - 1/12 Monography by Franco Fissore - Plans by Ancre

Thanks a lot Uwek!!!!
 grapnel.......
This piece has some difficulty since we have to weld 8 pieces in a little space. Producing heat that will pump out those pieces that are already welded. So I decided to make a “mold” where all pieces can be “secured” ....... Two pieces of wood with 5 holes.... 1 for the central piece and 4 for the hooks

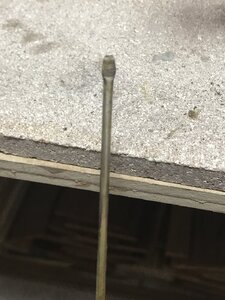
One 2 mm wire heated in one of its ends...

Smashed......

its hole...


A little tube in the other end and hooks in 1 mm wire....


To the mold and welded......


So far so good......

The tips....

And.....

Aged.... It is done...

grapnel.......This piece has some difficulty since we have to weld 8 pieces in a little space. Producing heat that will pump out those pieces that are already welded. So I decided to make a “mold” where all pieces can be “secured” ....... Two pieces of wood with 5 holes.... 1 for the central piece and 4 for the hooks
One 2 mm wire heated in one of its ends...
Smashed......
its hole...
A little tube in the other end and hooks in 1 mm wire....
To the mold and welded......
So far so good......
The tips....
And.....
Aged.... It is done...
Attachments
Kurt Konrath
Kurt Konrath
That is a great scratch build. Looks like some of fishing lures my wife used on big fish!, but of course hers are not finished the same as yours.
") Fore sure it is better than mine. Women are natural for this kind of tasks......
Fore sure it is better than mine. Women are natural for this kind of tasks......Thanks Jim.... just following your stepsThat's what a real craftsmanship is all about!!! Excellent!!
Base.....
I decided at this time, it will be my first diorama. So I went to the internet and the monograph and I saw a couple a good ideas. I went to prepare de basa as a beach with sand, taking care of the leveling, not uniform surfaces and so......

I put some logs...aged. They are going to “receive“ the boat....
Let’s see how is looking so far.....

I t need to be completed with some “fences” and fixing some spots without sand.....

now.... let’s start to see how is going to look forward.... but before we need to work in the beach capstan ....
I decided at this time, it will be my first diorama. So I went to the internet and the monograph and I saw a couple a good ideas. I went to prepare de basa as a beach with sand, taking care of the leveling, not uniform surfaces and so......
I put some logs...aged. They are going to “receive“ the boat....
Let’s see how is looking so far.....
I t need to be completed with some “fences” and fixing some spots without sand.....
now.... let’s start to see how is going to look forward.... but before we need to work in the beach capstan ....
Last edited:
Beach capstan.... from the monograph I took the plans. I realize the scale is not right. So for this 1:12 I decided to take the internal plan which is 1:24 ....


Now...le’t see.....


This is pretty much the actual statement....
Regards to you all and thanks for following this log
This is pretty much the actual statement....
Regards to you all and thanks for following this log
Last edited:
Great diorama and model - Looking very good.
I think the boat laying on the slipway is a very good way to present it
I think the boat laying on the slipway is a very good way to present it
Planset review - S. Catarina - 1759, Traditional Mediterranean Fishing Vessel Gozzo" by Franco Fissore
The new ancre monographie of Franco Fissore about the S. Caterina - Traditional Mediterranean Fishing Vessel GOZZO - 1759 was presented by his own model built in scale 1:12 in Rochefort I think this will be one of the standard beginners scratch built monographie -> a planset review you can...
shipsofscale.com
Uwek
Thanks a lot. I was thinking about putting a couple of wedges to show the boat vertical..... your opinion?
Regards
Thanks a lot. I was thinking about putting a couple of wedges to show the boat vertical..... your opinion?
Regards
I am not sure, if the fishermen would have done it - to bring her verticalUwek
Thanks a lot. I was thinking about putting a couple of wedges to show the boat vertical..... your opinion?
Regards
- with this inclined you have a maybe better view inside the model
but this is maybe mainly a question of taste


In the diorama is going to look like this.....

Is not finished yet!!!!
But we will need to wait because this log catch up my work already
Regards
Is not finished yet!!!!
But we will need to wait because this log catch up my work already
Regards
Kurt Konrath
Kurt Konrath
If you have not done so, I suggest you secure your sand to the diorama base.
I also do model railroads and we always secure scenery material to base.
If you need to, prep how you want it, then give light coat of "wet water" water mixed with soap to allow it to soak in, then apply diluted matt medium or white glue to soak and when it dries you should not be able to tell its there. Keep sand in place if the diorama gets bumped or items get nudged.
If you have not done so, I suggest you secure your sand to the diorama base.
I also do model railroads and we always secure scenery material to base.
If you need to, prep how you want it, then give light coat of "wet water" water mixed with soap to allow it to soak in, then apply diluted matt medium or white glue to soak and when it dries you should not be able to tell its there. Keep sand in place if the diorama gets bumped or items get nudged.
I did it but I did not know about using soap...... what is the reason behind?
Kurt Konrath
Kurt Konrath
Adding soap or isopropyl alcohol to water helps break down surface tension on material. This allows glue to later soak down into scenery materials better. If not fully wetted before the glue just makes a crust on top of material, and if thick it will still be loose underneath, and then if crust on top is broken the loose material goes everywhere. Just ask me how I know this fact!!
With trains, we have what is called ballast on sides and underneath tracks, which can be 1/4" thick in scale I use. My first attempts to glue down worked what I thought was well, then in use the crust cracked and loose bits of gravel when everywhere.
Just like other on this forum help us newer folks to learn ship building, my fellow model railroaders told me what I did wrong and how to fix it.
Adding soap or isopropyl alcohol to water helps break down surface tension on material. This allows glue to later soak down into scenery materials better. If not fully wetted before the glue just makes a crust on top of material, and if thick it will still be loose underneath, and then if crust on top is broken the loose material goes everywhere. Just ask me how I know this fact!!
With trains, we have what is called ballast on sides and underneath tracks, which can be 1/4" thick in scale I use. My first attempts to glue down worked what I thought was well, then in use the crust cracked and loose bits of gravel when everywhere.
Just like other on this forum help us newer folks to learn ship building, my fellow model railroaders told me what I did wrong and how to fix it.
Thanks a lot !!!!
Let’s continue with the wheelbarrow.....


Yet another task done.....
Yet another task done.....
This is going to be my previous last post........ The model is “already finished”......You never finish a diorama.... you have to abandon it!!!!
The beach capstan usually were anchored to a stone wall. This was necessary to provide resistance at the time they pull the boat to the beach.......
I used “nativity” technique to create it....


The beach capstan usually were anchored to a stone wall. This was necessary to provide resistance at the time they pull the boat to the beach.......
I used “nativity” technique to create it....
Capstan anchored......


