-

Win a Free Custom Engraved Brass Coin!!!
As a way to introduce our brass coins to the community, we will raffle off a free coin during the month of August. Follow link ABOVE for instructions for entering.
-

PRE-ORDER SHIPS IN SCALE TODAY!
The beloved Ships in Scale Magazine is back and charting a new course for 2026!
Discover new skills, new techniques, and new inspirations in every issue.
NOTE THAT OUR FIRST ISSUE WILL BE JAN/FEB 2026
You are using an out of date browser. It may not display this or other websites correctly.
You should upgrade or use an alternative browser.
You should upgrade or use an alternative browser.
"Start-up Conversations" and "Build Support-Tips, Advice" here.
Just put it up in build logs as a independent build log. Doesn't matter that you're putting it all up at once.Yes will do Tony P once I’ve finished the rigging. Should be by Xmas. Not sure where you can post the finished build AND the photos of the build log?
Clogger, Which line did you use for the curved top of the hull jig ??
I'm curious as to which types of wood our builders are choosing ?? I plan on using Beech for the frames, rising wood, keel, ceilings etc. Cherry for deck furnishings, interior bulkheads doors etc. Maple in small amounts where possible maybe. Then again I may go with Beech 100%
Hello Tony,
I'm planning to use a combination of cherry and beech. Like you, I may use beech throughout the build.
Bill
I'm planning to use a combination of cherry and beech. Like you, I may use beech throughout the build.
Bill
Yes. Did you order it yet ? I have beech I can use here for the keel assembly. The thinner frame and ceiling lumber I have to get still.Hello Tony,
I'm planning to use a combination of cherry and beech. Like you, I may use beech throughout the build.
Bill
Hi Tony,
No not yet. I'm kinda waiting to see what everyone else is using. I have the monograph ordered and it shipped yesterday.
Bill
No not yet. I'm kinda waiting to see what everyone else is using. I have the monograph ordered and it shipped yesterday.
Bill
Tony P
I can’t remember exactly what I did now.
However I remember asking the same question on another forum and got this reply:
Quote: Hi Clogger I followed line “e” on the plans. The line is only drawn on the starboard side of the plan and is not reflected on the port side. To solve this I ran a centre line down some tracing paper and traced the starboard side. I then flipped the paper over to get the sameprofile on the port side.
Oh ok thanks yes. I’ve seen it. Didn’t know that was you there. Just curious as it doesn’t seem clear to me.Tony P
I can’t remember exactly what I did now.
However I remember asking the same question on another forum and got this reply:
Quote: Hi Clogger I followed line “e” on the plans. The line is only drawn on the starboard side of the plan and is not reflected on the port side. To solve this I ran a centre line down some tracing paper and traced the starboard side. I then flipped the paper over to get the sameprofile on the port side.
You have to work at it... But I like the look of it. I dont care for painted models in general...
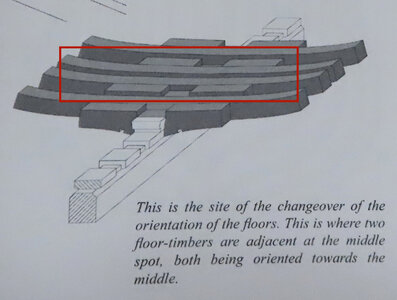
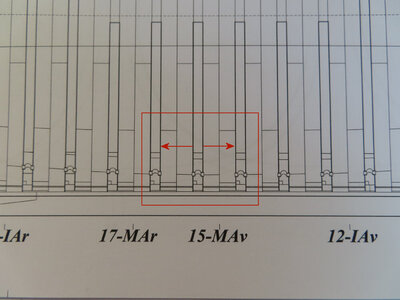
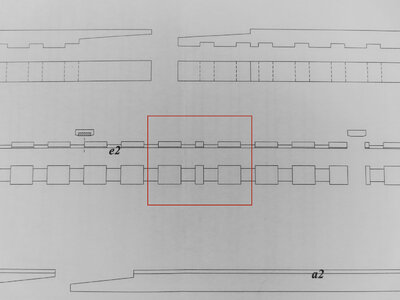
Being very new to reading and understanding plans, this is the first thing I noticed that (to me) I could make a mistake. Below are shown how the Floor Timbers reverse directions at the midpoint of the Keel or thereabouts. Also, I found out the mystery of those tiny circles and arcs on Planche 4.
Good idea Donnie
It’s very complex no doubt. I’ve made several parts several times to get things right and I just started last week ! Good thing is Adrian’s book and Gerard’s book follow the plans. Between the two of them it’s not bad. The biggest issue I think for me anyway is to know what order to do things. This is my focus in all my modeling. Sometimes it’s better to wait on a process till we’re a bit further along. I go with the plan in my mind that I don’t glue anything at all unless I can’t go further without doing it. Only then I’ll glue parts together after being very very sure I can without causing issues down the road. I’ve been looking at the plans and books for months now. I suggest everyone studies them thoroughly. Understand what the lines on the parts stand for. Get out your red pencil or highlighter and mark important things in the books you may miss while building. Advice to everyone, make 3 or 4 copies of particular part templates because you’ll need them without fail. This is a real project to be sure !
It’s very complex no doubt. I’ve made several parts several times to get things right and I just started last week ! Good thing is Adrian’s book and Gerard’s book follow the plans. Between the two of them it’s not bad. The biggest issue I think for me anyway is to know what order to do things. This is my focus in all my modeling. Sometimes it’s better to wait on a process till we’re a bit further along. I go with the plan in my mind that I don’t glue anything at all unless I can’t go further without doing it. Only then I’ll glue parts together after being very very sure I can without causing issues down the road. I’ve been looking at the plans and books for months now. I suggest everyone studies them thoroughly. Understand what the lines on the parts stand for. Get out your red pencil or highlighter and mark important things in the books you may miss while building. Advice to everyone, make 3 or 4 copies of particular part templates because you’ll need them without fail. This is a real project to be sure !
Thanks Donnie and Tony for taking the time to share your discoveries and insight. Us newbies (meaning me…) are and will be profoundly grateful. 
- Joined
- Oct 17, 2020
- Messages
- 1,691
- Points
- 488

Good morning Denni, the observation that with regard to what you say, in the past I had exposed them on some construction sites but, I only received negative responses from various opinions. FrankBeing very new to reading and understanding plans, this is the first thing I noticed that (to me) I could make a mistake. Below are shown how the Floor Timbers reverse directions at the midpoint of the Keel or thereabouts. Also, I found out the mystery of those tiny circles and arcs on Planche 4.
Page 19 in the LeR booklet.
View attachment 346114
Planche 4
(note: the tiny circles w the arcs are spacers/chocks
between the frames for the passage of water).
View attachment 346113
Planche 2
View attachment 346112
Very good idea - I am pretty sure, that there is a need for such parts....Ahoy!
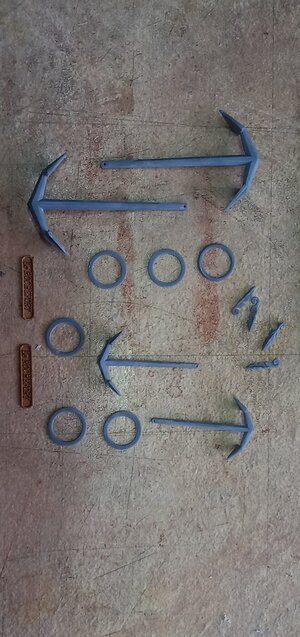
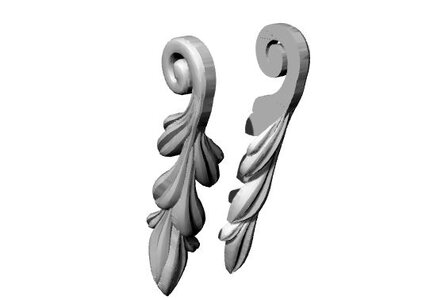
If anyone needs anchors and decors for the model LE ROCHEFORT..... WELCOME
View attachment 345978View attachment 346400
Treenails, Bolts, Nails , where ? Which material ? I'm not sure which ship I was looking at in the past ( I'm in info overload right now and cant find it) but I seem to treenails, iron bolts and nails being used. Anyone have this info ? I do remember though that the frames were held by square headed nails or bolts on Le R. I was going to use undyed toothpicks for treenails and brass rod for nails and bolts. I don't mind the look of bare brass so I may go that route. Has anyone found more info on this than me ?
Last edited:


