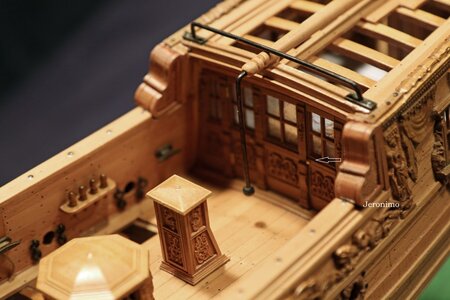
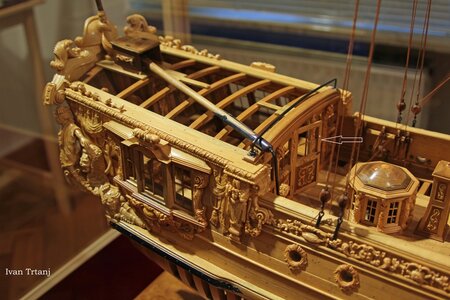
Statenjacht PEGASUS circa 1700 [COMPLETED BUILD]

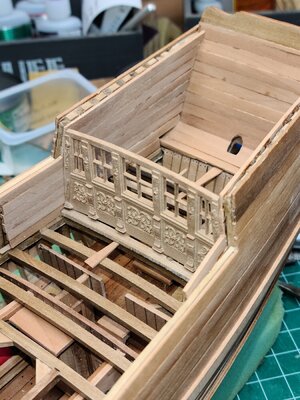
Wow!! No wonder you were quiet for a while... This carving section wall looks awesome, it like it was born there. Seems you really excited to complete this task for the stern section. I cannot wait to see the model under oil...

Thank you !!!!

With your comment I realized I called bow the stern :-) HA HA. I did the corrections.

Step by step is taking shape.

Daniel
 
...you got it, Daniel!! Does this carving section (as well as others) requires cleanning or it comes like this?

HAHAHAHA ... I am a disaster.

Yes... carving is as it came. All the carvings have the same quality. Like the chimneys and skylights I already have done and pictured in previous postings, this will be treated equally. First wood sealer, then cleaning with 0000 steal wool, if needed. These doors will not need the wool. Then poly or oil.

Carvings are expectacular.

I do not understand why the other companies don't do the same as the Chinese. They could offer the carvings in wood as an upgrade. Well, who knows.

Cheers
Daniel
 
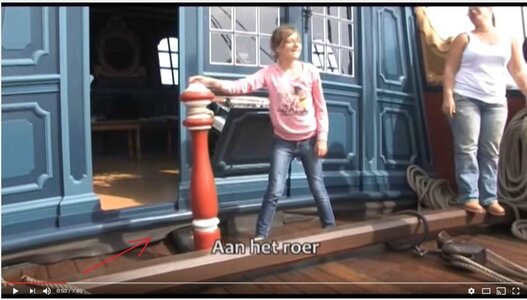
Great job Daniel. I agree that the door facade looks lovely in place. But that tiller is crazy. Who thinks to do something like that? I saw the earlier pictures but in the model its just really cool...

You make me laugh a lot.

For many weeks I was thinking the same..... "why I was trying to modify the original kit ?? Am I crazy?". " Why I am trying to do all these lower deck additions ?? Am I crazy ? " and MORE, I was not able to find a Pegasus kit with the stern lower cabin finished. Just only a Russian modeler added the circular staircase. All the other modelers added a straight stair and ALL the modelers planked the floor deck to avoid the lower view of that stern cabin.

So those are my reasons, after I crashed my head against the wall many times. "I wanted to be my Pegasus diferent".

You will see I will not plank the deck. I will let all the lower deck to be seen. All the other modelers, after doing great/amazing jobs on the other cabins, added a lot of deck floor planking, blocking a lot the view of those amazing jobs.

Cheers and thank you for stopping by and commenting.

Daniel
 
Is this a toilet just in front of the stern cabin?
I love these details!
But where did all the s**t go? Into the bilge?
Thank you for the compliments !!!


Yes it is a toilet.

There is another one I placed on the kitchen cabin.

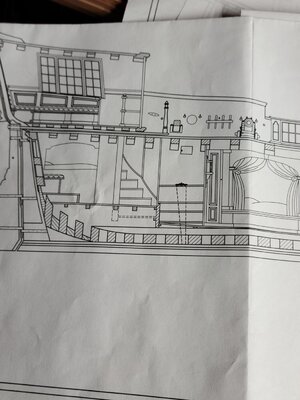
The below picture is from the Statenjacht Utrecht plan drawings. I have adapted, with a lot of liberty, the interior to the Statenjacht Pegasus.

You can see the toilet beside the stern lower cabin.

Now that you started this topic, I would like to know, from the experts, how they avoided water to go inside.... "if the funnel in dash lines is in contact with the water" .

20210222_150944.jpg

Cheers
Daniel
 
When I sailed on board the "Tovarish" there where some urinals (is this the right word?) installed.
We had some days of heavy weather and when the bow went down into a wave valley, all the pee inside the tubing came back to you :mad:.
The toilets had no doors and getting relieve was a special thing.
I found some ladies restrooms and secretly used them. (don´t tell on me ;))

Amazing....

I am a city guy and I tried all my life to avoid being on a ship. I love building them, but I have 0 knowledge, beside what I read.

Daniel
 
Model shipbuilding created the wish to sail the real things. I tried it three times on tall ships ( Tovarish and two wooden schooners, North and East sea).
Every time I got seasick (one time extremely and I wanted to die) and it was no fun. Although it was a great experience, I gave it up.
Not the shipbuilding ;)
 
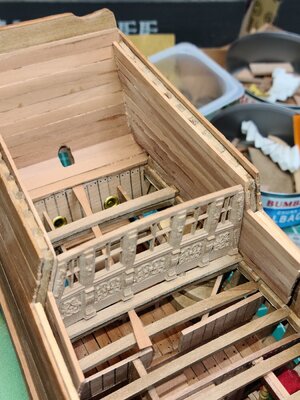
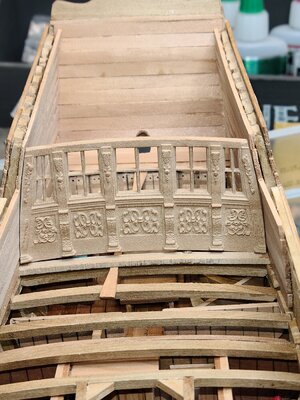
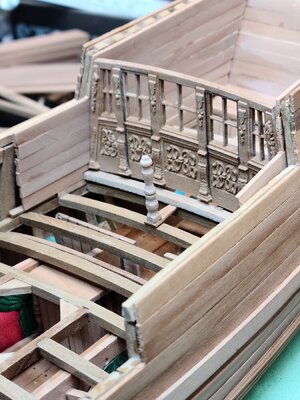
Stern cabin interior planking finished.

Dry fit testing of the doors.

View attachment 215478View attachment 215479View attachment 215480

From now on, I will need to minimize my mistakes :) . All will be very visible :)

Cheers
Daniel


Hi Daniel
Stern cabin interior planking finished.

Dry fit testing of the doors.

View attachment 215478View attachment 215479View attachment 215480

From now on, I will need to minimize my mistakes :) . All will be very visible :)

Cheers
Daniel


Hello Daniel,
don't forget the door.
Karl

12.029.JPG049.JPG
 
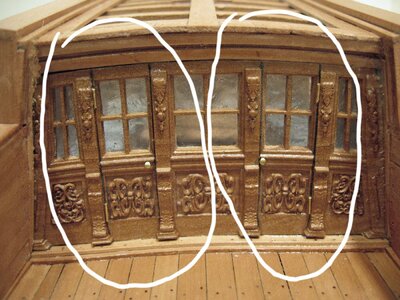
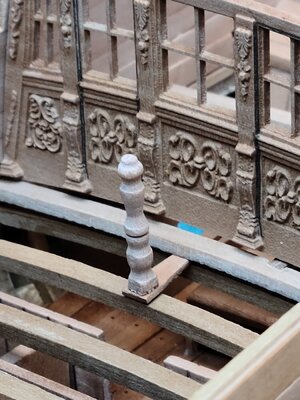
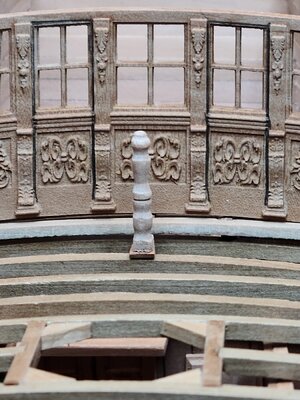
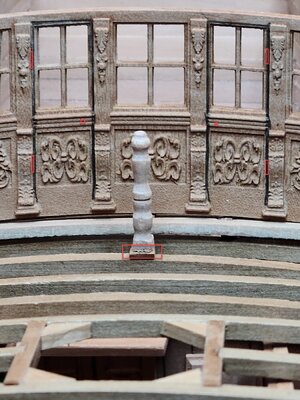
Hello Daniel. Tell me you turned the tiller handle yourself...!!! Very good! One small comment, though you will hate me soon for my non-stop comments. Take a look at your image, which I edited. First, you should sand flash the bottom of the tiller's handle so there is no gap. Second, I see you outlined the doors to the cabin with a black line, very good!!! To add so it will look even more realistic, you may add fake hinges (just cut the wire) and glue. Another nice addition would be the door handle.

20210224_132709.jpg
 
Hello Daniel. Tell me you turned the tiller handle yourself...!!! Very good! One small comment, though you will hate me soon for my non-stop comments. Take a look at your image, which I edited. First, you should sand flash the bottom of the tiller's handle so there is no gap. Second, I see you outlined the doors to the cabin with a black line, very good!!! To add so it will look even more realistic, you may add fake hinges (just cut the wire) and glue. Another nice addition would be the door handle.

View attachment 215969

I like you making comments. So please continue.

Yes I did the handle with the lathe.... hurray !!! I was so happy that I took the picture with the handle just "out of the oven". I have to finish the details on it yet.

About the doors, they are not finished yet. Yesterday I did the lines. Like Karl (@Jeronimo) because I wanted to give a hand of wood sealer. I was not sure if I could do the line with the wood sealer on. I still need to add the hinges and handles.

I was so happy on how the hand tiller resulted that I decided to post. But to have it in perspective I needed to place the unfinished doors as background.

That it is my friend !!!

My next steps will be finishing the decorations (sealer, wool sanding if needed, poly). I need to have them done because they will be my template for cutting the windows and to move on with deck details.

I also need to add all the knees against the beam. But I am waiting until I "fix" the beams (glue them). Just in case I need to take them out.

Still a LOT of big and small details to be done.

And PLEASE !!!! continue to make comments and point to me any detail you feel can improve the job.

Cheers
Daniel
 
Last edited:
I agree 100% with @Jimsky Jimsky's comments. Sort out those little details and it will look splendid. Congratulations with your lathe work young man!
 
Back
Top