-

Win a Free Custom Engraved Brass Coin!!!
As a way to introduce our brass coins to the community, we will raffle off a free coin during the month of August. Follow link ABOVE for instructions for entering.
-

PRE-ORDER SHIPS IN SCALE TODAY!
The beloved Ships in Scale Magazine is back and charting a new course for 2026!
Discover new skills, new techniques, and new inspirations in every issue.
NOTE THAT OUR FIRST ISSUE WILL BE JAN/FEB 2026
You are using an out of date browser. It may not display this or other websites correctly.
You should upgrade or use an alternative browser.
You should upgrade or use an alternative browser.
- Joined
- Oct 17, 2020
- Messages
- 1,691
- Points
- 488

Good afternoon Stullo, Thanks for your kindness to post the project
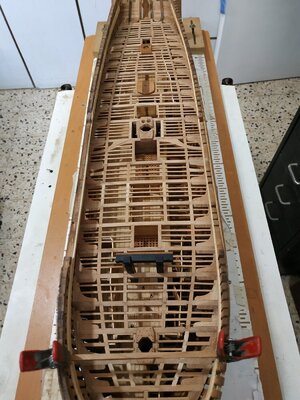
Upper Deck Beam #12
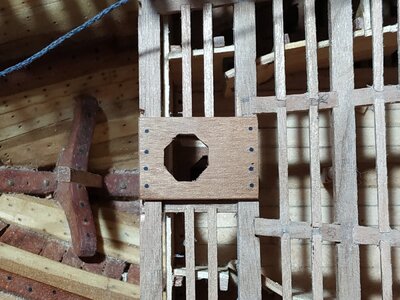
Note inner Carling needs adapting to take the Pin of the Main Jeer Bitt- a simple notch but as it is will be a weakened area/joint, I reinforced it with superglue to underside before fixing in position.
Beams #13 and #14-regular, but inner Carling gap is narrower at 24mm to accommodate the Capstan Step-
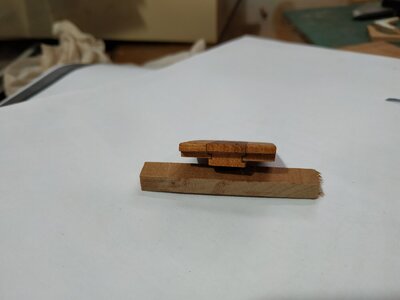
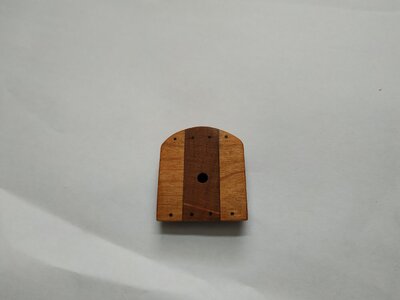
This is a solid plank between Beams 14 and 15.
Size given as 10.07mm X7.42mm with a hole of 2.65mm to receive the Spindle of the Capstan.
This hole DOES NOT go through the but to a depth suggested of +/- 2.5mm.
The aft side is let down on Beam#15 by 3.71 so that a similar hight sits above the beam.
Note this aft side only covers half the Beam width.The fore side is semicircular, similarly let down, but extends slightly foreward of the Beam it overlaps {#14)
Along either side are Support Pieces, 7.95x5.3mm.
These are also let down so their upper surfaces are in line with the Step.
TFFM mentions them probably fitting into a Rabbet on the sides of the central plank, but having cut them to size already, I realized that to fit into the Rabbit would narrow them significantly.
I fixed the Plank and Side pieces together and then milled the letting down as a unit.
The underside area is rounded upto “Fay” with the Beams curvature.
TFFM points out that the upper surface would have to be horizontal to allow the Capstan to turn- the illustration shows the Let Down of the sides where it sits on the Carlings, to be angled. I can’t see how this can be done unless the Let Down on Beams #14 ans 15 are different.
I took an easy way out and,copying the angle between the beams, set the Step in the mill and “scimmed” off to the horizontal.
It leaves the piece thinner, but the same above the beam level.
( Worth noting that in this, and some other things such as the depth of the spindle hole, the Sheer and Profile plans differ)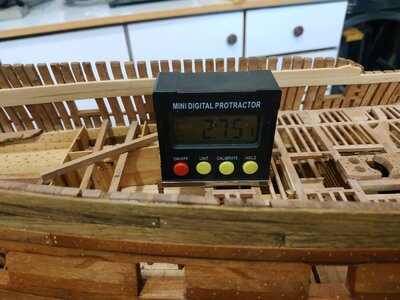


#17 Upper Deck Beam
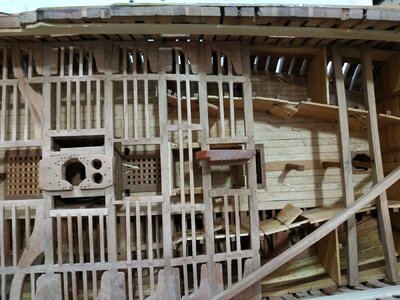
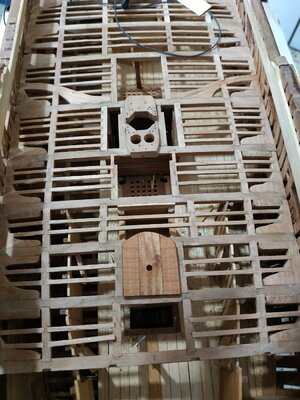
Supports the forward part of the Mizzen Mast Partner. This is of the type build for the Lower Deck. The supporting Carling are 3.98x2.65mm and half underlap the beams, so that their upper surface is 0.4mm below this level of the beams.
I made the groove in the underside of the beam 1.7mm deep and the mortise of the Carling 1.3mm.
The Carlings are set 11.0 mm apart.
The Plank Partner is a single plank 2.12mm thick and 17.49nn wide. It is let down on the beams by 0.4mm so it sits on the Carlings also.
The Ledges that fit these Carlings are left proud by 0.4 to compensate.
Aft, the inner Carlings are in line with the support Carlings and therefore appear to sit on those Carlings which are mortised under the beam. The 3D rendition also seems to show this.
Murphy’s Law is in effect. Either the spaces are narrowing or my fingers are getting fatter!!. In any case, fitting the various bits is getting more difficult-especially the Hanging Knees- and more pieces are being dropped and difficult to retrieve.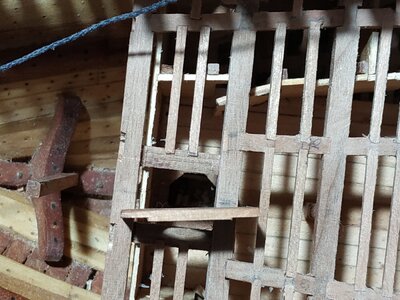


Upper Deck Beams cont.
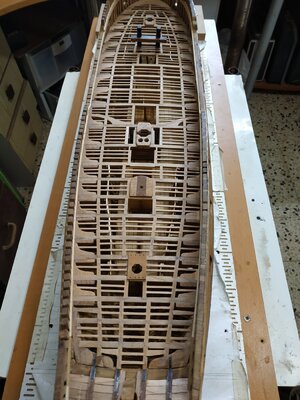
#19. Inner Carlings support a Scuttle, otherwise regular.
#20. Note no Lodging Knees, but rather a Packing Piece to support a wedge shaped Ledge.
#21. No Knees (? that's why short beams ha! ha!)-beams and Ledges directly onto Knee of Wing Transom
#22. Onto W.T.Knee, outer Carling also onto WTK, no outer Ledges. Inner Carling mortised onto Wing Transom, with a single wedge shaped Ledge between them.
Note temporary Forecastle Deck Beam #3 placed as marker for the Bowsprit Step, which sits onUpper Deck #2 and scored on F. Deck Beam. #3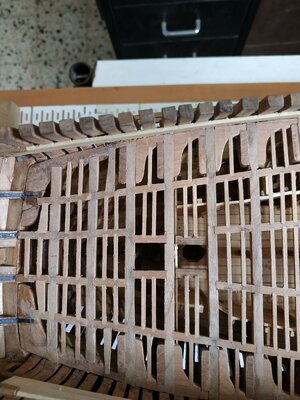


- Joined
- Apr 20, 2020
- Messages
- 6,241
- Points
- 738

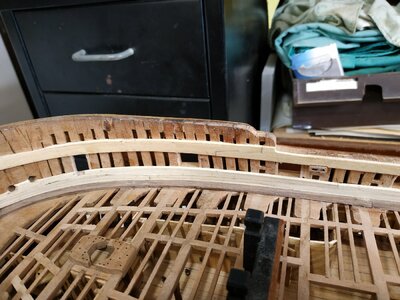
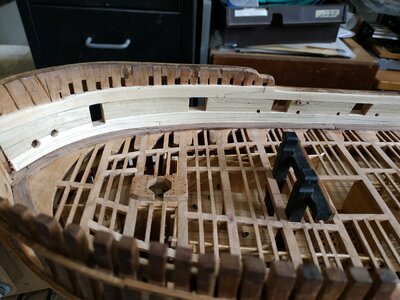
wonderful work, my dear friendUpper Deck Beams cont.
#19. Inner Carlings support a Scuttle, otherwise regular.
#20. Note no Lodging Knees, but rather a Packing Piece to support a wedge shaped Ledge.
#21. No Knees (? that's why short beams ha! ha!)-beams and Ledges directly onto Knee of Wing Transom
#22. Onto W.T.Knee, outer Carling also onto WTK, no outer Ledges. Inner Carling mortised onto Wing Transom, with a single wedge shaped Ledge between them.
Note temporary Forecastle Deck Beam #3 placed as marker for the Bowsprit Step, which sits onUpper Deck #2 and scored on F. Deck Beam. #3View attachment 289821View attachment 289822View attachment 289823


Hallo Stuglo, it turned out very well, very impressive.
Bowsprit Step
This will sit on fore aspect of #2 Upper Deck Beam, scores into the #3 Forecastle Beam and continues upward to form the Foretopsail Sheet Bitts.
According to my plans, this is not a straight line- between the beams it is angled aftward (6deg) then vertically above.
I could make each side out of one piece from a wide block, or in two stages, joining at level of the forecastle beam.
Checking the Peter Goodwin book, this seems acceptable (and is certainly easier).
These uprights are 4.24mm square and separated by 13.78mm
A rough beam is made for the forecastle deck-3.45x2.65mm with a roundup equivalent to 3.18mm(over max width).
The bases are notched with pieces at 6deg off the vertical with the mill. The upper end cut to reach the mid thickness of the forecastle beam, and notched at a similar angle. While in the mill, the acute tip milled to horizontal, to allow simple sitting of the vertical Bitt.
The Step is separated by the Step Chock- 2 planks of 3.18mm thickness rabbeted together- and in turn rabbeted into the uprights-a 1.6 mill bit worked wonders.
There is an additional rabbet to be made on the lower outer corners. This is for the Manger Planks. Discussed in a later chapter, but stated as level to height of the lower point of the Hawse Hole.
The position and size of the Bowsprit mortise is left for later.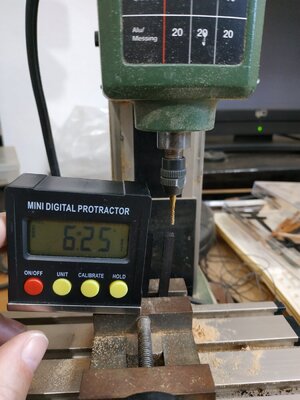
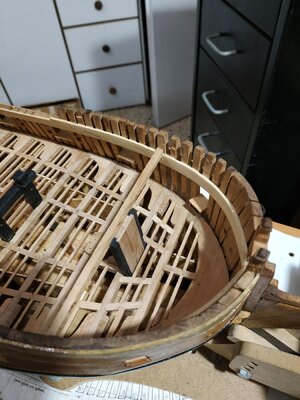


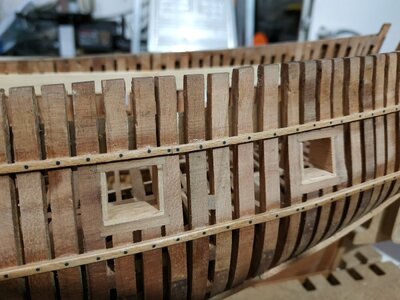
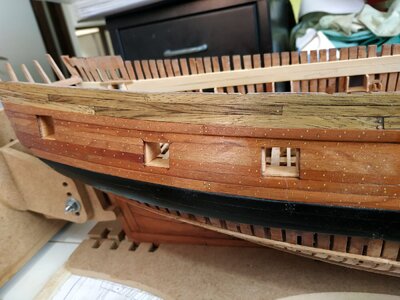
Upper Deck Port Stops.
These are linings of port sills -form a rabbet for port lids. Lower stop and 2
sides.
(Most kit models I made have an upper stop as well.The books I’ve checked show this or are not clear on the subject but I’ve come to trust TFFM.)
They are 0.8mm thick. The sweep ports also have a similar lining but 0.4mm.
The Stops are recessed to the inner edges of the planking and sill. The inner edges are flush to the frame . The outer edges are shaped to fit and the inner overlong to be sanded to shape after fitting and gluing.
This seemed simple, but gave me no end of (self imposed) trouble. Because of slope and initial misunderstanding that they needed to include width of the Quikwork (internal planking) I made them very overlong.
Also, I’d previously applied oil or poly to the Wales, and the port sills and wall didn’t “take” the PVA glue.
Also I cut the wood for the side sills with the grain running sideways When I came to sand the grossly overlong inner parts, they kept separating from the port wall and then a few broke.
It took a while to realise that I must clean the walls with alcohol, narrow the pieces off the model before gluing again. I was too stupid and stubbon to remake them all again, so I persevered with what I had.
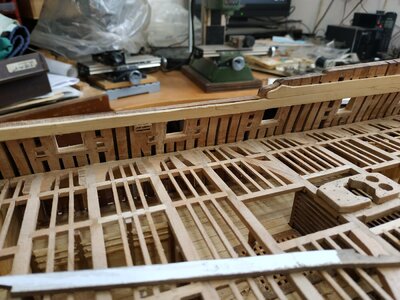
This sanding of the inner hull also highlighted the deficiencies of some of these frames. To be corrected or hidden soon.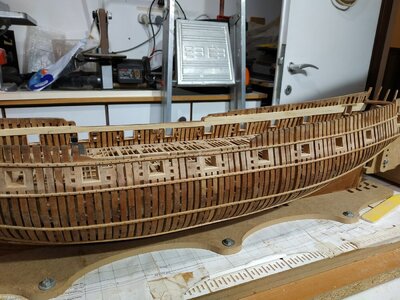


- Joined
- Apr 20, 2020
- Messages
- 6,241
- Points
- 738

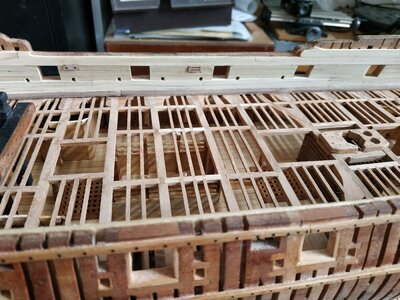
My dear friendUpper Deck Port Stops.
These are linings of port sills -form a rabbet for port lids. Lower stop and 2
sides.
(Most kit models I made have an upper stop as well.The books I’ve checked show this or are not clear on the subject but I’ve come to trust TFFM.)
They are 0.8mm thick. The sweep ports also have a similar lining but 0.4mm.
The Stops are recessed to the inner edges of the planking and sill. The inner edges are flush to the frame . The outer edges are shaped to fit and the inner overlong to be sanded to shape after fitting and gluing.
This seemed simple, but gave me no end of (self imposed) trouble. Because of slope and initial misunderstanding that they needed to include width of the Quikwork (internal planking) I made them very overlong.
Also, I’d previously applied oil or poly to the Wales, and the port sills and wall didn’t “take” the PVA glue.
Also I cut the wood for the side sills with the grain running sideways When I came to sand the grossly overlong inner parts, they kept separating from the port wall and then a few broke.
It took a while to realise that I must clean the walls with alcohol, narrow the pieces off the model before gluing again. I was too stupid and stubbon to remake them all again, so I persevered with what I had.
This sanding of the inner hull also highlighted the deficiencies of some of these frames. To be corrected or hidden soon.View attachment 292032View attachment 292033View attachment 292034View attachment 292035
wonderful work, well done

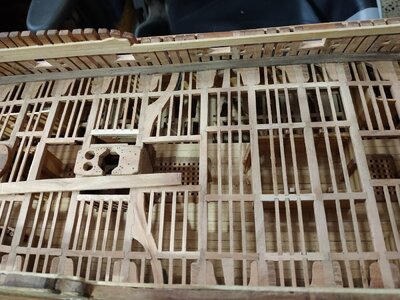
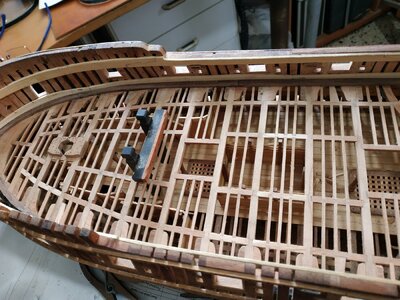
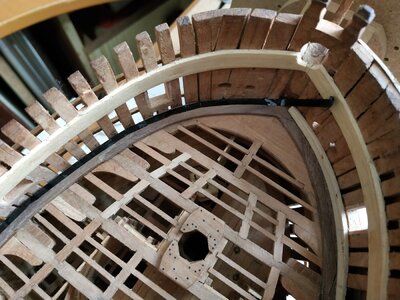
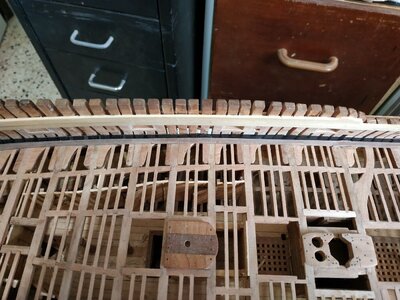
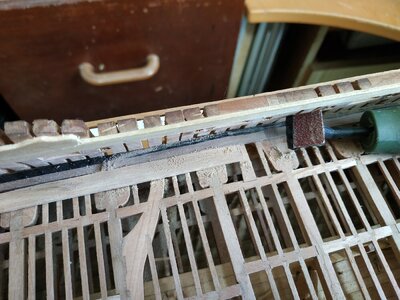
Upper Deck Waterway.
Separating the Deck from the Hull Frames.
Made width 6.36mm with thickness 2.13 at its outer ¼-(supposed to be “bearded back” 0.2mm-but will ignore),on which rests the Spirketting (inner hull strakes).
The inner ⅔ is thinned to match the thickness of the planks -1.6mm.
There is a slope of 1mm between the two thicknesses.
Thought initially to use card but found that the printed cut outs matched pretty well and easier to trim the wood directly.
Joints of hooked scarph make it easier to fit from stern ,forewards.
The foremost pair of either side are separated by a small chock behind the stem.
I intend to plank only one half if the deck and will omit the Spirketting on that side.
I therefore masked this side by2.5mm while fitting the lower Spirketting to other.
Final thinning after deck planks are fitted, but initial work using a Proxxon wand sander.
(This is a wonderful tool but until now of limited use because the supplied adhesive sanding paper only lasts a matter of minutes. I found that now, even used cut-outs from self-adhesive 5in. Disks, work like magic and last)
Anway, fitting a shortened sanding square with the last 1mm of the head masked (plastic decorative strip) allowed me to sand away most of the excessive thickness.
(Alternatives such as milling on the curve, or making a bespoke scraper, seem more difficult)


Kurt Konrath
Kurt Konrath
Your making great progress, I like all the fine attention to details to get it right.
Your ship has developed very nicely, Stuglo. You have come a long way and it looks really good.
Upper Deck Spirketting
These are the strakes #22 and #23
They are 1.6mm thick. Top and Butt joints.
The upper edge of #23 is in line with the bases of the Gun Ports (except aft). It is also horizontal, NOT right angles to the face of the frame.
The upper edge is chamfered to meet the thinner Quickwork above.
The foremost #23 is wider so as to include the lower part of the Hawse Holes.
Upper Deck Quickwork
These are strakes #24,#25,#26- filling the gap between the Gun Ports.
They are 1.06mm thick.
The foremost #24 encloses the rest of the Hawse Holes.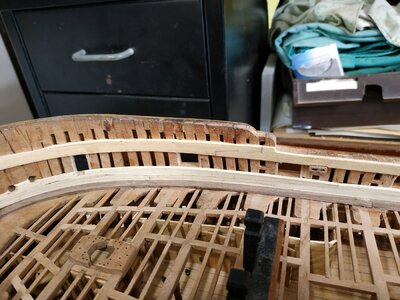


Hello Stuglo very nice work.
Scuppers - Upper Deck Drainage Tubes
Quite apprehensive about making these - opportunity for big time screw-up, especially trying to angle down from the outer side of the Waterway, to the Wale at the correct and consistent line.
Using the TFFM drawing, estimate angle at 15deg., and use my digital protractor to guide my Dremel drill. Use a 8mm bit for a guide which will allow me to correct afterwards.
There are 7 Scuppers- 5 with an inner diameter of 2.12mm.
Another 2, the Manger and the Pump Dale,are 2.65mm (All shown on the various plans.)
We are told the Scuppers pass between the hull Frames where they are reinforced by small Scupper Support Blocks. Most lie beneath Sweep Ports, where frames are”shifted”.
They are supposedly lined, but I haven’t found a way of doing it yet. HELP and SUGGESTIONS welcomed.
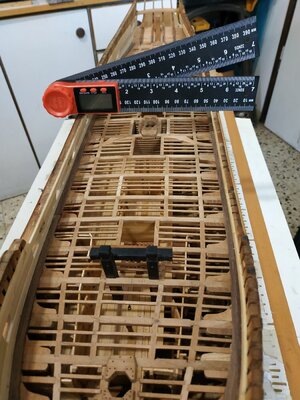
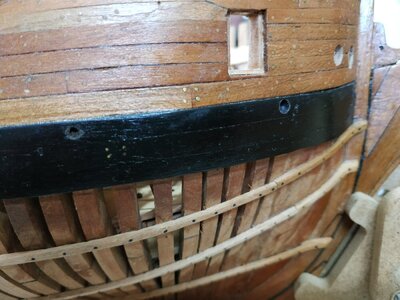
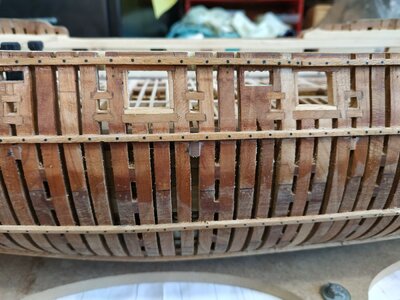
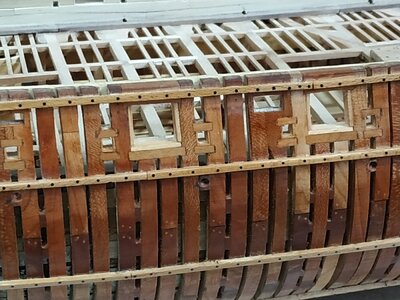


The scuppers are an important detailThey are supposedly lined, but I haven’t found a way of doing it yet. HELP and SUGGESTIONS welcomed.
I am using rectangle or round brass-tubes to simulate the scupper tube.
I saw also already on master models the use of thin metal foil, best maybe out of lead, so you can adjust the diameter at the endings (widening)
The original scuppers were often made our of lead
Remains of the vessel – Virtual Dive Trails
vdt.cismas.org.uk
interesting info about an original contemporary scupper out of lead:
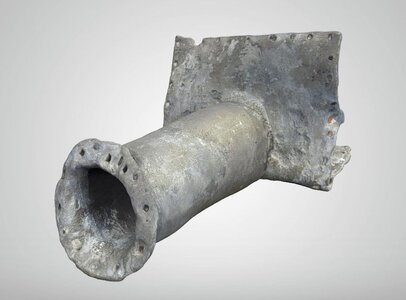
A lead scupper liner is from the wreck of the London-based slave ship Henrietta Marie. A scupper is a hole in a ship’s side at the level of the weather deck that allowed sea water and rain to drain overboard. Lead liners in the form of flanged pipes helped to harden and protect the scuppers. The Henrietta Marie scupper liner consists of a pipe 17cm long (an indicator of the thickness of the hull at deck level) and 6.5cm diameter. The inboard flange is broad, flat, and of an angled L-shape; it was attached to both the deck and the inner face of the hull with small nails. The outboard flange is a narrower ring that was also nailed. Many nail holes and the impressions of nail-heads are seen along the edges of both flanges. The piece is quite heavy and weighs 7.208kg (16lbs).
Here you can find a 3D-model of this scupper - you can turn it to see it from all sides
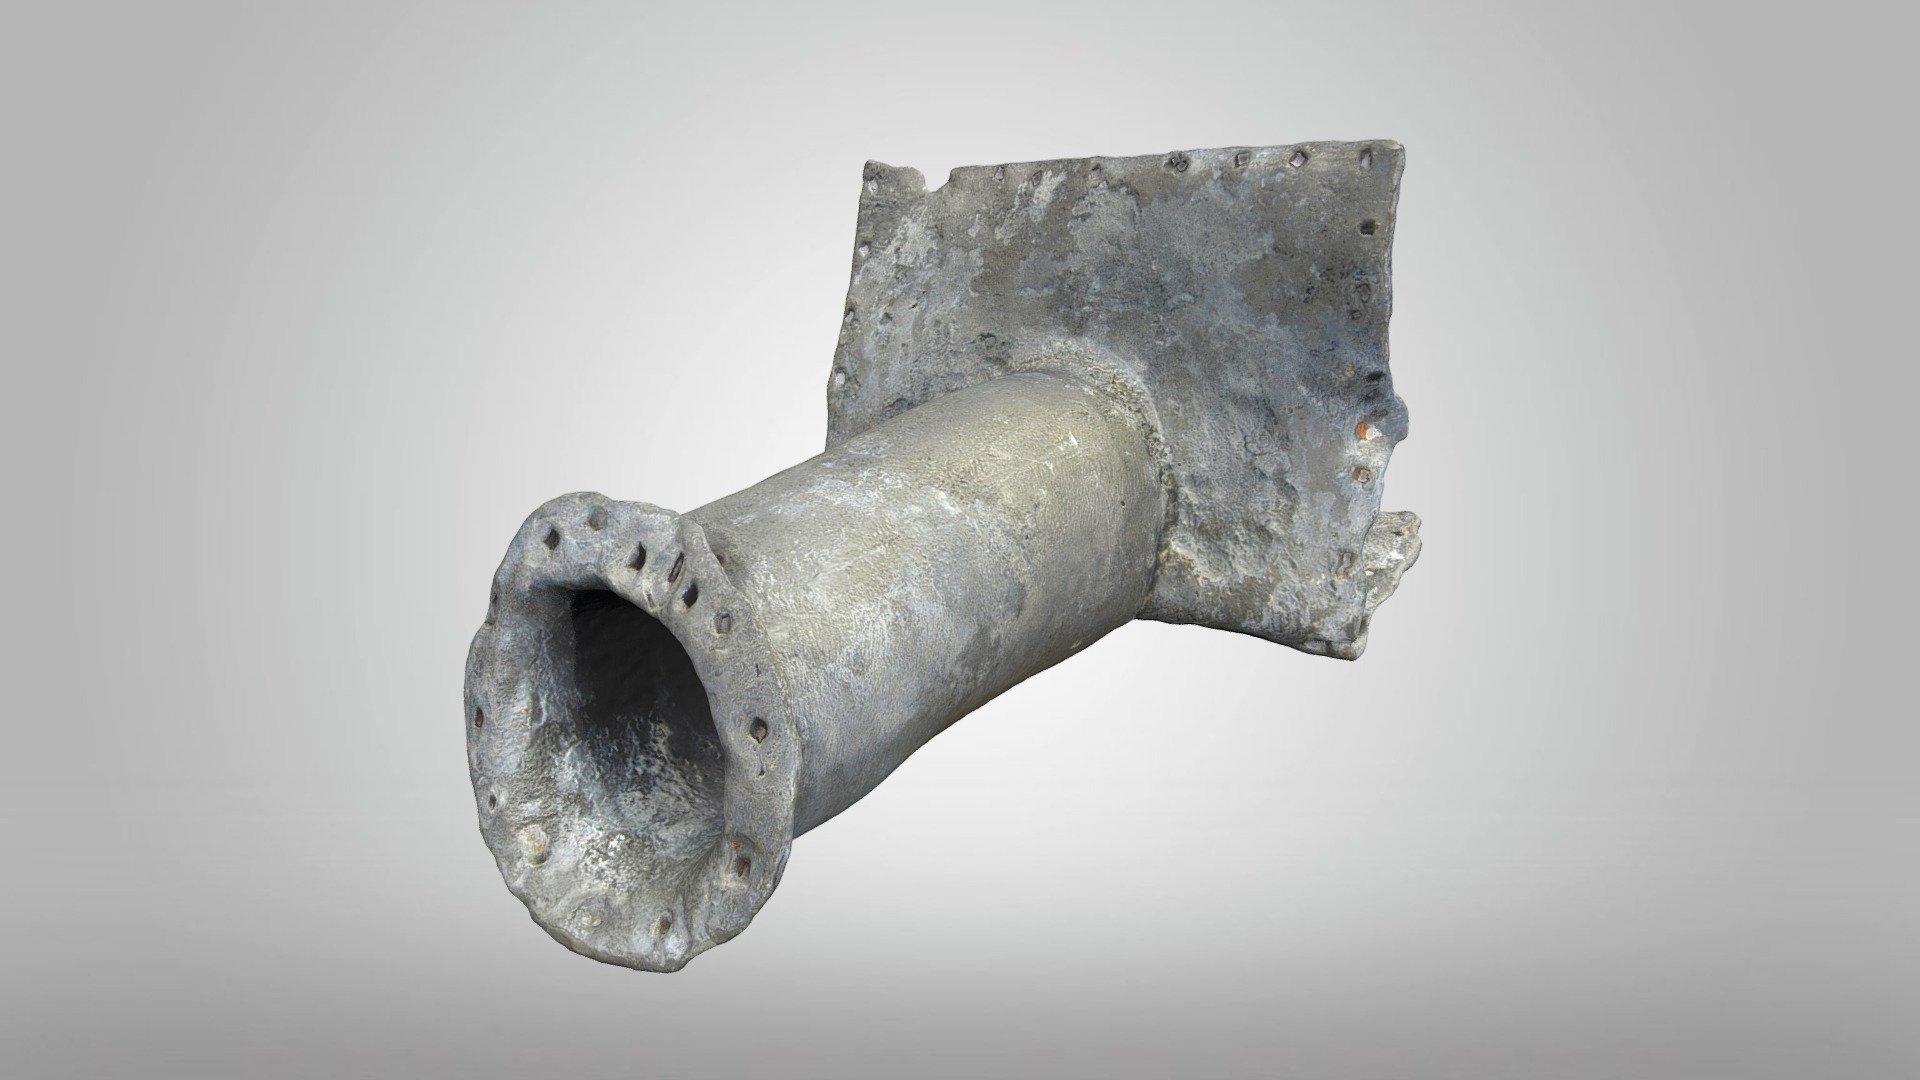
Henrietta Marie Lead Scupper Liner 1986.008.1350 - 3D model by The Mel Fisher Maritime Museum (@mfmaritimemuseum)
A lead scupper liner is from the wreck of the London-based slave ship Henrietta Marie. A scupper is a hole in a ship’s side at the level of the weather deck that allowed sea water and rain to drain overboard. Lead liners in the form of flanged pipes helped to harden and protect the scuppers. The...
very nice work! Beautiful!


