T227 Sir Gareth, round table class trawler, 1:48 scale, 3D print and scratch build [COMPLETED BUILD]

Every modeller will recognise the necessary but really boring chores that pop up once in a while. This is where 3D printing really comes to its own.

40 pieces of 18mm bulwark supports, with rivets and all: 60 minutes from first line on Fusion to a bed full. I'll have to sand them a little, but will do that on the bed. Did a few strokes already, hence the dust.

View attachment 460950
You can send me over a gross of them anytime Marco. Regards Jack

NO! What am I saying, I just love making them individualy then adding the rivits one by one!
 
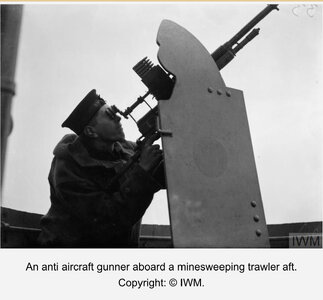
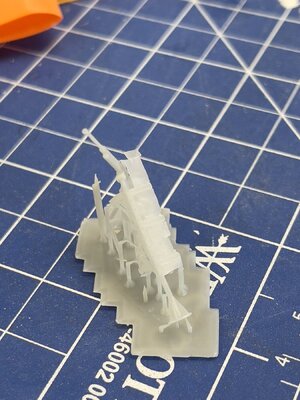
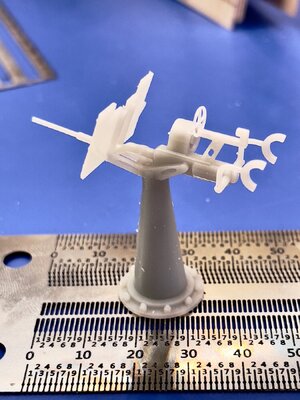
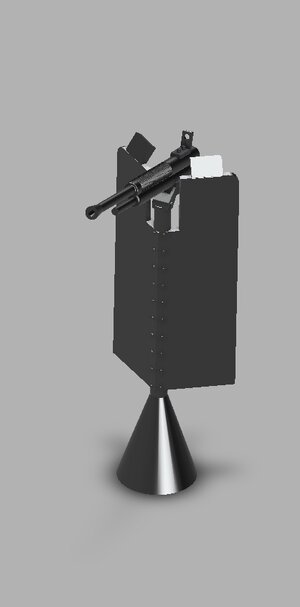
Looking through all the information about armed trawlers, I found that most - Round Table Class included - throughout the war had a mix of AA armament. And I found an interesting picture of a gunner on such a trawler. So that's what I am going to do: a Hotchkiss 1909 .303 with a shield on a quite thin pole like mounting.

Drawing something that would look like the thing was an OK job, realising that most details would be invisible at 1/48 scale. But printing was another matter: to keep things in scale, the shield turned out to be 0.05 mm thick. That's a stretch ... so I'll do it in 0.5mm. You are welcome to measure and calculate back to real world steel thickness :)


IMG_5052.jpegtempImagesrifVr.jpg
 
Joking aside Marco, your 3D printing looks great and if you ever think of selling the odd bit I would be interested. I am looking for a 1/48 scale RN Quad Vickers 0.50" for HMS Picotee if you fancy a challange. As for scale I bought a 1/48 4" QF Gun that had been resin cast and the shield around it was so thick it would have done justice as armour on the side of a battle ship.

Great work and all very interesting. Cheers JJ..
Jack,

Thanks for the great support! And it makes me try even harder to get things right. Fun!

About a quad 50 cal … to give you an idea … the barrels would be 1/48th of half an inch. Casting will always be a problem.
Printing in 3D will be a challenge as well. Not for the resolution, but to get the positioning so, that the really thin parts don’t require supports. I’d do that in two or three parts.

You are talking about these, aren't you?

It's a pity Shapeways went pear shaped ... they had BEAUTIFUL 3D prints. Costly, but absolutely stunning. I won't be able to get that definition.

Let me think about it and see what I can come up with. And I'll either do it and for free, or not do it at all.

Wait, out.

Screenshot 2024-07-27 at 14.50.38.jpeg

Screenshot 2024-07-27 at 14.50.00.jpeg
 
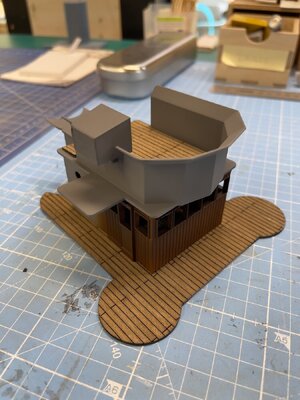
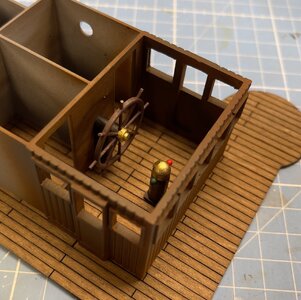
In the meantime I am getting into the details of the ship. And I really have to think my way through the logic of printing, connecting, painting and getting layers on top of each other. In this case, I can only do a few steps on the inside of the wheelhouse: the bottom plate (etched real birch from my laser printer) is also the platform for all kinds of outside gear. And requires supports on the underside. This best can be done first, before glueing the wheelhouse on. And the compass bridge has a similar problem. But I can glue parts like the wheel to the wall. Which means painting first. The compass is not fixed yet and shown just for fun.

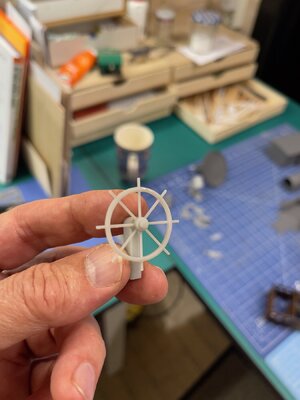
About the wheel: my first trial was really too thin and flimsy. In 3D you have to find the middle way between 'true to scale' and 'printable'. So from close up it is a very simple wheel. But with paint and in scale it looks the part!

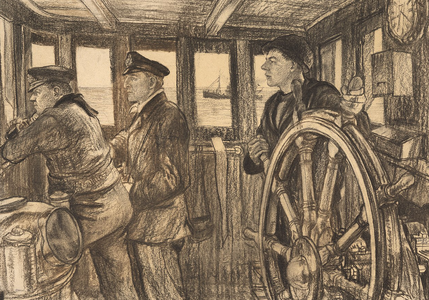
Fun fact: these trawlers had their wheel (helm) facing 'backwards'. This was the simplest solution to get everything working with the chains and such. And I found a nice picture to show what that looked like.

IMG_5058.jpeg

IMG_5060.jpeg

Screenshot 2024-07-26 at 15.42.33.png

IMG_5056.jpeg
 
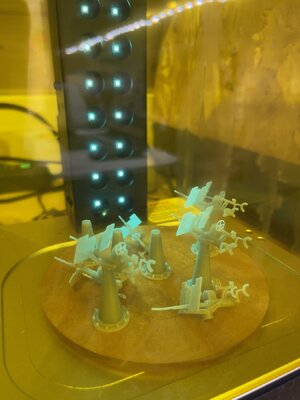
And another detail is taking shape: the 20mm stern gun, here still in the UV chamber. Anyone unfamiliar with resin printing: it requires maturing with UV. Sunlight will do the job, but at risk of heat warping or even melting details. Hence the UV contraption. It can be used to put a whirlpool box on as well, filled with IPA to clean the resin parts before UV-ing them.

I designed the gun based on a very detailed plan, albeit simplifying it to make it printable (for me, I'm sure some can do much better!).

And as usual it worked at first go. But if I had printed just one model, it would have been taken care of by Murphy. In the end I'd rather have a few spare.

IMG_5062.jpeg

IMG_5065.jpeg
 
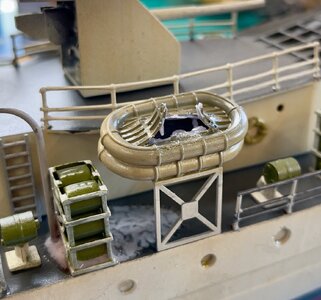
As an aside: my first legs with 3D printing was with a half scratch model of a ww2 destroyer. And that really was and still is a learning object 'pur sang'. Today I learned a valuable lesson again: do NOT under mature your prints and do NOT create enclosed areas without any 'valve' to release pressure. As I need some 'Carley floats' and had made them for that ship, I sat staring at that destroyer and suddenly noticed that some goo was dripping down on the deck ...

The model is in my work shed and it can be fairly warm. All of the 3D printed parts look good, except those floats. And yes, they have enclosed space between them.

Oh well, better now and on that ship.

IMG_5066.jpeg
 
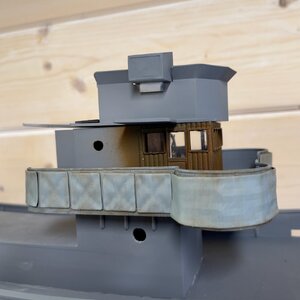
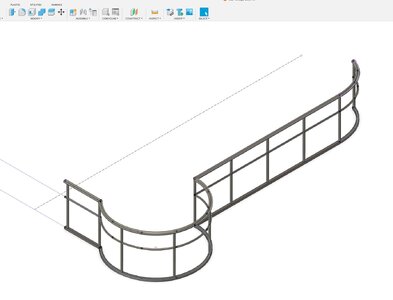
I learned a lot over the last days: creating soft looking materials is hard. In this case I designed the overall bridge railing structure and added the anti-splinter mats. And of course I could have reverted to clay or actual cloth, I really wanted to see if you can create something like this in Fusion. My view: not so bad at all.

First coating, all structures still stacked without glue.

I also glazed the wheelhouse and will now paint the backside in 507a. Carefully. Just a thought: could've done the glazing AFTER. Oh well.

IMG_5070.jpeg

Screenshot 2024-07-29 at 20.01.26.jpeg
 
I learned a lot over the last days: creating soft looking materials is hard. In this case I designed the overall bridge railing structure and added the anti-splinter mats. And of course I could have reverted to clay or actual cloth, I really wanted to see if you can create something like this in Fusion. My view: not so bad at all.

First coating, all structures still stacked without glue.

I also glazed the wheelhouse and will now paint the backside in 507a. Carefully. Just a thought: could've done the glazing AFTER. Oh well.

View attachment 462161

View attachment 462163
Looks like you will have to get out the masking tape Marco;)

Great work, cheers JJ..
 
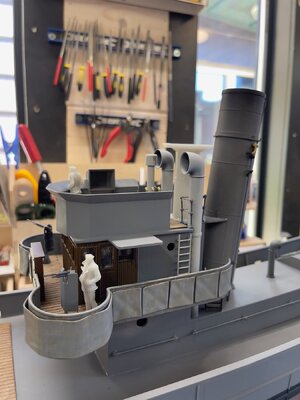
A short update. I decided to focus on the bridge and compass deck, working on the details. And I’ve still got a lot of open ends, amongst others supports, brackets, hoses, wires and whatnot. But I created the overall structure, including the air vents. That was a revelation: instead of all kinds of tricks using curved lines and 'splines', I just create a standing pipe with an vertically offset disk at the top and lofted pipe and disk together. About five minutes work.

It is rather a steep learning curve, with lots of trial and error, mostly because of not really thinking things through. At some stage I thought I could take a shortcut by reusing ladders from another (non scratch) model. But a long ladder in 1/96 scale does not equal a short one in 1/48. So I looked at step height, width and such. And I designed new models both for the vertical ones and the more stair like ones, with handrail.

To provide some sense of scale I printed ‘the lone sailor’, here still in grey resin. If anyone knows of a downloadable printable Royal Navy sailor, that would be great.

I also found that printing hand held rails in true scale is nearly impossible. Too flimsy and thin, curling or breaking off as I removed supports. So I changed tack and only printed the brackets, but used 0.8mm brass rod for the lengths. Overall I think I will be able to do more than 95% by own design and print. Good enough.

Onward!

IMG_5111.jpeg
 
A short update. I decided to focus on the bridge and compass deck, working on the details. And I’ve still got a lot of open ends, amongst others supports, brackets, hoses, wires and whatnot. But I created the overall structure, including the air vents. That was a revelation: instead of all kinds of tricks using curved lines and 'splines', I just create a standing pipe with an vertically offset disk at the top and lofted pipe and disk together. About five minutes work.

It is rather a steep learning curve, with lots of trial and error, mostly because of not really thinking things through. At some stage I thought I could take a shortcut by reusing ladders from another (non scratch) model. But a long ladder in 1/96 scale does not equal a short one in 1/48. So I looked at step height, width and such. And I designed new models both for the vertical ones and the more stair like ones, with handrail.

To provide some sense of scale I printed ‘the lone sailor’, here still in grey resin. If anyone knows of a downloadable printable Royal Navy sailor, that would be great.

I also found that printing hand held rails in true scale is nearly impossible. Too flimsy and thin, curling or breaking off as I removed supports. So I changed tack and only printed the brackets, but used 0.8mm brass rod for the lengths. Overall I think I will be able to do more than 95% by own design and print. Good enough.

Onward!

View attachment 464412
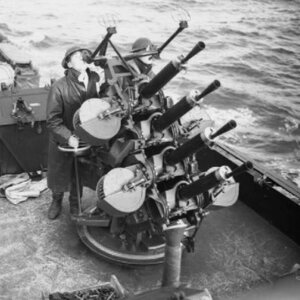
Those Hotchkiss? bridge guns look very convincing Marco. Bravo!
 
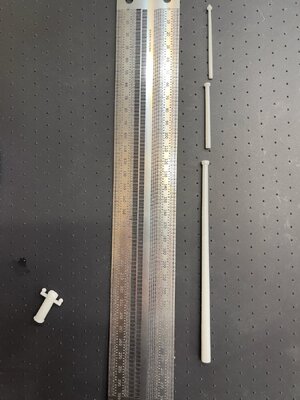
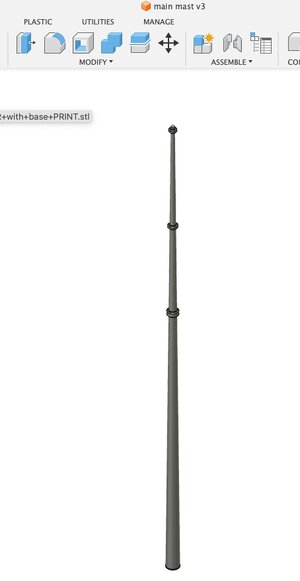
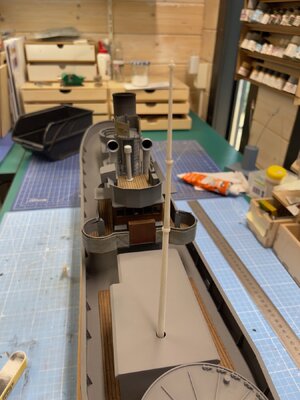
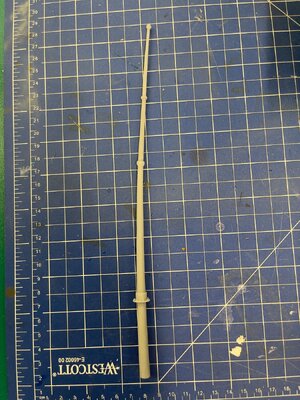
A few weeks ago there was the question if it was possible to 3D print a mast. Well, yes. But it is not that easy. I first tried it with my FDM printer (for non 3D folks, that is the nozzle pouring kind, with 'filament'), but that didn't work. For strength it was best to print it flat, but it curled up from the bed. So I reverted to resin (the goo in a bath 3D printing). And that worked. It will not be a very strong mast, but with the stays and other cables it will be sturdy enough. I hope. If not, I will revert to wood.

The three images show the CAD model, the just out of print and the glued together total. Length 254mm, bottom 7mm, top 2mm, tapered all the way. Note: when they revamped these ships after the war to become fishing trawlers, the mast was exchanged for a much thicker and sturdier one. In wartime it was mostly for some radio aerials, to float a balloon, etc.

Note: the mast is not yet glued in the model. That will come later, as there is still a lot to be done around that deck house.

IMG_5117.jpeg

Screenshot 2024-08-14 at 14.48.25.jpg

IMG_5125.jpeg
 
Well, we are a few days later and things are not looking too good for that mast. The problem is that resin, or at least the one that worked for everything else, is too soft. So after having put the mast in a jar, awaiting mounting it in its place, I found that it started to bend. And that's just gravity at work, not me putting it under stress. And I'm pretty sure that putting stays and such on will not help.

So now I will try it again on the FDM printer, albeit positioned differently. If that also doesn't work, I will revert to wood.

Hmmm, now that I think of it, I might try to make a hollow mast and put a metal rod in.

Oh well, it is a hobby.

IMG_5146.jpeg
 
Well, we are a few days later and things are not looking too good for that mast. The problem is that resin, or at least the one that worked for everything else, is too soft. So after having put the mast in a jar, awaiting mounting it in its place, I found that it started to bend. And that's just gravity at work, not me putting it under stress. And I'm pretty sure that putting stays and such on will not help.

So now I will try it again on the FDM printer, albeit positioned differently. If that also doesn't work, I will revert to wood.

Hmmm, now that I think of it, I might try to make a hollow mast and put a metal rod in.

Oh well, it is a hobby.

View attachment 465807
Keep trying Marco you will get there. A metal rod sounds a good idea, or maybe a wooden one? That way if you have to drill into the mast it might prove easier. To my eye a wholly wooden mast can never look as good as what you are making.
BTW I tried, but without much luck. to discover if the 'Round Tables' had wooden or metal masts. My thinking was that since a lot of the photographs of Sir Lamorak and Sir Kay's masts show what looks like a lightning conductor they where probably wood, but in truth I don't know.

Cheers JJ..
 
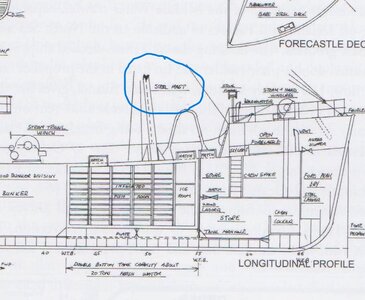
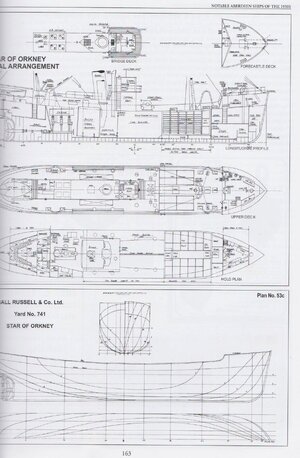
Hi Marco, not wanting to let go regarding mast material I had a thought (rare) the 'Round Tables' where based on the trawler Star of Orkney built by Hall, Russell & Co Ltd, Aberdeen who also built some 'RT's' including of course Sir Gareth, so I took a look at the general arrangement drawings for Star of Orkney and the main mast is given as steel. Of course this is not conclusive, wood may have been less expensive and easier got in 1941-42.

Star 2.jpegStar.jpeg
 
Back
Top