T227 Sir Gareth, round table class trawler, 1:48 scale, 3D print and scratch build [COMPLETED BUILD]

Right behind you: I looked at Star of Orkney as well. But I cannot find the link to masts on Round Table.

But fun!

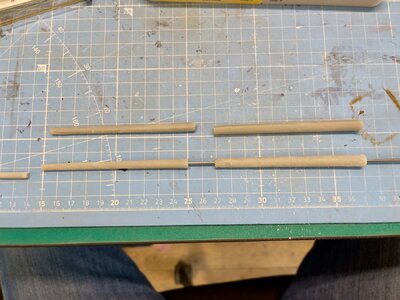
In the mean time I have printed 2/3 of the mast: I’m doing a hybrid job, one part in polycarbonate, one part in PLA (both filaments) and the top part (the thinnest) in resin. I’m gluing 2mm wooden dowels (aka tooth picks) in pre-bore holes to connect the three parts.

And as far as I can see, the masts were painted. Light sea grey on the two lighter ships, mid sea grey on the others. 1724164915625.jpeg
 
In the mean time I am at my fourth iteration of that :mad: mast ... not so easy 3D printing such a straightforward thing. I mean, basically it's just a rod of some 250mm length. Oh well. I'll get there.

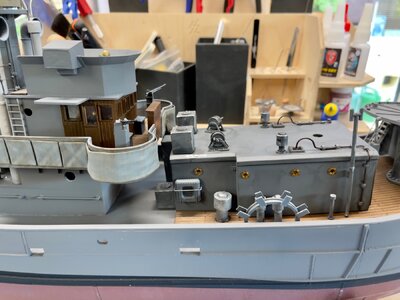
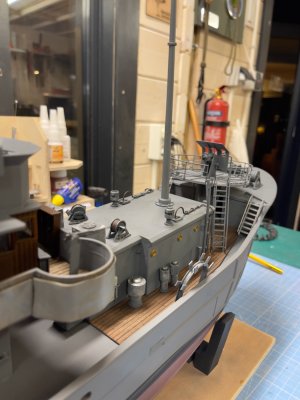
What is fun is my progress on the deckhouse. Printed, added all the funny parts (exhausts, water bins, etc), painted the lot, dry brushed edges. My ship will be weathered. And I know first hand: after four weeks of sailing, everything is covered in grime, soot and whatnot.

It's still not glued onto the deck, as I want to add a little more detail.

IMG_5152.jpeg
 
Great photo Marco, it is all coming together nicely. I particularly like the finish you have achieved on the mushroom vents, they look like they have been to sea and got a few good soakings.

Cheers JJ..
 
In the mean time I have been struggling with the main mast. After a fourth iteration, combining several processes and still not succeeding, I decided to try one last time. Back to the original plan: print in resin and stiffen up with a center rod. To be sure I checked the measurements and found that I could add a millimeter to the base, resulting in 0.3mm at the top. You wouldn't notice, but it left a little more room for a metal rod.

I cut the mast in three parts, printed the parts including the center bore and hoped for the best. And it seems to work. The mast is still not stiff, but I guess that a wooden mast of just a few millimeters would be flimsy as well. And the thinnest part will get some support from an additional part that was mounted along its length in the real world anyway.

Good enough, on with the next steps. Never thought that the toughest part would be what is basically a tapered rod.

IMG_5159.jpeg

IMG_5160.jpeg
 
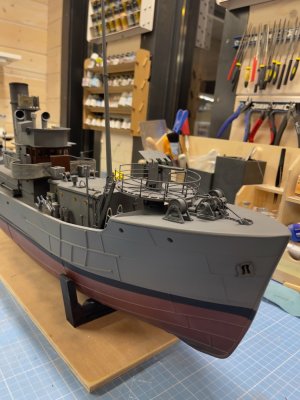
Small steps, but making good progress. I was able to print the railing around the main gun platform in one go. Size is slightly thicker: 1mm which would mean 48mm. I think the railings were something like 32mm. But that doesn't work, as it becomes too wobbly. I also added the stairs. In the mean time I worked on small paint jobs and finally glued the deckhouse in place.

And look at that mast! I can't wait to start with stays, lines and whatnot. Oh, and I have decided that the small mast on the smoke stack will be a brass rod. It would be 110mm at 1.6mm ... no room for a rod in that if I'd print it in resin, so it will be a brass rod only. Oh well.

And of course there is a LOT to clean up, retouch, weather and such. But fun.

@JJ: your build and images helped me a lot, as the drawings sometimes make you wonder what you are looking at. And some parts are actually missing in some of the views.
So thanks!

IMG_5234.jpeg

IMG_5233.jpeg
 
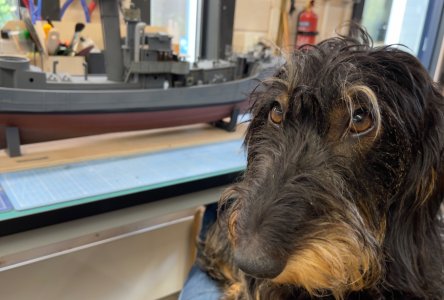
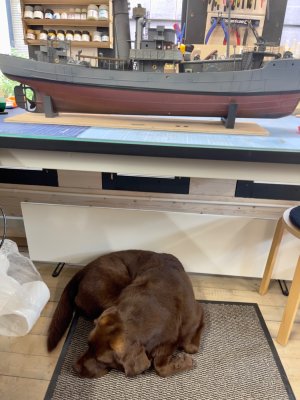
Sometimes I have the inspector over at my shed, looking at things, thinking his thoughts. 'Sir James Bigglesworth', better known as 'James' (and to some as 'death below the knees'). The only thing I make sure of keeping an eye out on what he is doing. Silence is golden. Except with doxxies. Then silence is suspicious. Very suspicious.

IMG_5247.jpeg
 
I like your good fellow -
it is everytime good to know, that "somebody" is interested in what we are doing in the workshop
 
I am making slow progress, but that was expected at this stage of the build. What I hadn't really thought through and perhaps should have started earlier, is the dinghy. That is a build in itself, at least, if you want to be particular about details.

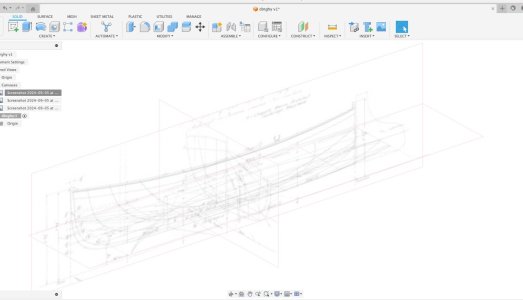
Oh well, first issue was to find information ... not such much was written about 7.5ft little dinghies. But I found a 10 footer that looks the part, at least at 1:48 scale. But the 'plan' is just a very small jpeg. Hmmm ... Oh well, it'll have to do.

Setting up X, Y and Z in Fusion was easy. But I will be busy for a while to make a boat out of it.

Screenshot 2024-09-05 at 13.33.48.jpg
 
That little boat is going to be a somewhat longer project. The outline of the hull is already a bit of an issue, but - and everybody will recognise this - the more I study on it, the more detail I want to add. Ribs and such, planking ... and all in 3D print.

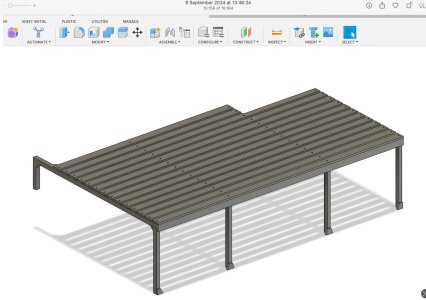
Luckily there are some “simpler” chores, such as the boat deck. I thought. What a strange deck! Odd dimensions, having to fit on three levels on the ship, brrr. But I think I succeeded. Only had to print it twice as of course I miss measured one axis.

Here still in bare resin, fit check before painting.

Screenshot 2024-09-09 at 15.03.58.jpg

Screenshot 2024-09-09 at 15.04.19.jpg
 
I try to 3D print as much as possible. The hull is some 880 mm long, so I had to cut it in four parts to fit it in my fdm printer (which can handle 245mm).

View attachment 459839
I am curious if you printed this keel down with supports or keel up without them. I have been thinking of the same type of project and the largest printer has a 12" x 12" build plate so there is room for this size of pieces.
 
I am making slow progress, but that was expected at this stage of the build. What I hadn't really thought through and perhaps should have started earlier, is the dinghy. That is a build in itself, at least, if you want to be particular about details.

Oh well, first issue was to find information ... not such much was written about 7.5ft little dinghies. But I found a 10 footer that looks the part, at least at 1:48 scale. But the 'plan' is just a very small jpeg. Hmmm ... Oh well, it'll have to do.

Setting up X, Y and Z in Fusion was easy. But I will be busy for a while to make a boat out of it.

View attachment 469388
Hi Marco. I have visited your build-log some time ago, but now went through it. I am impressed by your ‘learning curve’ about Fushion. A Deja-vu for me to a year ago. And the outcome of the 3D printing looks great. I like this way of working in ‘plastic related material’. But for the time being I stay on scratch with Evergeen …….. ;)
Regards, Peter
 
I am curious if you printed this keel down with supports or keel up without them. I have been thinking of the same type of project and the largest printer has a 12" x 12" build plate so there is room for this size of pieces.
I printed them with the cuts on the plate. So like a quartered and than sunk ship. No supports. And printed it FDM on a high quality (so slow) setting. Four times about ten hours printing.

A tip: next time I will incorporate the deck as well, perhaps with some openings for anything I’d want to put inside that hull (think “engine”).

It solves quite a problem: measuring the deck into the hull afterwards.

Hope this helps.
 
Hi Marco. I have visited your build-log some time ago, but now went through it. I am impressed by your ‘learning curve’ about Fushion. A Deja-vu for me to a year ago. And the outcome of the 3D printing looks great. I like this way of working in ‘plastic related material’. But for the time being I stay on scratch with Evergeen …….. ;)
Regards, Peter
Nothing wrong with Evergreen. Got loads of it. But am pig headed with this ship.
 
I printed them with the cuts on the plate. So like a quartered and than sunk ship. No supports. And printed it FDM on a high quality (so slow) setting. Four times about ten hours printing.

A tip: next time I will incorporate the deck as well, perhaps with some openings for anything I’d want to put inside that hull (think “engine”).

It solves quite a problem: measuring the deck into the hull afterwards.

Hope this helps.
Thanks for that information. I had forgot about printing in that orientation. It makes a lot of sense!
 
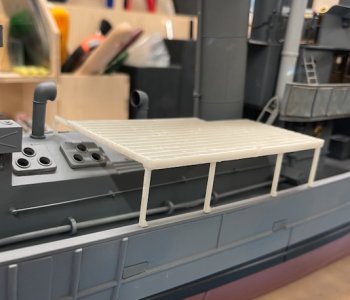
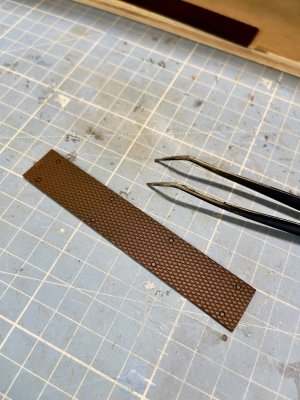
I was wondering about a bench like construction on both sides of the ship and received some solid info from JJ. Not a bench, steel plates with diamond pattern. Some trawler thing.

Hmm. Another lesson to learn: 1/48 scale diamond patterned plates. But … was simpler than I thought.

Included holes and the bolts to screw them on the deck. In the print, not in reality.

1725972941323.jpeg
 
Back
Top