Looking good Brian. I've never used the dull coat varnish on a wooden deck before. I will have to give that a shot. I've also used the Midwest Model Shop advice on sticking the wooden deck pieces to black tissue paper, then using Gorilla glue to attach the decks; bit messy but seems to hold the decks down well.Hello friends,
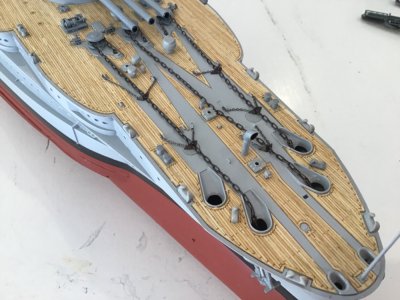
Been busy at my workbench this weekend. I primed and top coated the hull with anti fouling red and upper hull above waterline in Haze grey. In addition, my timber deck arrived from China, and I applied a coat of Testers dull coat clear varnish to the sheet. After the varnish dried I peeled off the backing and applied the deck. I read somewhere that the deck can lift up around the edges, so I liberally applied superglue gel to the plastic surfaces before applying it. Seems to work well.
Looking at applying additional details to the hull { degaussing lines and avgas line. }. Been researching some info supplied by David and Steve.
View attachment 517497View attachment 517498=
-

Win a Free Custom Engraved Brass Coin!!!
As a way to introduce our brass coins to the community, we will raffle off a free coin during the month of August. Follow link ABOVE for instructions for entering.
-

PRE-ORDER SHIPS IN SCALE TODAY!
The beloved Ships in Scale Magazine is back and charting a new course for 2026!
Discover new skills, new techniques, and new inspirations in every issue.
NOTE THAT OUR FIRST ISSUE WILL BE JAN/FEB 2026
You are using an out of date browser. It may not display this or other websites correctly.
You should upgrade or use an alternative browser.
You should upgrade or use an alternative browser.
The Arizona 1/200. Trumpeter.
- Thread starter Bryian
- Start date
- Watchers 14
-
- Tags
- plastic trumpeter uss arizona
Damn! What a mess. And a hazard!Well this has thrown a spanner in the works !
I noticed when unpacking my 3D printed upgrade parts, that there was a sticky residue over everything. When I started to remove the ships funnel from the sprue, I had liquid resin pour out from the base of the part. What a horrible mess.
i have contacted the vendor about this, so we shall see what happens.
View attachment 518861View attachment 518862View attachment 518863
You are making great progress mate. Having been away and now back at work, haven't even finished putting my hull together yet, although like you I have built up some of the sub-assemblies. She's looking good.Ahoy shipmates,
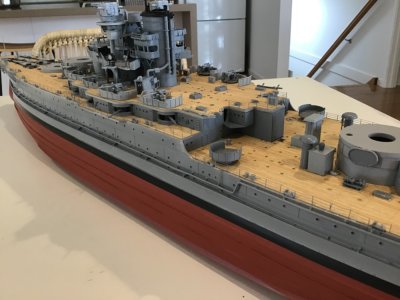
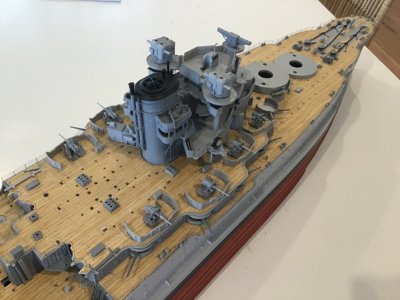
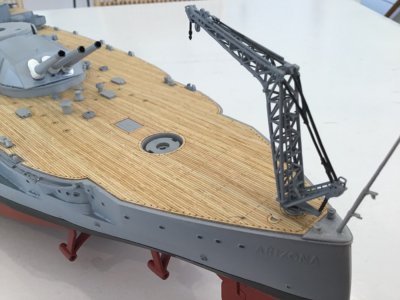
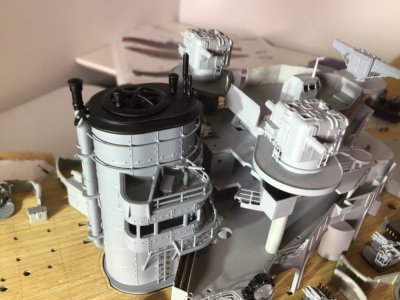
I have had a productive weekend on my Arizona build. I have assembled some of the superstructure and fitted anchor chains and fittings.
I have decided not to go with red turret tops, as I prefer the look of the battleship colour scheme around 1939 circa. I am using haze grey for surfaces above the waterline.
.View attachment 521721View attachment 521722View attachment 521723
Hi friends,
Some more progress today. My replacement ships funnel arrived in the mail, along with 2 catapults and another floatplane. It’s taken over an hour to remove all the 3d printed support pieces but certainly worth the effort and additional expense of purchasing these aftermarket 3d printed parts. The details are beyond my ability to construct with photoetch parts.
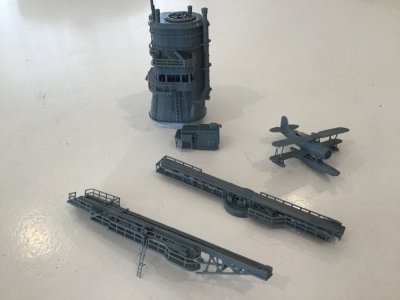
Some more progress today. My replacement ships funnel arrived in the mail, along with 2 catapults and another floatplane. It’s taken over an hour to remove all the 3d printed support pieces but certainly worth the effort and additional expense of purchasing these aftermarket 3d printed parts. The details are beyond my ability to construct with photoetch parts.

Hahaha.... thought you would ask that. I think around 1940, just before her final refit and paint job. 
Well, to be honest, I am basically building the model straight from the box David. (with the exception of 3D parts ) I am grateful for your feedback and reference material, so please keep commenting.
I went with the Haze grey colour scheme as I personally don't like the look of the deep blue paint job as depicted at Pearl Harbour. I am using the Seagull bi-planes so that suggests an earlier version of the ship.
I went with the Haze grey colour scheme as I personally don't like the look of the deep blue paint job as depicted at Pearl Harbour. I am using the Seagull bi-planes so that suggests an earlier version of the ship.
Last edited:
The catapults in particular look terrific!Hi friends,
Some more progress today. My replacement ships funnel arrived in the mail, along with 2 catapults and another floatplane. It’s taken over an hour to remove all the 3d printed support pieces but certainly worth the effort and additional expense of purchasing these aftermarket 3d printed parts. The details are beyond my ability to construct with photoetch parts.
View attachment 522729
Looks pretty good to me mate. Do you know what size chain you used?I added some additional scratch parts to the anchors . Some small chain and photoetch bracing bits attached to the main anchor chains. It’s not completely accurate, but it’s my scratch building effort.
View attachment 522733
Looks pretty good to me mate. Do you know what size chain you used?
Steve, are you referring to the main anchor chain, or the small chains I added ? The small chains are around 2.5mm length per link.
The small ones, so thanks for that. I wanted to include simialr detail this time around.Steve, are you referring to the main anchor chain, or the small chains I added ? The small chains are around 2.5mm length per link.
Dang... that looks amazing. I love how the decs pop, also the chains look even better with the braces.
- Joined
- Aug 14, 2018
- Messages
- 825
- Points
- 403

Hi Bryian, I have been watching your great log from a distance and enjoying the photos and chat immensely. I was wondering about the link size of your anchor chain is it not the main (larger), chain that is 2.5mm? @ 1/200 that would be around 19 inches which sounds about right. I am asking as I am considering HMS Hood in 1/200 as my next build.
Cheers JJ..
Cheers JJ..
With the ladders on the turrets, just found out an interesting tidbit. Turrets 1,2 and 4 only had a ladder on the port side; not both at moulded on the kit parts. Turret 3 had to the port ladder and the STBD ladder from the catapult.Hello friends,
A small update on my build. I have assembled the turrets with metal barrels and the aftermarket 3d printed blast bags. I added some photoetch ladders as well. I have to say, the fitment of the blast bags was terrible. I had considerable difficulties with them. I had to trim and file them to fit the turrets. I do think they are superior looking to the kit supplied blast bags.
In addition, I assembled the aftermarket 3d printed floatplane. This is rather puzzling as I only received one plane and one catapult. Looks like the plane is a Sc 1 seagull floatplane, not like the kit supplied kingfisher planes.
View attachment 520187View attachment 520188
Sorry for not responding sooner Jack. The large anchor chain was supplied in the kit, and the smaller chain I had left over from a 1/700 scale build many years ago.Hi Bryian, I have been watching your great log from a distance and enjoying the photos and chat immensely. I was wondering about the link size of your anchor chain is it not the main (larger), chain that is 2.5mm? @ 1/200 that would be around 19 inches which sounds about right. I am asking as I am considering HMS Hood in 1/200 as my next build.
Cheers JJ..


