• Ships of Scale has incorportated an extra level of security when you log In. Please follow on-screen prompts to acknowledge that you are not a robot via a "Check Box" or a "Pictorial Check Box Puzzle". This is needed due to higher level of AI Activity Security.
  • SUBSCRIBE TO SHIPS IN SCALE TODAY!

    The beloved Ships in Scale Magazine is back and charting a new course for 2026!
    Discover new skills, new techniques, and new inspirations in every issue.

    NOTE THAT OUR NEXT ISSUE WILL BE July/August 2026
  • Win a Free Custom Engraved Brass Coin!!!
    As a way to introduce our brass coins to the community, we will raffle off a free coin during the month of August. Follow link ABOVE for instructions for entering.

The GRACIE S - a POF Model

Joined
Oct 2, 2025
Messages
602
Points
198

The GRACIE S - a POF Model

Classroom 2 MWF - evening EST - short presentations

Featuring: The Station Section Method

A framing method that I have been developing over the last 20 years.

This class will only cover the framing portion of building a model of Gracie S.


Gracie S
San Francisco pilot schooner 1893
95.5' x 83' x24'7" x 19'7" 91t

Stations 52" intervals

R&S 26"
Frames 8" as a paired bend 16"
Space 10"

The model is 1:48 scale.
frames 0.17" Black Cherry Prunus serotina
spaces 0.21" Pine 2x4 Home Depot aisle special
space tops 0.21" Yellow Poplar Liriodendron tulipifera

Gracie S is a small vessel. It was designed for speed with no provision for it being a cargo carrier.
It looks fast, sleek, but a bit hippy.
 
The Station Section Method

First I will describe concept behind this POF method and its advantages.
My first scratch build was Kate Cory, plans by Eric A.R.Ronnberg Jr.., 1/4":1'.
I used the Hahn method. It is an excellent first scratch POF method to learn from. Hahn was building at 1/8":1' scale in his presentation. At this scale the waste of framing stock is insignificant. At 1/4" scale the wood is eight times the volume and the loss to waste is noticeable. For a skills development project the loss is acceptable if domestic species of wood is used. I lofted each frame by hand on vellum. The process was very time consuming, tedious, and frustrating. I found that I cannot plot acceptable curves. An easier lofting method became a priority.
Doing the frames as scale appropriate individual timbers was also a priority. Drawing and building each bend as an isolate unit became something to avoid. On a large ship, this can involve drawing up to 200 or more individual frame shapes.

After many starts and stops I have developed a method that works for me. I have tried different names - station sandwich method is one - but right now Station Section Method is my choice.

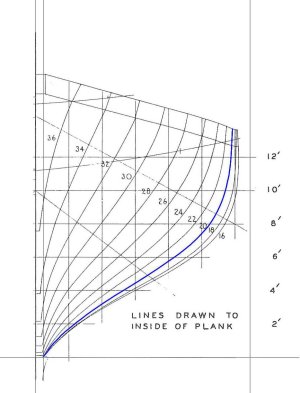
On lines plans of a ship, the shape for each station is already on the plan. There are usually between 20 and 30 individual shapes. No plotting is necessary.
This means that all of the frames between two stations must be built as a stack, as a unit, as a section. That is: if having to plot points and draw 200 to 300 new curves is to be avoided, the station shapes have to stand for their associated frames. The actual shape of most of the frames is determined by how the wood itself is shaped.
My reading indicates that the 1670's era Navy Board framing was done as sections. Even more significant is the probability that the mold loft only chalked the frame shape at each station on the floor and only made patterns for the timbers of each station. The patterns had marks - sirmarks - for each of the frames between each station. The shipwrights in the yard did the interpolation.

There needs to be a way to align the frames in each section. The two frames in a bend have very little area inside the frame that allows for a perpendicular line to be inside the two frames for most of the hull. This means that there is zero chance that a whole section of frames can be aligned using the inside bodies. A common alignment that is outside the frames has no limitations. It just means that there is more wood to remove when shaping. By having precise multiple alignment points there is an identical pattern in precise alignment at each end of a stack of frames (station section).

The locator points to mate the common faces for two sequential station sections are easily within the body of the frame. There is a limit on how deep a hole can be drilled without exiting the frame and marring the outside or inside face,

I also include temporary filling timbers in the spaces. I use construction Pine for this. It is low cost and easy to work. The frames in each section are more stable and shaping is much easier. The hull is a solid surface for shaping, faring, and sanding. It is not like trying to smooth a picket fence or bumping along rail road track ties. The frames cannot move while being abused.
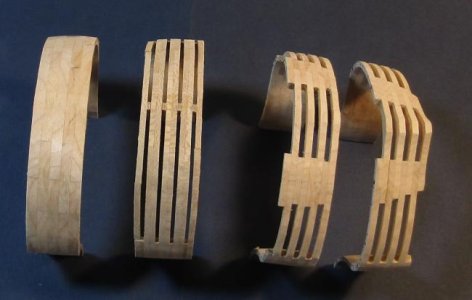
The framing style is not limited -- or constrained by this method.
Some of the possibilities to be shown on Monday.
 
photo # 000000 framing styles 2.jpg

Far left is a solid wall of frames

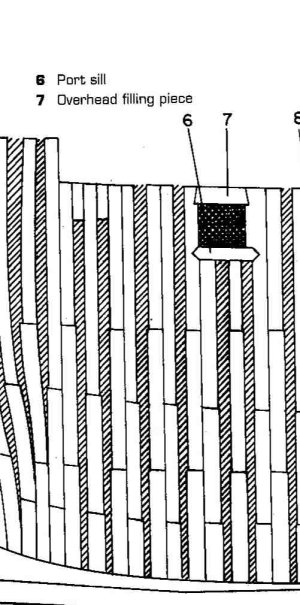
Next is a common North American and French style - a bend and a space - in the example with width of the space is the same as a frame. (The small piece of wood in the middle of each space is the deadwood. It goes from the top of the keel to the underside of the keelson. I believe the it was present in most if not all RN ships in the wood era. There would be a 1 inch high "window" close to the keel. The bilge water had to be able to flow between port and stb.) ( This is the part that I neglected to include when I framed this vessel. The result more than adequately demonstrated why it was a mistake not to include it.)

Second from right is my preferred styled framing. Navall timber framing is a complete frame alternating with a partial space. A short futtock 1 (Navall timber) overlaps the butt of the floor and futtock 2 -and probably what was part of futtock 4. The overlap forms a solid band of timber that resembles the band of Navy Board framing, This band mimics two proof diagonals. The diagonals give proof to the nature of shape of the hull.

The far right is Navy Board framing - late 17thC. Stylized by being regular. It is actually the way hulls were framed from just after frame first building replaced shell first. Many of the famous Navy Board models from the 1670's era are this style.

The frames in the example are made using Hard Maple. If the grain looks large relative to the size of the frames, that is because the scale is 1:120.


photo #0000-Beagle framing.jpg
(Marquardt - HMS Beagle)

It will also work for the complicated RN framing with bends and filling frames and timbers of different widths - sequentially narrower the higher. It just needs layers of cardboard added to the space filling timbers.

What it cannot do are cant frames. It would be significantly more difficult to include butt chocks.
Free standing single filling frames almost require butt chocks if using the current framing methods. Free standing single frames have unsupported end grain to end grain bonding. They may as well be dry butted for all the strength that any glue could provide. The Station Section method protects single frames during shaping and faring - by locking them in with the temp space filler Pine, so butt chocks are not needed.

My personal choices are to forego butt chocks, use square framing for the whole hull - no cant frames - and no single free standing frames.
With butt chocks - I do not see how to fit them into frames with a lot of bevel and they are all but invisible for anything but a section model.
Cant frames - except for CA Redwood dimensions I do not see that any species of tree could provide stock deep enough to allow square frames in the zone where the frames are canted for an actual ship.. At model scales, this is not a problem and I use stylized framing so I am not cheating.

The Station Section Method does not use a baseboard. It uses no jigs. The keel - stem - sternpost - all go on after. There is one strict limitation. The framing stock must all have strict tolerances for stock thickness. Error creep is a constant hazard.
 
Last edited:
I use Painter19 as my drawing program. It is raster based the curves are not smooth on a micro level. They are facets, but not so as I notice. When the curve is expressed in wood, it is smooth.
I only use basic drawing program tools. What is necessary is having an unlimited number of layers. Allowing for large files is helpful. Opening and saving as PNG is a must for me. The process involves replicating an existing design and accurately manipulating it. No new design generation is involved. There are no formula generated curves - or any formulas to fill out. I have not found a macro function in Painter. Having one would save on time.
As it is, the way I loft only requires days. I can generate frame timber patterns ready to cut wood for a RN first rate in 14-18 days. I began my early Georgian Royal Navy project in 2021 and have framing timber patterns for about 120 individual vessel ending at 1776, when, for my family, the Royal Navy went from being Our navy to being Their navy. That averages to about three vessels per month.


Lofting


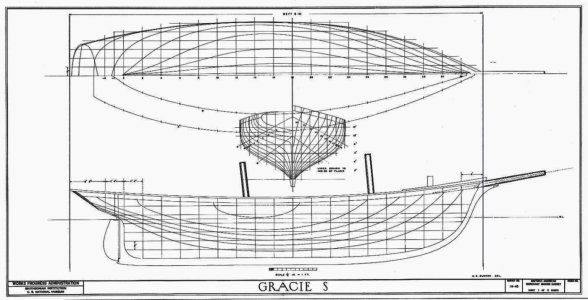
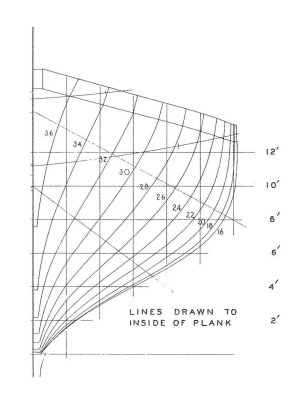
photo #11-hull lines 25.jpg

The key plans from HAMMS will be 0011.tif


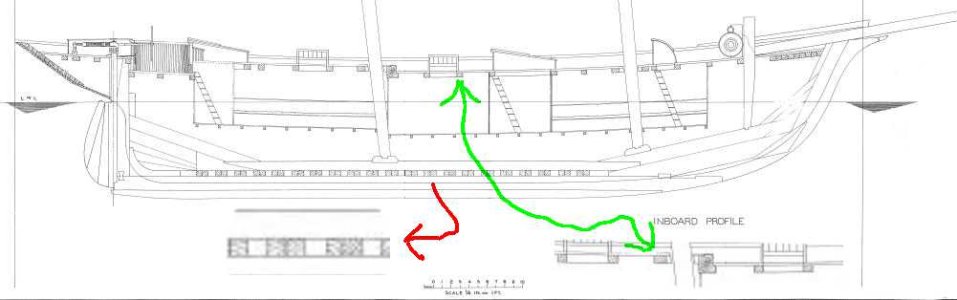
photo #00000000-inboard profiletiff.jpg

Provides the evidence that the framing is all bends, 8" sided, 10" space (red arrow).
The location of the deck beams and the height at the centerline. (green arrow) I would make the deck beams. Trim and temp fit them in position and measure the roundup for each one separately. Measure the distance from the rail to the crown of the beam. Add the beam thickness and the roundup. Make a gauge to site the top of the deck clamp at each beam.


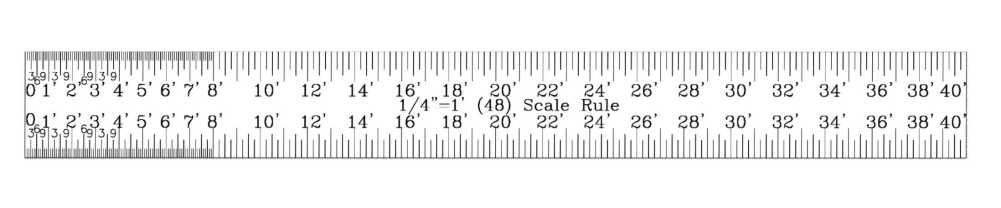
photo # 22-ruler check.jpg

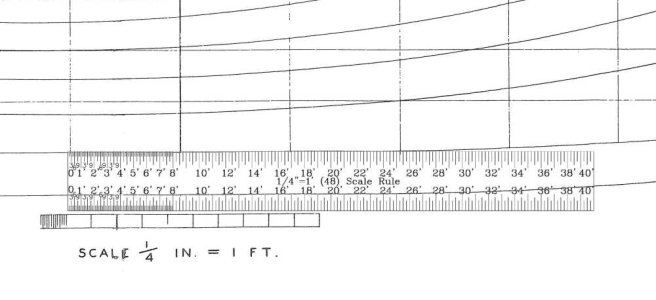
A tool necessary here is a 1:48 ruler that has been scaled in my drawing program (Painter19) to print out with identity with my architects triangular scale.

The white background is CUT. The ruler layer is transparent except for the ruler black.

photo #33-scale plan.jpg

The plan is checked and the scale is adjusted.


Tiff to PNG 51.9% is my scale correction factor.


photo #44-GracieS Profile 48 1 .jpg

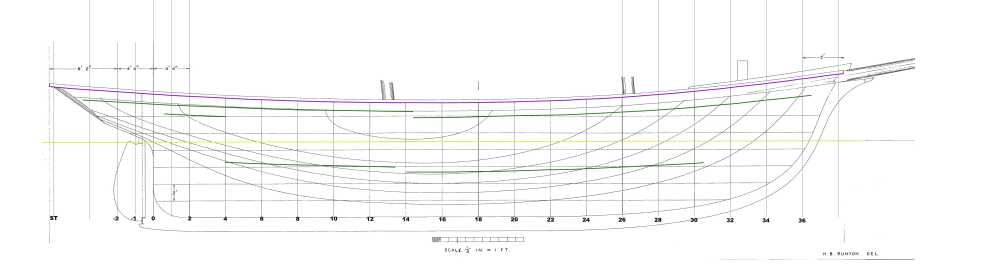
The profile is processed first.


photo #55-GracieS Profile 48 2 .jpg

The lines that are needed are color coded. The stations are made prominent and identified.

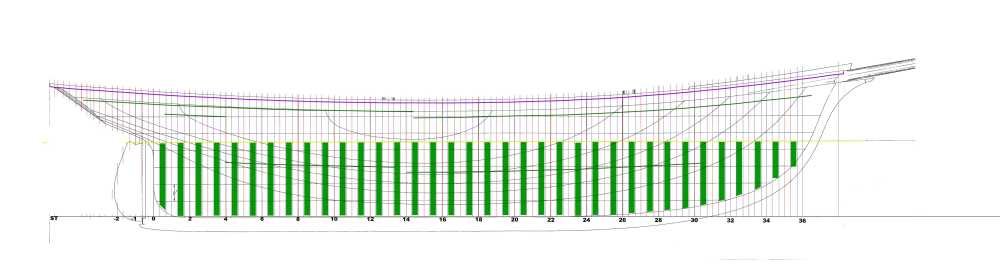
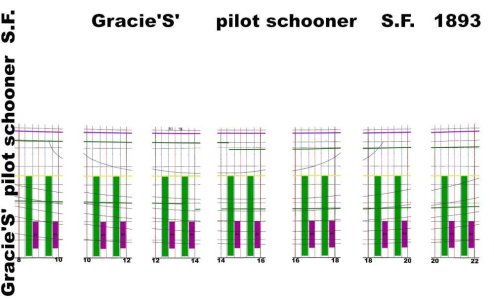
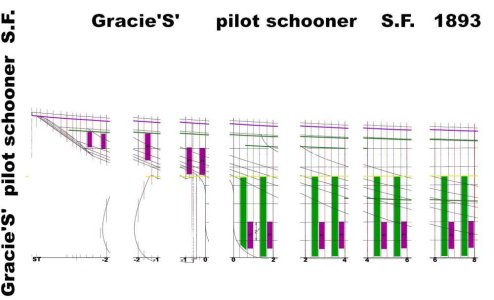
The frame lines and spaces.


photo #66-GracieS Station frames  1.jpg
photo #77-GracieS Station frames  2.jpg
photo #88-GracieS Station frames  3.jpg
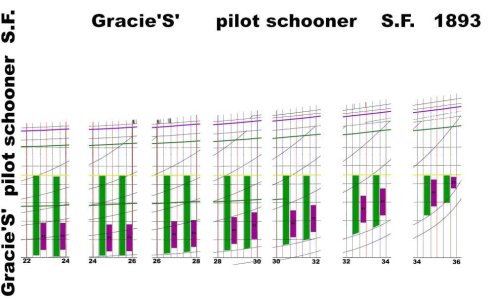
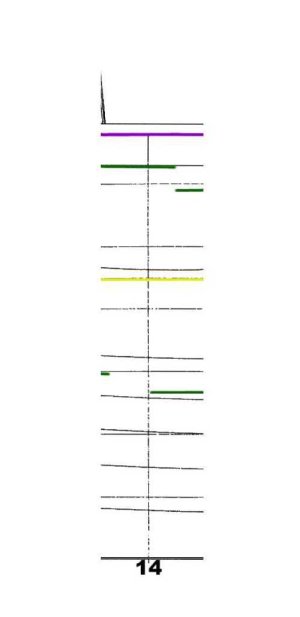
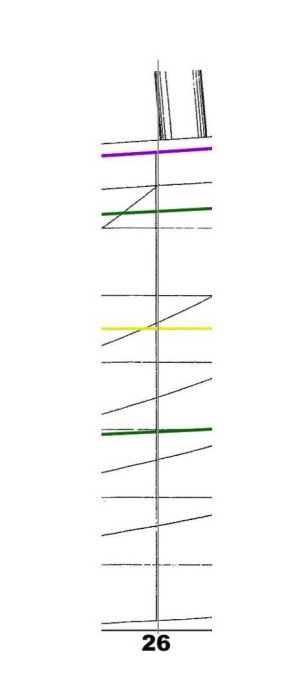
The assembly guide is extracted and printed.


photo #99-GracieS Profile 48 3 14 .jpg
photo #1010-GracieS Profile 48 3 26 .jpg

The data for each station is saved as a separate layer.
 
photo #1111-GracieS Body 48 fore .jpg
photo #1212-GracieS Body 48 aft .jpg

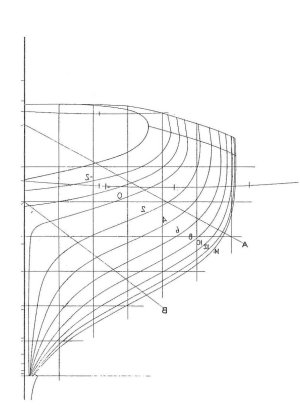
The Body plan is processed.


photo #1313-GracieS Body 48 16 0.jpg
photo #1414-GracieS Body 48 18.jpg
photo #1515-GracieS Body 48 20.jpg
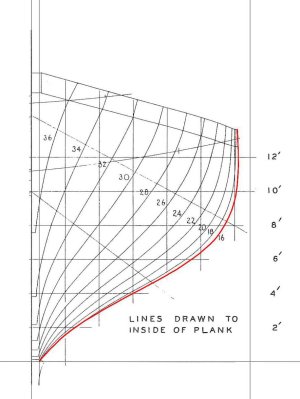
The outside shape of each station is traced on its own separate layer


photo #1616-GracieS Body 48 fore trace.jpg
photo #1717-GracieS Body 48 aft trace.jpg

Eventually each station is traced.

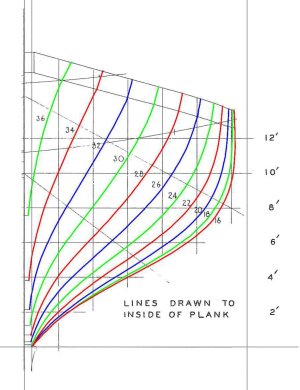
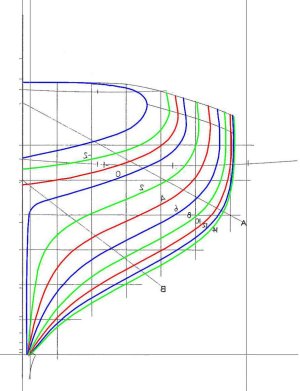
The station shape is color coded. Three colors are used and cycled.

Each station is processed into a frame.

The butts of the timbers need to be defined and added to the base for every frame.
The base is the vertical center line, the horizontal top of the heel rabbet at midship, the outside of the keel midship, and a vertical line outside the greatest breadth to make sure the horizontal rail, WL, wales, underside of the deck at the side, bottom of port sill, top of port lintel lines at each station are long enough for the gauges.

I drew butts for short length timbers for Gracie. The shape of Gracie is more "V" than "U". I decided to frame Gracie using a single timber for futtock one from keel to rail and broke a rule by having futtock one port meet futtock one stb at the midline on top of the keel. The floor timber as I defined it has way too little surface area with futtock one. I further compounded the error my omitting the deadwood in the space. These decisions made for unnecessary problems during shaping. In the final model, the floor is all but invisible and the deadwood can be added when the keel is placed. These mal judgments are only fabrication problems.

30-GracieS HF48 16-18 .jpg

The vertical line running thru the "G" is the width of the floor. The two diagonal lines are the not chosen multi-timber option.
A third diagonal midway between the two is probably needed.
Looking at it now, I should have used the inside diagonal to define the floor timber until the shape at the ends has it too close. At that point the outer diagonal would serve.

Each new vessel is its own teacher for showing things that could have been done better.
 
photo #1818-GracieS Body 48 16 1.jpg
Start with the frame outside shape


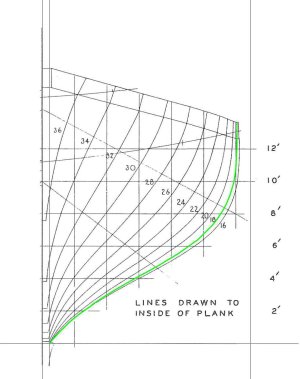
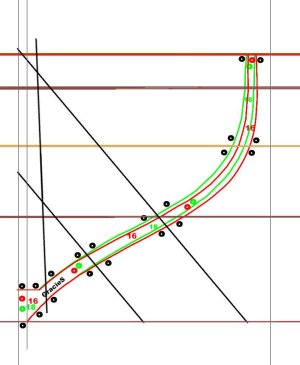
Hand lofting the moulded dimension uses a compass to draw an interior semicircle at the desired spot on the outline with a radius equal to the moulded dimension. The inside frame line was the tangent of each semicircle all connected


photo #1919-GracieS Body 48 16 2.jpg

In Painter I made up a series of circles with a different diameter from 3 inches up to 20 inches in scale, each a different layer.
One side tangent to the frame line. The progression is done by eye. It is much easier to side a disk into position than it is to draw semicircle


photo #2020-GracieS Body 48 16 3.jpg

The inside line is connecting the tangents. The moulded dimension.


photo #2121-GracieS Body 48 16 4.jpg
The name of the vessel is added. The identity of the frame for every timber also.
The butt line for the half floor is sited.
 
Back
Top