I to am building this boat. It’s the original over 30 years old. I started 9 months ago my first boat also. You are better off with the updated pieces and I hope instructions may have improved. I think your build looks excellent and have signed up to see more. Very well done and good luck b
-

Win a Free Custom Engraved Brass Coin!!!
As a way to introduce our brass coins to the community, we will raffle off a free coin during the month of August. Follow link ABOVE for instructions for entering.
-

PRE-ORDER SHIPS IN SCALE TODAY!
The beloved Ships in Scale Magazine is back and charting a new course for 2026!
Discover new skills, new techniques, and new inspirations in every issue.
NOTE THAT OUR FIRST ISSUE WILL BE JAN/FEB 2026
You are using an out of date browser. It may not display this or other websites correctly.
You should upgrade or use an alternative browser.
You should upgrade or use an alternative browser.
The Norske Love" by Noël Luc Build log
- Thread starter Noël Luc
- Start date
- Watchers 28
-
- Tags
- billing boats norske lowe
Noel your planking looks very good so far. Are there instructions with your kit? Are there graphics that depict the planking? Are the planks tapered! Finally is the hull single or double planked? I seem to recall that mine was single planked. Personally I would go to the bottom and begin working upward.
Hello, Ronaldo, what do you mean by the "updated pieces"? The instructions for this boat are very minimal. I bought the new laser cut version because I also had the version from 40 years ago. Is that what you mean with the updated pieces? I hope your boat is making good progress too! Have you already planked the hull and if so how did you do it?I to am building this boat. It’s the original over 30 years old. I started 9 months ago my first boat also. You are better off with the updated pieces and I hope instructions may have improved. I think your build looks excellent and have signed up to see more. Very well done and good luck b
I also think that the planking looks good so far. There is little to no information in the kit on how to plank the boat! The way I have done this so far is something I looked up on the internet or read and saw on photos in this forum. The planks that I have already glued are indeed tapered at both ends. The planks are 7mm wide in the middle and 4 to 5mm at the ends. I thought I would stick with a single planking provided that it was successful in its entirety! On this forum I have also seen photos where from where I am now, the planking at the bottom is being worked further up until the planking is finished! Maybe that's the best way! You'll know first when it's been successful. If all goes wrong, I can still fill and sand the underside!Noel your planking looks very good so far. Are there instructions with your kit? Are there graphics that depict the planking? Are the planks tapered! Finally is the hull single or double planked? I seem to recall that mine was single planked. Personally I would go to the bottom and begin working upward.
- Joined
- Jun 17, 2021
- Messages
- 3,199
- Points
- 588

If you keep it as nicely under control as you have so far, very little, if any, filling and sanding will be required beyond what could be considered caulking. You should have very fair and realistic results. I am impressed! 

Hey Peter, what do you mean by "caulking"? my translation program doesn't recognize that word!If you keep it as nicely under control as you have so far, very little, if any, filling and sanding will be required beyond what could be considered caulking. You should have very fair and realistic results. I am impressed!
here is what caulking meansHey Peter, what do you mean by "caulking"? my translation program doesn't recognize that word!
Thanks Peter for the movie! I learned something new again. I'm going to watch the movie again tomorrow! Here in Belgium it will now be midnight in 10 minutes so I'm going to bed now!here is what caulking means
- Joined
- Jun 17, 2021
- Messages
- 3,199
- Points
- 588

Thanks (as always) to Jim(sky). 
Sorry Jimsky, I didn't see that you took care of the film! Of course I also thank you for the film. Very interesting!Thanks (as always) to Jim(sky).
It's looking beautiful on you. Thanks for sharing it. I love it.In the previous post of my Norske Love I was able to show 25 photos, therefore this sequel. Is this the right way to show the further progress of the construction? I don't know how to use the forum properly yet!!!
View attachment 465952
View attachment 465953View attachment 465954View attachment 465955View attachment 465956View attachment 465957View attachment 465959
What scares me most is the hull planking for my first boat. I hope I started on the right foot and I can finish it on the right foot. I have done a lot of research and read a lot of tips and information on the internet and on this forum. Constructive criticism is always welcome if I do something wrong because I can use your experience!!
View attachment 465962
View attachment 465963
View attachment 465964
View attachment 465966
View attachment 465970
my first planks!
View attachment 465975
View attachment 465976
View attachment 465977
View attachment 465978
View attachment 465979
View attachment 465980
View attachment 465981
View attachment 465982
View attachment 465983
View attachment 465984
View attachment 465985
View attachment 465986
This is the place in the construction of my Norske Love so far!
I think the place in the planking where I am now is the most difficult. I'm having trouble continuing to make turns this way.
Good advice is welcome
Thanks for following these posts!!
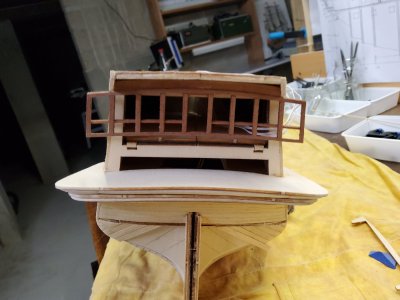
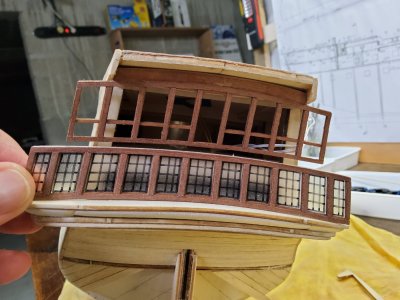
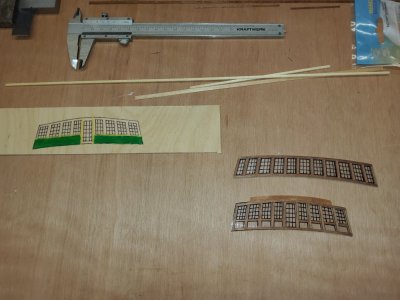
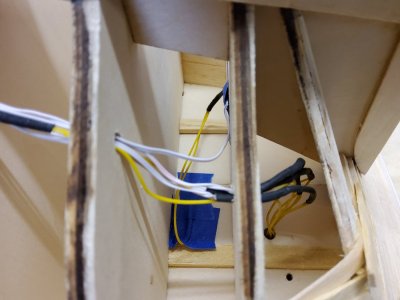
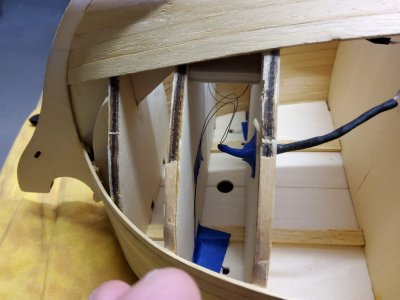
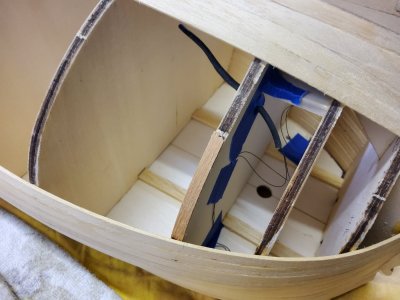
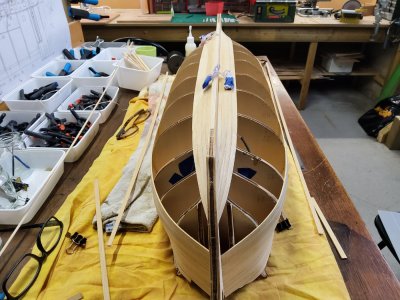
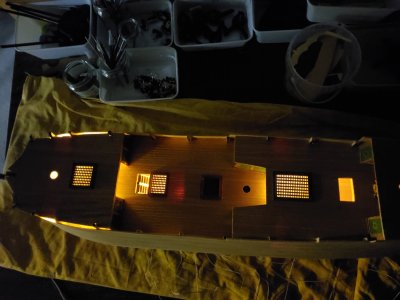
Hi all, after a few renovations in our house I have now started again on my Norske Love!. At my hobby shop I found the necessary LEDs and other small lights to further build into the hull. In the pictures you can see how I did that. This had to be done before I could continue working on closing the hull. You can also see the preliminary result of how and where the lights burn in the boat! In the end you can not see the wires anywhere in the boat up to the light itself! I have also prepared a few parts to mount at the back of the boat. First I will now try to completely close the hull of the boat.
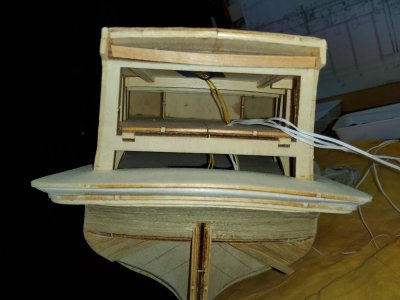
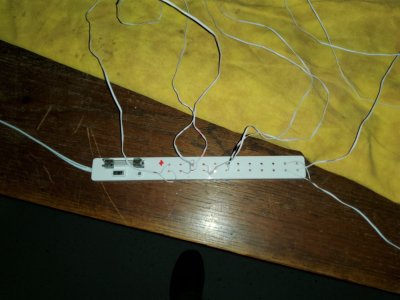
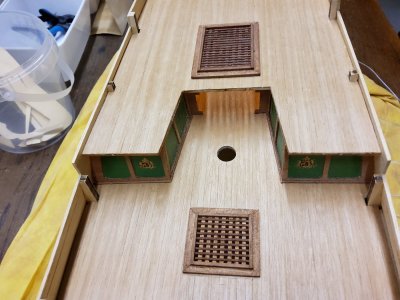
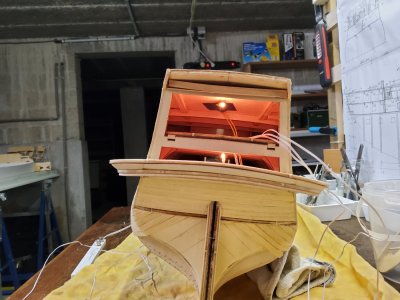
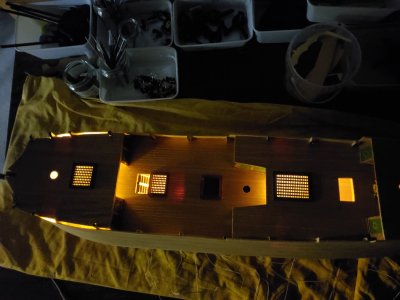
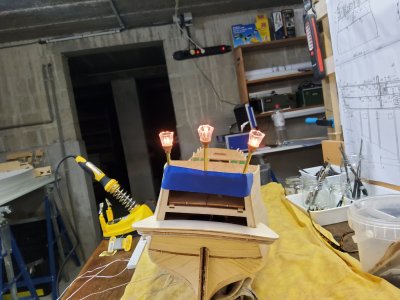
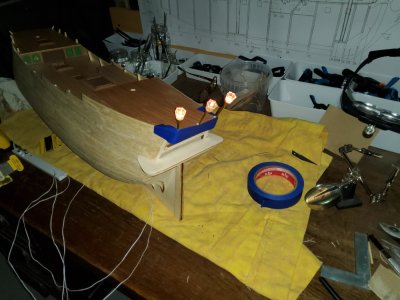
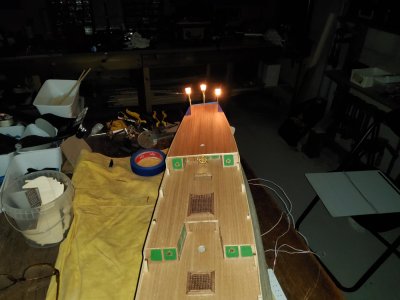


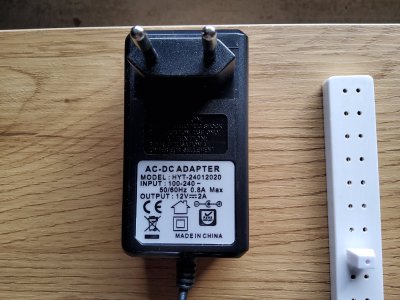
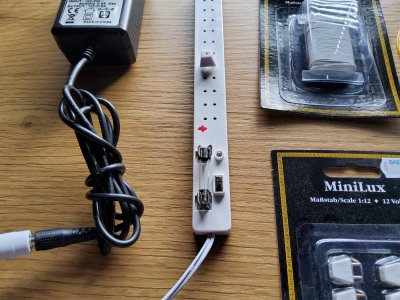
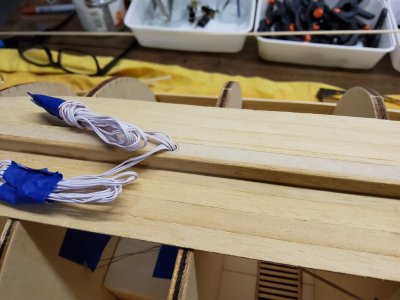
Hello Ridley, I have 2 types of lights. One is a light but not a LED (the one with the yellow wires) and the other is a LED (the one with the black thin wires with a resistor on the plus side). This is because the hobby shop where I buy everything for my boat could no longer supply the lights with the yellow wires! Both can be connected to an AC/DC power adapter. The data of the adapter can be read in the picture. INPUT 110-240 volts alternating current, 50/60 Hertz and 0.8 Amps maximum! OUTPUT 12 volts direct current 2 Amps! I have installed the lights and LEDs in the boat in different places and I have extended the wires to about 30 cm outside the keel of the boat (See picture of the wire I used for this). The mini plugs are attached to the end of the wire (See picture). The plugs then fit into the white strip that is connected to the adapter. In total 12 lights or LEDs can be connected (There are also white strips with 3 or 6 connections) In my boat I have 10 light points, 3 on the lanterns and the others are distributed over the boat in the different decks (see photo). I hope this explanation can help you further and if possible I also hope to be able to see a few photos of your version of the Norske Love. I can always learn!!!Love your work, I am building the same model and wonder could you tell me what type of leds and power supply you used? Is it for the lanterns only or other areas?
Cheers Ridley.
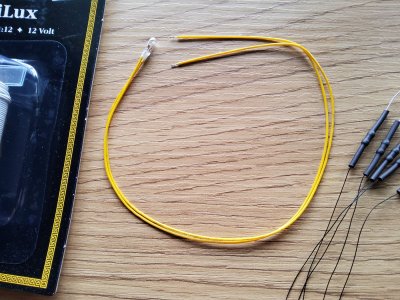
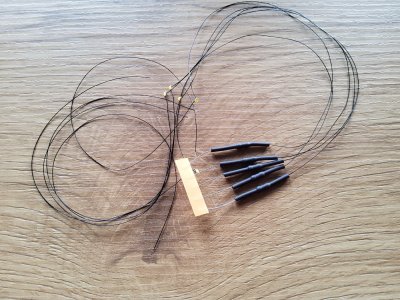
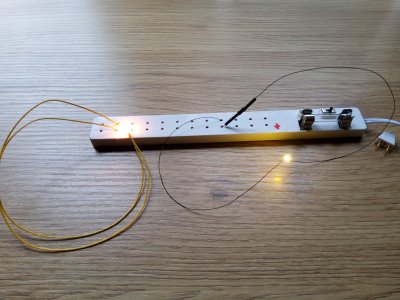
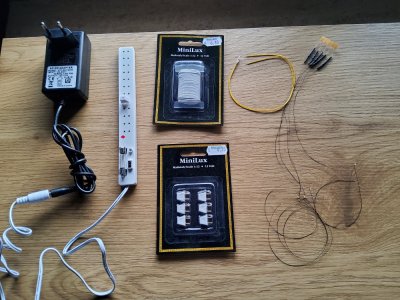
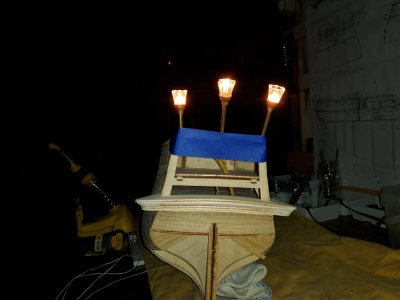
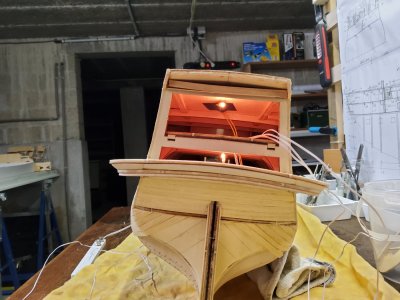
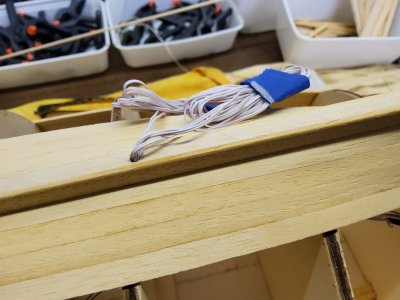
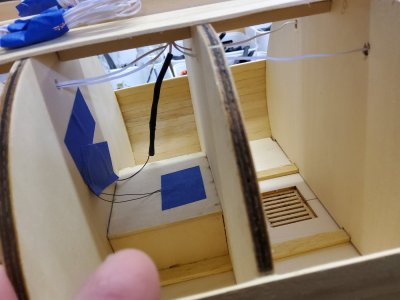
Hi Noel, thank you so much for all the information. I am at the stage of my build to consider what needs to be done before everything is buttoned up. I took quite a while to prep for this, I built a jig, read and reread the Billings instructions, studied the drawings, bought model shipbuilding books etc . Did you discover anything you should have done prior to planking and decking? I will post some pics soon. Thanks again for your help it is greatly appreciated. Cheers Ridley.Hello Ridley, I have 2 types of lights. One is a light but not a LED (the one with the yellow wires) and the other is a LED (the one with the black thin wires with a resistor on the plus side). This is because the hobby shop where I buy everything for my boat could no longer supply the lights with the yellow wires! Both can be connected to an AC/DC power adapter. The data of the adapter can be read in the picture. INPUT 110-240 volts alternating current, 50/60 Hertz and 0.8 Amps maximum! OUTPUT 12 volts direct current 2 Amps! I have installed the lights and LEDs in the boat in different places and I have extended the wires to about 30 cm outside the keel of the boat (See picture of the wire I used for this). The mini plugs are attached to the end of the wire (See picture). The plugs then fit into the white strip that is connected to the adapter. In total 12 lights or LEDs can be connected (There are also white strips with 3 or 6 connections) In my boat I have 10 light points, 3 on the lanterns and the others are distributed over the boat in the different decks (see photo). I hope this explanation can help you further and if possible I also hope to be able to see a few photos of your version of the Norske Love. I can always learn!!!
View attachment 475187
View attachment 475188
View attachment 475189
View attachment 475190
View attachment 475191
View attachment 475192
View attachment 475193
View attachment 475195
View attachment 475197View attachment 475198
View attachment 475199
View attachment 475200
View attachment 475201
View attachment 475202
View attachment 475194
View attachment 475196
Hello Ridley, you should know that the Norske Love is my first boat ever that I am trying to build! Maybe you have a lot more experience than I have at the moment. I can tell you what is important to me personally and what I think I could have done better so far! I started the boat three months ago and I wanted to see quick progress in the progress of the build! That is something that is already over! I came to the conclusion that it is important to have patience!!! I now spend more time researching in this forum and on the internet than actually building the boat!Hi Noel, thank you so much for all the information. I am at the stage of my build to consider what needs to be done before everything is buttoned up. I took quite a while to prep for this, I built a jig, read and reread the Billings instructions, studied the drawings, bought model shipbuilding books etc . Did you discover anything you should have done prior to planking and decking? I will post some pics soon. Thanks again for your help it is greatly appreciated. Cheers Ridley.
The planking of the deck I would do differently now. I planked in full planks and would now do it more true to how it really looks on a real boat. No more full planks and I would show where the nails in the planks are! Maybe I could still put that on the planks with a pen! For the planking of the hull as a beginner I did a lot of research. How to bend planks and how to calculate how many planks are needed and how to adjust them at the ends. On this forum I found a pdf file last week that I would have liked to have had earlier. If you are also a beginner I advise you to read it and study it. I would do it differently now after reading it!! I have provided the pdf file in attachment in my answer.
I have also prepared a few parts to mount on the stern of the boat. On the plans of the boat you can measure many dimensions and take these dimensions into account when mounting the parts (the plans are on the same scale as the size of the boat). I now have to adjust a few things that I did not take into account when mounting a number of parts. The supplied information for building the boat is certainly not spectacularly good but it is worth studying the plans carefully before mounting parts!
At the moment these listed findings are for me the most important that I have learned. Maybe these are things for you that you have known for a long time and do you also have important findings for me that you want to share?
Greetings from Belgium!
Attachments
Hi Noel, it is my first build too, I have made quite a few plastic aircraft models and built model steam engines [see pic}. As I said before I am in no hurry to complete this as long as it's done before I peg out!Hello Ridley, you should know that the Norske Love is my first boat ever that I am trying to build! Maybe you have a lot more experience than I have at the moment. I can tell you what is important to me personally and what I think I could have done better so far! I started the boat three months ago and I wanted to see quick progress in the progress of the build! That is something that is already over! I came to the conclusion that it is important to have patience!!! I now spend more time researching in this forum and on the internet than actually building the boat!
The planking of the deck I would do differently now. I planked in full planks and would now do it more true to how it really looks on a real boat. No more full planks and I would show where the nails in the planks are! Maybe I could still put that on the planks with a pen! For the planking of the hull as a beginner I did a lot of research. How to bend planks and how to calculate how many planks are needed and how to adjust them at the ends. On this forum I found a pdf file last week that I would have liked to have had earlier. If you are also a beginner I advise you to read it and study it. I would do it differently now after reading it!! I have provided the pdf file in attachment in my answer.
I have also prepared a few parts to mount on the stern of the boat. On the plans of the boat you can measure many dimensions and take these dimensions into account when mounting the parts (the plans are on the same scale as the size of the boat). I now have to adjust a few things that I did not take into account when mounting a number of parts. The supplied information for building the boat is certainly not spectacularly good but it is worth studying the plans carefully before mounting parts!
At the moment these listed findings are for me the most important that I have learned. Maybe these are things for you that you have known for a long time and do you also have important findings for me that you want to share?
Greetings from Belgium!

Last edited:
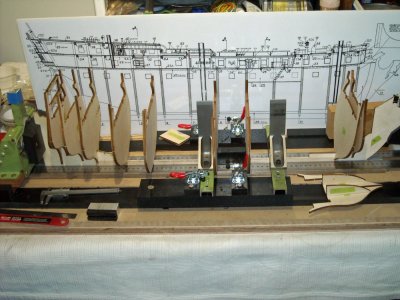
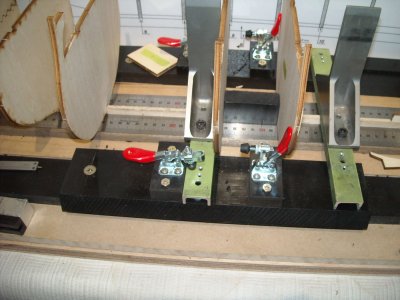
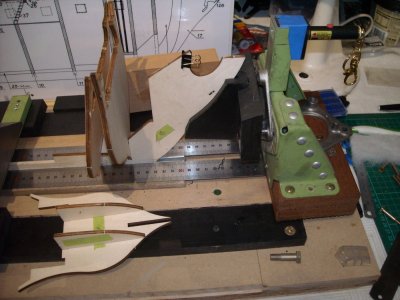
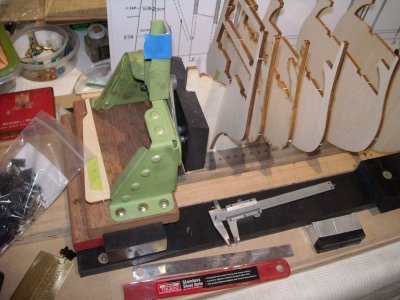
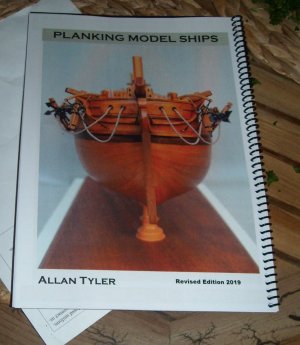
Hey Ridley, this is fantastic what you have made there! You are without a doubt talented!! You will profit from that in the later construction of the boat! Do you have a pdf file of the other planking manual? I would be interested in that! In our country they say "measuring is knowing"!!Hi Noel, it is my first build too, I have made quite a few plastic aircraft models and built model steam engines [see pic}. As I said before I am in no hurry to complete this as long as it's done before I peg out! Part of the fun for me is researching, reading, checking out other people's builds and see what tips they can share. As I said I built a jig which is probably overkill but for me getting the hull as perfect as you can will reward you later on. I have that planking reference pamphlet and I saw another planking manual on this forum which looks interesting [see pic]. I have researched the lights and will probably use Arduino. I have only glued 2 bulkheads and will install the rest when I sort out the led circuit. You are doing a good job an as you mentioned patience is the key and I like the old adage 'measure twice cut once'. Here are some pics. Greetings from Victoria, Australia
View attachment 476229
View attachment 476230
View attachment 476231
View attachment 476232
View attachment 476233
View attachment 476234
I also want to show you my attempt to hang the boat in my own construction! You can then turn the boat 360 degrees. It was an idea I had, to what extent I can and will use it I do not know yet.

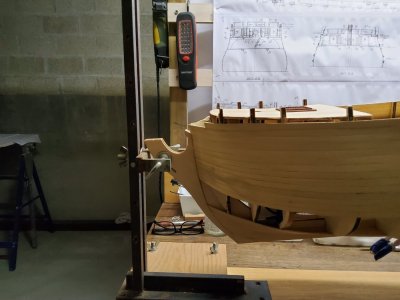
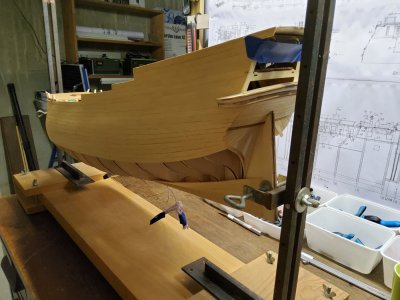
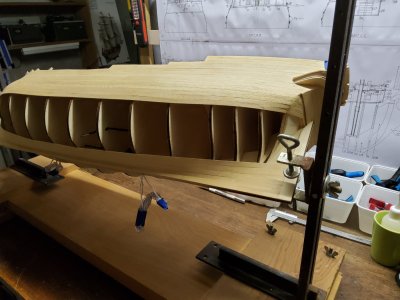
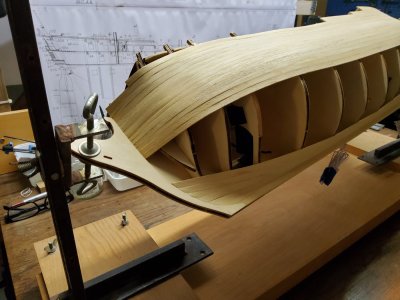
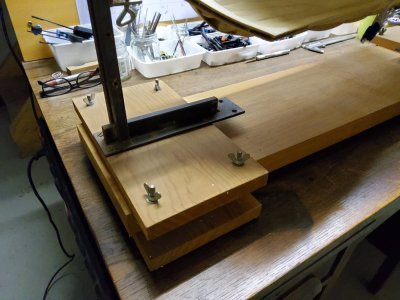
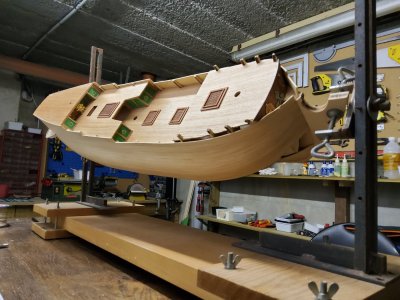
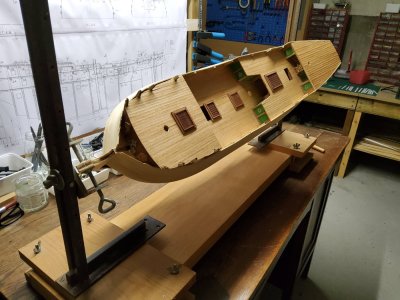
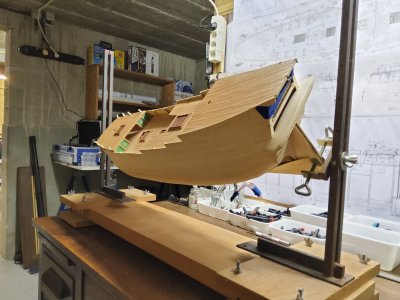
Last edited:
I love your home made working stand. Your planking is well done too.
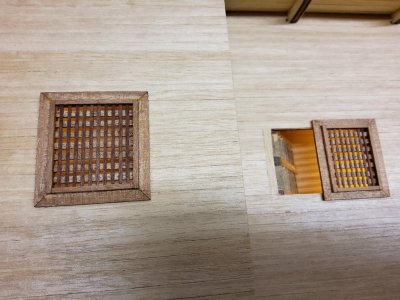
Noel, that looks excellent! The rotating jig is very handy, I will do something similar when required. Why are you not happy with the deck planking? Does it look "too good' I suppose it just you want as the shipwright. What parts of the stern should you have installed sooner? Did you make your own gratings? I am tempted to buy after market. Here is the PDF you wanted. I will follow your build with interest! Cheers Ridley.Hey Ridley, this is fantastic what you have made there! You are without a doubt talented!! You will profit from that in the later construction of the boat! Do you have a pdf file of the other planking manual? I would be interested in that! In our country they say "measuring is knowing"!!
I also want to show you my attempt to hang the boat in my own construction! You can then turn the boat 360 degrees. It was an idea I had, to what extent I can and will use it I do not know yet.
View attachment 476313
View attachment 476314
View attachment 476315
View attachment 476316
View attachment 476317
View attachment 476318
View attachment 476319
View attachment 476320
View attachment 476321


