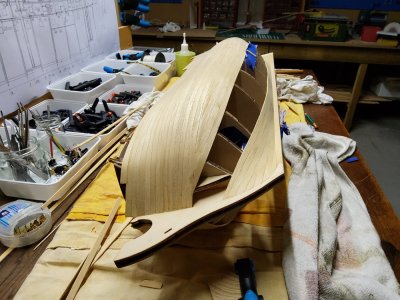
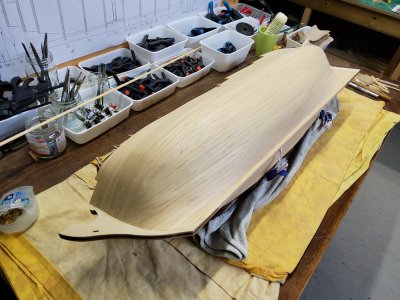
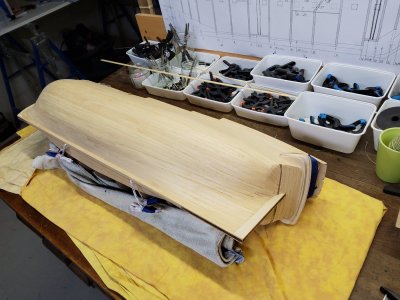
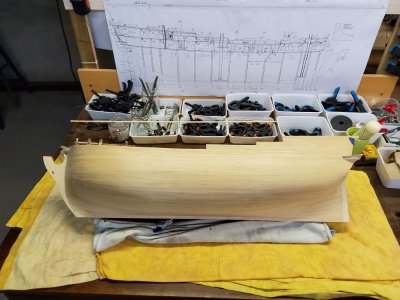
The Norske Love" by Noël Luc Build log

Noel, that looks excellent! The rotating jig is very handy, I will do something similar when required. Why are you not happy with the deck planking? Does it look "too good' I suppose it just you want as the shipwright. What parts of the stern should you have installed sooner? Did you make your own gratings? I am tempted to buy after market. Here is the PDF you wanted. I will follow your build with interest! Cheers Ridley.
Hey Ridley, first of all thanks for the pdf file. That looks very interesting!
The planking of the different decks does not look true to life. If you look up Dean62 Norske Love in the Search Forum you will find on page 2 with the logo of an airplane the construction of the Norske Love that Dean 62 made. In 108 pages you can follow the construction. I think this is amazingly well done! Very professional!! If you look at the decks there you will know what I mean!
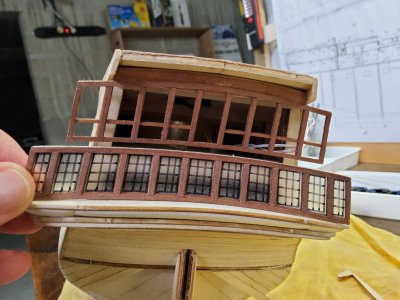
The stern parts with number 46 from the manual I mounted too high (I think). I had to make part number 47 thinner and I probably can only mount 1 of the two parts with number 49 otherwise I cannot get the windows in between. I will know for sure when I want to mount everything definitively! (Picture)
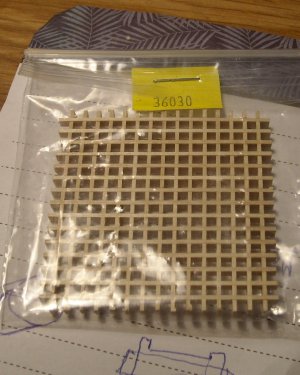
What do you mean by "Did you make your own gratings? I am tempted to buy after market"? I use a translation program and the program has trouble translating this sentence!
NL 0174.jpg
 
Hey Ridley, first of all thanks for the pdf file. That looks very interesting!
The planking of the different decks does not look true to life. If you look up Dean62 Norske Love in the Search Forum you will find on page 2 with the logo of an airplane the construction of the Norske Love that Dean 62 made. In 108 pages you can follow the construction. I think this is amazingly well done! Very professional!! If you look at the decks there you will know what I mean!
The stern parts with number 46 from the manual I mounted too high (I think). I had to make part number 47 thinner and I probably can only mount 1 of the two parts with number 49 otherwise I cannot get the windows in between. I will know for sure when I want to mount everything definitively! (Picture)
What do you mean by "Did you make your own gratings? I am tempted to buy after market"? I use a translation program and the program has trouble translating this sentence!

View attachment 476951
Hi there Noel, these are the 'gratings' the Dutch translation may be different. I saw these online from Cornwall model boats UK. I know some purists would have me keelhauled for using aftermarket parts! I can live with that!
I have seen Deans work [excellent} but will give it a closer look in regard to the decks.
Thanks for pics of the stern section, I will dry build everything, I use a number drill #60 [1.02mm] and dressmakers pins. I have glued some frames and modified the jig.I will send more pics as I progress. I have a side project; a diorama of a Short Stirling aircraft being refueled, to complete.
Thanks again for your help. Cheers Ridley.

DSCN3726.jpg
 
That right angle bend at the aft most bulkhead doesn’t look right. Are you sure there isn't a joint there like the part above? Or perhaps there should be a filler block to ease the bend?

Your woodwork is brilliant and that hand painted stern decoration is breathtaking!
 
That right angle bend at the aft most bulkhead doesn’t look right. Are you sure there isn't a joint there like the part above? Or perhaps there should be a filler block to ease the bend?

Your woodwork is brilliant and that hand painted stern decoration is breathtaking!
Hey Smithy, thanks for your reply! What exactly do you mean with the right angle that is not correct? It is my first boat and therefore my first hull that I am trying to plank! I can really use the help of more experienced builders! What do you mean with "Are you sure there isn't a joint there like the part above"? Do you also mean a filler block with balsa wood?
I have not yet bent a right angle because the angle consists of two pieces! I know that I am now at a difficult point to close the hull further, I am still looking for how to proceed!! All help is welcome!!
My woodwork is satisfactory so far but as for the hull I hope that I can close it in the same way! Do you mean the decoration on the stem (front) of the boat around the mast? On the stern (back) I have not yet done any painted decoration!
Greetings from Belgium!
 
Oops I meant the decoration above the bowsprit. It’s beautiful.

‘Right angle’ in English means an angle of 90 degrees. It does not look correct to be bending your planks through 90 degrees. I don’t think that is possible on the real ship.

Yes, I meant maybe it needs filler block and a less acute bend.
Smithy, the design of the decoration on the stem of my boat was made by Dean62. He designed the decoration!! He designed it, cut it out of wood and placed it on his boat. Unbelievably beautiful!! I took over the design! It was not designed by me! (see the building of the Norske Love by Dean62 on page 39). Credit where credit is due!!! Thanks to Dean62!!!
 
That right angle bend at the aft most bulkhead doesn’t look right. Are you sure there isn't a joint there like the part above? Or perhaps there should be a filler block to ease the bend?

Your woodwork is brilliant and that hand painted stern decoration is breathtaking!
I have to agree with you Smithy, there is no way it would be so sharp. This is my first build too but Noel is miles ahead and his work is of a high standard, I will use a carved piece of balsa in the stern area and try and achieve a smoother more realistic curvature. Cheers
 
I have to agree with you Smithy, there is no way it would be so sharp. This is my first build too but Noel is miles ahead and his work is of a high standard, I will use a carved piece of balsa in the stern area and try and achieve a smoother more realistic curvature. Cheers
Hi Smithy and Ridley, I also agree with your comments but I think I am too far into the planking to change now! I see the planking now as a learning process for my next boat the HMS Victory Limited Edition which I have already bought! I would approach the planking differently now! I would now divide the hull with temporary planking in sections of maximum 5 planks. That gives me more guidelines to work with! With all the things I did wrong, I am still somewhat satisfied with the current result. I always intended to use a single planking. I think I will succeed in closing the hull further this way even though it is not always the way real ships were built! Thanks for your comments! (you can keep doing that) I can only learn from them!!
 
Hi Noel, I just noticed someone was building a Billings Norske Love kit. Mine has been put on hold for a while as I finish an airplane build of a P-38 I started.
You are doing a great job. As you know she is a big ship and there is a lot of planking to complete the hull! As far as the design on the bow, I am honored you liked it enough to use it. ;)
Keep up the good work, I hope to get back to my ship build soon.
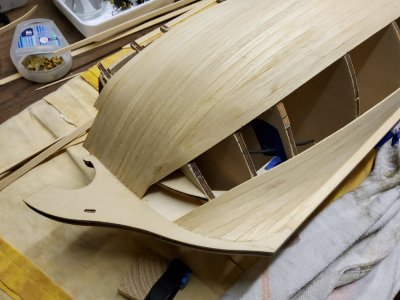
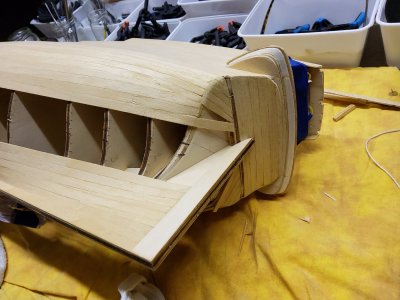
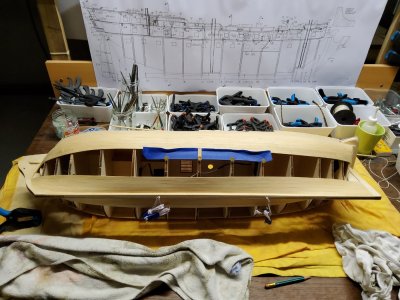
Hello Dean, thanks for your reaction! I was amazed with what perfection you have built your boat the Norske Love so far! I regularly go to your boat to see how I can build my boat even better! Your planking is without a doubt breathtaking! I have approached my planking wrong from the beginning (maybe normal for my first boat?) Now I know that I have to divide the hull into different sections of about 5 planks. I did not do that and now I have a lot more work to close the hull completely! In the pictures you can see how I try to close the hull. Fortunately I have a lot of patience to make it as perfect as possible but it will not be as it was made in reality in the past! If you can give me good advice that is always welcome! I look forward to following the further construction of your boat!
I saw the design on the bow and took it over, maybe I should have asked first? I did mention that the design was not mine but from "Dean62".
I hope your airplane will be finished soon so I can follow you back for the construction of the Norske Love! Greetings from Belgium

NL 0186.jpg
NL 0188.jpg
NL 0189.jpg
NL 0190.jpg
 
Hello Dean, thanks for your reaction! I was amazed with what perfection you have built your boat the Norske Love so far! I regularly go to your boat to see how I can build my boat even better! Your planking is without a doubt breathtaking! I have approached my planking wrong from the beginning (maybe normal for my first boat?) Now I know that I have to divide the hull into different sections of about 5 planks. I did not do that and now I have a lot more work to close the hull completely! In the pictures you can see how I try to close the hull. Fortunately I have a lot of patience to make it as perfect as possible but it will not be as it was made in reality in the past! If you can give me good advice that is always welcome! I look forward to following the further construction of your boat!
I saw the design on the bow and took it over, maybe I should have asked first? I did mention that the design was not mine but from "Dean62".
I hope your airplane will be finished soon so I can follow you back for the construction of the Norske Love! Greetings from Belgium

View attachment 478522
View attachment 478524
View attachment 478525
View attachment 478526
You are correct, it is best to plank in sections of approximately 4 or 5 boards at a time, or bands. Those bands should be predetermined by looking at the flow of the hull. You can mark those with string temporarily or with a plank. Then you have to figure out the taper of each board. To do that, you must find the largest width (mid ship) and mark 5 board widths. Then you have to mark every bulkhead with that same number of marks. So you divide the width of the band at each bulkhead by 5. You do that on every bulkhead. Now when you start to plank the hull, you can mark your planks to make the proper taper. That means marking the width and distance at each bulkhead on the plank. Hope that makes sense. And at the bow, you sometimes have use a drop plank if your boards would be too thin to taper all 5. And at the stern you have to add stealers because the board would not be wide enough.
On your planking you have done so far…
Rather than come to a point as you have, you should have tapered your boards. But it’s okay, you can still taper the remaining planks. But first you must add another plank or two that ends in a point, until your plank ends at the keel. Then you can taper your remaining planks hopefully.
And that area you are closing is below the waterline, so you will paint it white. So if it doesn’t look good, you can hide it to some degree with the paint.
Also, no need to ask permission to copy anything I did. Like I said, I am happy you liked it enough to want to use it yourself. ;)
 
Assembling a model like the Noske Love is a rewarding experience that requires time and precision, and so far, your work has been excellent. At each step, your attention to detail and patience will be reflected in the final result. Keep going, taking the time to appreciate each phase of the process: plank by plank, you’ll soon be rewarded with a beautiful hull, a true reflection of your dedication and skill. Well done!
 
Assembling a model like the Noske Love is a rewarding experience that requires time and precision, and so far, your work has been excellent. At each step, your attention to detail and patience will be reflected in the final result. Keep going, taking the time to appreciate each phase of the process: plank by plank, you’ll soon be rewarded with a beautiful hull, a true reflection of your dedication and skill. Well done!
Hello Oxor31 and HHIG, thanks for your reaction and kind words! Planking the hull of the Norske Love is indeed a challenge! For my first boat I am somewhat satisfied with the result so far! With the experience gained I would do it differently on a next boat as you can read in my previous reactions! In the meantime I have the first side of the boat completely closed (see photo)! I hope to have the second side ready in the next week. I only do 1 or 2 planks per day! Greetings from Belgium!

NL 0192.jpg
NL 0193.jpg
NL 0194.jpg
NL 0195.jpg
NL 0196.jpg
 
WOW!!!! Really well down.
Hello Oxor31 and HHIG, thanks for your reaction and kind words! Planking the hull of the Norske Love is indeed a challenge! For my first boat I am somewhat satisfied with the result so far! With the experience gained I would do it differently on a next boat as you can read in my previous reactions! In the meantime I have the first side of the boat completely closed (see photo)! I hope to have the second side ready in the next week. I only do 1 or 2 planks per day! Greetings from Belgium!
 
Congratulations on your progress! You’re doing a solid job, especially for a first ship. Planking the hull is indeed a demanding task, and tackling it step by step is the best approach. It’s clear that you’re putting care and attention into your work, which is the most important part.

The photo shows steady progress, and the result is shaping up nicely. I’m sure the second side will turn out even better as you continue to refine your technique. Thank you for sharing your updates—looking forward to seeing how it evolves!

Warm regards from France.
 
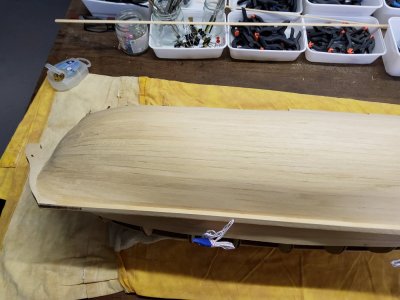
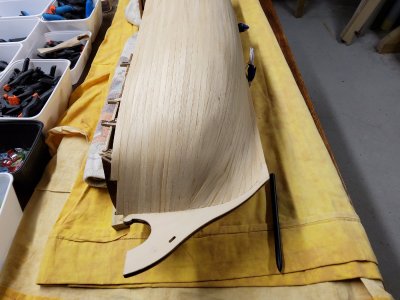
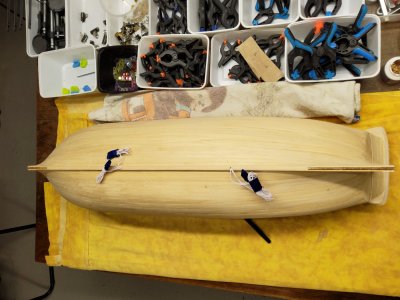
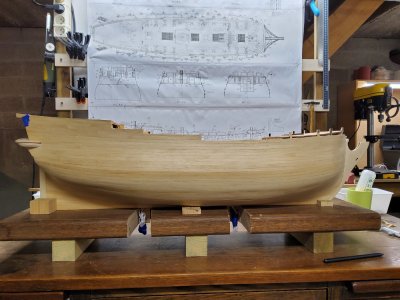
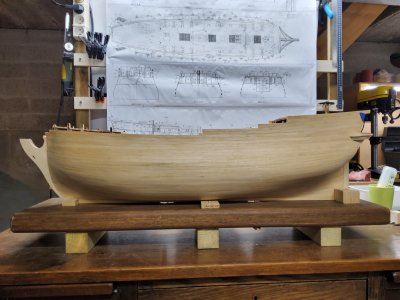
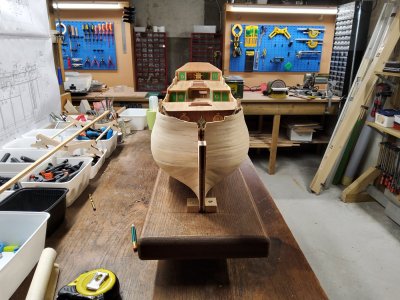
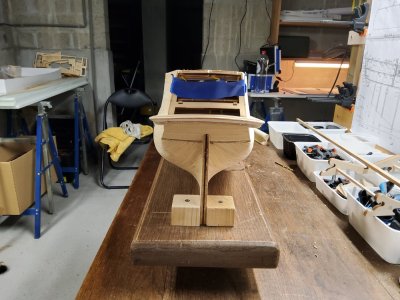
Hello everyone, I finally closed the entire hull as you can see in the pictures. I learned a lot from this and it will help me with making my next boat that I already bought, the HMS Victory Limited Edition!! I only have to finish a small piece at the front of the bow. I also made a construction to put the boat straight so that the wires of my lighting are not damaged! Is there anyone who can help me to determine at what height the waterline will be? I also don't know yet whether I should make the entire hull darker with a darker wood color or whether I should paint the bottom of the boat white up to the waterline! Suggestions are welcome! Best regards from Belgium

NL 0199.jpg
NL 0200.jpg
NL 0201.jpg
NL 0202.jpg
NL 0203.jpg
NL 0204.jpg
 
Back
Top