The Royal Caroline / ZHL

You said " I also purchased the upgrade sculpture pieces from resin to wood ". Can you tell me where you purchased these " bits" from. Thanks
The kit is from ZHL and offers upgraded wood carvings for the Royal Caroline they sell!
 
I live in New Jersey, USA. What was the name and address of that planking company you purchase wood from? Greatly appreciate the information. Enjoy the building of that ship. TY.
 
Salut Bandido
Je vais suivre avec plaisir votre construction avec cette belle maquette
Marco

Hi Bandido
I will be happy to follow your construction with this beautiful model.

Marco
 
I live in New Jersey, USA. What was the name and address of that planking company you purchase wood from? Greatly appreciate the information. Enjoy the building of that ship. TY.
you can find it under modelers sawmill.com. I haven't received my order yet so I can not comment on the quality yet, If you want to wait till I receive it as it is in transit I will let you know.
 
I think we should wait until you get your material back. Then you can let all of us know if you were happy with the materials. That would be really appreciated. It is always hard to find good quality suppliers and we should let everyone know of the bad ones.
 
Also, all the bulkhead points will be sanded as always before the planking is installed. deck surfaces are lightly sanded anyway before planking whether painted or not, titebond works great! black works well to hide all areas seen but not covered if you know what I mean I will not be painting the first layer or structural planking. so finish planking will be adhered to the wood surface directly. I hope that helps why I do what I do!
I did the same by painting the interior of my Soleil black. It's been a while since I've seen your postings, Bandido! I'll have to go back and see how you finished your Soleil Royal.
Vic
 
You said " I also purchased the upgrade sculpture pieces from resin to wood ". Can you tell me where you purchased these " bits" from. Thanks
I purchased them from ZHL when I bought the Royal Caroline from them
 
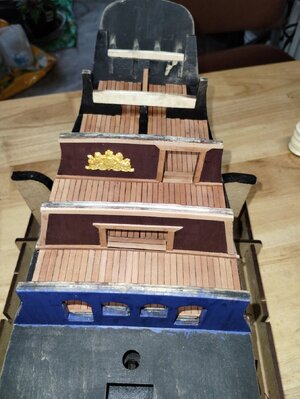
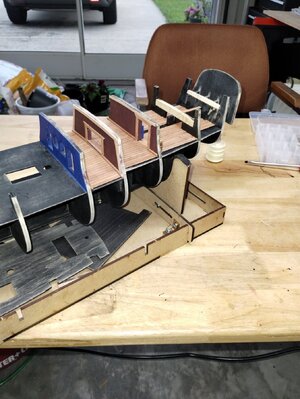
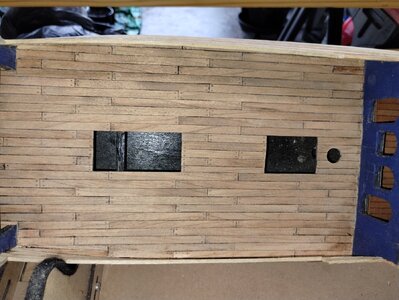
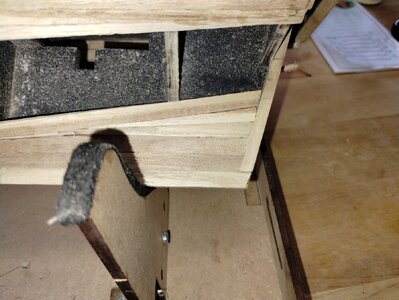
been working on the cabin decking and walls added a few things to the decorations, and got a little carried away with the trim, probably not 1750's design!! also, the resin trim is not being used any longer; I installed it on the walls as decoration. It all is mutt as you can't see it anyway when the roofs are installed on the cabins! pictures enclosed. but it is fun. I saw a photo of the Royal Caroline with the roof cut out on the cabins and beamed and the interior decorated with furniture looked good! I looked for 1/50 scale furniture and decoration from that period but was unsuccessful.
Decided to paint the exterior cabin walls blue, to match the color I will be using on the background for the upper exterior hull walls again the blue looks good with Gold bling bling! I used some 1 x 4 mm cherry planking leftover from my Druid build for the floors. I am not a fan of the teak color provided for all the 5 x 80mm planking. too yellow for me "Preference!!" I am thinking about dying the planking Brown Mahogany! looks good! I will dye it before installing, resolving any glue issues blocking the stain!! a problem I have experienced in the past _"Stain does not like dried glue" More work!!

IMG_20240629_182825420 (1).jpg

IMG_20240629_182058328.jpg
 
Received my new build from ZHL last week! The Royal Caroline. 1750's Royal pleasure Yacht in 1/50 scale POB, the cost was in the intermediate area mid $250's, my bank account needs a break:D the Druid being in the $900's, Le Soleil in the $600's. But after receiving and going through the kit, as always you get what you pay for!!! less money less kit! I also purchased the upgrade sculpture pieces from resin to wood due to all the fancy detail sculpture on the ship. that was $200, so looking at $450! couple other areas that I will upgrade is deadeyes kit only has one size will order 1 size smaller for the upper Shrouds. the blocks were unacceptable, never seen these before have a picture of them?? so I ordered singles, doubles and a couple triples, The rigging line I also replaced with Dard brown Standing and tan running lines in three sizes, This I did on my Le Soleil kit! The other area I am looking at is the finish planking provided it is only .02 thick same as on the Le soleil!! I like to use .5mm in Cherry for that purpose. I am getting a quote from a company in New jersey who makes planking I am waiting for a cost! Probably when all the smoke clears will be into the project for under $700. All of this extra expense is due to my preference. The kit comes with an English Manuel on a cd Rom, all sheet plans look good easy to understand, the masts and yards are already sculptured to size, which will save time, not one of my favorite things to do! The shroud deadeye mounting hardware is complete

View attachment 455119

View attachment 455120

View attachment 455122

View attachment 455123

View attachment 455124

View attachment 455125

View attachment 455126
This $200 was the best investment to guarantee the good quality of your kit. it's incredible how producers give themselves the right to save on the quality of such important finishing items ! Good work !
 
Great to see, that you working on this Royal caroline kit - this will be interesting to follow

Maybe of some interest for you:


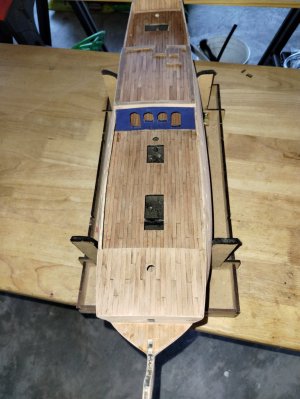
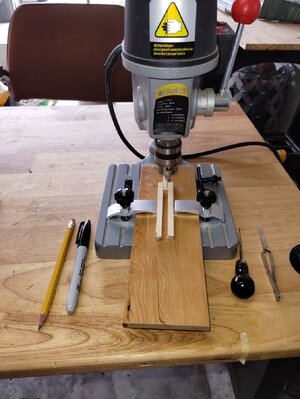
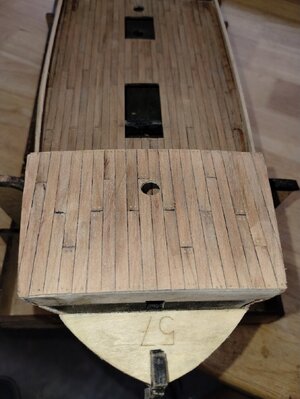
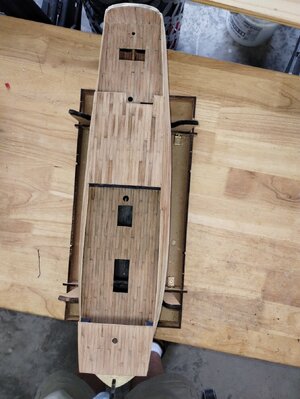
I started laying the deck and cabin roof planking, I am using cherry wood .5 x 6mm that I ordered, rather than what was supplied with the kit as I am not a fan of teak! and the teak was not consistently the same width! but I am experiencing some issues with inconsistencies with the thickness as .5mm is pretty thin! Block sanding has helped! The but joints are drilled to represent tree nails and I used a Black marker to define the tar sealant! to drill the tree nail holes I built a jig to ensure the holes were consistent. I also used a 3-bar stagger on the planks. I am using a modified brown mahogany stain and Matt varnish I mixed up to finish the planks. I should have laid the planks on the stern deck before installing the cabin roof as it will be more difficult now to lay the planks on the stern. "Planning"

IMG_20240706_140411646.jpg

IMG_20240706_170656046.jpg

IMG_20240706_170656046.jpg
 
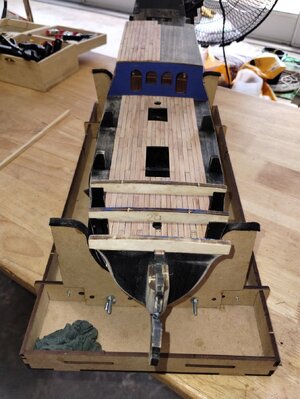
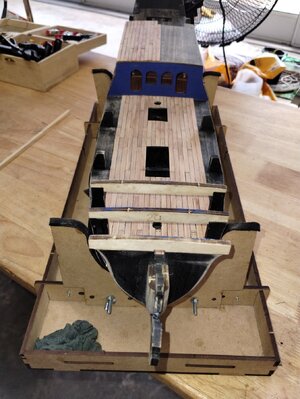
completed the decking I decided to experiment with the color, I first put one coat of clear acrylic poly and then sanded the surface, then I applied a mixture of stain and varnish, and then 0000 steel wooled the surface to smooth it out. I will apply clear poly later I liked the outcome with a little weathered look. I will do the same to the hull as I will be final planking with .5 x 7 mm cherrywood!

IMG_20240723_130354336.jpg

IMG_20240723_130310445.jpg

IMG_20240723_130558315.jpg

IMG_20240723_130550436.jpg
 
completed the decking I decided to experiment with the color, I first put one coat of clear acrylic poly and then sanded the surface, then I applied a mixture of stain and varnish, and then 0000 steel wooled the surface to smooth it out. I will apply clear poly later I liked the outcome with a little weathered look. I will do the same to the hull as I will be final planking with .5 x 7 mm cherrywood!

View attachment 460777

View attachment 460778

View attachment 460780

View attachment 460781
Looks very natural
 
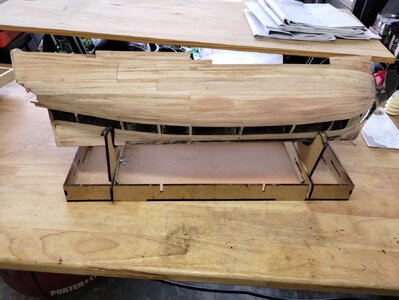
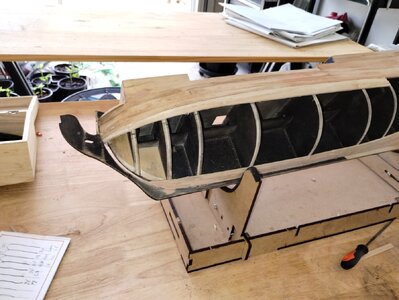
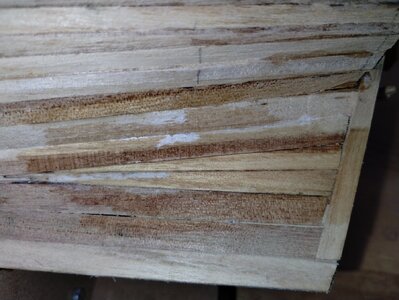
Started planking the hull with base planking the planks are easy to work with! and they supplied plenty of material!! For me this is a very complicated task as how the planks are fitted and applied to the hull and will use this method on the finish planking, Many years ago my Uncle a scratch builder got me interested in building model ships, and instructed me always to ensure when you lay out your hull planking plan to assure the planks reach from stem to stern! that is not easy at times, but can be accomplished for sure! The other thing I do is vary plans a little from one side of the hull to the other and choose which side I will use when finish planking the hull. The area I decided to make a personal change is in the deadwood area at the stern, the planks are very thick 2mm and the thickness of the keel is 4mm I did not want to chisel out the areas because I was worried removing that much material and the planks would still not lay flush sand down the planks that lay in the deadwood area and still have a bulge, so I decided to make the keel wider I plan to taper the additional width as it approaches the bow stem down to the original width you will never be able to tell when looking at it. The rudder area I will work on.

IMG_20240723_130619876.jpg

IMG_20240723_130504087.jpg

IMG_20240715_133437453.jpg

IMG_20240715_133446000.jpg
 
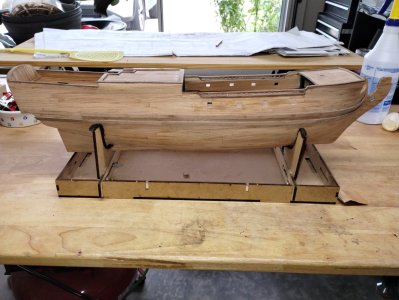
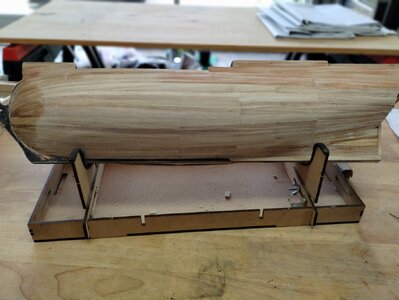
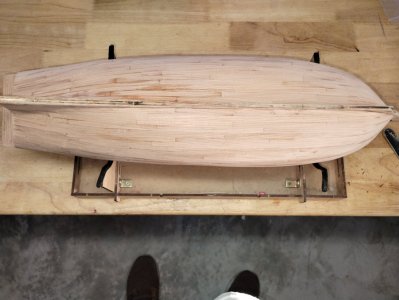
I completed the hull planking on one side and have 5 planks on the other side to finish the first planking, Planking was fairly straight forward as pointed hulls are! I measured and laid 4 planks in a group and adjusted those as I went along; to maintain my stem to stern plank runs I installed 2 stealers in the stern and 2 drop planks in the bow area. Pointed bow ships like the Royal Caroline. much easier than my other build the Le Soleil Royal with a bluff type bow. I will follow this plank plan for the final finish planking. fairly simple, straight forward, eye pleasing when completed. the planks will be no longer than for this scale around 150 mm. which equals to 750 cm or 25 to 25 feet. The one area I made a mistake was the material I am going to use for the final planking on the hull and the deck planking, The Royal Caroline as I understand used a Yellow Oak type wood, I have already purchased cherry!! Next time I will read more detail about the ships I am going to build :oops: I still have a lot of block sanding to do and some filling before I final plank, but the base turned out good.

IMG_20240725_114540164.jpg

IMG_20240725_114553907.jpg

IMG_20240725_114730560_MF_PORTRAIT.jpg
 
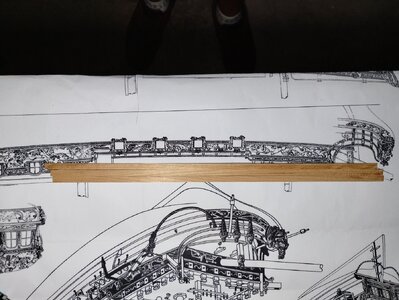
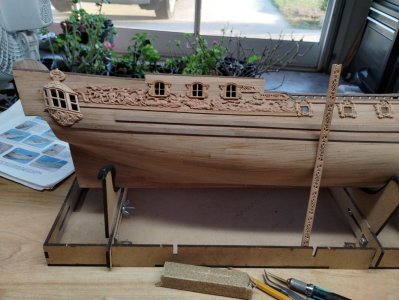
It has been a while since I have posted anything, have been working on the final finish planking, gun ports, and Wales, and I finished the railings
For those of you who might build this kit. here are a few things you should know.
: the English instructions are not much help the translation to English is confusing
: The sheet plans/instructions and the English instructions manual are not the same again, confusing.
: There are not a lot of measurements in the plans,
Be careful when opening up the gun ports. I assembled a cannon to make sure the gun ports were not too high or low before cutting as the plastic carvings are a little tricky?? as with the main cabin windows.
Do not remove the support piece of wood from the stem as it makes it very weak! I broke off the stem a few times!!
I had to study the plans very closely and use a lot of common sense, as the plans are brief!! with the sets of plans showing different requirements made it frustrating for me so far! The planking is fairly straightforward! I used .5mm finish planking rather than the .2mm finish planking supplied with the kit
I read the ship was built using yellow oak, I used light cherry, I should have done my reading before ordering. The planking supplied is very dark reddish, and the decking is teak. again the original ship from what I read was in yellow oak.
I purchased the wood upgrade carvings. they are nice the only issue again no instructions as the carving are in individual pieces the ones supplied are one-piece parts. but the wood carving will give me more flexibility for all the installation locations.
So far the quality for the price is a deal. I think it will make a beautiful model ship when I get it completed.
IMG_20240831_185156591.jpg

IMG_20240831_185547817.jpg

IMG_20240831_191404110 (1).jpg

IMG_20240907_165844823.jpg
 
Back
Top