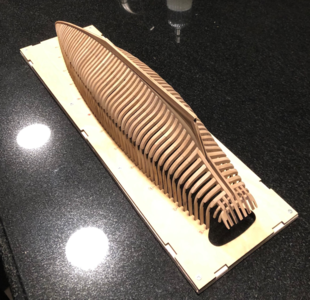
Wow what a great photo. I really like the "Cathedral" look.
-

Win a Free Custom Engraved Brass Coin!!!
As a way to introduce our brass coins to the community, we will raffle off a free coin during the month of August. Follow link ABOVE for instructions for entering.
-

PRE-ORDER SHIPS IN SCALE TODAY!
The beloved Ships in Scale Magazine is back and charting a new course for 2026!
Discover new skills, new techniques, and new inspirations in every issue.
NOTE THAT OUR FIRST ISSUE WILL BE JAN/FEB 2026
- Home
- Forums
- Ships of Scale Group Builds and Projects
- Bluenose PoF Group Build
- Bluenose Group Build Logs
You are using an out of date browser. It may not display this or other websites correctly.
You should upgrade or use an alternative browser.
You should upgrade or use an alternative browser.
The Schooner Bluenose 1921, POF Yuanqing Models 1:72 [COMPLETED BUILD]
Hello everyone, I hit a milestone, all frames are now in place. The transom frames were the most difficult, after dry fitting I had to glue up the end pieces then attach it as a unit to the frame support piece. Well, that required sanding the notches in various locations a little at a time until it slid into place.
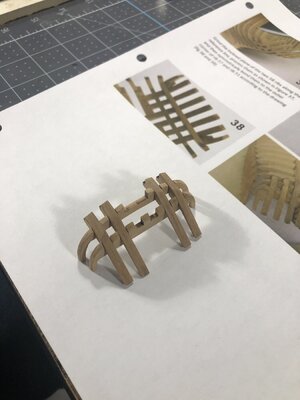


The transom section is not a perfect fit but close enough for final fairing along with the rest of the hull.
Hope you enjoy till next update.


The transom section is not a perfect fit but close enough for final fairing along with the rest of the hull.
Hope you enjoy till next update.
Congratulations Daniel. That really looks wonderful! Have a great Easter!Hello everyone, I hit a milestone, all frames are now in place. The transom frames were the most difficult, after dry fitting I had to glue up the end pieces then attach it as a unit to the frame support piece. Well, that required sanding the notches in various locations a little at a time until it slid into place.
View attachment 367737View attachment 367738View attachment 367739
The transom section is not a perfect fit but close enough for final fairing along with the rest of the hull.
Hope you enjoy till next update.
Looks great Daniel! Fantastic job!Good morning once again everyone. Peter @Peter Voogt reminded me to take a look at the cathedral effect. To my eye I would say the alignments created are within an acceptable tolerance. This is about a third of the frames installed so hopefully this trend continues. Check it out.
View attachment 367647View attachment 367648View attachment 367649
More to follow.
What is amazing in the cathedral view, is the deck beams are at the upper notch where the frames are doubled and the railing is at the lower part of the notch. The rest of the frame is cut off!
Makes you wonder why they made the frames so tall? It just makes it harder to work inside the hull.
Congrats on the first milestone! She looks beautiful! Fun work ahead doing the sister keelson and lower beams!Hello everyone, I hit a milestone, all frames are now in place. The transom frames were the most difficult, after dry fitting I had to glue up the end pieces then attach it as a unit to the frame support piece. Well, that required sanding the notches in various locations a little at a time until it slid into place.
View attachment 367737View attachment 367738View attachment 367739
The transom section is not a perfect fit but close enough for final fairing along with the rest of the hull.
Hope you enjoy till next update.
- Joined
- Sep 3, 2021
- Messages
- 5,160
- Points
- 738

As always an impressive sight, even when partial.Good morning once again everyone. Peter @Peter Voogt reminded me to take a look at the cathedral effect. To my eye I would say the alignments created are within an acceptable tolerance. This is about a third of the frames installed so hopefully this trend continues. Check it out.
View attachment 367647View attachment 367648View attachment 367649
More to follow.
When permanently attaching the frames, it might be useful to apply spacers to ensure correct frame pitches; it did wonders for my build.
Last edited:
Thanks Paul! Happy Easter to you and yours too.Congratulations Daniel. That really looks wonderful! Have a great Easter!
Last edited:
I wondered the same thing Dean, then it struck me how difficult it would have really been without that extra extension, that would mean no flexibility at all for installation, and I am glad it was there (I think).Makes you wonder why they made the frames so tall? It just makes it harder to work inside the hull.
Thanks for the advice, Johan, I think they would be required during the fairing process as well as installation of the lower longitudinal stiffeners in some locations. If there are sections where the spacing is very close to the plan distance, then shouldn't need them.When permanently attaching the frames, it might be useful to apply spacers to ensure correct frame pitches; it did wonders for my build.
Ha! Me make you look bad!!Wow! I think yours looks better than mine did at this stage!
View attachment 367763
Can you people stop making me look bad!
 Dean I struggle just to keep myself from looking like a Kindergartner in the shadow of your work!
Daniel,Thanks for the advice, Johan, I think they would be required during the fairing process as well as installation of the lower longitudinal stiffeners in some locations. If there are sections where the spacing is very close to the plan distance, then shouldn't need them.
Prior to adding the support planks for the deck beams (they run horizontal at the bottom of the notch, where frame thickness is doubled), You will add the waterway boards with all of the notches, it will not be glued, but just put in place as a spacer to ensure all frames are the correct width apart. While the waterway boards are temporarily in place, you will glue in the deck beam support planks to the frames. Hope that makes sense, it is in the instructions.
As Johan recommended, at glue up of the frames to the keel, I used spacer boards to ensure the frames could not get twisted. If there is a snug fit between frame and keel notch, and the keel notch is square to the keel, then we can assume the frames are reasonably square to the keel. The waterway board will ensure any deviance is corrected prior to installing the deck beam supports. So do not skip that, as it is a chore, due to possible adjustments of the notches in the waterway boards!
By the time you think about fairing the hull, trust me... it will be rigid with beams!
Your doing a great job thus far! The frame work is very clean and precise. A good foundation for what's ahead!Ha! Me make you look bad!!Dean I struggle just to keep myself from looking like a Kindergartner in the shadow of your work!
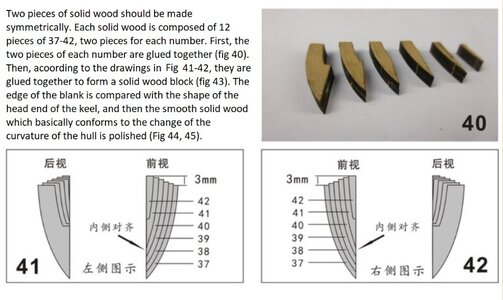
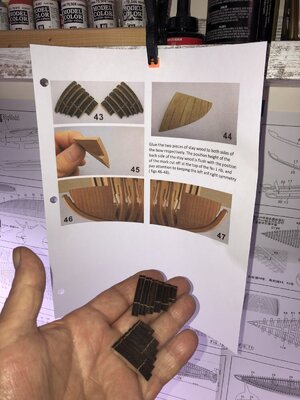
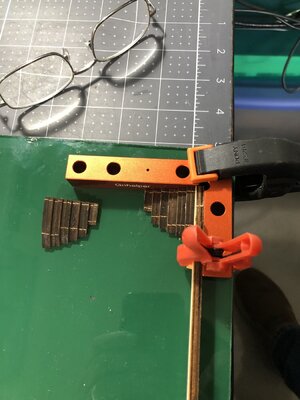
Thank you for the heads up, Dean. I just finished gluing in those tiny multibeveled wings #58 to the transom ribs. My next step is to read ahead before I do anything, and I will take special notice of your suggestion.add the waterway boards with all of the notches, it will not be glued, but just put in place as a spacer to ensure all frames are the correct width apart.
- Joined
- Sep 3, 2021
- Messages
- 5,160
- Points
- 738

Can you stop complaining?Can you people stop making me look bad!

Since when is your Bluenose-build inferior to the others?
A very nice job, Daniel. And special the transom frames looks very very nice. It are parts that can give you a headache.Hello everyone, I hit a milestone, all frames are now in place. The transom frames were the most difficult, after dry fitting I had to glue up the end pieces then attach it as a unit to the frame support piece. Well, that required sanding the notches in various locations a little at a time until it slid into place.
View attachment 367737View attachment 367738View attachment 367739
The transom section is not a perfect fit but close enough for final fairing along with the rest of the hull.
Hope you enjoy till next update.
Regards, Peter
Well…I could look at Peters BN if I want to be humbled!Can you stop complaining?
Since when is your Bluenose-build inferior to the others?


