Better to find out now before you start sanding!Hmmm, in my last post only one of the assemblies is incorrect. They should be mirror images of each other so here comes a quick redo.
View attachment 367849
- Home
- Forums
- Ships of Scale Group Builds and Projects
- Bluenose PoF Group Build
- Bluenose Group Build Logs
You are using an out of date browser. It may not display this or other websites correctly.
You should upgrade or use an alternative browser.
You should upgrade or use an alternative browser.
The Schooner Bluenose 1921, POF Yuanqing Models 1:72 [COMPLETED BUILD]
- Joined
- Sep 3, 2021
- Messages
- 4,947
- Points
- 688

That's pure, undiluted masochism; don't do that to yourself!Well…I could look at Peters BN if I want to be humbled!

Hi Daniel. The tops of those little parts must be shifting a bit upwards:Hmmm, in my last post only one of the assemblies is incorrect. They should be mirror images of each other so here comes a quick redo.
View attachment 367849

The picture in the manual is not in line with the drawings.
Because the bow is going upwards. Please hold them on the keel agains the 1st frame and then you can also see the line you have to sand on the bottom in order to follow the rabbet in the keel.
The tops can eventually sanded later when you have the line of the railing.
Regard, Peter
Thanks Peter, I see what you mean when holding the assembly against the 1st frame. I was wondering about the 3mm slope so I shall wait later as you say and match the rail line.
This next update features the keelson installation. This amazing 3-piece notched stringer took me several hours to de-char and file to fit along the top side of the keel over the frames. Once properly fitted I removed them and placed the faux tree nails for effect then permanently glued them in.
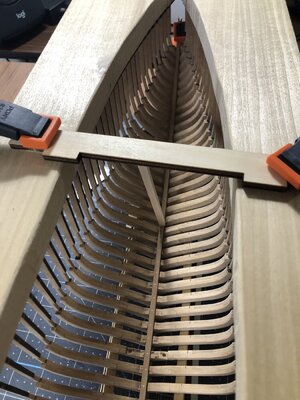
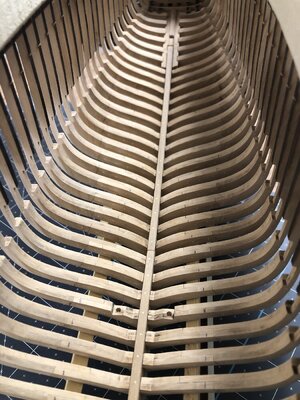
I laid a couple of strips of Obeche onto the cradle to help spread the load and have better support.
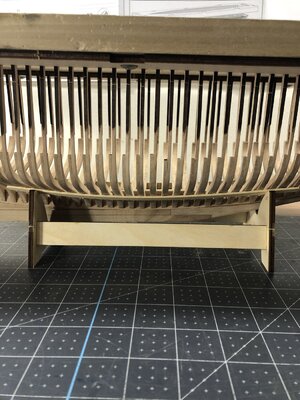
I see hours and hours of sanding ahead, my little 2.5-gal shop vac is getting a workout.
Till next time,


I laid a couple of strips of Obeche onto the cradle to help spread the load and have better support.

I see hours and hours of sanding ahead, my little 2.5-gal shop vac is getting a workout.
Till next time,
First class work here my friend! I'm loving it!
The keelson fits nicely, Daniel. Labour-intensive parts with those 55+ notches to slide with a 4-sided fit over and in those frames.This next update features the keelson installation. This amazing 3-piece notched stringer took me several hours to de-char and file to fit along the top side of the keel over the frames. Once properly fitted I removed them and placed the faux tree nails for effect then permanently glued them in.
View attachment 367980View attachment 367981
I laid a couple of strips of Obeche onto the cradle to help spread the load and have better support.
View attachment 367984
I see hours and hours of sanding ahead, my little 2.5-gal shop vac is getting a workout.
Till next time,
Regards, Peter
Good morning once again everyone. Peter @Peter Voogt reminded me to take a look at the cathedral effect. To my eye I would say the alignments created are within an acceptable tolerance. This is about a third of the frames installed so hopefully this trend continues. Check it out.
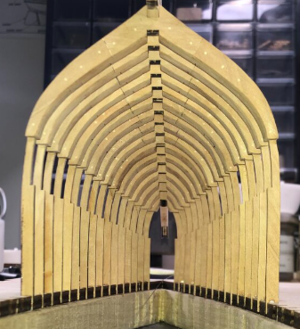
'Cathedral effect'. Love it

Good morning Daniel. Wow. This is brilliant work. I am super impressed. Your first POF as well! Cheers GrantThis next update features the keelson installation. This amazing 3-piece notched stringer took me several hours to de-char and file to fit along the top side of the keel over the frames. Once properly fitted I removed them and placed the faux tree nails for effect then permanently glued them in.
View attachment 367980View attachment 367981
I laid a couple of strips of Obeche onto the cradle to help spread the load and have better support.
View attachment 367984
I see hours and hours of sanding ahead, my little 2.5-gal shop vac is getting a workout.
Till next time,
Thanks Grant, I used to think POB ships had a lot of sanding. I am enjoying seeing this ship come together though.Good morning Daniel. Wow. This is brilliant work. I am super impressed. Your first POF as well! Cheers Grant
- Joined
- Jan 9, 2020
- Messages
- 10,522
- Points
- 938

Dear Daniel. My friend, please accept my apologies for my long absence. My heartiest congratulations for completing the hull frames (including those pesky ones at the stern)! The completed work looks superb even without any sanding or fairing. You are on a very good wicket here.
Dear Heinrich, no apologies necessary my friend. Thank you for your observations. I hope you had a good visit to your heartland, and all is well. My progress from this point has been somewhat stalled as I have landed a nice mapping project, one of the largest of my little mapping company and it is consuming most of my time. I will be back on the BN soon though. It is great to see you back my friend.Dear Daniel. My friend, please accept my apologies for my long absence. My heartiest congratulations for completing the hull frames (including those pesky ones at the stern)! The completed work looks superb even without any sanding or fairing. You are on a very good wicket here.
Looking very nice Daniel! 
- Joined
- Oct 11, 2021
- Messages
- 738
- Points
- 403

Congratulations on landing one of your biggest projects! love the work on the keelson!Dear Heinrich, no apologies necessary my friend. Thank you for your observations. I hope you had a good visit to your heartland, and all is well. My progress from this point has been somewhat stalled as I have landed a nice mapping project, one of the largest of my little mapping company and it is consuming most of my time. I will be back on the BN soon though. It is great to see you back my friend.
Good Sunday afternoon to all.
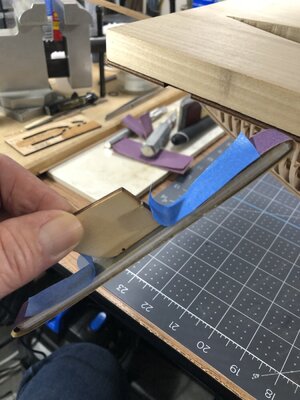
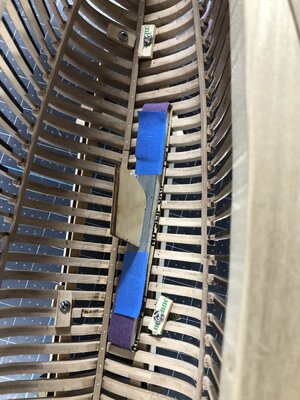
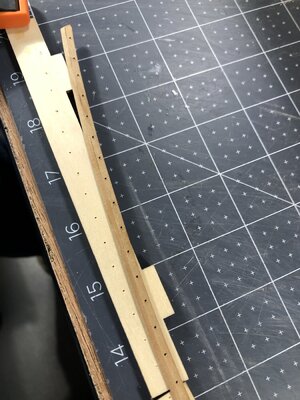
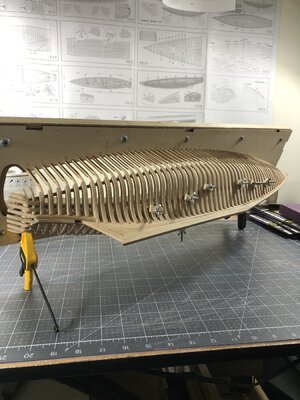
Finally finished my map project and am now back to work on the sleek beautiful Blue Nose. I have spent a few hours fairing the hull ribs, actually not near as many hours as I was anticipating. The interior fairing was made simple by covering some old flexible sanding sticks with some 220 and 320 grit paper plus a handle I made on it.
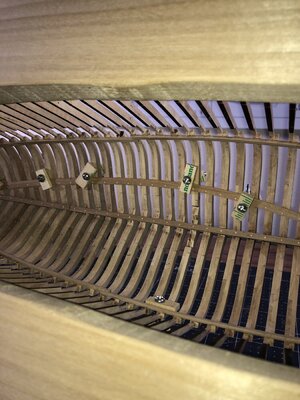
Next are a few pics of the upper deck support whalers and the hardware I fabricated to hold everything in place. Once all four runners were glued in, I removed the thin spacers you see which will be installed permanently later on in the build.
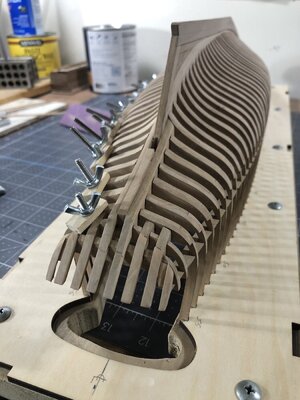
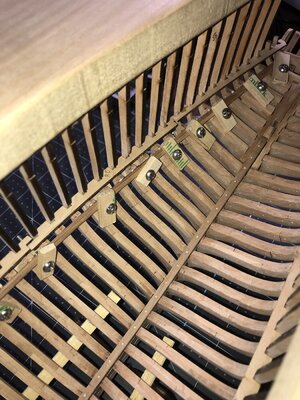

Next you will see the first half of the lower deck whaler beam support piece installed. Once I finish the other side and install the two sister keelsons, I'll go ahead, and clear coat mixed with a little stain everything before going any further.
Before I forget, here is a shot of the laminated nose piece.
That all for now, hope you all enjoy and happy modeling!
Finally finished my map project and am now back to work on the sleek beautiful Blue Nose. I have spent a few hours fairing the hull ribs, actually not near as many hours as I was anticipating. The interior fairing was made simple by covering some old flexible sanding sticks with some 220 and 320 grit paper plus a handle I made on it.


Next are a few pics of the upper deck support whalers and the hardware I fabricated to hold everything in place. Once all four runners were glued in, I removed the thin spacers you see which will be installed permanently later on in the build.


Next you will see the first half of the lower deck whaler beam support piece installed. Once I finish the other side and install the two sister keelsons, I'll go ahead, and clear coat mixed with a little stain everything before going any further.


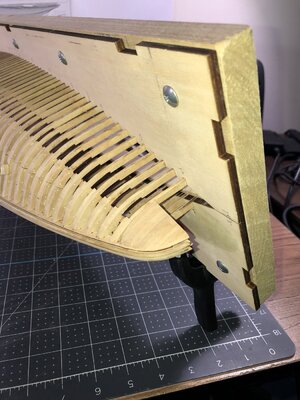
Before I forget, here is a shot of the laminated nose piece.

That all for now, hope you all enjoy and happy modeling!
Thank you, Peter, I am really excited about this build.let me be the first to say that this looks excellent. the home Made tools are the best, so love the sanding stick with handle Daniël.
Looking fantastic Daniel!


