Thanks Grant, I hope the outcome is cheers and not tears.Hello Daniel. All looking ready for action. Cheers Grant
- Home
- Forums
- Ships of Scale Group Builds and Projects
- Bluenose PoF Group Build
- Bluenose Group Build Logs
You are using an out of date browser. It may not display this or other websites correctly.
You should upgrade or use an alternative browser.
You should upgrade or use an alternative browser.
The Schooner Bluenose 1921, POF Yuanqing Models 1:72 [COMPLETED BUILD]
Thanks Peter, I love your assembly description, "The Big Merge." I'm going to have to adopt that one.It’s all about preparation, Daniel. And that is looking very nice. Almost ready for the big merge.
Regards, Peter.
- Joined
- Sep 3, 2021
- Messages
- 4,949
- Points
- 688

In car assembly terms, this might be seen as "the Marriage".Thanks Peter, I love your assembly description, "The Big Merge." I'm going to have to adopt that one.
Good morning all,
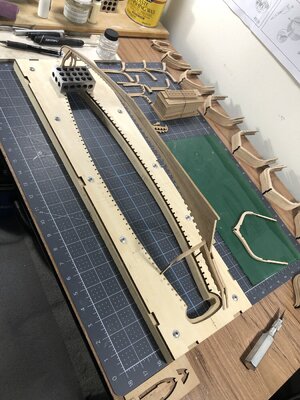
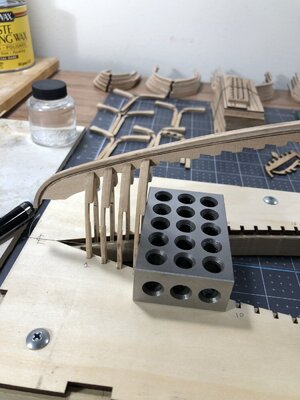
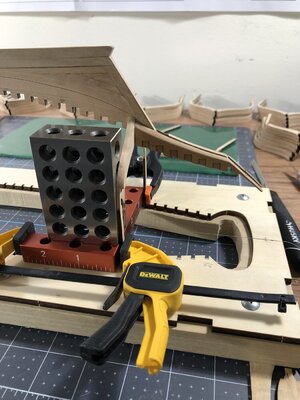
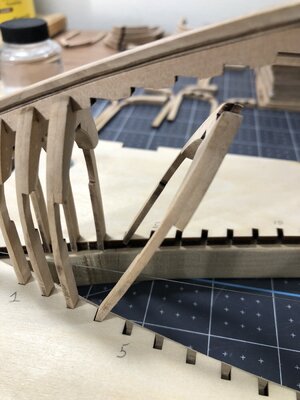
I finally finished the off-ship sanding of the ribs and now able to cut loose on their installation onto the keel. I set up a string line down the center of the jig and placed the set up frames #1 and #49 to start. You can see the attempt I made to plumb up and stabilize the keel for further frame placement.
I found that chamfering the ends of the frame extensions allows for fairly easy tilt-up placement without having to use too much force.
I hope you all enjoy this, thanks for checking in.
I finally finished the off-ship sanding of the ribs and now able to cut loose on their installation onto the keel. I set up a string line down the center of the jig and placed the set up frames #1 and #49 to start. You can see the attempt I made to plumb up and stabilize the keel for further frame placement.


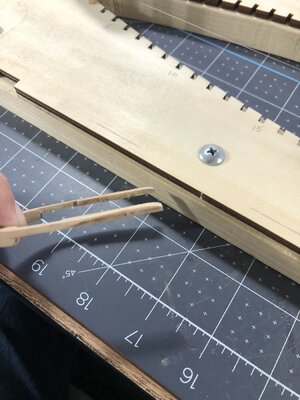
I found that chamfering the ends of the frame extensions allows for fairly easy tilt-up placement without having to use too much force.


I hope you all enjoy this, thanks for checking in.
Exciting Daniel! Is this a test fit or are you gluing the frames in place?
I'm presently in model-builder 'lock' - for the life of me I can't figure out how to get all the transom pieces joined to the sternpost and aft frame at the same time while keeping everything level and joined tightly. I should have tried the BN first!
I'm presently in model-builder 'lock' - for the life of me I can't figure out how to get all the transom pieces joined to the sternpost and aft frame at the same time while keeping everything level and joined tightly. I should have tried the BN first!
Excellent! Looks like you have a good start on the frame and keel assembly. Everything looks very good!Good morning all,
I finally finished the off-ship sanding of the ribs and now able to cut loose on their installation onto the keel. I set up a string line down the center of the jig and placed the set up frames #1 and #49 to start. You can see the attempt I made to plumb up and stabilize the keel for further frame placement.
View attachment 367450View attachment 367451View attachment 367452
I found that chamfering the ends of the frame extensions allows for fairly easy tilt-up placement without having to use too much force.
View attachment 367453View attachment 367454
I hope you all enjoy this, thanks for checking in.
Hi Paul, this is glue-up now. I actually did a test fit of all the frames, some of the slots were a very tight fit so I sanded them to a comfortable push fit. This procedure was time consuming but very necessary as you have to glue and join each frame in three locations simultaneously. I wish I could help you with your required multi location simultaneous glue up. I'm clearly operation at the edge of my current ability.Exciting Daniel! Is this a test fit or are you gluing the frames in place?
I'm presently in model-builder 'lock' - for the life of me I can't figure out how to get all the transom pieces joined to the sternpost and aft frame at the same time while keeping everything level and joined tightly. I should have tried the BN first!
- Joined
- Sep 3, 2021
- Messages
- 4,949
- Points
- 688

I like that chamfering you do, it sure must ease installation of the frames.Good morning all,
I finally finished the off-ship sanding of the ribs and now able to cut loose on their installation onto the keel. I set up a string line down the center of the jig and placed the set up frames #1 and #49 to start. You can see the attempt I made to plumb up and stabilize the keel for further frame placement.
View attachment 367450View attachment 367451View attachment 367452
I found that chamfering the ends of the frame extensions allows for fairly easy tilt-up placement without having to use too much force.
View attachment 367453View attachment 367454
I hope you all enjoy this, thanks for checking in.
You only have to make sure the frames fit in the tool without play.

Yes, I left approx. 1-2mm at the top of the chamfer to fill the jig slot snugly.I like that chamfering you do, it sure must ease installation of the frames.
You only have to make sure the frames fit in the tool without play.

- Joined
- Sep 3, 2021
- Messages
- 4,949
- Points
- 688

I didn't expect anything less.Yes, I left approx. 1-2mm at the top of the chamfer to fill the jig slot snugly.
A good start, Daniel. Soon the first (small) Cathedral-view ……..Good morning all,
I finally finished the off-ship sanding of the ribs and now able to cut loose on their installation onto the keel. I set up a string line down the center of the jig and placed the set up frames #1 and #49 to start. You can see the attempt I made to plumb up and stabilize the keel for further frame placement.
View attachment 367450View attachment 367451View attachment 367452
I found that chamfering the ends of the frame extensions allows for fairly easy tilt-up placement without having to use too much force.
View attachment 367453View attachment 367454
I hope you all enjoy this, thanks for checking in.
Regards, Peter
Thanks for the complement, Peter. it's always a pleasant surprise when an idea that works pops into one's mind.
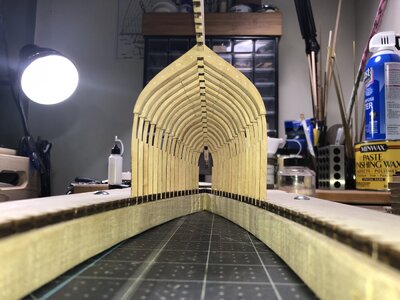
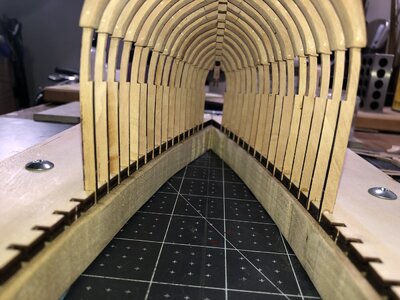
Good morning once again everyone. Peter @Peter Voogt reminded me to take a look at the cathedral effect. To my eye I would say the alignments created are within an acceptable tolerance. This is about a third of the frames installed so hopefully this trend continues. Check it out.

More to follow.


More to follow.
Impressive!
It’s looking good, Daniel! Going ‘straight forwards’.Good morning once again everyone. Peter @Peter Voogt reminded me to take a look at the cathedral effect. To my eye I would say the alignments created are within an acceptable tolerance. This is about a third of the frames installed so hopefully this trend continues. Check it out.
View attachment 367647View attachment 367648View attachment 367649
More to follow.
Regards, Peter
Good evening Daniel. That is such a captivating pic, the cathedral view. To my uneducated POF eye it looks perfect. Reminds me of one of Paul’s @dockattner classic phrases “it no accident they/it fits perfectly “. Certainly applies to your craft so far. Nice. Cheers GrantGood morning once again everyone. Peter @Peter Voogt reminded me to take a look at the cathedral effect. To my eye I would say the alignments created are within an acceptable tolerance. This is about a third of the frames installed so hopefully this trend continues. Check it out.
View attachment 367647View attachment 367648View attachment 367649
More to follow.


