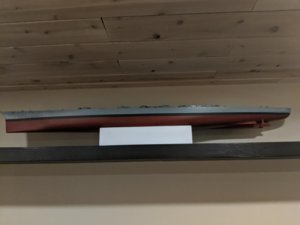
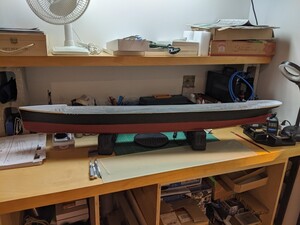
Man, She is huge! Wow! Great job so far! 
-

Win a Free Custom Engraved Brass Coin!!!
As a way to introduce our brass coins to the community, we will raffle off a free coin during the month of August. Follow link ABOVE for instructions for entering.
-

PRE-ORDER SHIPS IN SCALE TODAY!
The beloved Ships in Scale Magazine is back and charting a new course for 2026!
Discover new skills, new techniques, and new inspirations in every issue.
NOTE THAT OUR FIRST ISSUE WILL BE JAN/FEB 2026
You are using an out of date browser. It may not display this or other websites correctly.
You should upgrade or use an alternative browser.
You should upgrade or use an alternative browser.
- Joined
- Feb 23, 2019
- Messages
- 420
- Points
- 323

If this link helps a does contain a lot of helpful information.
Thanks...hull is almost done finishing.. daunting task of drilling hundreds of portholes next!Man, She is huge! Wow! Great job so far!
Thanks man... I have noticed that source of reference previously but prefer https://www.rivet-counter.com/ as it is more directed to the modeller!If this link helps a does contain a lot of helpful information.
When I was assembling plastic model in scale 1/350 i drill holes for portholes and inserted pieces of cut tubing (size of the porthole). This makes all of the portholes identical with nice edge. Later, I introduce a drop of lac to make it like a glass. It does require extra (cach) spending and time, thought.Thanks...hull is almost done finishing.. daunting task of drilling hundreds of portholes next!
Yes i will use Krystal Klear from Microset for the portholes and the same if not some acetate sheet for larger windows! I painted first and then drilled holes because they get all clogged up after painting and need redrilling anyways!When I was assembling plastic model in scale 1/350 i drill holes for portholes and inserted pieces of cut tubing (size of the porthole). This makes all of the portholes identical with nice edge. Later, I introduce a drop of lac to make it like a glass. It does require extra (cach) spending and time, thought.
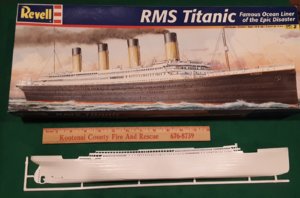
Revell 1/570 scale (box scale) the original molds are 1970. I have the 1996 edition.
Oh... that kit!!! I remember it being an epic disaster.. Just kidding man!! If you build it, I will watch.
Mr Shanks, I need to finish SOMETHING before I start another project, however, the plan for my Titanic is a cool nightlight.
Awesome! I really want to get this kit and will be watching your progress. Looks great so far. I do have a question though. What do you folks use to spray large surface areas. I’m currently building the 1/200 Bismarck and I’m not 100% satisfied with the coverage using my airbrush.
One of the ways (maybe not the best way) is to use Airspray cans of paint. Major modeling manufactures e.g. Tamia, Humbrol, etc made both enamel and acrylic paint. Also, you can use Automobile paint, they have many varieties and color to choose fromAwesome! I really want to get this kit and will be watching your progress. Looks great so far. I do have a question though. What do you folks use to spray large surface areas. I’m currently building the 1/200 Bismarck and I’m not 100% satisfied with the coverage using my airbrush.
Couple of comments.
- If you cannot get large area coverage with your airbrush you may want to look at the tip/needle size. It might be that you are using a fine tip/needle that cannot flow enough volume of paint to cover a large area. Keep in mind that if you change to a larger size airbrush tip you will also need to increase the pressure.
- Model spray paints are outstanding for large area coverage. However, be prepared as it can become quite expensive.
- Would not recommend using automotive type spray paints - the volume is too high, and the paint pigment is typically too large for scale model work. It can be used for some basic colors (black, white, primer, etc), but experience and care is needed when applied.
Hope this helps.
Thanks, I’ll investigate tip sizes for my airbrush. Trying to sell my wife on this kit.Couple of comments.
- If you cannot get large area coverage with your airbrush you may want to look at the tip/needle size. It might be that you are using a fine tip/needle that cannot flow enough volume of paint to cover a large area. Keep in mind that if you change to a larger size airbrush tip you will also need to increase the pressure.
- Model spray paints are outstanding for large area coverage. However, be prepared as it can become quite expensive.
- Would not recommend using automotive type spray paints - the volume is too high, and the paint pigment is typically too large for scale model work. It can be used for some basic colors (black, white, primer, etc), but experience and care is needed when applied.
Hope this helps.
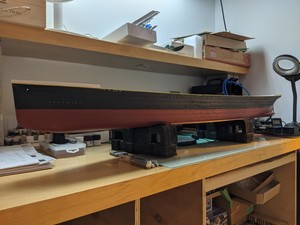
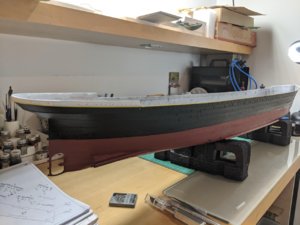
ok so little more work on the hull finish but I had a feeling the boot topping line was off slightly and I was correct if you will notice in the 2 close up image those are NOT portholes.. Doh... they are guidelines!!! Not certain if supposed to fill them up after masking that line off?
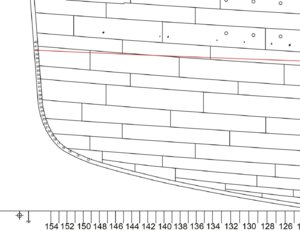
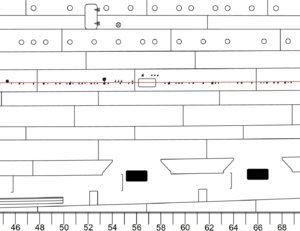
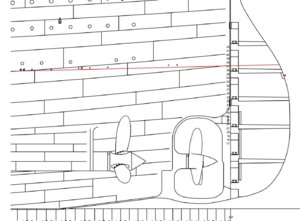
Sir those are not guidelines. Those are Titanic’s water discharges. They were on the real ship as well. As for your waterline you are way off. Maybe this could help:
I have the 1/200 Bismarck also and painted the hull same way... I used Tamiya sprays... hand air brushing not an option for that surface area imoAwesome! I really want to get this kit and will be watching your progress. Looks great so far. I do have a question though. What do you folks use to spray large surface areas. I’m currently building the 1/200 Bismarck and I’m not 100% satisfied with the coverage using my airbrush.
I used TS-33 for anti-fowling as previously mentioned for all my hulls!
Thanks for the info... lol I never claimed to be a Titanic expert and the painting instructions or lack thereof in this make it difficult to get exact... I did wind up lowering it slightly as best I can see from the box art and other sources on the net... Its still not perfect but will have to go with that for now... is not my intention to 'rivet count' this build!Sir those are not guidelines. Those are Titanic’s water discharges. They were on the real ship as well. As for your waterline you are way off. Maybe this could help:
btw where did you get that reference?Thanks for the info... lol I never claimed to be a Titanic expert and the painting instructions or lack thereof in this make it difficult to get exact... I did wind up lowering it slightly as best I can see from the box art and other sources on the net... Its still not perfect but will have to go with that for now... is not my intention to 'rivet count' this build!
Thanks for the info... lol I never claimed to be a Titanic expert and the painting instructions or lack thereof in this make it difficult to get exact... I did wind up lowering it slightly as best I can see from the box art and other sources on the net... Its still not perfect but will have to go with that for now... is not my intention to 'rivet count' this build!
I hope it didn’t come off as critique. I was just trying to help. I’m watching your build with interest.
btw where did you get that reference?
Those are from Bob Read - a known expert in the Titanic community. You will find many resource articles as well as a very accurate color guide on his site http://www.titanic-cad-plans.com/
This is also a very good source of inspiration. Probably the most accurate 1/350 build of titanic ever: http://www.titanicmodel.net/
final shot of the hull... starting the main deck work next including LED install preparations!
I hope it didn’t come off as critique. I was just trying to help. I’m watching your build with interest.
Not at all I was looking for advice... just wanted to be clear I am only a novice model builder!
Those are from Bob Read - a known expert in the Titanic community. You will find many resource articles as well as a very accurate color guide on his site http://www.titanic-cad-plans.com/
This is also a very good source of inspiration. Probably the most accurate 1/350 build of titanic ever: http://www.titanicmodel.net/
Thanks again!I hope it didn’t come off as critique. I was just trying to help. I’m watching your build with interest.
Those are from Bob Read - a known expert in the Titanic community. You will find many resource articles as well as a very accurate color guide on his site http://www.titanic-cad-plans.com/
This is also a very good source of inspiration. Probably the most accurate 1/350 build of titanic ever: http://www.titanicmodel.net/


