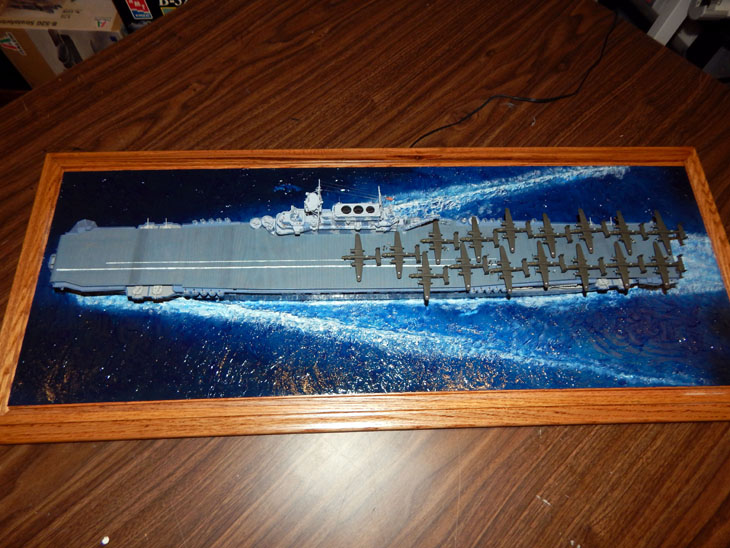
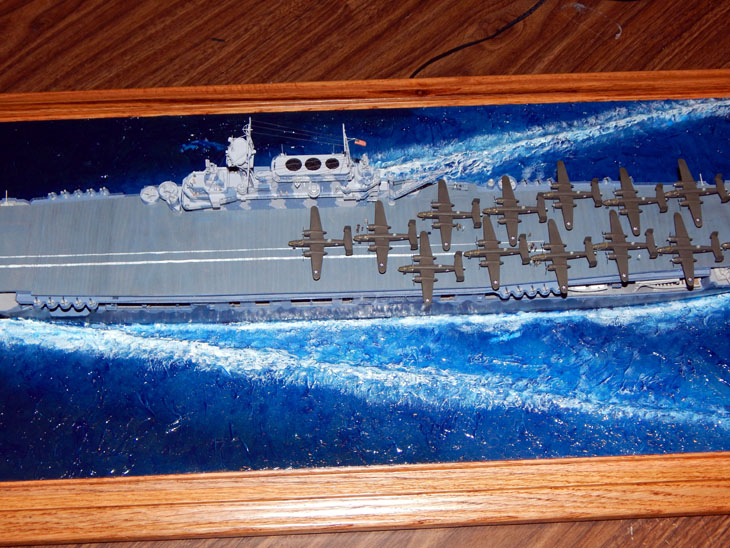
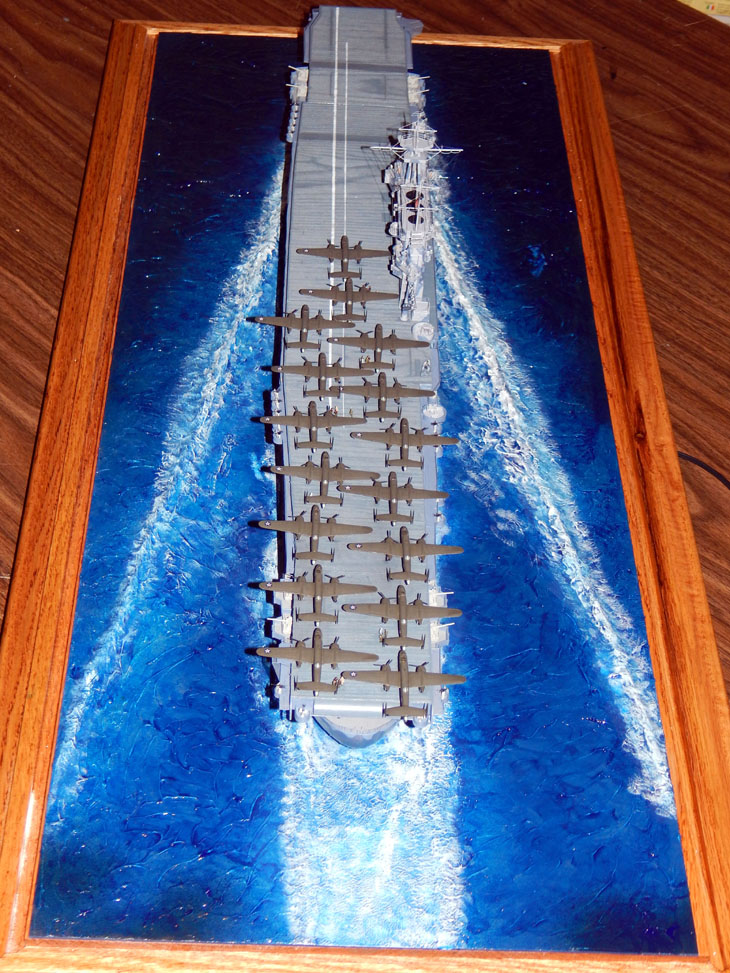
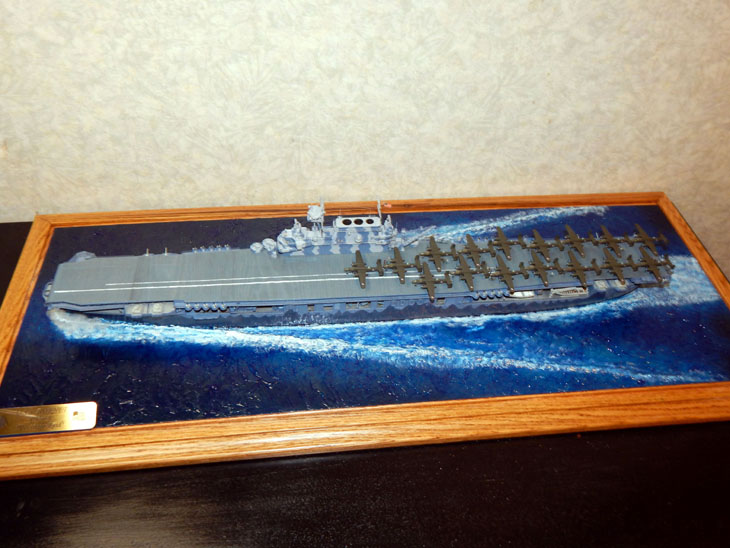
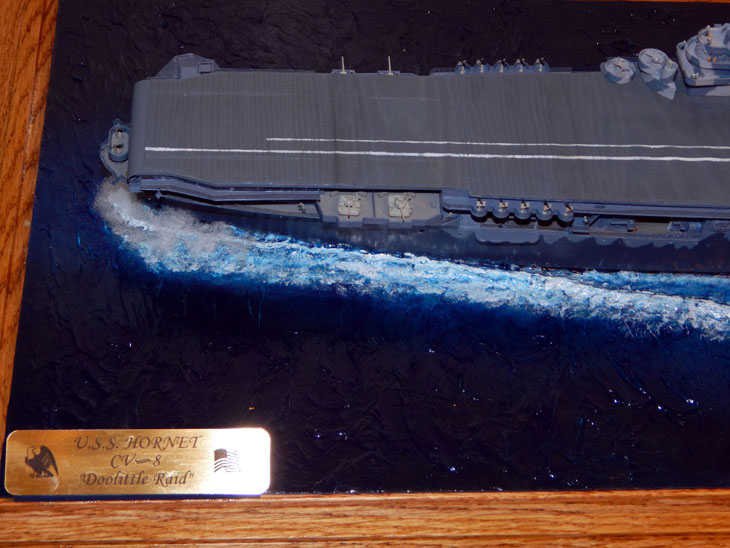
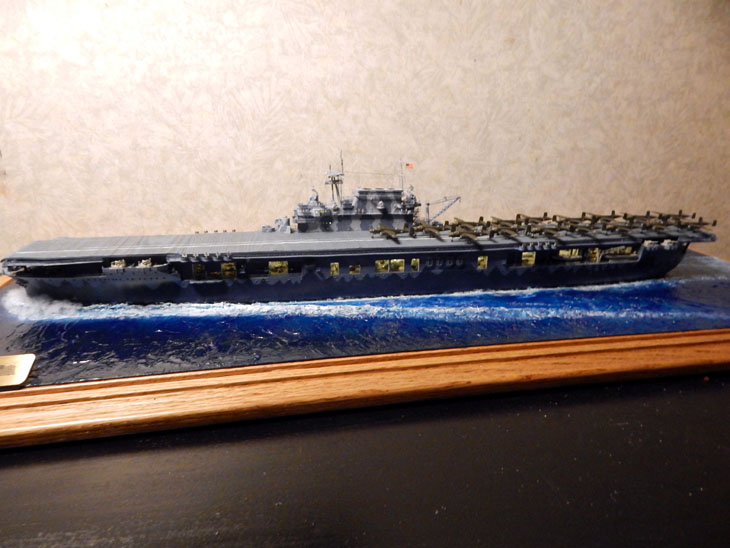
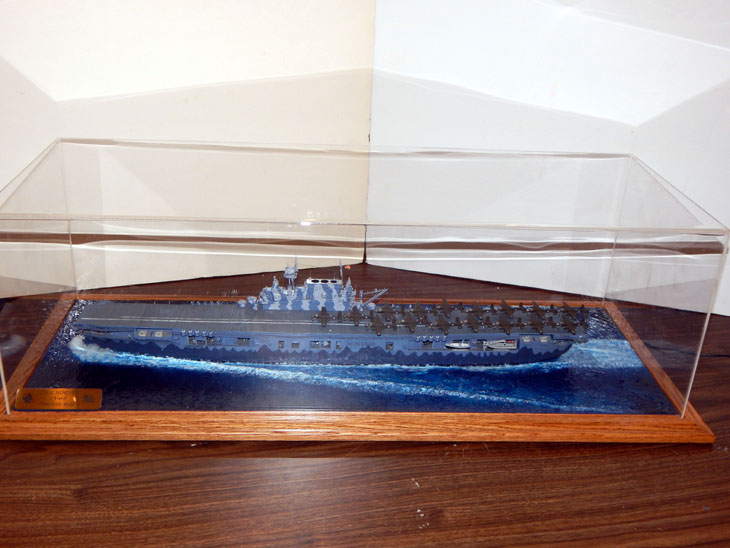
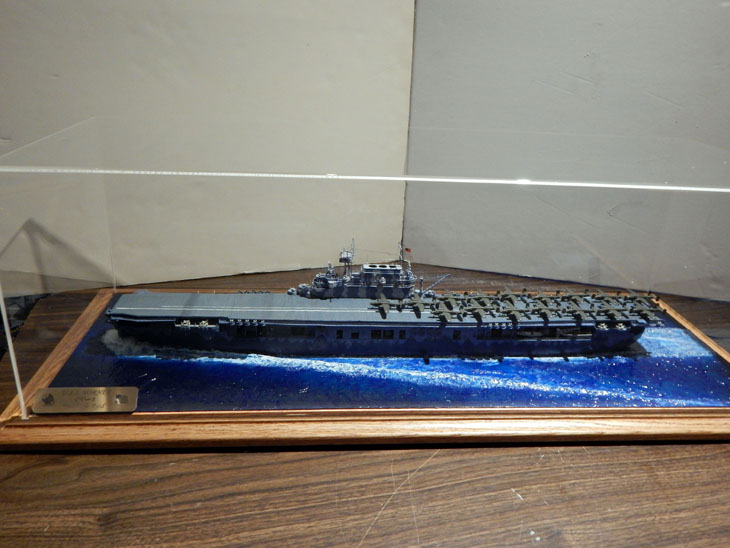
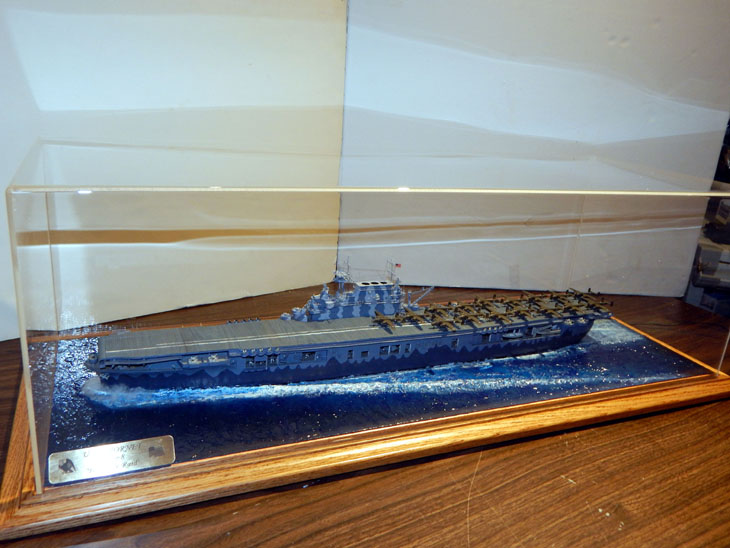
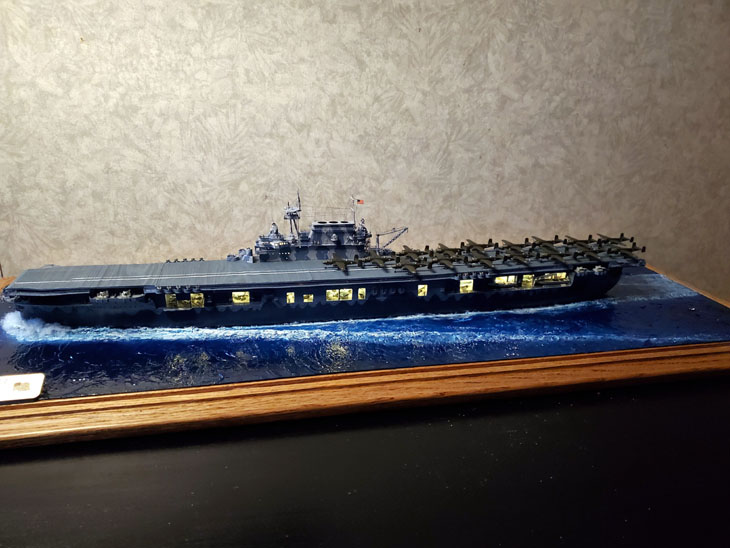
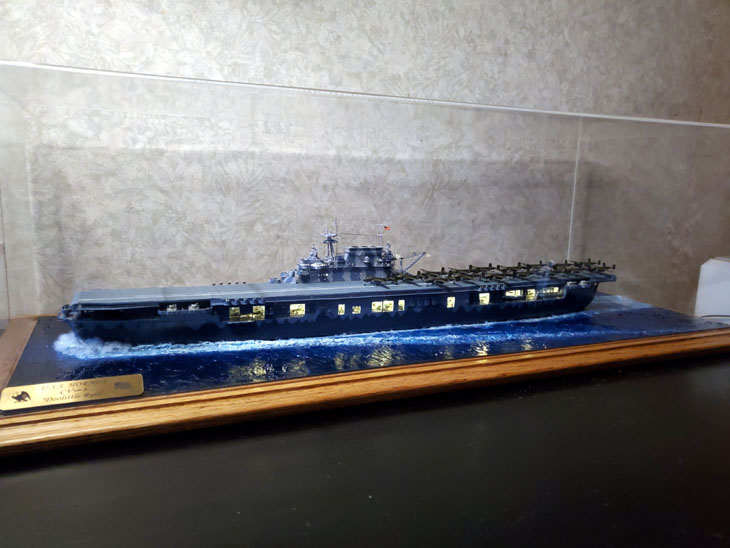
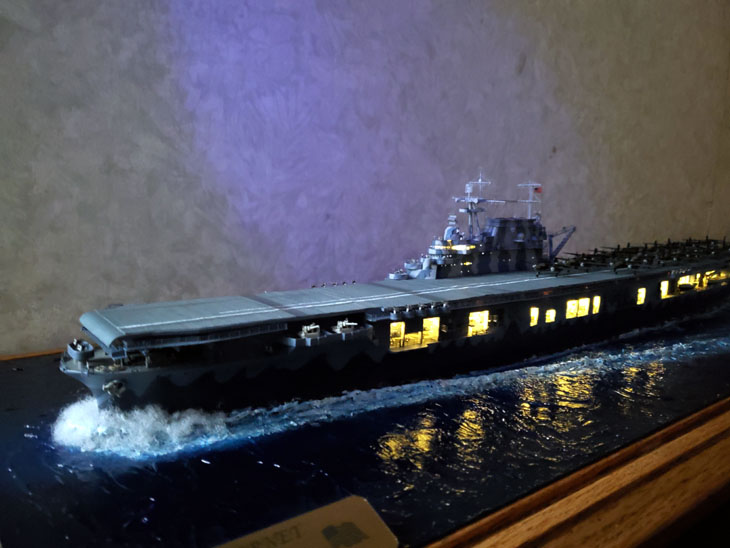
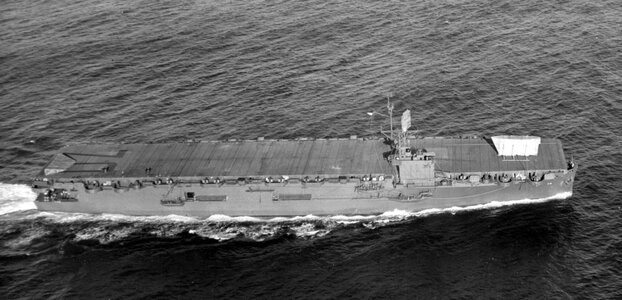
Trumpeter 1/350 USS Hornet - Doolittle Raid [COMPLETED BUILD]

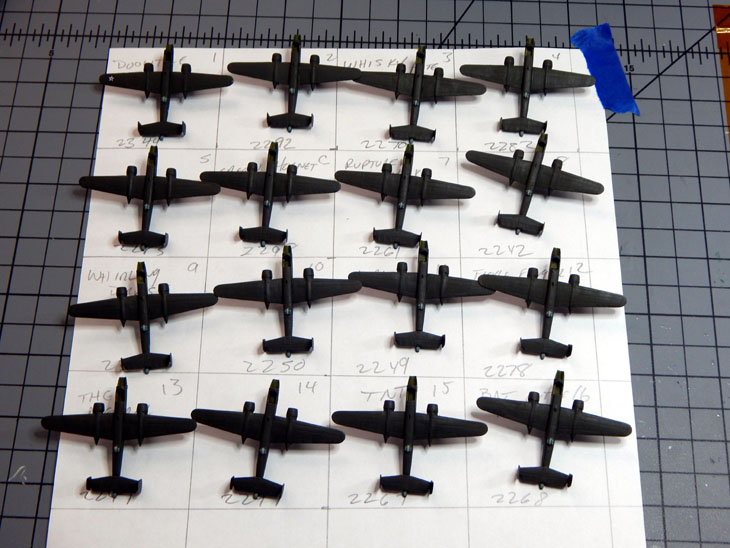
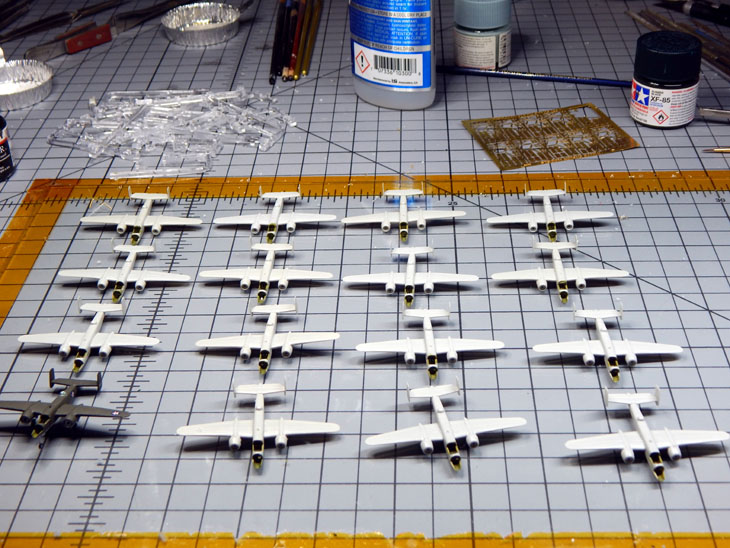
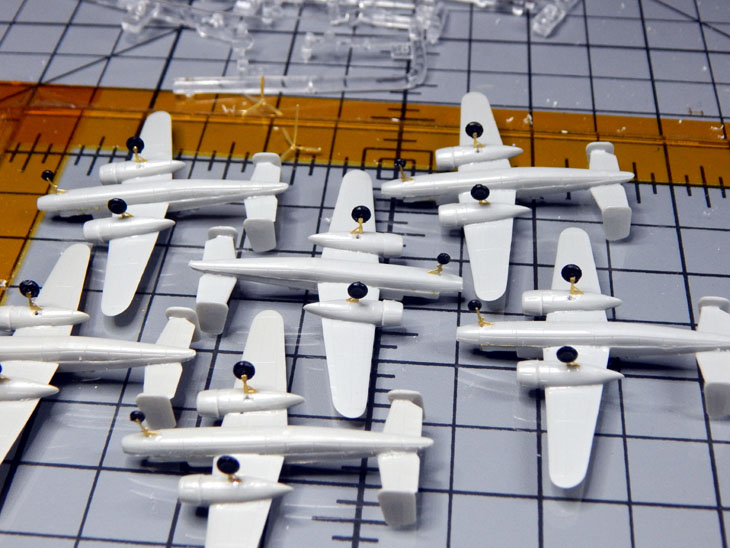
Week 28 - This week has been spent building the B-25B’s. I made an assembly line so I could open up the fuselages for the cockpits. Once all the aircraft fuselages were built I placed them on the flight deck just to see placement. I placed them as they were staged when they pulled out of San Francisco Bay and then how they were staged for the launching just to give you an idea on how much space they had to work with to get perform this mission. I will be staging them as they were on deck as the ship left San Francisco Bay on April 1, 1942.

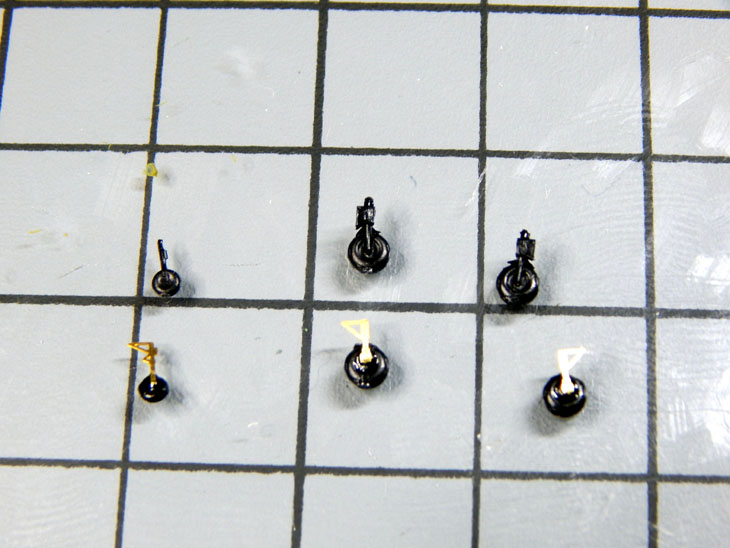
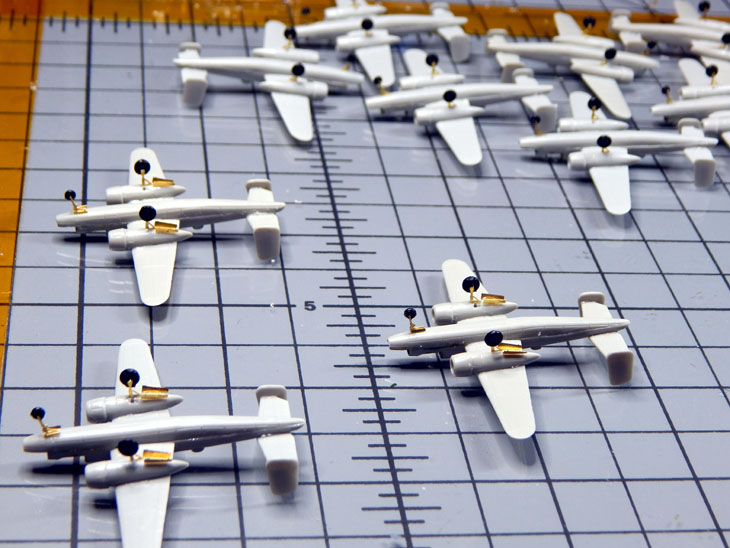
I then made all the landing gear using the PE struts and the kit wheels which had their struts removed. These were then installed on all the aircraft. Next on the assembly line was adding all the landing gear doors. The undersides of all the aircraft were then painted with Neutral Gray with aluminum for landing gear and wheel hubs. Getting ready to paint the Green Drab on the topside then add all the decals. Then I just need to add the propellers and the canopies. The B-25B’s should all be completed this coming week. I am also going to measure out and start preparing the base for the display case.

You can see the numerous photos and details from the start of the huge project in my build log at https://davidsscalemodels.com/build-log/1-350-uss-hornet-cv-8-doolittle-raid/
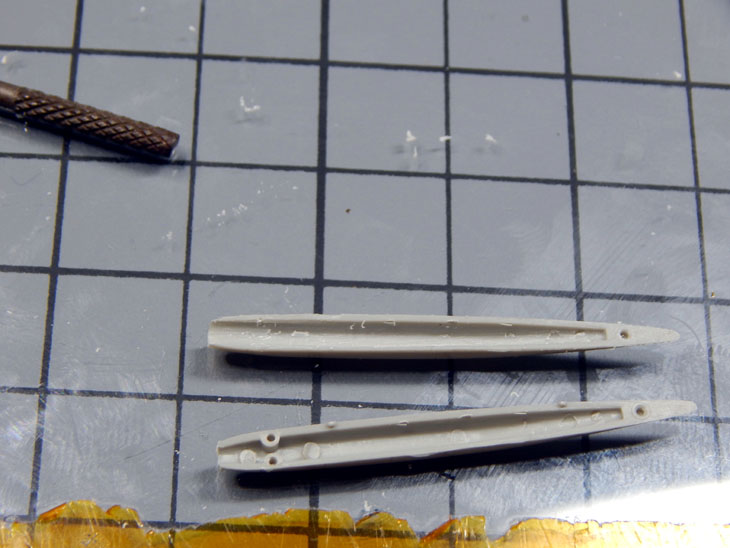
dscn6486.jpg


dscn6489.jpg


dscn6492.jpg


dscn6495.jpg


dscn6497.jpg


dscn6499.jpg


dscn6504.jpg
One piece of localized history, as I have been told, Doolittle's squadron practiced their takeoffs from a flat topped lava throat by Central Point Oregon, called Flat Top Butte. I used to look down on it when flying in our office Cessna 207 from Eugene to Medford, Oregon. The top was about 500 feet above the valley floor. Go to Google Earth for Central Point, Oregon then scan to the northwest about 5.5 miles and it is obvious although now overgrown from what it was. Rich (PT-2)
 
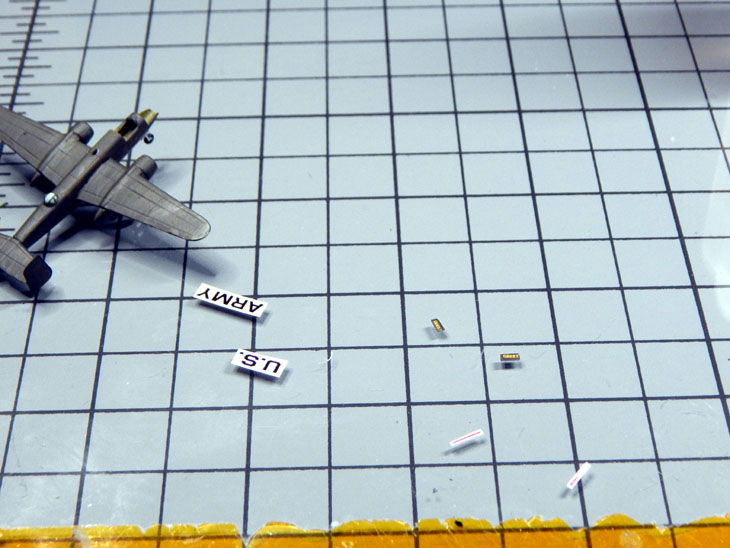
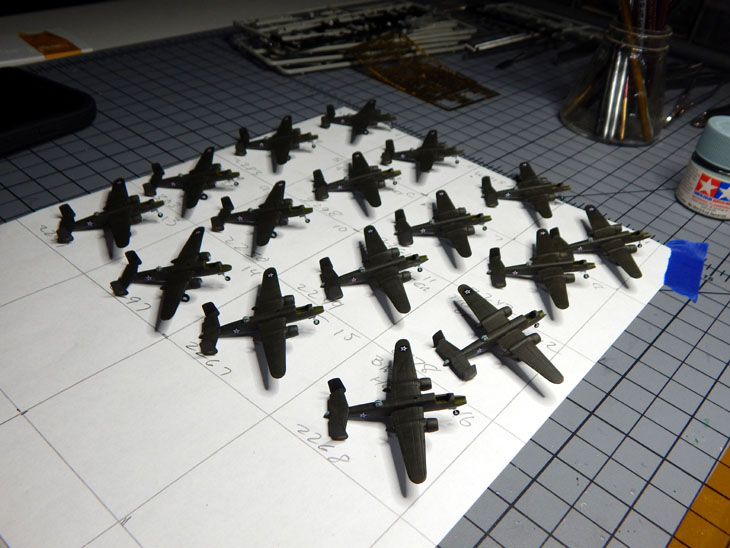
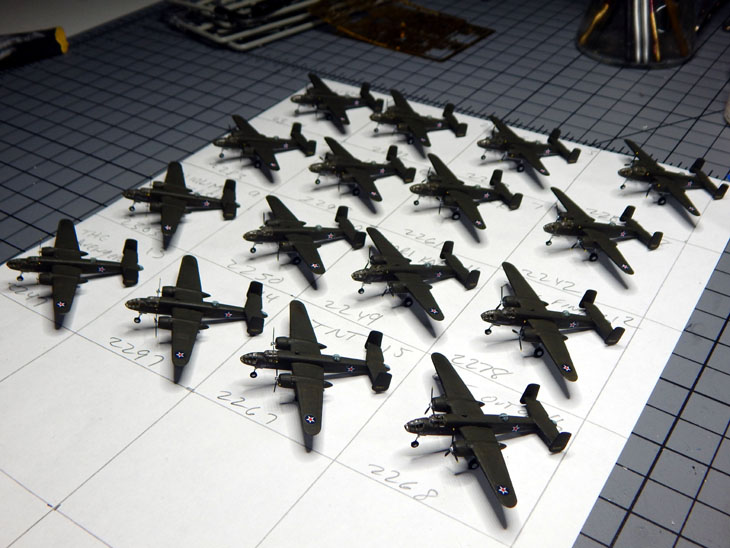
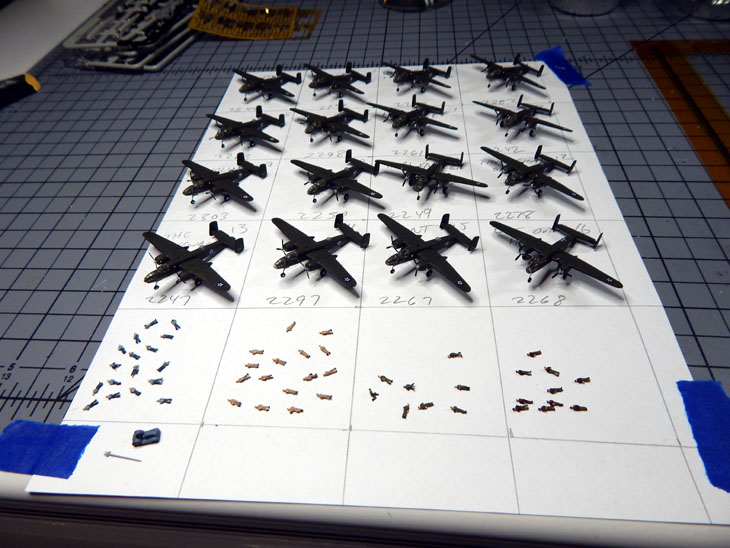
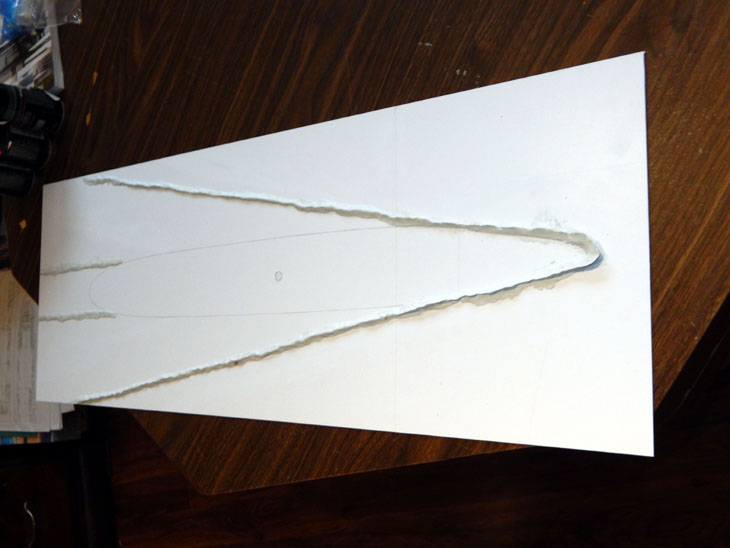
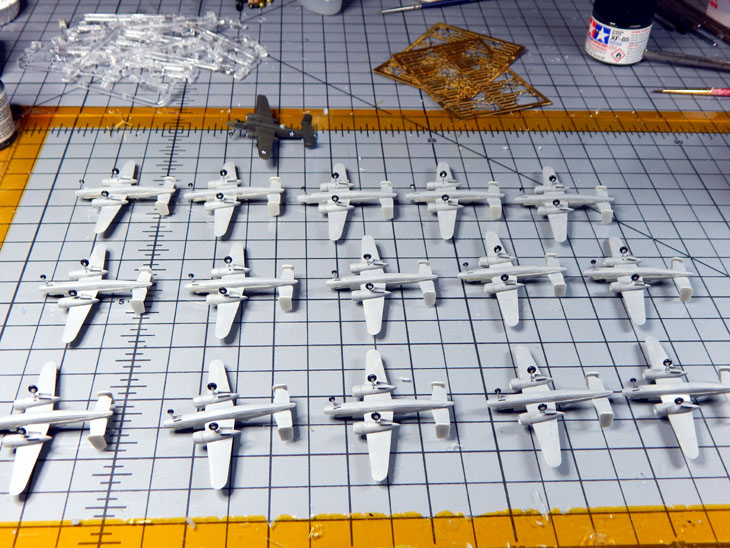
Week 29 – One week closer to completing this project! The B-25B’s are now complete. I spent the early part of the week painting the aircraft, building the propellers and painting them, applying the decals and installing the canopy and nose. They are then set on a grid so I can place them on the ship in order. It was a little time consuming as I had to let the paint dry then the decals set. During these little breaks I started to layout the base. I needed to do this so I can get the exact measurements to order the display case. The case ended up being 33” long, 12” wide and 10” tall to accommodate the base and ship. Once the case sizing was established I contacted Grandpa’s Cabinets ( https://www.grandpascabinets.com/ ) Display Cases for Collectibles - Custom Display Cases and ordered the case. I then figured out the position of the ship and where the wakes will be. Since I am using sheet styrene for the base I decided to use some Milliput to for the wakes. Also during one of these breaks I packed up all the electronics in the hull and glued on the waterline base.

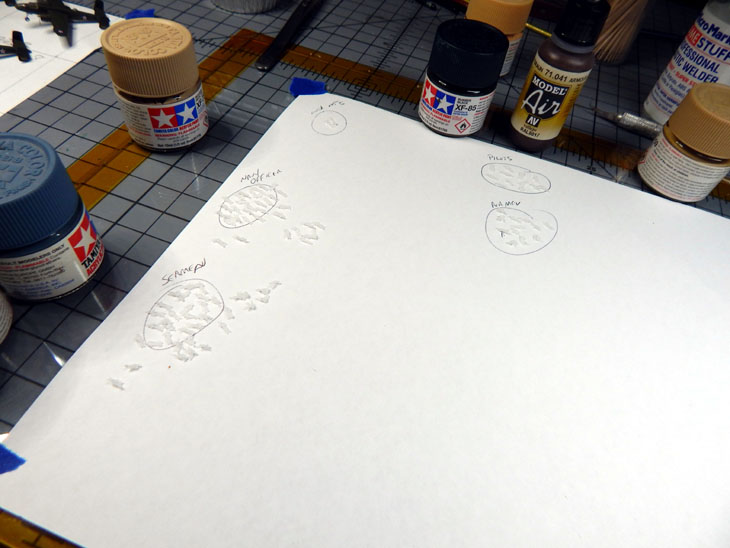
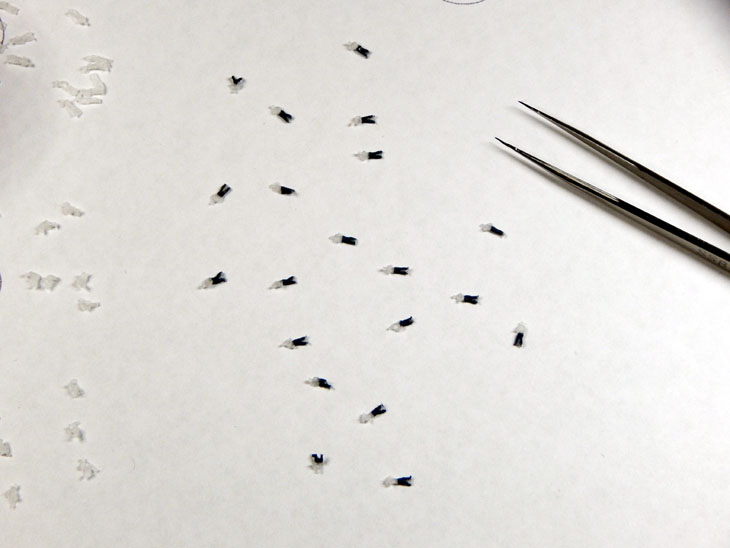
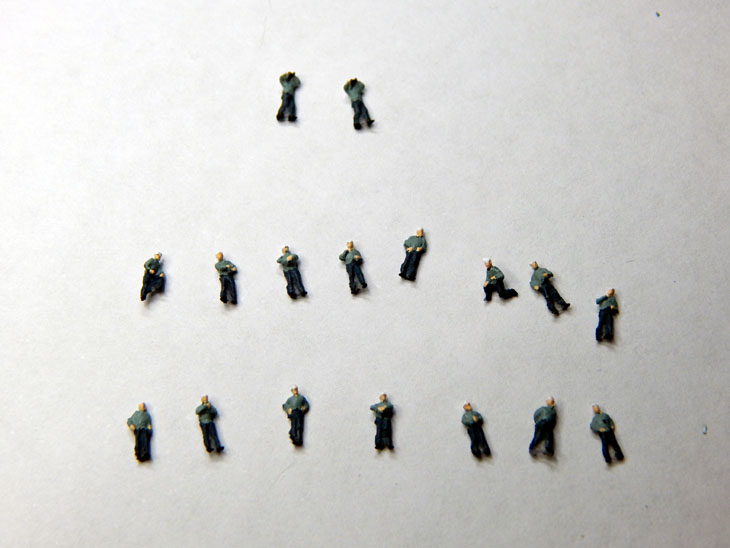
After installing the canopy and nose on the aircraft I then added the propellers and painted the tips. This now completes all sixteen B-25B’s of the Doolittle Raiders. I then grabbed the dish with all the 3-D printed crew and sorted them out (Navy enlisted, Navy Officers, USAAF pilots, and USAAF enlisted). I will be painting them and then placing them and the B-25’s on the flight deck. I will then build up the base.

You can see the numerous photos and details from the start of the huge project in my build log at https://davidsscalemodels.com/build-log/1-350-uss-hornet-cv-8-doolittle-raid/


dscn6505.jpg


dscn6509.jpg


dscn6511.jpg


dscn6512.jpg


dscn6513.jpg


dscn6522.jpg


dscn6524.jpg


e171836.jpg


e172137.jpg


e172159.jpg
 
Last edited:
Welcome to last and final week of the Trumpeter 1/350 USS Hornet CV-8 Project!

This is going to be a huge update. I am breaking in up into 3 sections due to the details and number of photos. The first section is adding the figures and aircraft to complete the ship. The second section will be on making the “At Sea” base. The last section is the photos of the completed project. At the bottom is a list of all the accessories that were used to create this project.

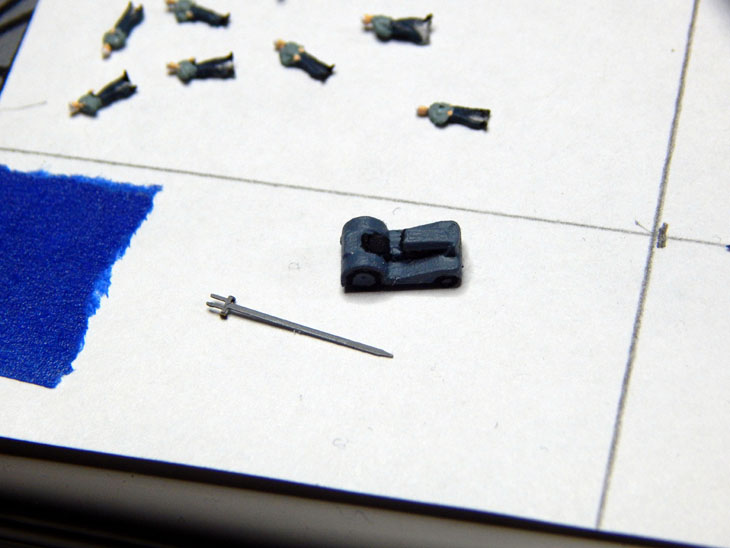
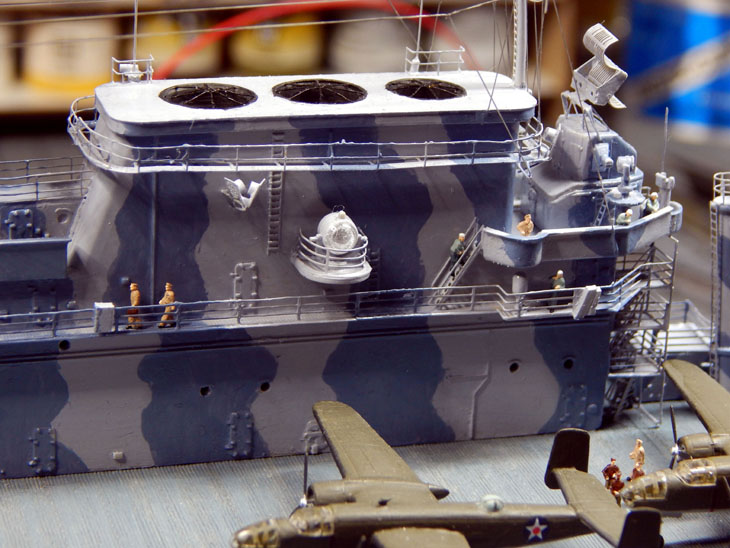
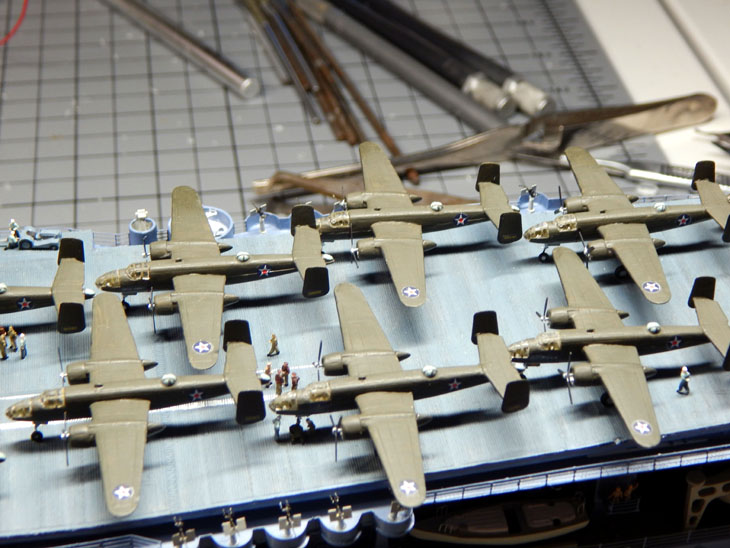
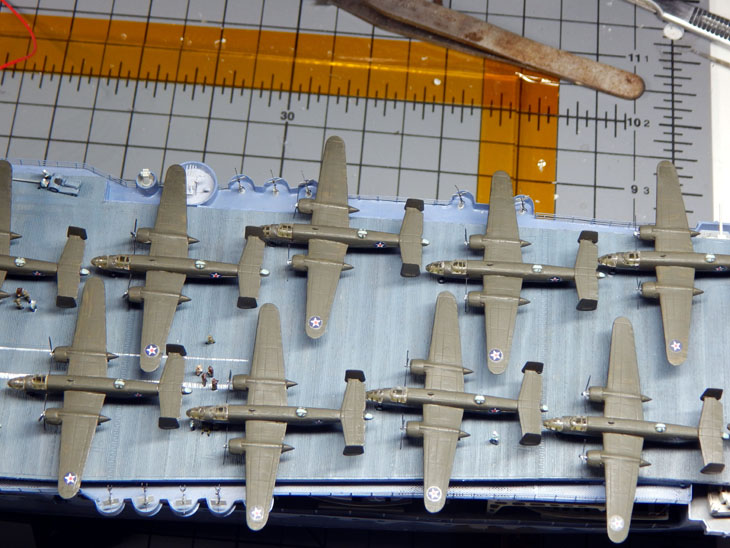
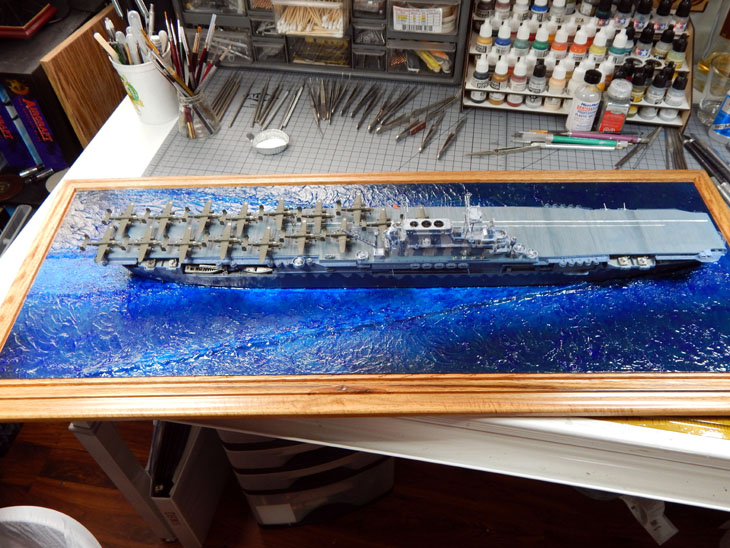
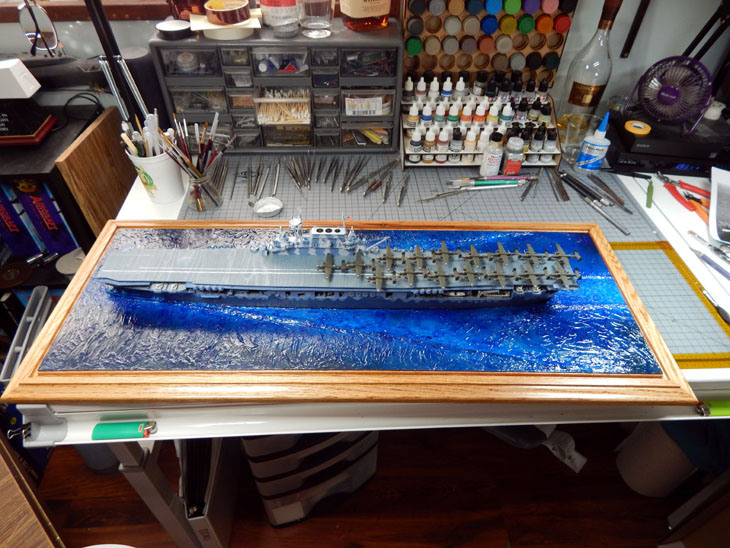
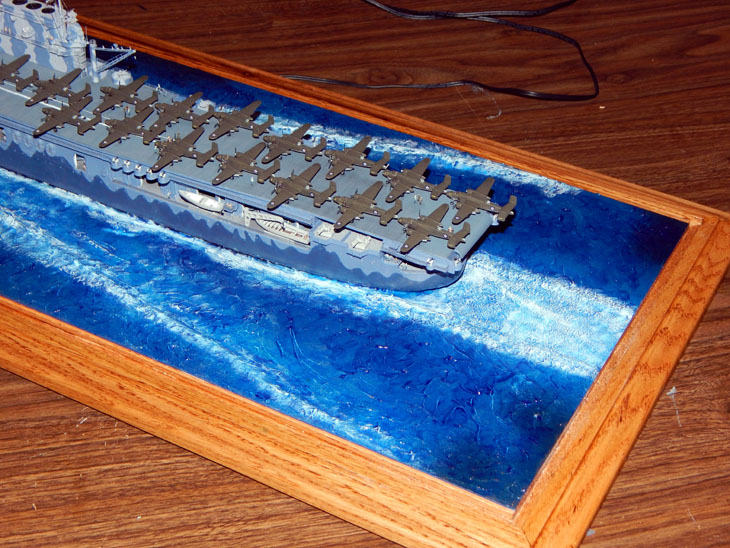
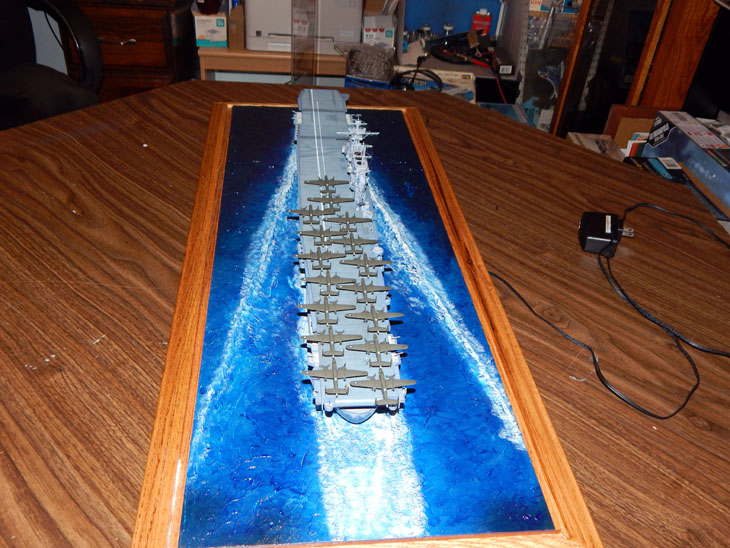
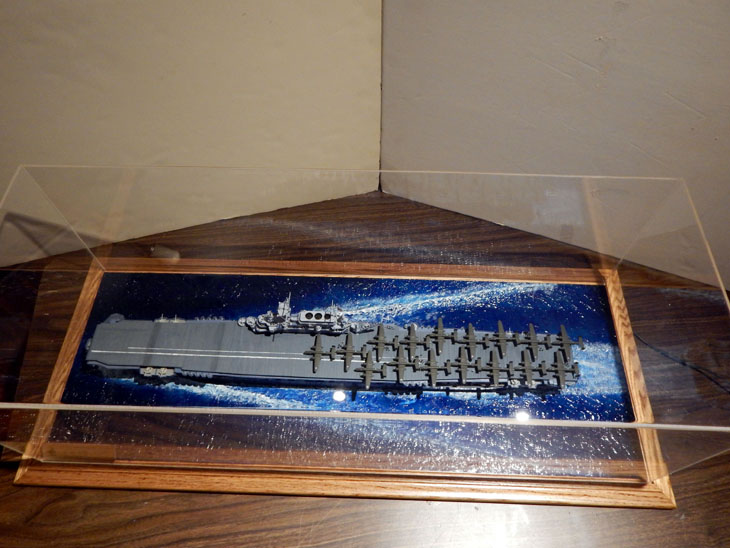
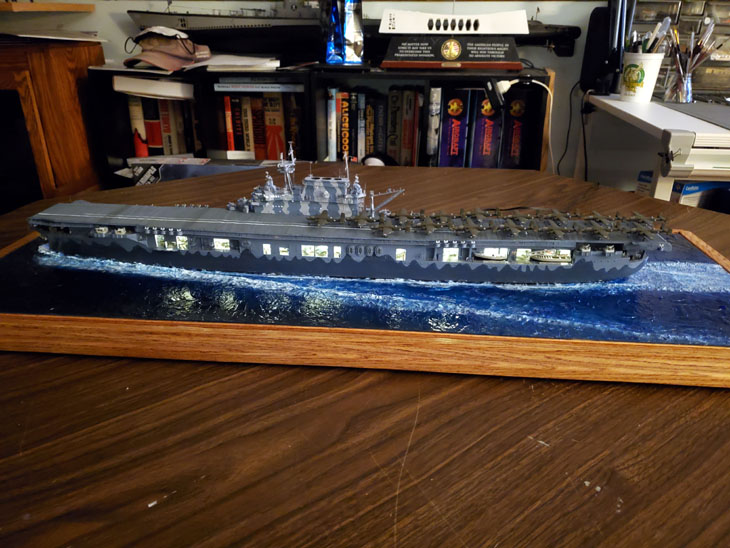
Section 1 – The crew and aircraft loaded aboard. All of the figures used on the flight deck and island are the 3-D printed figures. I separated them into four groups. The four groups are Enlisted Navy, Navy Officers, USAAF enlisted, and the brave USAAF pilots of the Doolittle Raiders. I also added a Moto-tug with a tow bar. The figures come in various poses. It even gave me to sailors using binoculars as lookouts. These were placed on the front of the island at the level just above the bridge. There are two crew members removing the tow bar for storage as well as the USAAF pilots talking on the flight deck. The aircraft were then staged on the deck in their launch order. Doolittle’s aircraft leads the group. I staged them as they were when they were leaving San Francisco Bay. I picked this particular point in time as it was the last time the hangar deck doors would have been open. Once the ship was out to sea the hangar doors would be closed.

dscn6529.jpg


dscn6530.jpg


dscn6534.jpg


dscn6540.jpg


dscn6545.jpg


dscn6550.jpg


dscn6554.jpg
 
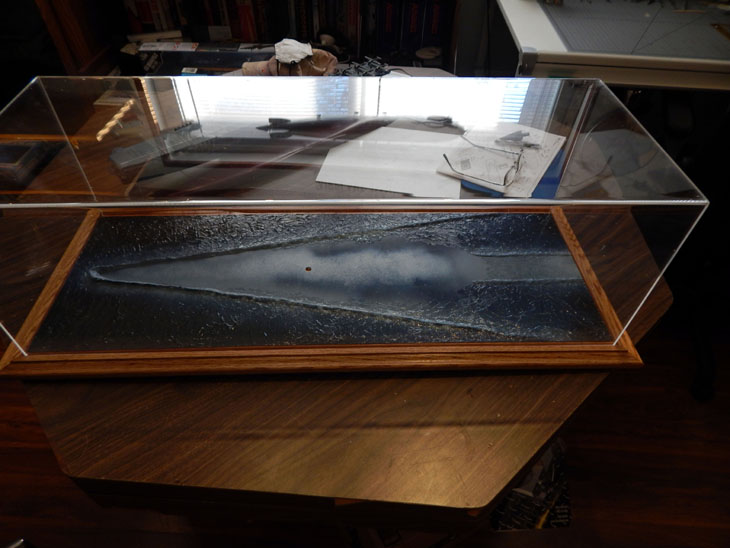
Section 2 – Creating the base. I used two sheets of 1/8” sheet styrene. The sheets are 24” long and 12” wide. After gluing the sheets end to end I trimmed it back to 33” long. Side note: I gave these measurements to Ron and Grandpa’s Cabinets so that the case would hold the base inside the acrylic cove. As usual, Ron’s artistry in making quality display cases was right on. The base fit perfectly inside the cover.

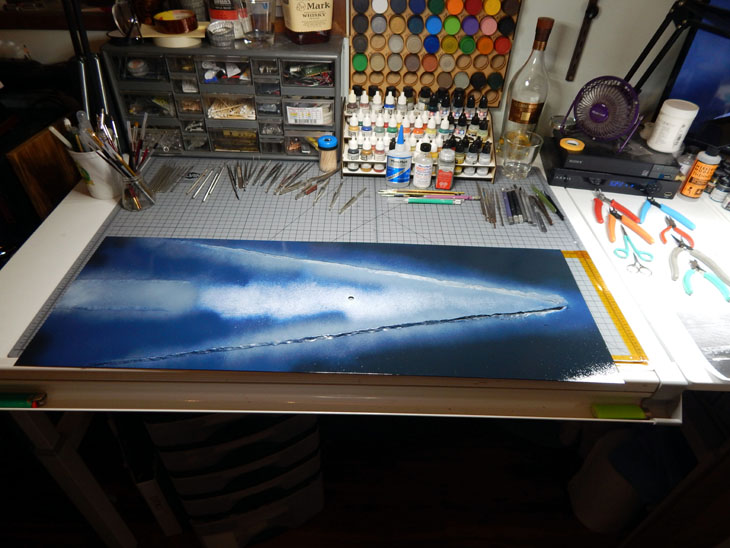
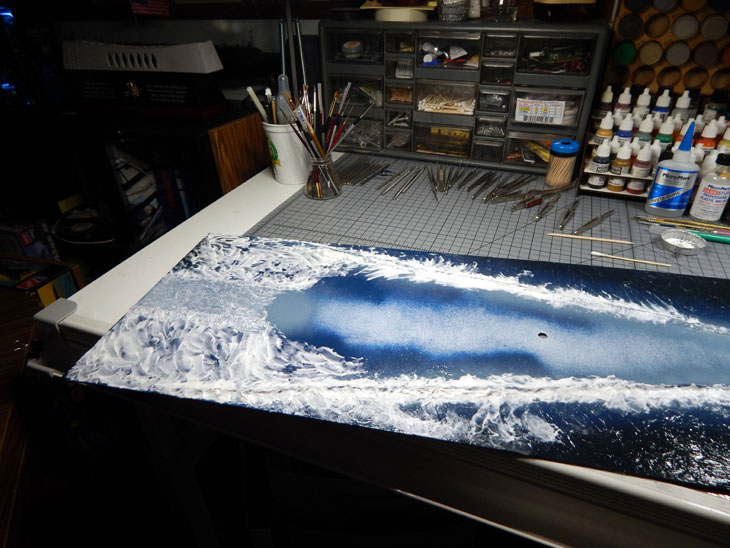
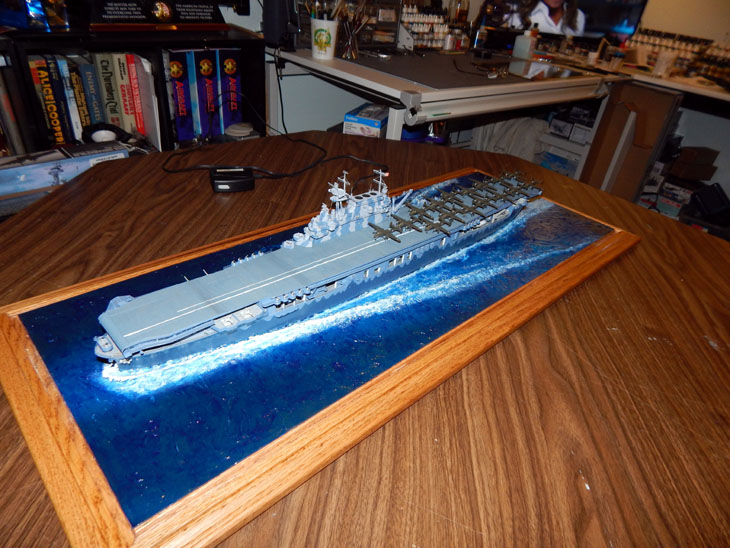
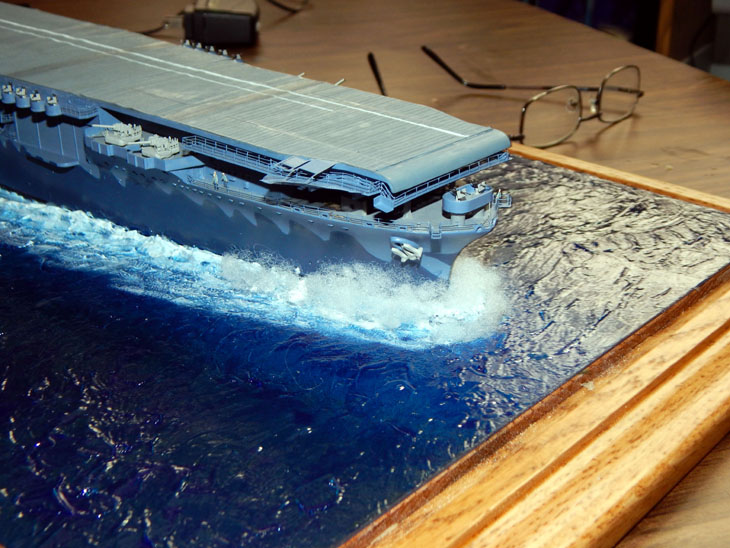
Moving forward, I mixed up some milliput putty to create the bow wake as well as the trailing wake. I then sprayed the base colors. I use dark sea blue on the open areas, regular blue closer to the ship, and intermediate blue for the wakes. I began laying the first coat of acrylic gel. I used a round brush typically used for applying eye makeup. When applying the acrylic gel it is best to make the strokes horizontal to the ship. This gives the waves an even direction. For the trailing wake I dabbed the acrylic gel vertically. The ship model was the glued to the base. The second coat of acrylic gel was then laid down. This coat was to build up the bow wake as well as the splashing along the hull. I also did some vertical dabbing around the bow to give the surface the splashed look from the bow. The third and final coat of acrylic gel was mostly the aft wake to build up the sides even with the hull. After the acrylic gel was fully cured the surface was then painted using Tamiya X-23 clear blue gloss. This gives the “water” a Pacific blue tone as well as blending the three shades of blue. Once dry, I then used Tamiya XF-2 flat white to paint the top of the wakes. The white was then dry brushed on surrounding wave detail near the wake. White was finally dry brushed vertically on the bow spray and the aft wake. Then using the same large brush I used to apply the acrylic gel I dipped it in thinner and lightly brushed all the white areas. This blended the white and clear blue giving various shades of blue and white for the visual effect of the wakes. Finally, once everything was dry I used Pledge Floor coating over all the water to give it a super high gloss (wet look). I then applied a second coat along the bow and used fiber fill (like what is used in stuffed animals or throw pillows) to create the bow splashing the water. I then lightly sprayed some Pledge onto the fibers to add water droplets. This completed the base! Later this coming week I will make a Tips and Tricks page on creating the sea base for anyone who would like to use this method.

dscn6563.jpg


dscn6568.jpg


dscn6575.jpg


dscn6579.jpg


dscn6592.jpg


dscn6593.jpg


dscn6596.jpg


dscn6597.jpg


dscn6599.jpg


dscn6618.jpg
 
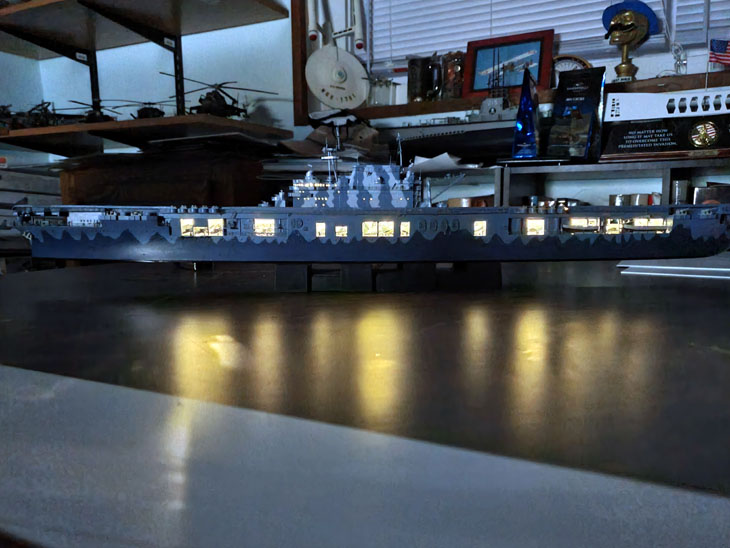
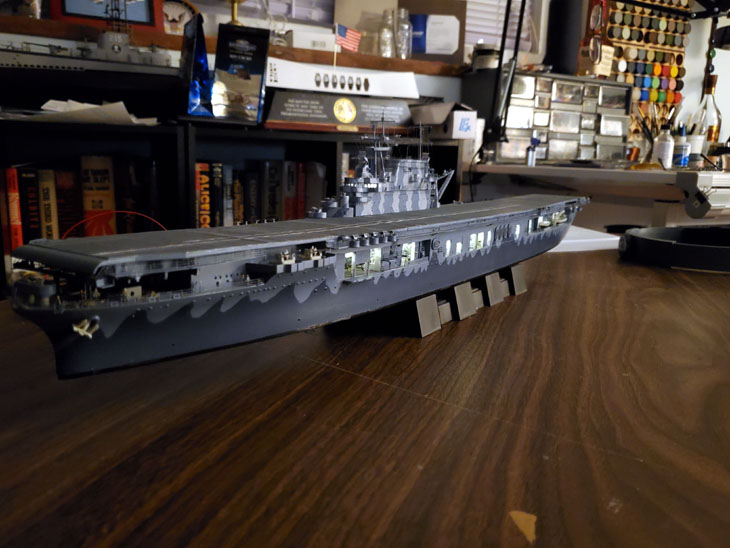
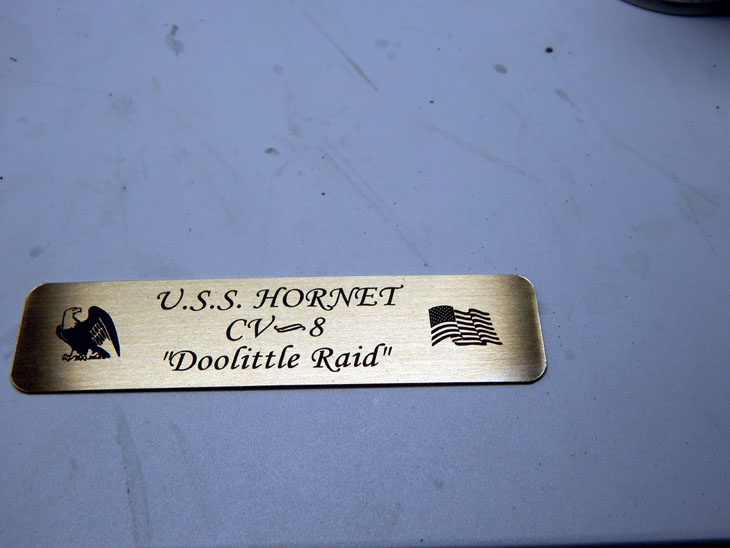
And now the final section – I added a jack under the base so I can plug in the AC/DC adapter to supply power to the LED’s. I then took some sheet styrene and made a mount to hold the brass nameplate. The clear cover was then placed over the ship completing the ship. This project took approximately 30 weeks and 660 hours to build. The kit itself while not quite accurate in the bow section went together very well. The extensive amount of photo etch really brings out the details. Adding the crew figures was a first for me. I prefer the 3-D printed figure more than the Tamiya crew figures. The 3-D figures look way more realistic and have many different poses. The lookouts, The figures that are walking up stairs, and some figures kneeling are just some of the poses that worked out well. The Doolittle Raiders Aircraft decals that I made worked out very well. Once I get the page set up I will be offering these decals in both 1/350 and 1/200 scale. I have also scheduled a photographer to take some professional photos next week. For now below are the final photos I took. I also included a list of all the accessories used on this project and a short video of the completed ship which can be seen in my build log.

I want to thank all my fans and viewers for following along on this long highly detail build. I hope you have enjoyed watching this build. Take Care and happy modeling!

You can see the numerous photos and details from start to finish of the huge project in my build log at https://davidsscalemodels.com/build-log/1-350-uss-hornet-cv-8-doolittle-raid/


dscn6607.jpg


dscn6611.jpg


dscn6613.jpg


dscn6616.jpg


dscn6624.jpg


dscn6625.jpg


dscn6631.jpg


dscn6633.jpg


dscn6644.jpg


dscn6647.jpg


dscn6648.jpg


f0005.jpg


f0007.jpg


f0009.jpg


f0014.jpg
 
And now the final section – I added a jack under the base so I can plug in the AC/DC adapter to supply power to the LED’s. I then took some sheet styrene and made a mount to hold the brass nameplate. The clear cover was then placed over the ship completing the ship. This project took approximately 30 weeks and 660 hours to build. The kit itself while not quite accurate in the bow section went together very well. The extensive amount of photo etch really brings out the details. Adding the crew figures was a first for me. I prefer the 3-D printed figure more than the Tamiya crew figures. The 3-D figures look way more realistic and have many different poses. The lookouts, The figures that are walking up stairs, and some figures kneeling are just some of the poses that worked out well. The Doolittle Raiders Aircraft decals that I made worked out very well. Once I get the page set up I will be offering these decals in both 1/350 and 1/200 scale. I have also scheduled a photographer to take some professional photos next week. For now below are the final photos I took. I also included a list of all the accessories used on this project and a short video of the completed ship which can be seen in my build log.

I want to thank all my fans and viewers for following along on this long highly detail build. I hope you have enjoyed watching this build. Take Care and happy modeling!

You can see the numerous photos and details from start to finish of the huge project in my build log at https://davidsscalemodels.com/build-log/1-350-uss-hornet-cv-8-doolittle-raid/


dscn6607.jpg


dscn6611.jpg


dscn6613.jpg


dscn6616.jpg


dscn6624.jpg


dscn6625.jpg


dscn6631.jpg


dscn6633.jpg


dscn6644.jpg


dscn6647.jpg


dscn6648.jpg


f0005.jpg


f0007.jpg


f0009.jpg


f0014.jpg
Beautifully finished off with the crew and presentation! Rich (PT-2)
 
Congratulations also from my side - very good model - and I like your "sea" - this is looking very good
and you installed all 16 Mitchell bomber on the deck - historical interesting model
 
Beautifully finished off with the crew and presentation! Rich (PT-2)
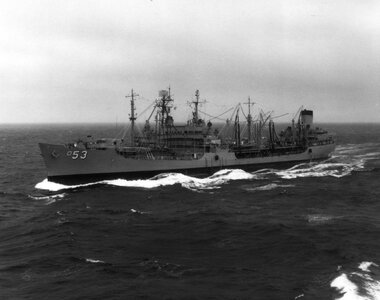
As a side note observation and not degrading your presentation of the bow wave for the carrier; as a former Naval Aviation Photo Interpreter using photos of ships, after we determined their length we could also assess their forward speed by the bow waves' pattern that was set up by crests and troughs of the water along their side. These are set up behind the initial bow wave as the speed creates a wave height and trough which is then again repeated further aft along the hull. Large ships such as carriers would produce several sets of these, extending outwards at a similar angle as the initial bow wave. (three or more are possible dependent upon speed)
I have forgotten the equation to determine the speed but we could measure the distance between them along the hull to find the forward speed. This is true as long as the hull is not "planing" as in small craft at high speed with the bow and forward hull out of the water and the initial wave produced by the underside of the hull. You have probably seen this in small motor boats at high speed in a plane.
You have completed an impressive carrier ready to launch the aircraft when orders are given. Rich (PT-2)
I copied the wake with respect to the ship from an actual photo of the USS Hornet at sea on the https://www.history.navy.mil website. The bow splash is a little larger than the actual photo but the bow wave and the wash behind the ship match the photo reference.
 
I copied the wake with respect to the ship from an actual photo of the USS Hornet at sea on the https://www.history.navy.mil website. The bow splash is a little larger than the actual photo but the bow wave and the wash behind the ship match the photo reference.
My guess would then be that the carrier was a a moderate speed but that is an assumption only. Good use of resources on your part. Here are a couple of other photos that show the crests and troughs created along the hull underway, not as large as your photos that I did not find but illustrating my offering posted above:
Hull waves example USS Caliente.jpg
CVE Fanshaw Bar.jpg
In photo analysis we were looking at the smaller details as well as large. Rich
 
On 1 April 1942 sixteen modified B-25B bombers were loaded aboard the USS Hornet CV-8. The next day the USS Hornet along with the ships of Task Force 18 sailed towards the Hawaiian Islands. They met up with the USS Enterprise and Task Force 16 then headed across the Pacific Ocean. On the morning of 18 April 1942 approximately 650 nautical miles from the Island of Japan, sixteen B-25B’s Led by Lieutenant Colonel James Doolittle launched off the Hornet’s deck to perform the first air operation to strike the Japanese mainland in retaliation for the attack on Pearl Harbor.

For this next build I am building Trumpeter’s 1/350 USS Hornet as she was during the Doolittle Raid. This is going to be a super-detailed project. It is being built to be displayed at a museum that is creating a display of the raid for the 80th anniversary. This project is estimated to take around 4 – 5 months to complete. There are many aftermarket accessories that will be utilized in this build. So far I have four different sets of photo etch parts just for the ship, a wooden deck, all the B-25B’s as well as all the aircraft that were stored in the hangar bay that were later moved to the flight deck after the bombers departed in case the Task Force was spotted and needed to defend itself. All of the aircraft have multiple photo etch sets for the cockpits and exterior details. I will also be illuminating it as well. I have many accessories still on order like 3-D printed Moto-Tugs and crew members. At the end of the project I will list all of the accessories I used. I also purchased two reference books. One on the USS Hornet itself and the other covers the Doolittle raid. I also located a shipbuilding drawing of the Yorktown class carriers that covers all the decks from keel to the top of the island. I scaled the hangar deck sheet to 1/350 scale and printed it out so that I can accurately place the interior walls and other details.

Starting with the hangar I began using the White Ensign Hangar bay photo etch set (#3541). The instructions give you sizes and plans to scratch build the hangar bay walls. I installed the hangar deck then painted it deck grey and gave it a basic weathering. I will be doing more weathering/staining once I figure out the layout of the aircraft. Using Evergreen Models 1.0mm styrene sheets I cut out the parts for the interior walls per the hangar bay detail set instructions. I have a few sheets of extra doors and rails from previous ship sets so after building the walls I added photo etch doors, stairs and rails to match the reference photos. The kit walls have numerous ejector pin marks. Instead of filling and sanding all of them I opted to use sheets of 0.5mm sheets to cover them. Also, since I will be illuminating the hangar bay I cut open many of the hangar bay side doors. With the starboard side interior walls assembled per the photo etch set instructions I added all the fine details as they are shown in the photos from the reference book.

After adding details to the forward elevator bay I did some detail work on the bow. One of the obvious things missing from the model details is the bow mooring guides. I used some styrene tubing to make these. I then reshaped the anchor chain holes. On the kit these were just straight thru holes. I used a file to make them angled and flared. I removed the molded chain and will be replacing it with a real anchor chain. There are two supports for the front of the flight deck. I filled the mounting holes for the kit plastic ones and installed the correctly sized photo etch parts from the White Ensign Detail set (#3525). Working on getting the starboard side interior detailed and installed this coming week.


See more photos and details in my build log at https://davidsscalemodels.com/build-log/1-350-uss-hornet-cv-8-doolittle-raid/
Hallo @Wolfman63
we wish you all the BEST and a HAPPY BIRTHDAY
Birthday-Cake
 
We will be locating to another state further south in the coming months. I have the 1:350 Langley to build then as a new shop work space.
 
Section 2 – Creating the base. I used two sheets of 1/8” sheet styrene. The sheets are 24” long and 12” wide. After gluing the sheets end to end I trimmed it back to 33” long. Side note: I gave these measurements to Ron and Grandpa’s Cabinets so that the case would hold the base inside the acrylic cove. As usual, Ron’s artistry in making quality display cases was right on. The base fit perfectly inside the cover.

Moving forward, I mixed up some milliput putty to create the bow wake as well as the trailing wake. I then sprayed the base colors. I use dark sea blue on the open areas, regular blue closer to the ship, and intermediate blue for the wakes. I began laying the first coat of acrylic gel. I used a round brush typically used for applying eye makeup. When applying the acrylic gel it is best to make the strokes horizontal to the ship. This gives the waves an even direction. For the trailing wake I dabbed the acrylic gel vertically. The ship model was the glued to the base. The second coat of acrylic gel was then laid down. This coat was to build up the bow wake as well as the splashing along the hull. I also did some vertical dabbing around the bow to give the surface the splashed look from the bow. The third and final coat of acrylic gel was mostly the aft wake to build up the sides even with the hull. After the acrylic gel was fully cured the surface was then painted using Tamiya X-23 clear blue gloss. This gives the “water” a Pacific blue tone as well as blending the three shades of blue. Once dry, I then used Tamiya XF-2 flat white to paint the top of the wakes. The white was then dry brushed on surrounding wave detail near the wake. White was finally dry brushed vertically on the bow spray and the aft wake. Then using the same large brush I used to apply the acrylic gel I dipped it in thinner and lightly brushed all the white areas. This blended the white and clear blue giving various shades of blue and white for the visual effect of the wakes. Finally, once everything was dry I used Pledge Floor coating over all the water to give it a super high gloss (wet look). I then applied a second coat along the bow and used fiber fill (like what is used in stuffed animals or throw pillows) to create the bow splashing the water. I then lightly sprayed some Pledge onto the fibers to add water droplets. This completed the base! Later this coming week I will make a Tips and Tricks page on creating the sea base for anyone who would like to use this method.

dscn6563.jpg


dscn6568.jpg


dscn6575.jpg


dscn6579.jpg


dscn6592.jpg


dscn6593.jpg


dscn6596.jpg


dscn6597.jpg


dscn6599.jpg


dscn6618.jpg
Truly a beautiful model. Amazing job right down to the diorama lights plane detail and figures of crew.
 
Don't know if I'd have the courage to do something like this. Just being on the open seas is one scary thought. Let alone in an aircraft hot made for aircraft carrier decks. And on top of that in a time of war. It took all I had just to be in the artillery.
 
Back
Top