TuboCAD Drawing: Any Angle Machinist Vice

Donnie

Administrator
Staff member
Administrator
Forum Moderator
Joined
Aug 21, 2011
Messages
5,109
Points
738

Location
Madison, MS
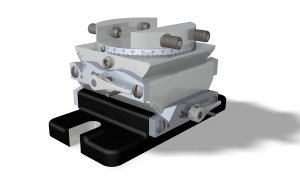
With the assistance of a tutorial, here is a Vice. The drawing was in about 14 stages of about 1 hour or more each. I guess about 18 hours total to do this. Materials selection and adjustments took several hours to do. What I would like to produce is an exploded view. This vice has 18 Layers. Each layer is actually a separate part. So, this drawing is actually a real working vise and the angles could be adjusted and re rendered !!! The protractor band is a drawing in its own right using a special bending tool. All fasteners are taken from McMaster-Carr site and manipulated. Those are real screws (but virtual).
Thanks for watching.
Donnie
Any-Angle-Tool-Vise.jpg
 
Stunning work Donnie! You're bringing the same attention to detail you use for shipbuilding to these CAD drawings.
 
Thanks Jim, Bob and Mike.

Bob, I am using TurboCAD Pro Platinum 2017 version 24 with Ligthworks Plugin. It also used Red SDK. The program came with 2D and 3D training materials. This is what I use at my office. I also use it at home. The cost is very reasonable (compared to AutoDesk and SolidW) at about $1400
I personally believe it is well worth it. I have been trying to get others here interested in the program so that drawings and things can be shared. Mike41 basically has all his investment into AutoDesk so it is natural that he wants to stick with that. Solid Works is at a corporate cost level up into perhaps $10,000 and more.
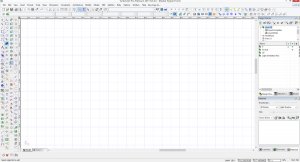
Here is a screen shot of the workspace I use. You need a pretty stout computer if you plan to do some serious rendering. That vise takes about 10 seconds to render the thing in full quality rendering and most of the time is rendering the scene lights. As you can see from the Caboose I drew, that was done in TurboCad deluxe (which is only $129) that is not a typo - $129 and I imported a scene into drawing for more realism. TurboCad has really come a long way to become a pretty good professional alternative. Right now, I am following a PDF tutorial on how to draw a Radial Engine. The tutorial cost about $44, but to me it is worth it as I consider this a hobby as well. If you decide to get (at least the deluxe version, let me know if you do and we can chat back and forth on it). Just take into consideration that the Pro Plat has a tremendous amount of 3D tools that are not on the Deluxe version so it is sort of limited in some of the things you can do.
The workspace is configurable only limited by your imagination and how much time you want to spend setting up your workspace. I have an aquaintence that was nice enough to send his config file to me.
What I like about doing 3D with this program is that you do most of your drawing in 2D and then you extrude your parts. In other words, take a Cannon barrel. I draw the "profile" 2D (actually only one half of it). Then I use what is called a "revolve" tool and in a matter of seconds, I have a full Cannon in 3D.


TCW-ScreenShot.jpg

 
I definitely can't afford that Pro version and without 3D, it's not worth making the switch to the deluxe version. I'm using a Student version my stepson got for me when he was working on his Masters degree. I also use the Autodesk Fusion which is practically the same thing as Autodesk Inventor, great 3D but steep learning curve. I can see why you like the Pro version. That's one heck of a toolset to work from!

Thanks,

Bob
 
due to family issues these days my time is very limited when i comes to model building. sometimes late at night i can sit down and play around with 3D modeling.

i though why not try and build an animinated model of the Cairo boilers, engines and paddle wheel.
something like these.


so i started with the main engine this was used to pump water into the boilers, heat the ship in winter and turn the capstan.
This type of modeling is more along the lines of model engineering because i can print out the parts and actually build a working model.

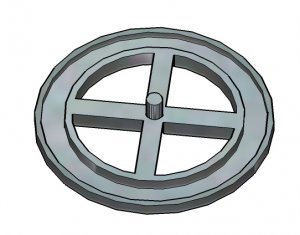
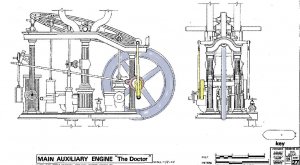
step one is to use the drawing i colored in the fly wheel and modeled that part first.


photo is a screen shot working in 2D i drew the wheel

then i went to workspace and 3D this is where i created the 3D partfly wheel7.jpg


fly wheel.JPG

doc drawing.jpg
 
Last edited:
i knew how to arrange photos on the old forum but dont know how to do it on the new forum version

starting the modeling i realized the drawing lacks a lot of finer detail and a lot of questions on walking beam steam engines. so i sent out a bunch of Emails to historical societies, steam engine museums, Cairo museum, forums, clubs and anyone i can think of to gather information. Well to date not one single reply.

the original engine was "lost" so i asked the Cairo museum how, why when and where it was lost. did it get lost durning the salvage and is it still on the bottom of the river OR was it salvaged and gone missing? again NO ANSWER
it looks like i can spend more time researching than actually building the model and it would be a big help if these sources would actually answer you.
 
Last edited:
let me see humm seems to be some sort of inline code but cant arrange the order of images

still clueless how to insert images between text lines

i can draw and create a working model steam engine easier than trying to post and edit

P5300017.JPG

can i type here
icture 128.jpg

type below image


icture 125.jpg

ok getting better at it i can do things and looks like the image goes where the curser is

when you ask How is this structure built? how is it held together? how does it work? details of every timber every nut and bolt. Creating a pieces of historical engineering is when you get the attention of museums, and the academics in model building, engineering, 3D modeling, animation
Fabrication of items right down to the exact number of teeth in a gear. Now your playing with the big boys
 
Last edited:
due to family issues these days my time is very limited when i comes to model building. sometimes late at night i can sit down and play around with 3D modeling.

i though why not try and build an animinated model of the Cairo boilers, engines and paddle wheel.
something like these.


so i started with the main engine this was used to pump water into the boilers, heat the ship in winter and turn the capstan.
This type of modeling is more along the lines of model engineering because i can print out the parts and actually build a working model.

step one is to use the drawing i colored in the fly wheel and modeled that part first.


photo is a screen shot working in 2D i drew the wheel

then i went to workspace and 3D this is where i created the 3D partView attachment 36688


View attachment 36687

View attachment 36686


Pretty impressive stuff Dave. Great job, wish I had the time to do that.

Bob
 
i know how the time slip slides away when you gotta do this and you gotta do that there is little time left for the things you want to do.

devils in the details
 
Bob,

Look at this Caboose I drew as I was using the simple $129 version of TC Deluxe. The big picture is that the Pro verison will allow you to do 3D chamfers and 3D fillets. Also other things like lofting from one complex 2D to another complex 2D object. This lofting is NOT ship drawing lofting. But rather lets say if you want to transition a rectangle into a circle. The program will automatically do this all you have to do is punch in the numbers and click. It is obvious with the price jump, there are many other tools available. But, for just for fun, the deluxe version will do fine.

Caboose:
https://www.shipsofscale.com/sosforums/index.php?threads/turbocad-drawing-train-caboose.1738/
 
i am using turbocad 18.2 deluxe and after watching videos on the pro versions i can see the limitations with the simplier versions.

so maybe working as a team i can draw parts and pass on the files for refinement in the pro version.

we see group builds all the time on different forums but you never see a group build to create a 3D model

everyone does not have to work in the same program because all these programs import and export usable files like SKL DWG DXF

i think the future of this hobby is evolving from hobby kits and actually building out of little sticks to 3D modeling and 3D printing my grandson in college for civil engineering can run circles around us with model engineering, 3D design, 3D printing, CNC machining and laser cutting and he is 19 years old.
The youth do not have wood working shops or the tools that are needed and believe me they are not interested in spending 100s of hours building a hobby kit, when i asked Jake about building a wooden model ship his answer was " na thats something old people sit around and do" not when the youth can design and build detailed computer models and print them out as a working model. What will we leave behind to inspire the young generation? some hobby kit in rummage sales and garage sales OR technology to recreate historical structures?
 
Last edited:
Bob,

Look at this Caboose I drew as I was using the simple $129 version of TC Deluxe. The big picture is that the Pro verison will allow you to do 3D chamfers and 3D fillets. Also other things like lofting from one complex 2D to another complex 2D object. This lofting is NOT ship drawing lofting. But rather lets say if you want to transition a rectangle into a circle. The program will automatically do this all you have to do is punch in the numbers and click. It is obvious with the price jump, there are many other tools available. But, for just for fun, the deluxe version will do fine.

Caboose:
https://www.shipsofscale.com/sosforums/index.php?threads/turbocad-drawing-train-caboose.1738/

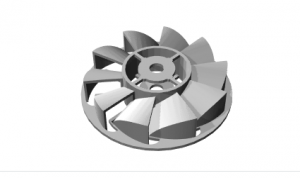
That's a pretty nice looking model Donnie. AutoCAD can do all the things you mentioned such as lofting, chamfers and fillets. Here's a water turbine I drew for that water powered sawmill project I've been working on for some time now.

Screen Shot 2018-03-12 at 5.15.13 PM.png
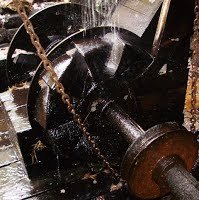
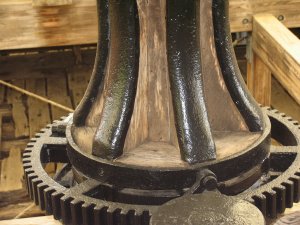
Here's a photo of the actual turbine
PA200026.jpeg

I had to use lofting to get the curved surface portion with the rectangular opening. The water flows into the rectangular opening and out the bottom causing the wheel to rotate. There's a lot of parts to the entire thing which I've drawn but I've never ordered a copy to actually build the thing from all of the parts.

Bob
 
Back
Top