-

Win a Free Custom Engraved Brass Coin!!!
As a way to introduce our brass coins to the community, we will raffle off a free coin during the month of August. Follow link ABOVE for instructions for entering.
-

PRE-ORDER SHIPS IN SCALE TODAY!
The beloved Ships in Scale Magazine is back and charting a new course for 2026!
Discover new skills, new techniques, and new inspirations in every issue.
NOTE THAT OUR FIRST ISSUE WILL BE JAN/FEB 2026
You are using an out of date browser. It may not display this or other websites correctly.
You should upgrade or use an alternative browser.
You should upgrade or use an alternative browser.
Now we know, how you made the surface treatment of the deck planking - some use oil or varnish - you use beerWell slowly working away on lots of little details when I got stuck in a possible covid exposure putting me into isolation. Went to buy a dremel at the local hardware and two of the employees on that day tested positive.
So now I have to stay the blazes home and hope for the best.
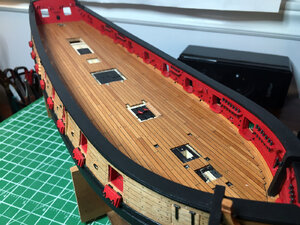
Few picks of what I have been working on.
View attachment 155191View attachment 155192View attachment 155193View attachment 155194View attachment 155195View attachment 155196
Cheers all, stay safe
Your deck is looking very good - the complete appearance is very find
Keep Care and I cross all the fingers!!!
Canoe21
Lawrence
Hello Robin, Great work as always, all of that detail you are adding sure is making your ship look great. For supplies these days I have been using Amazon.ca. There prices are not all that bad and they do deliver via Canada Post, have a look.
Regards Lawrence
Regards Lawrence
Well I think I cut my teeth doing the cheeks on the stem and hull. I just cut out using pear and carved the top head rail and it didn't go to badly. Think I will do up all the rest of the head rail parts and catheads before assembling them. Not totally sure if the top head rail actually gets notched into the mainrail or if the mainrail gets notched, or if it just rests against the mainrail and is held there by the cathead?
If Anyone wants to add any knowledge on that one I am all ears
 Oh the Admiral and I are out of isolation today all good! Just back from a walkabout. Phew!!
First two pics the finished cheeks, third pic the top headrail.
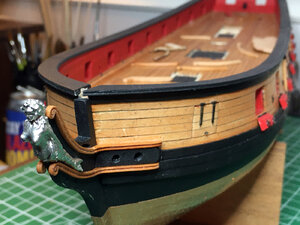
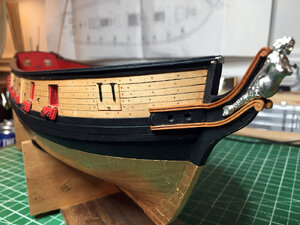
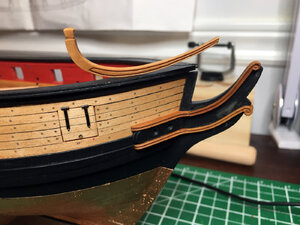
If Anyone wants to add any knowledge on that one I am all ears
First two pics the finished cheeks, third pic the top headrail.


Good to hear you are safe out of isolation.
I would expect the the main rail gets notched, but not sure.
I would expect the the main rail gets notched, but not sure.
Yes I would have thought so to. Does not appear to be in instructions or plan. I will have to work on it. As I am building them out of pear I can do a ruff draft using the laser cut kit basswood. Thanks for the help MaartenI would expect the the main rail gets notched, but not sure.
Kurt Konrath
Kurt Konrath
Sounds like you have a solid plan for the tests.
Good to hear your back and safe again.
Good to hear your back and safe again.
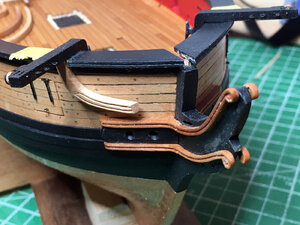
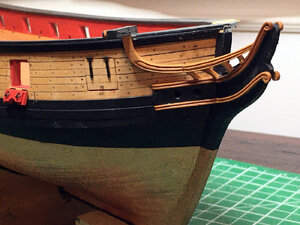
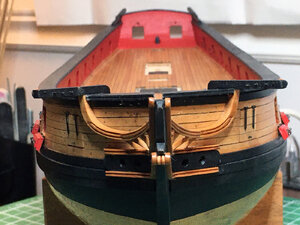
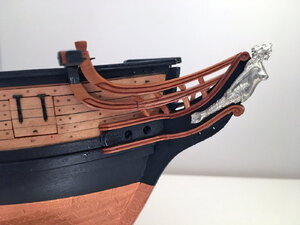
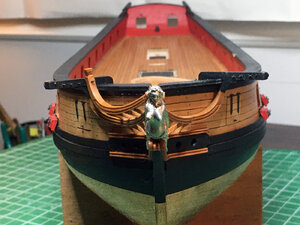
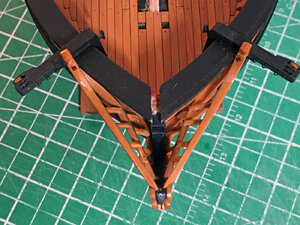
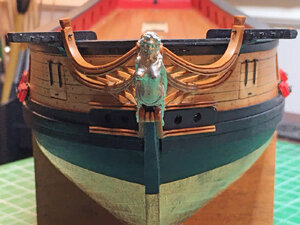
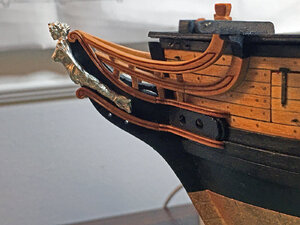
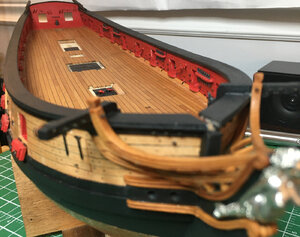
Well good day eh! It is time for an update on my headrails. I have installed all the headrails with timbers as well as the catheads with little working sheaves. The timbers turned into one very tedious task which took some amount of trial and error to get the final results. I am not totally happy with the timbers but they were certainly a learning experience and one I will take forward to improve on with future builds.
I have had a busy month at work so doing the timbers on the starboard side took a while. Adding the timbers to the port side went quite quickly because you then know what basic ruff form to shoot for in cutting them out. I used 1/16 X 1/8 pear to cut out the tiny ruff form, this would be test fitted by sliding it into place for the particular timber spot. If all the little angles of which there are many worked I would spot glue it on and use my mini chisels, mini sanding sticks and files to final shape it properly in position. They look a little ruff blown up but with the naked eye they look pretty good. My spacing could use some improvement to but they are tricky little pieces to work with at best and I learned a lot doing them.
Now I have some homework to do because I don't totally know all the purposes of the head rail system? I presume it is to help take the stresses caused by the fore sail and jib sails. But I really need to do some more homework.
I placed my headrails back a bit more towards the port opening than called for in the instructions. This also meant extending the middle rail length along the hull leading to the joint for the extension running to the checks on the stem.
Couple of pics of final results there will still be a straight top rail to go on with stanchions. Once that is done as to how you get in there to rig the eight little eye bolts hidden in back is beyond me, but time will tell lol. Cheers all, hope you are all staying well and thanks for all the comments, like's and suggestions!
@Maarten yes the easy solution was to notch the middle headrail in thanks for the advice
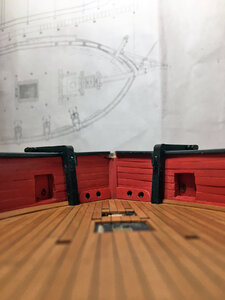


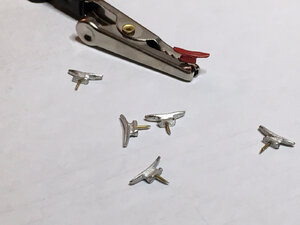
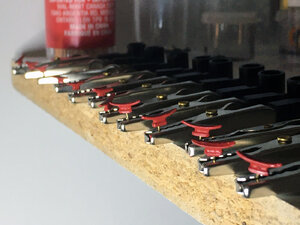
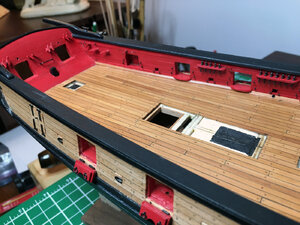
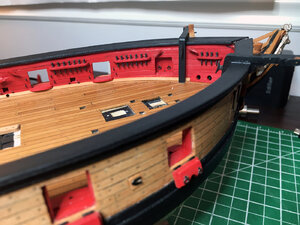
When they created a bubble for travel between the Atlantic Provinces the admiral and I escaped to Newfounland for a couple weeks of R&R. Back now and managed to get going on some of the inboard bulwark details. Added the swivel brackets for the carronades. Made up and pined in 6 pin rails on the port side. Added a bunch of cleats and lots of eyebolts. Here are a few pics. Cheers all 


- Joined
- Aug 16, 2019
- Messages
- 870
- Points
- 343

Just love your build Robin
I will start to work again on mine shortly as the Louis is now finish
I will start to work again on mine shortly as the Louis is now finish
Question: If the Syren figurehead was added by the British after she was captured, what did the stem look like as built by the Americans?
I have the feeling, that all models of the USS Syren / Siren are showing the mermaid figurehead.
on wikipedia is written:
British service history
After the capture by Royal Navy she had a figurehead of mermaid installed.

 en.wikipedia.org
I principle, I can not imagine, that the British invested the money and work, to change the figurehead although the ship was only used a a lazaret
on wikipedia is written:
British service history
After the capture by Royal Navy she had a figurehead of mermaid installed.

USS Syren (1803) - Wikipedia
I principle, I can not imagine, that the British invested the money and work, to change the figurehead although the ship was only used a a lazaret
American brig 'Syren' (1803)
American brig 'Syren' (1803). Dates of service, name changes, previous and next incarnations, dimensions, armament, commanders, officers and crewmen, actions, battles, sources
threedecks.org
British sloop 'Siren' (1814)
British sloop 'Siren' (1814). Dates of service, name changes, previous and next incarnations, dimensions, armament, commanders, officers and crewmen, actions, battles, sources
threedecks.org
Question: If the Syren figurehead was added by the British after she was captured, what did the stem look like as built by the Americans?
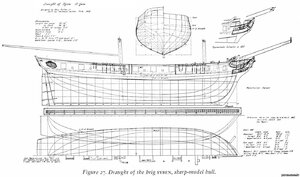
I tend to agree with Uwe that the British would not have added a mermaid at cost for a ship that was used as a lazaret. But here is a draft that shows something other than a mermaid. I do not know if this was a draft Chuck did for modeling purposes or not.I have the feeling, that all models of the USS Syren / Siren are showing the mermaid figurehead.
I Should be getting back to work on her soon tho. I've been having a bit of a summer holiday
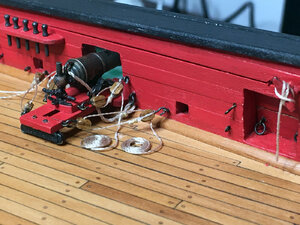
Here is a prototype carronade I did up with the kit material. I am just waiting on some silk thread now for serving and I will start back in. Cheers all thanks for the comments.
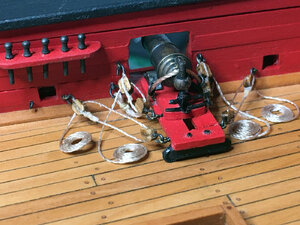
You're right - that shiny rope looks totally out of place. Haven't gotten that far with my Syren but will no doubt replace the kit supplied rigging ropes with something better.
To add to Jim's comments, that thread doesn't twist tight either, besides it shiny. my few cents.You're right - that shiny rope looks totally out of place. Haven't gotten that far with my Syren but will no doubt replace the kit supplied rigging ropes with something better.
You're right - that shiny rope looks totally out of place. Haven't gotten that far with my Syren but will no doubt replace the kit supplied rigging ropes with something better.
Thanks for the comments, it is certainly an added expense having to purchase but for sure will be well worth it (depending on my ability) I can see a rope walk in my future too.To add to Jim's comments, that thread doesn't twist tight either, besides it shiny. my few cents.
The kit rope is like working with a spring and I made up a special jig in order to make the coils, that took a lot of trial, error and some colorful language just to get what you see there.
I completely agree and understand, why you want to change these ropes - they are also not looking very realistic - so change the type of ropes !I tend to agree with Uwe that the British would not have added a mermaid at cost for a ship that was used as a lazaret. But here is a draft that shows something other than a mermaid. I do not know if this was a draft Chuck did for modeling purposes or not.
View attachment 178091
I Should be getting back to work on her soon tho. I've been having a bit of a summer holidayand purchased all new rigging ropes when after doing up one of the carronades with the kit material I just wasn't satisfied with the quality or appearance of the rope. Plus it was a b----h to work with.
Here is a prototype carronade I did up with the kit material. I am just waiting on some silk thread now for serving and I will start back in. Cheers all thanks for the comments.
View attachment 178092View attachment 178093
F.e. if you compare with these one..... what a difference
Crafty Sailor - Store News
This should be pretty much as with any other log. Just start the thread and...I am in the first row. :cool: I am promising to chime in. I would love to start my Leudo, but my Alert kit fascinated me so much... that I devote all my free time (if any) to her. But I will be alert to the Leudo. I...
shipsofscale.com
Uwe thank you so much for that link. A Canadian Store that I have never heard of before and strangely has never shown up in any of my searches. Bookmarked! Thanks again great input!F.e. if you compare with these one..... what a difference
BTW, Crafty Sailor is a member of SOS, you can PM Egor with any questions you may have.Uwe thank you so much for that link. A Canadian Store that I have never heard of before and strangely has never shown up in any of my searches. Bookmarked! Thanks again great input!


