WITH OUR LORD AND SAVIOUR JESUS CHRIST MAY ALL BE SAFE. Don
-

Win a Free Custom Engraved Brass Coin!!!
As a way to introduce our brass coins to the community, we will raffle off a free coin during the month of August. Follow link ABOVE for instructions for entering.
-

PRE-ORDER SHIPS IN SCALE TODAY!
The beloved Ships in Scale Magazine is back and charting a new course for 2026!
Discover new skills, new techniques, and new inspirations in every issue.
NOTE THAT OUR FIRST ISSUE WILL BE JAN/FEB 2026
You are using an out of date browser. It may not display this or other websites correctly.
You should upgrade or use an alternative browser.
You should upgrade or use an alternative browser.
It is really looking good - very clean and accurate - GreatJust a little update as I've been pretty busy work wise dealing with the strange times we live in.
Have the fore and aft port covers completed. The boarding ladder, bumpers and the chesstree.
Stay safe all of you.
View attachment 138960
Keep care (and distance) too
Thanks Uwe, Donny and others. I am about to go out and pick up groceries for people in isolation. I am managing a very large group of seniors and people at risk, hopefully we can all get though this together.It is really looking good - very clean and accurate - Great
Keep care (and distance) too
Warm Regards ~
YES IN A WORLD DIVEDED, MAYBE THIS CAN BRING US CLOSER AS GODS CHILDREN, KEEP SAFE ALL. Don
First It has been a while and I hope that you and yours are all safe and doing everything possible to stay that way. With all that is going on in the world it has taken me a bit to get me back into the shipyard. Both physically and mentally.
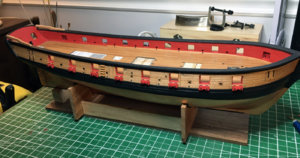
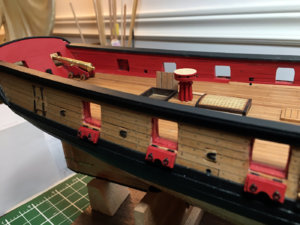
So after over a month of not working on the Syren I have started out mostly working on completing little missing details here and there. the rudder pintels and gudgeons needed the the nail heads added. The scuppers needed to be added inboard and outboard. The sheaves added and eyebolts outboard above the wales. Made up a bunch of split rings and such.
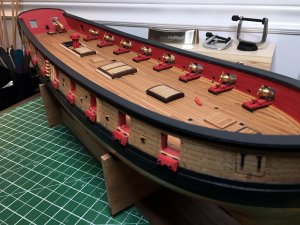
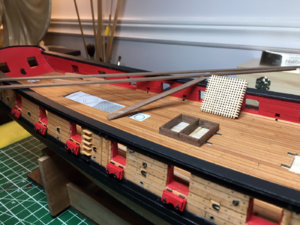
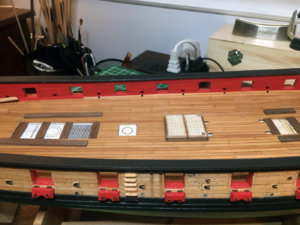
Then I was looking at chapter 12, So I got out my proxon fet and sliced up a black walnut board I had. Used that to rip some 3/16 x 1/16 walnut planks and some 1/32 pear and decided to try my hand at some deck fittings. I haven't done hatches with gratings before so wanted to give that a go. First I cut out all the coamings to size using the walnut. Then I set about building one frame and putting in the grates. They are a little tricky to work with but everything was so nice and square that it made it a lot easier. I had no luck trying to cut the square grate with a #11 blade so used a fine tooth kerf saw and that worked well. I cut them slightly oversize and then sanded them to fit. Here are a couple of pics. I was not sure how best to treat the grating and ended up trying tung oil on the two forward hatches. I kinda wish the grates did not look so yellow but hey it is what it is. Also adding treenails to the walnut turned out to be a bit of a waste of time as it is lost in the dark walnut. I put a fine inside boarder on the hatches using the 1/32 pear and added a ladder into the companion way opening. I've skipped over working on the carronades at the moment as I ordered some brass for making the mounts and I won't be able to get it until next week. Pics below
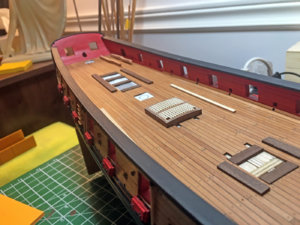
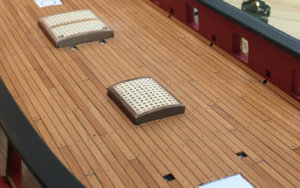
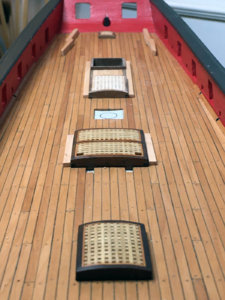
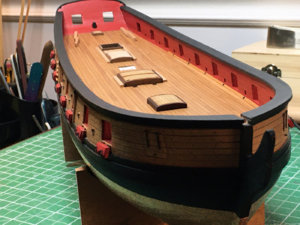
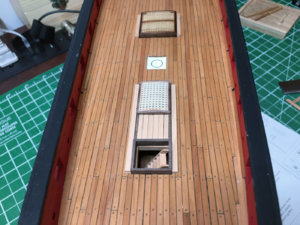
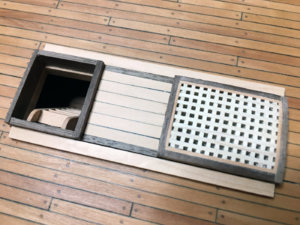
Dont mind my terrible solder joint on the galley stack, learning my new torch. Nothing is glued in and I will be redoing the stack ~ Stay safe ~
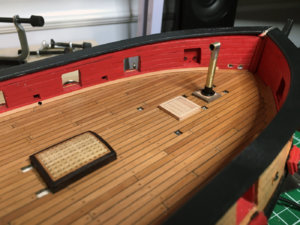
So after over a month of not working on the Syren I have started out mostly working on completing little missing details here and there. the rudder pintels and gudgeons needed the the nail heads added. The scuppers needed to be added inboard and outboard. The sheaves added and eyebolts outboard above the wales. Made up a bunch of split rings and such.


Then I was looking at chapter 12, So I got out my proxon fet and sliced up a black walnut board I had. Used that to rip some 3/16 x 1/16 walnut planks and some 1/32 pear and decided to try my hand at some deck fittings. I haven't done hatches with gratings before so wanted to give that a go. First I cut out all the coamings to size using the walnut. Then I set about building one frame and putting in the grates. They are a little tricky to work with but everything was so nice and square that it made it a lot easier. I had no luck trying to cut the square grate with a #11 blade so used a fine tooth kerf saw and that worked well. I cut them slightly oversize and then sanded them to fit. Here are a couple of pics. I was not sure how best to treat the grating and ended up trying tung oil on the two forward hatches. I kinda wish the grates did not look so yellow but hey it is what it is. Also adding treenails to the walnut turned out to be a bit of a waste of time as it is lost in the dark walnut. I put a fine inside boarder on the hatches using the 1/32 pear and added a ladder into the companion way opening. I've skipped over working on the carronades at the moment as I ordered some brass for making the mounts and I won't be able to get it until next week. Pics below


Dont mind my terrible solder joint on the galley stack, learning my new torch. Nothing is glued in and I will be redoing the stack ~ Stay safe ~

Heinrich thank you so much it means a lot to get a compliment like that. Even if it is more than I deserve. Just trying to do the best I can with what I've got. Learning as I go.Well done Robin! The overall effect is not only beautiful, but this must be one of the cleanest builds ever!
Capstan's this is the first time I've made one and it was a little confusing as the instructions call for 5/32 dowel to glue the whelps on, but the plans show 7/32. I went with the 5/32 here is a pic, I haven't detailed it yet or added the chocks. I am thinking of raising it up a 32nd more also by adding a round disk added under the drum head. To give me a little more height on the companionway. Hope it looks correct.
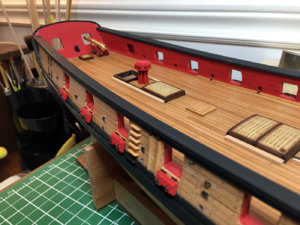
Ok I need a capstan expert. In the pic below I've flipped the drum head on the capstan which would give me an good additional 1/16 on the height I can make the companionway. Does reverting it make it look to flimsy?
Compare with pic above from last post done as per the instructions. Any help would be appreciated
Compare with pic above from last post done as per the instructions. Any help would be appreciated

Kurt Konrath
Kurt Konrath
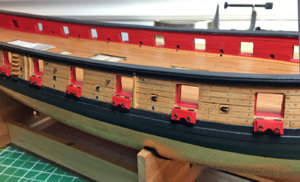
What are names and purpose of the sideways U shapes on hull between gun ports.Just a little update as I've been pretty busy work wise dealing with the strange times we live in.
Have the fore and aft port covers completed. The boarding ladder, bumpers and the chesstree.
Stay safe all of you.
View attachment 138960
Hi Kknorath, the U shapes are hinges which really should have a bit of wire detail added to bring out the hinge aspect more. They go to the sweep ports which they would open and slide long oars through so there is always a means of propulsion even in calm weather. Cheers ~
Kurt Konrath
Kurt Konrath
Thanks that explains the purpose well, I didn't know big sailing ships carried oars with them.
Nor did I and when I got the kit I was wondering what the hey was up with all the long oars they had on one of the lazer cut sheets.Thanks that explains the purpose well, I didn't know big sailing ships carried oars with them.
I was wondering what the hey was up with all the long oars

What are the doldrums?
Find out why sailing ships sometimes get stuck on windless waters around Earth’s ‘waistline.’

Mike great article, it amazes me how many common everyday terms that people use actually came from nautical terms going back years. Cheers ~
What are the doldrums?
Find out why sailing ships sometimes get stuck on windless waters around Earth’s ‘waistline.’oceanservice.noaa.gov


Speaking of Capstans, I did a little research and got some help from some friends as I really didn't know how they worked. Here is a pic which shows the basic run down for a smaller ship. Minus the crew it takes to work it and the little nippers 

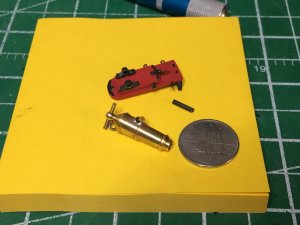
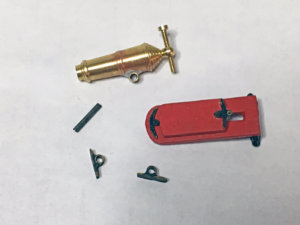
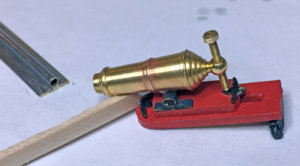
Got the brass in I was waiting for and made up a carronade prototype. Couple pics showing the sled mounts which were made by soldering a brass tube onto a brass flat bar strip then slicing thin diagonal strips to act as sled mounts. For the carronade mount I just used a short piece of brass tube soldered on. I know it doesn't look perfect but It is pretty much hidden under the carronade. I couldn't use silver solder because the caseys brass black won't affect it. Nothing cleaned up no breech ring yet and nothing glued on yet...
Stay the blazes home. Stay safe

Got the brass in I was waiting for and made up a carronade prototype. Couple pics showing the sled mounts which were made by soldering a brass tube onto a brass flat bar strip then slicing thin diagonal strips to act as sled mounts. For the carronade mount I just used a short piece of brass tube soldered on. I know it doesn't look perfect but It is pretty much hidden under the carronade. I couldn't use silver solder because the caseys brass black won't affect it. Nothing cleaned up no breech ring yet and nothing glued on yet...


Stay the blazes home. Stay safe
Ok when I test fitted the carronade in the port opening I found it was sitting to high. This meant removing the tube from the underside of the carronade and filing a channel into the carronade for the tube to go into. The carronade is sitting much better in the port opening after doing this, and looks neater all round.
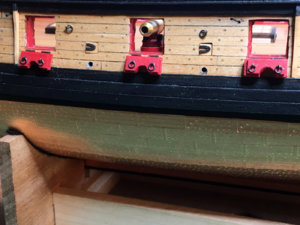
Couple before pics with the carronade to high in the port.
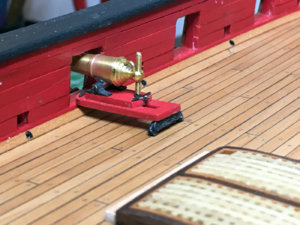
Couple of pic after inserting the the mount into a channel in the carronade.
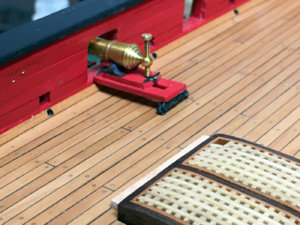
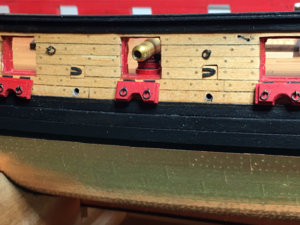
With that figured out it was time to work on some details for the carronades and sleds
I soldered on breach rings and made the carronade elevation screw handles. For the handles I took a thin slice off of some brass tubing which I drilled and added two bit of wire to. Here are a couple of pics. I'm open to any suggestions as this is all new to me
![IMG_3827[1].jpg IMG_3827[1].jpg](https://shipsofscale.com/sosforums/data/attachments/131/131578-e95f980a059dd4d8439ef2f756f6923f.jpg?hash=6V-YCgWd1N)
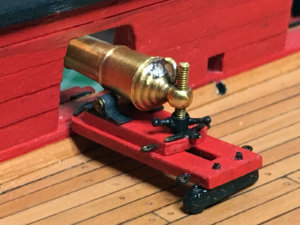
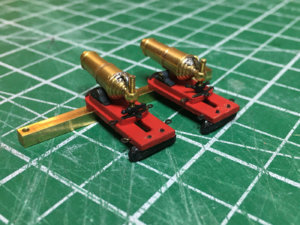
Going forward I will try tinning the breach rings before soldering them on. Should be a little neater looking.
Cheers ~
Couple before pics with the carronade to high in the port.


Couple of pic after inserting the the mount into a channel in the carronade.


With that figured out it was time to work on some details for the carronades and sleds
I soldered on breach rings and made the carronade elevation screw handles. For the handles I took a thin slice off of some brass tubing which I drilled and added two bit of wire to. Here are a couple of pics. I'm open to any suggestions as this is all new to me
![IMG_3827[1].jpg IMG_3827[1].jpg](https://shipsofscale.com/sosforums/data/attachments/131/131578-e95f980a059dd4d8439ef2f756f6923f.jpg?hash=6V-YCgWd1N)


Going forward I will try tinning the breach rings before soldering them on. Should be a little neater looking.
Cheers ~
Hi Heinrich, thanks for your great comment  No I haven't secured the carronades yet I will be using Casey brass black on them first. Right now the pins are just slid in holding them. -
Phew, just worked my way through your build log. Besides being very informative it’s great show of your craftsmanship.
Jan
Jan


